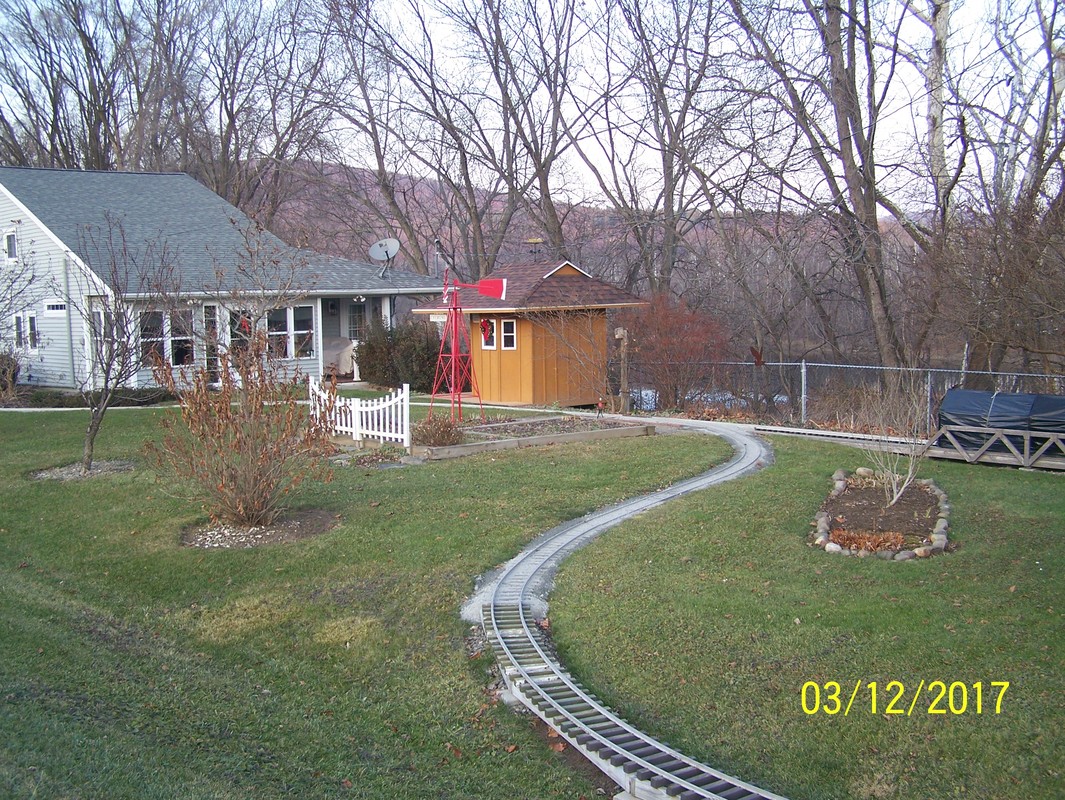
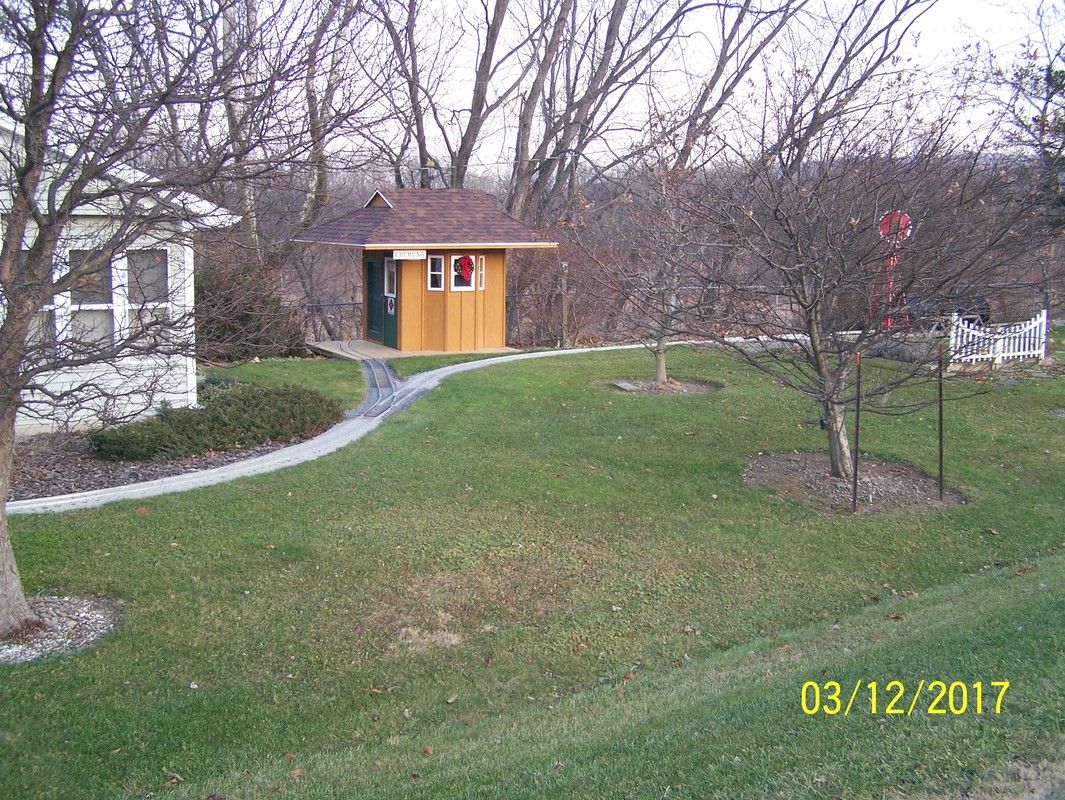
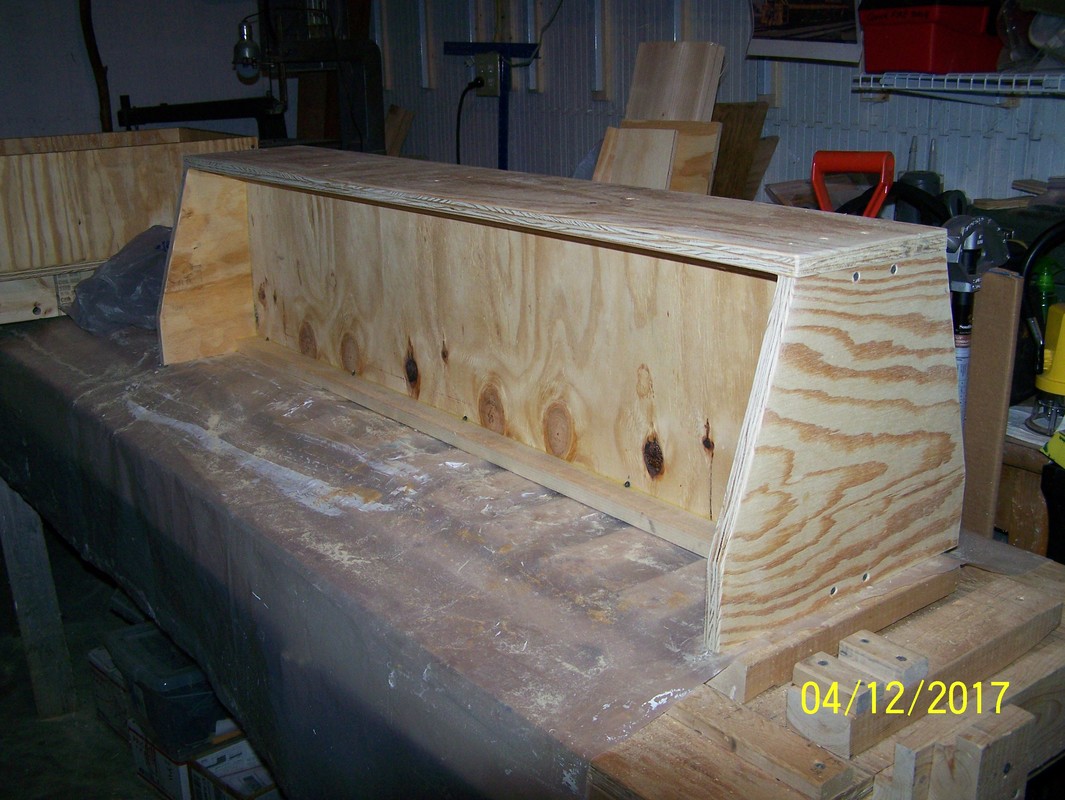
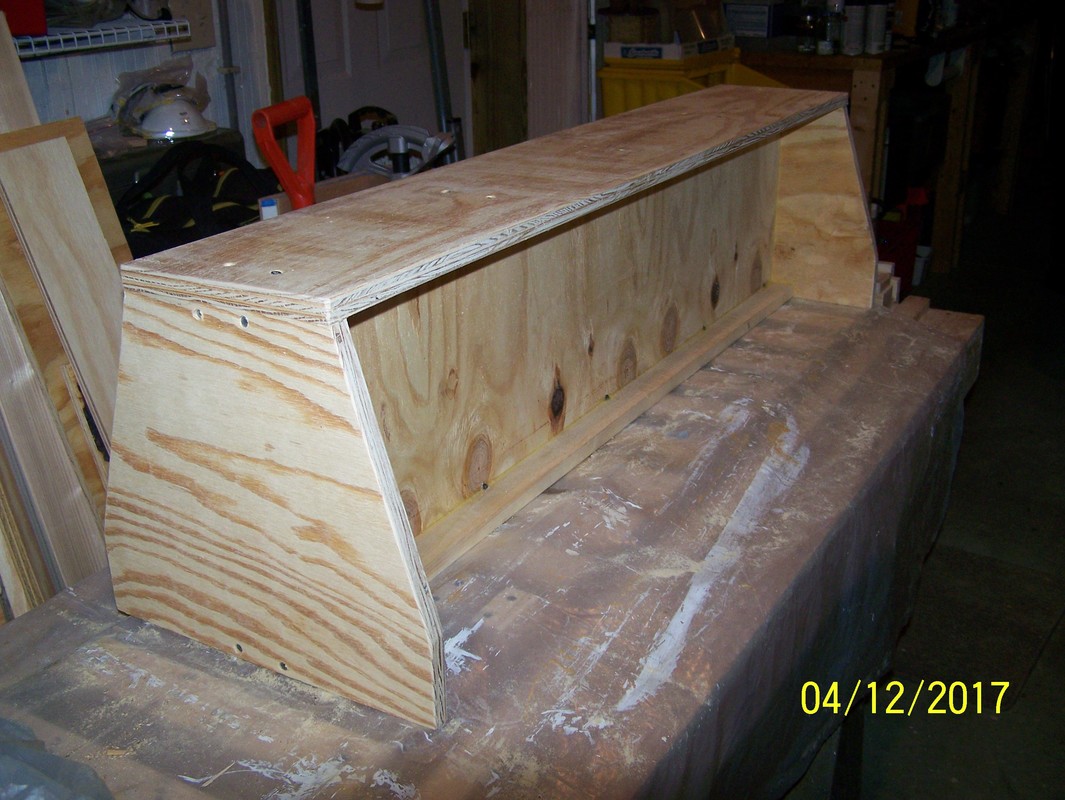
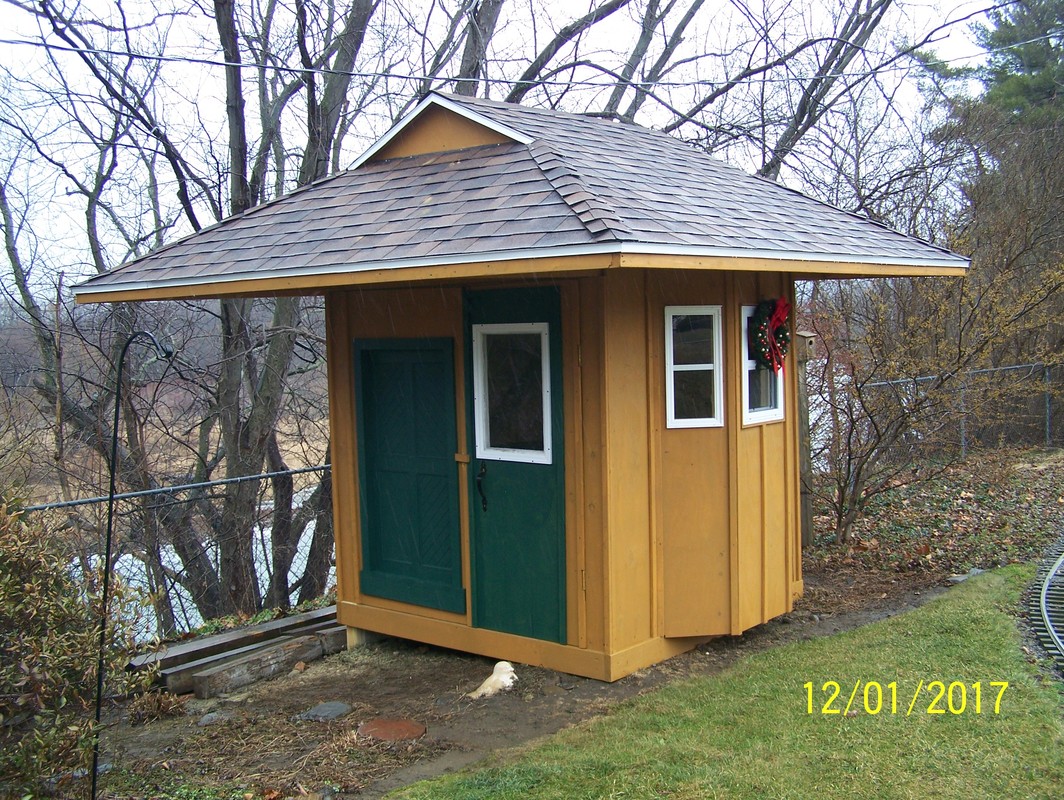
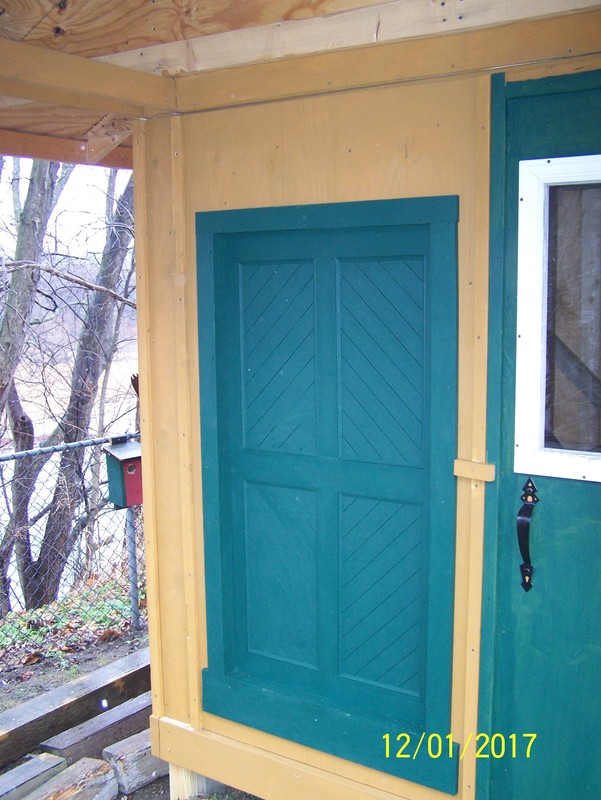
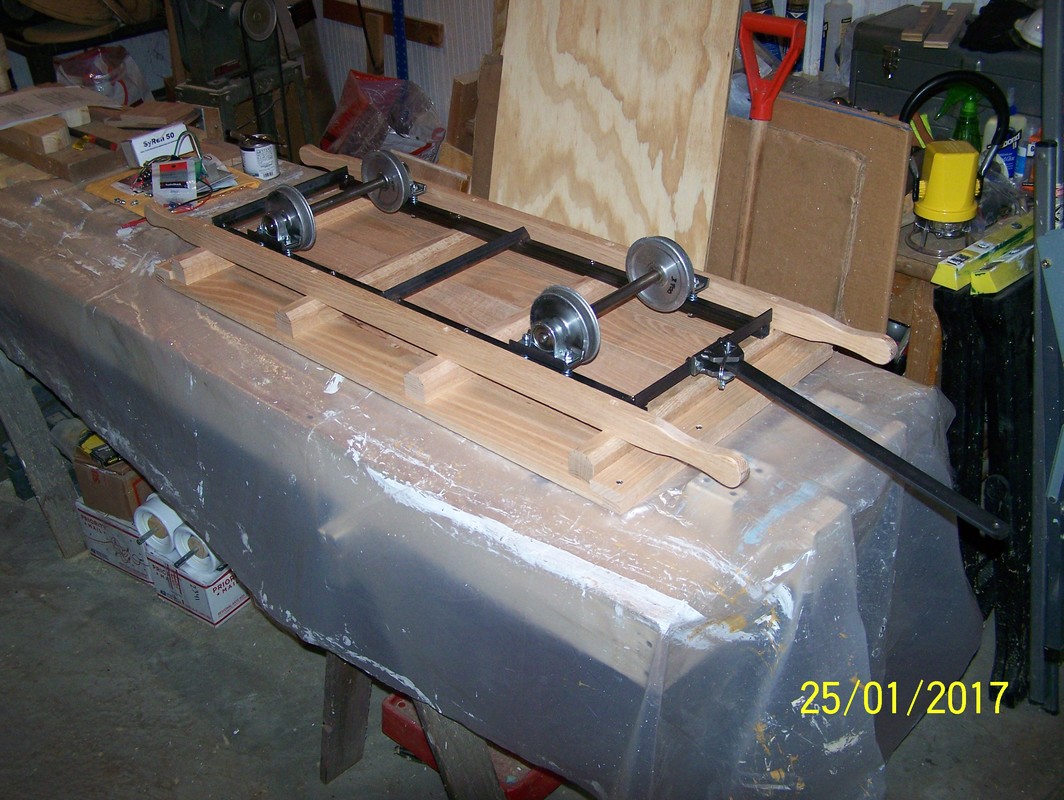
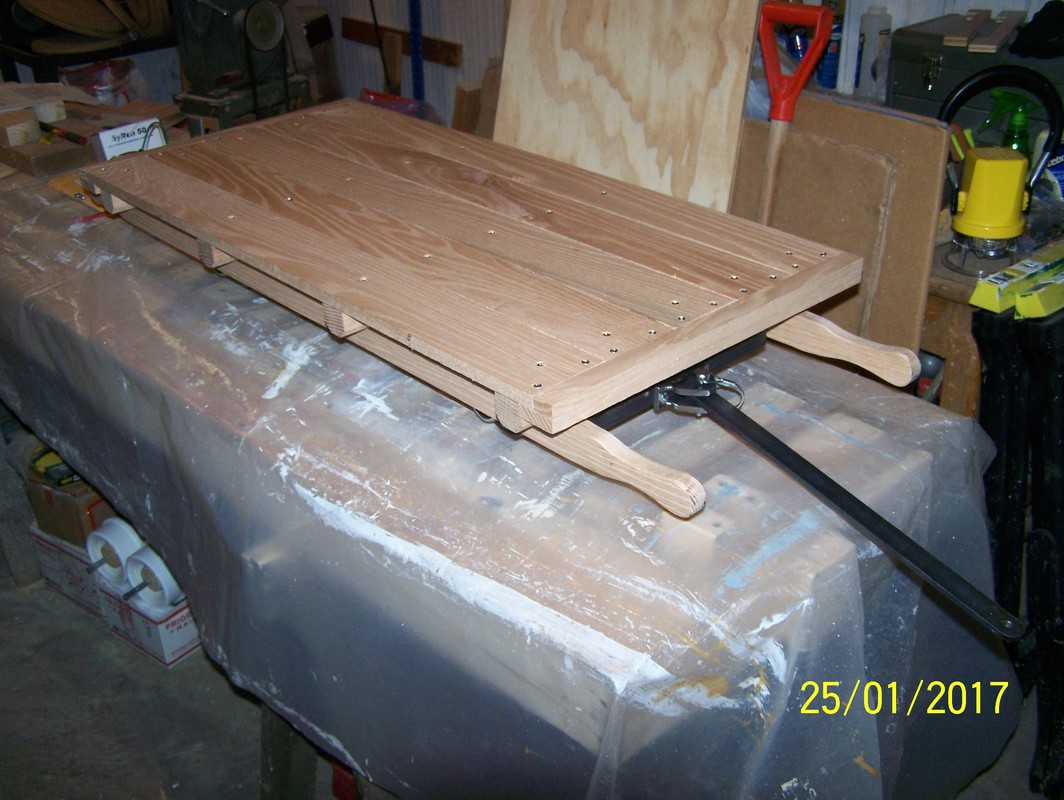
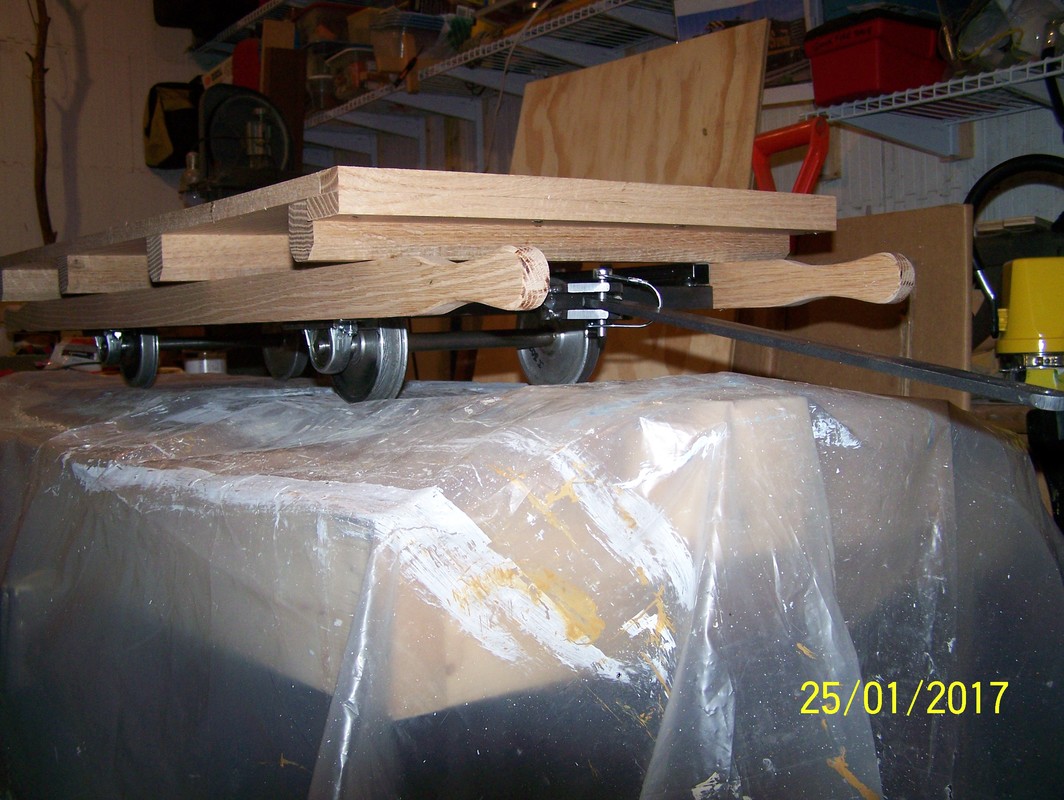
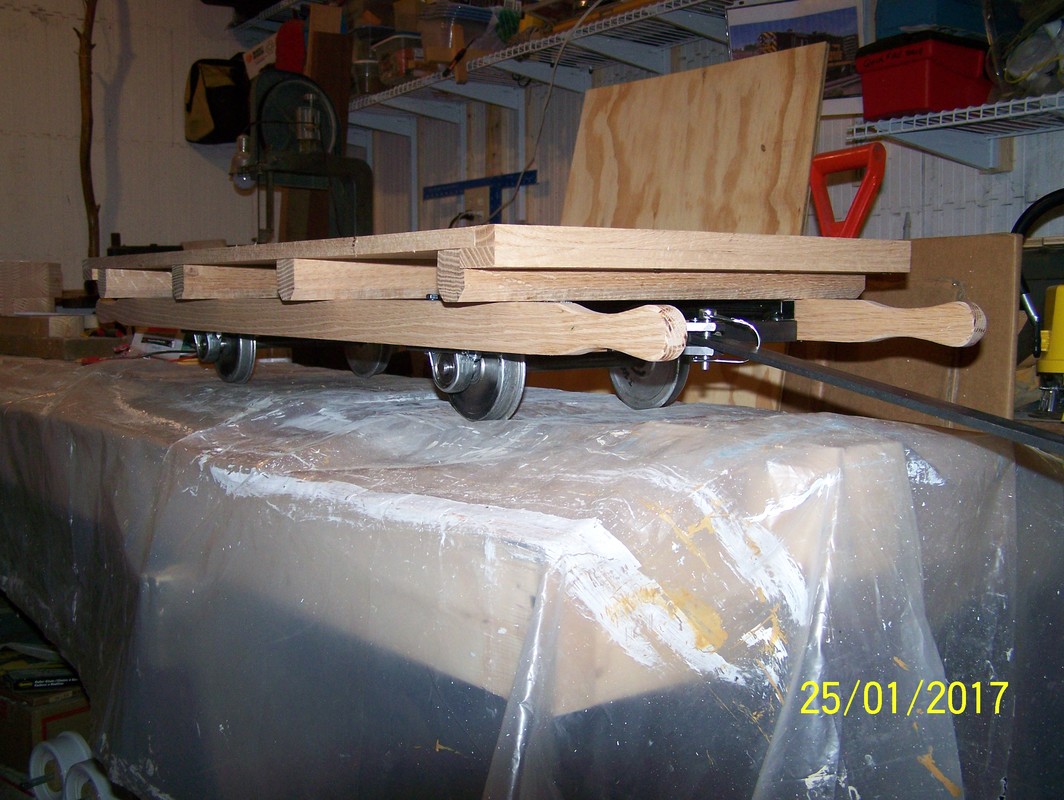
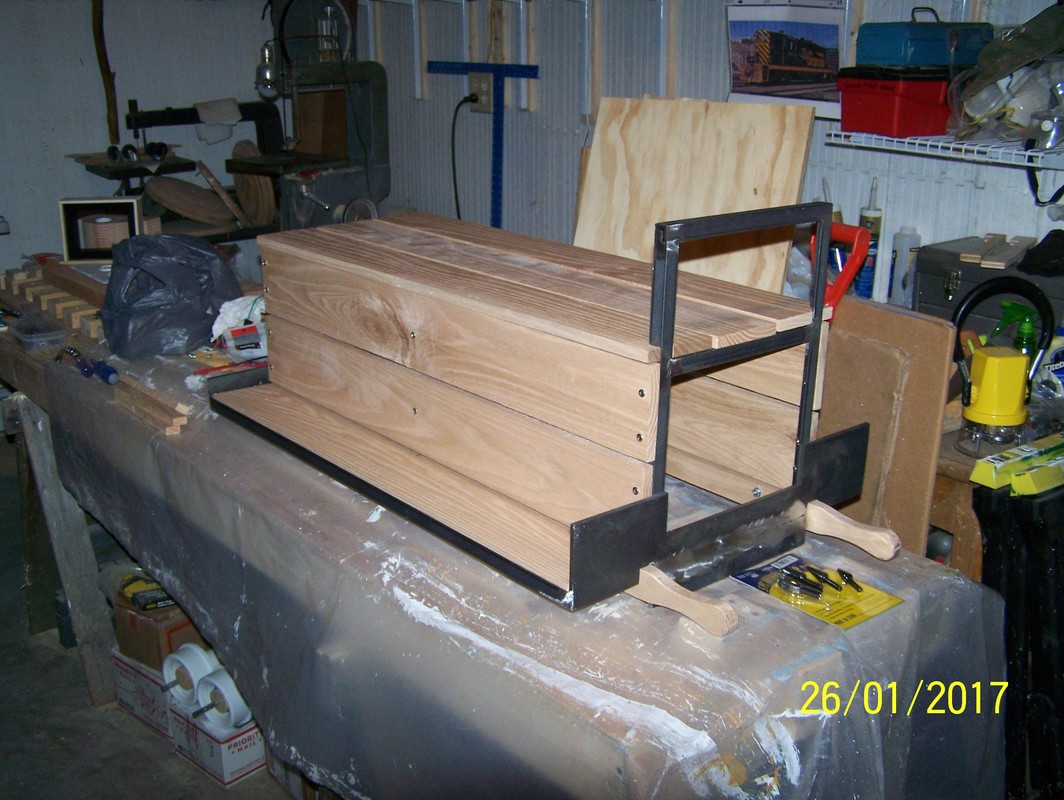
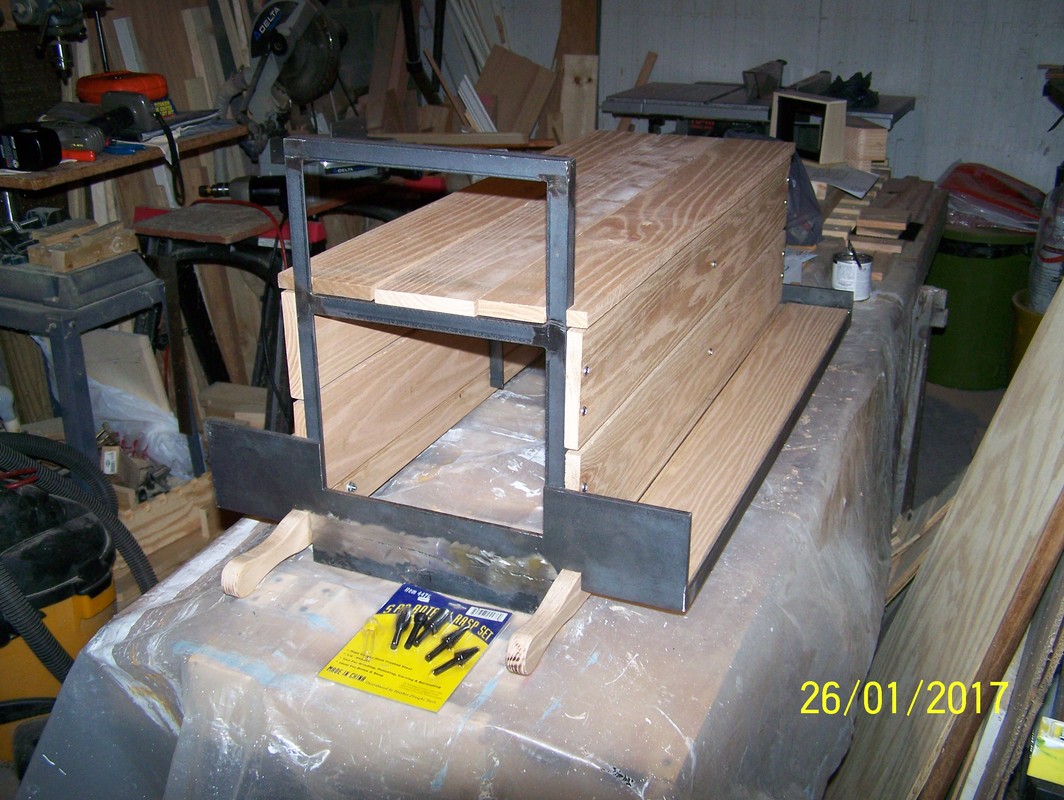
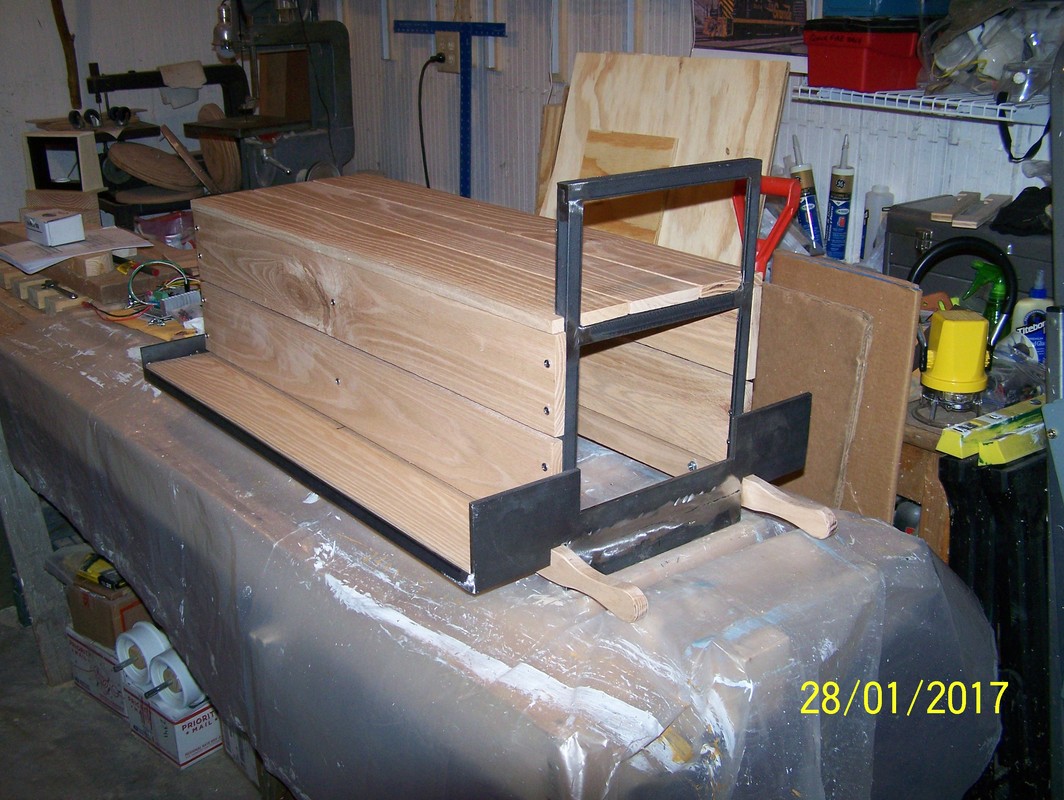
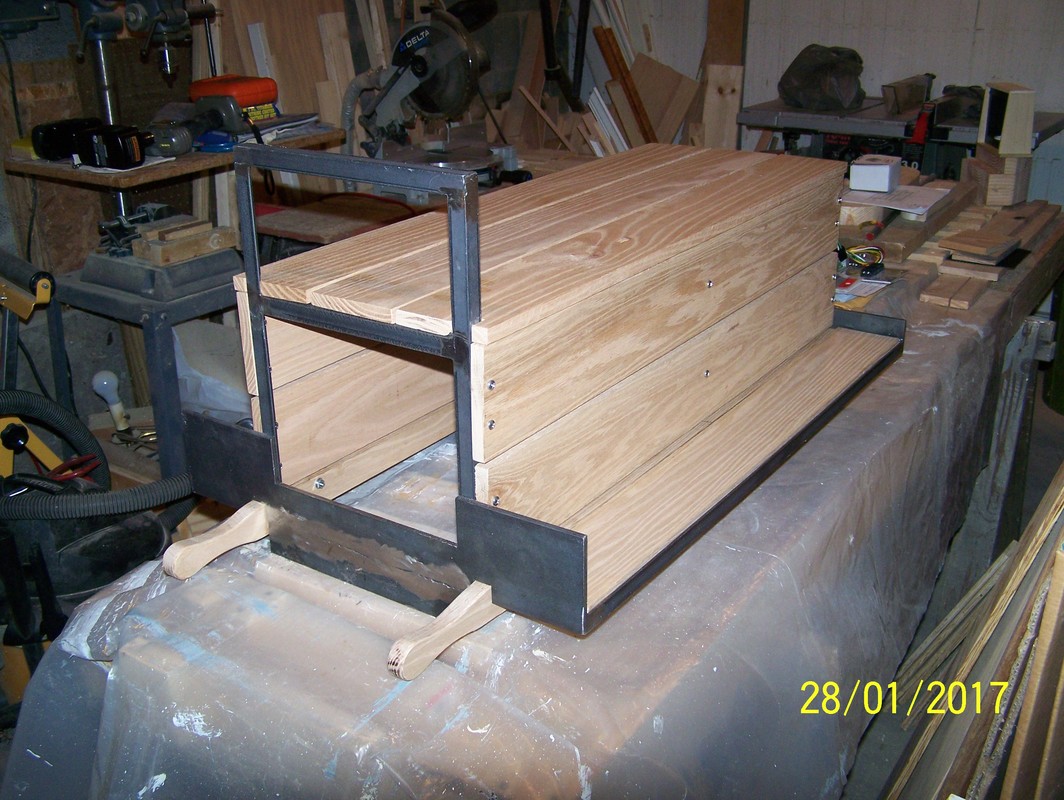
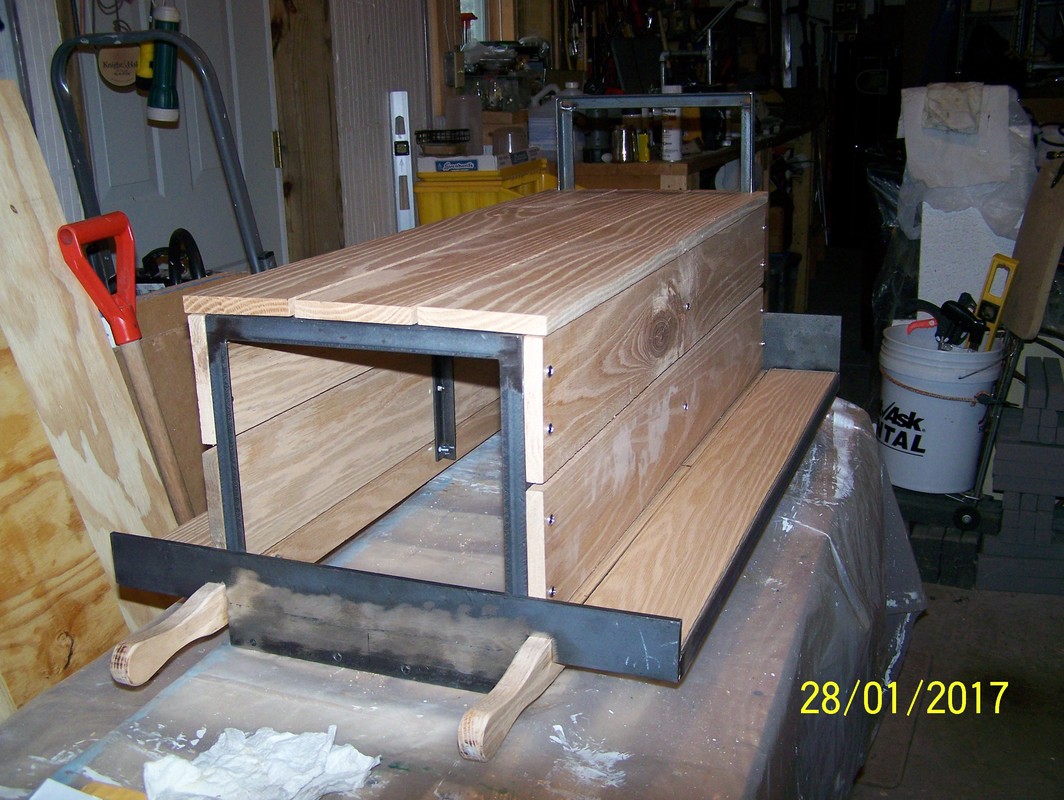
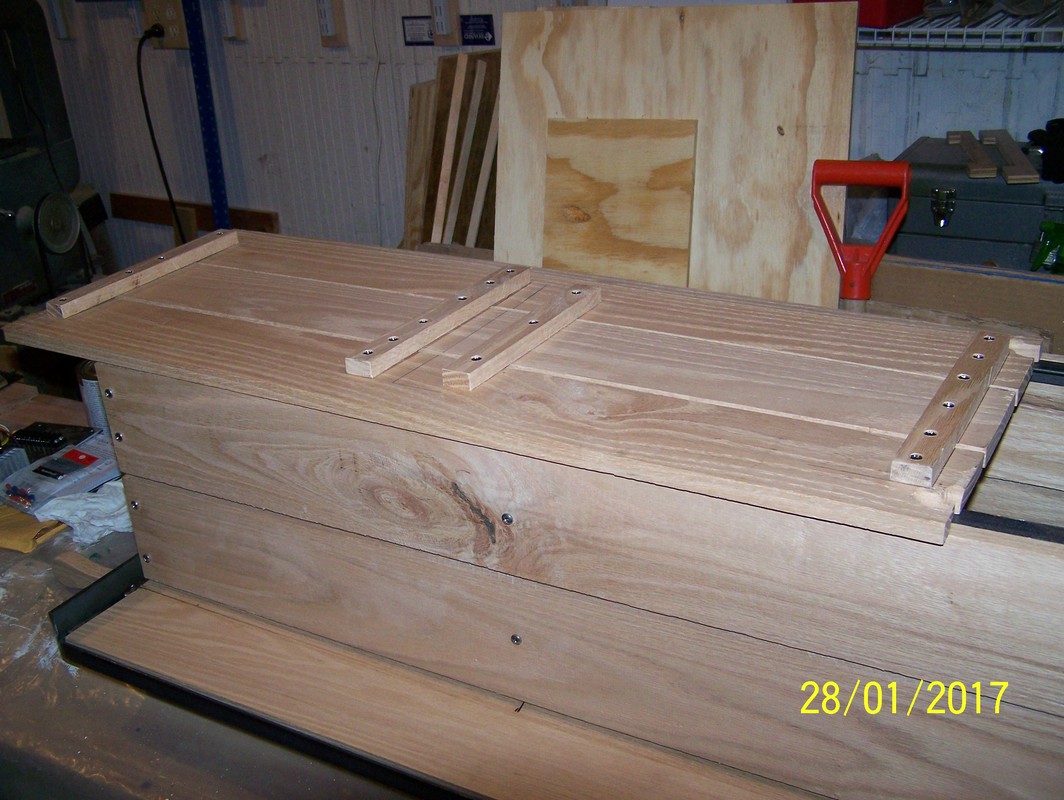
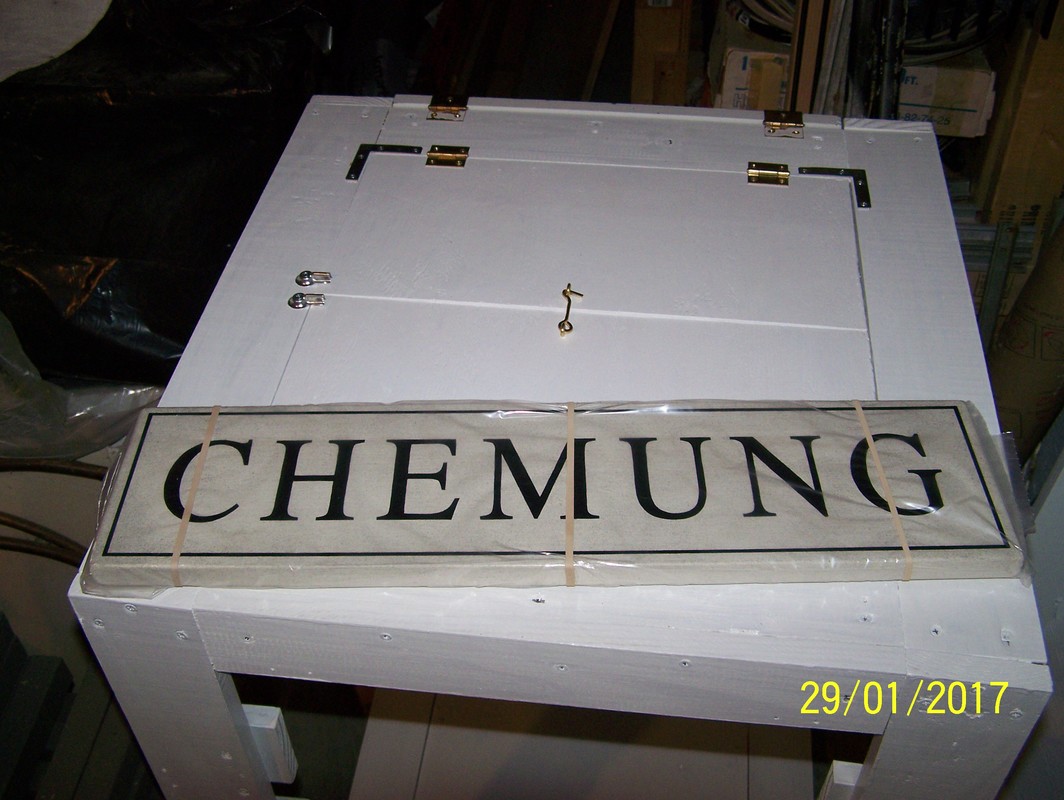
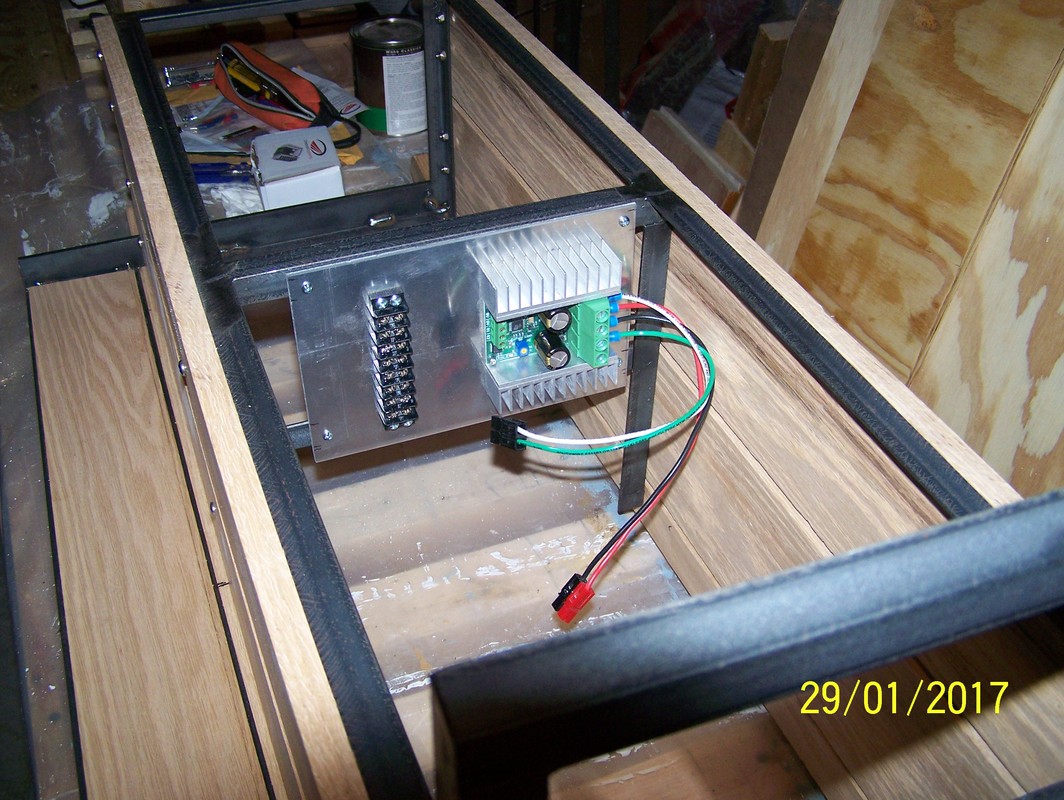
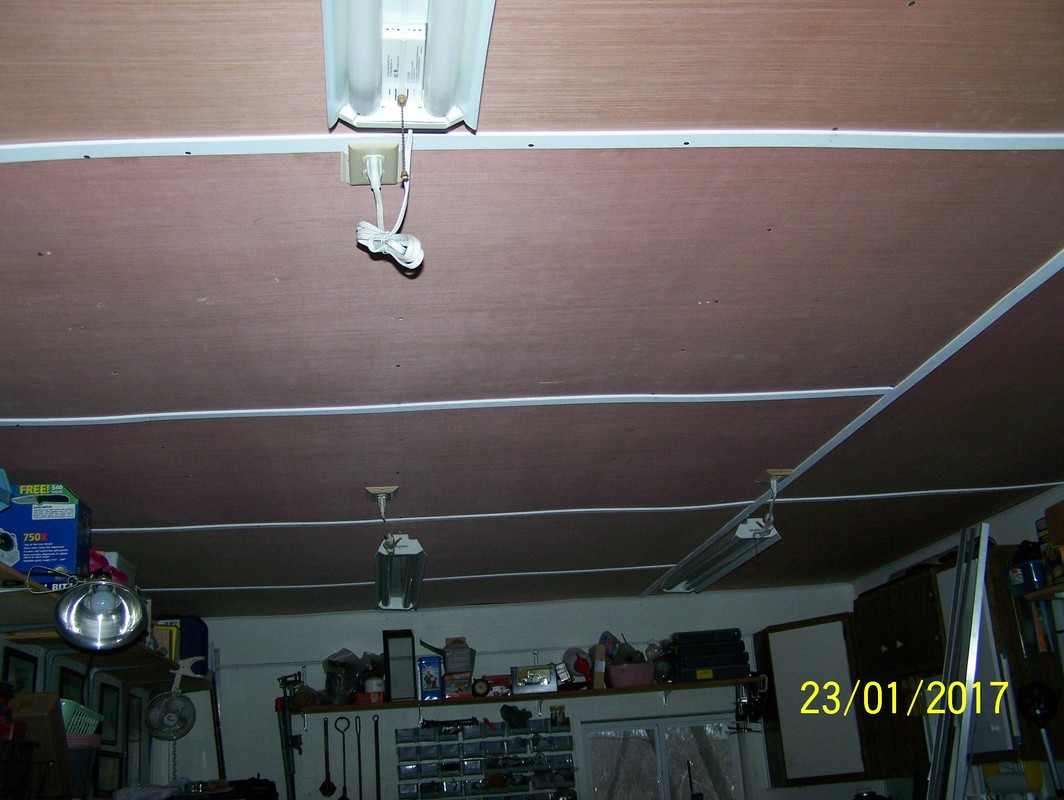
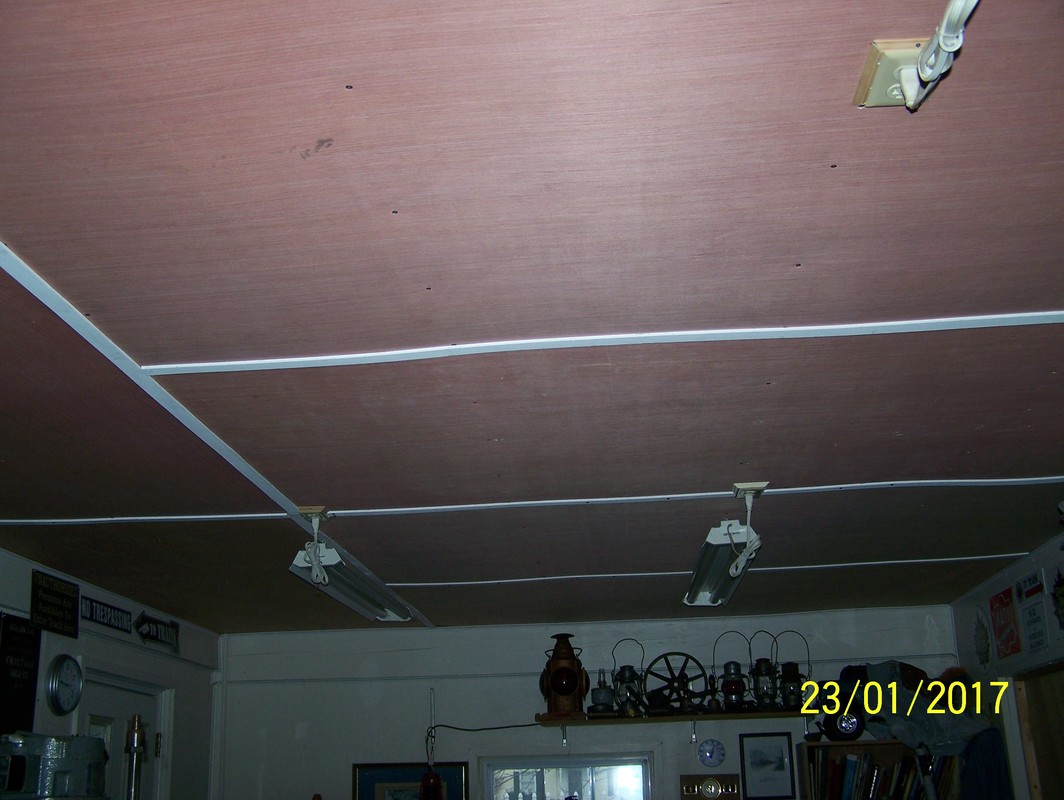
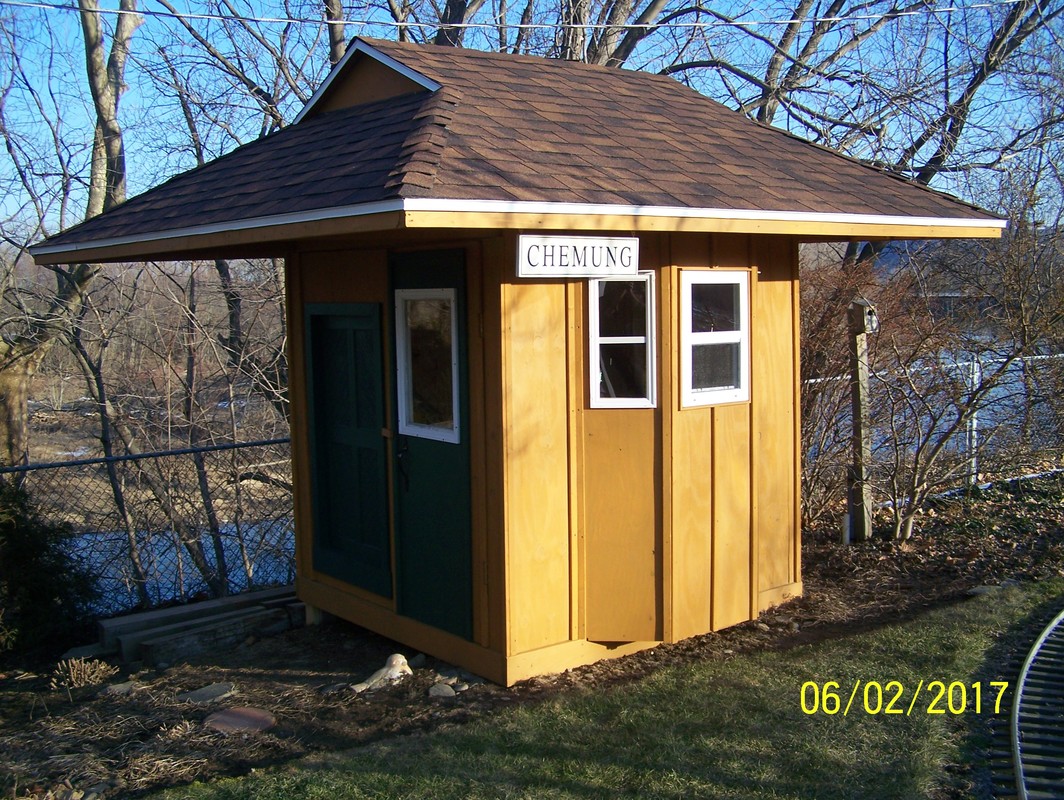
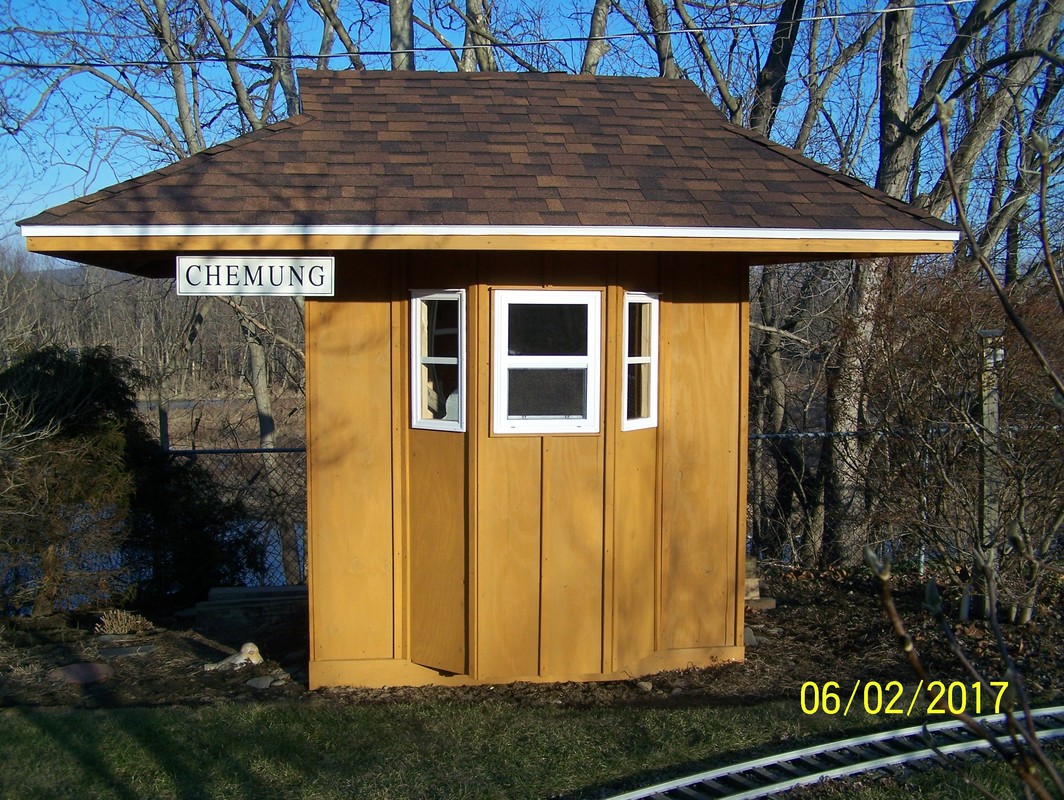
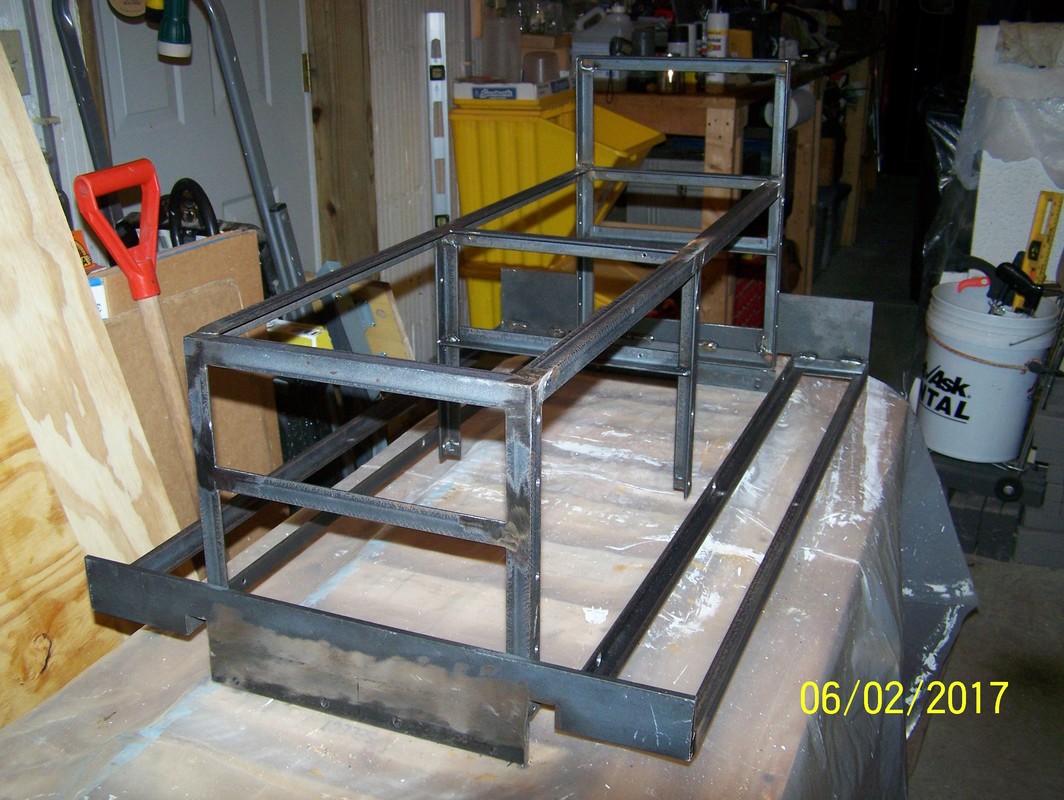
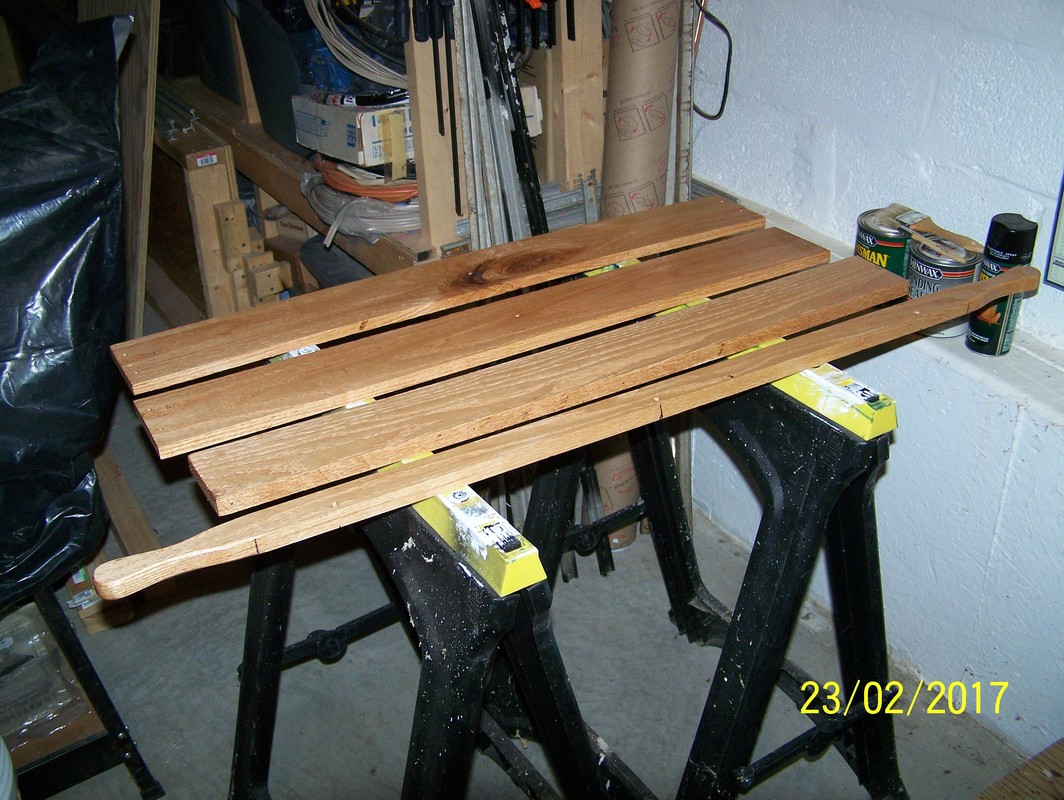
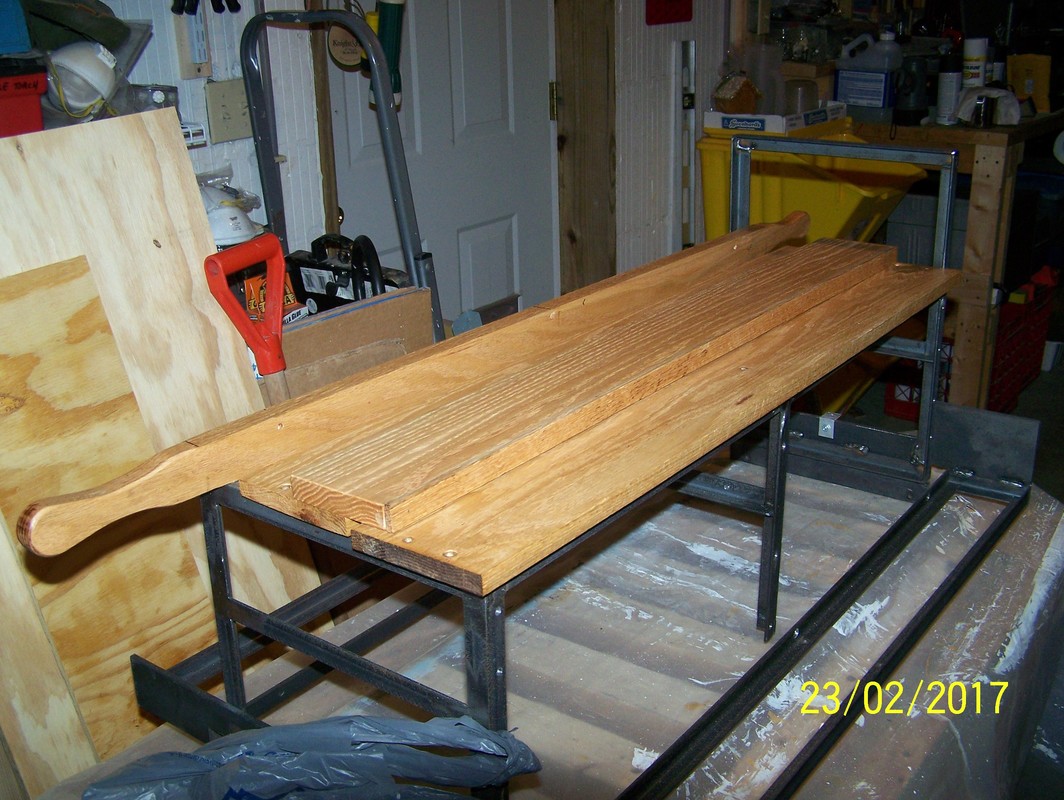
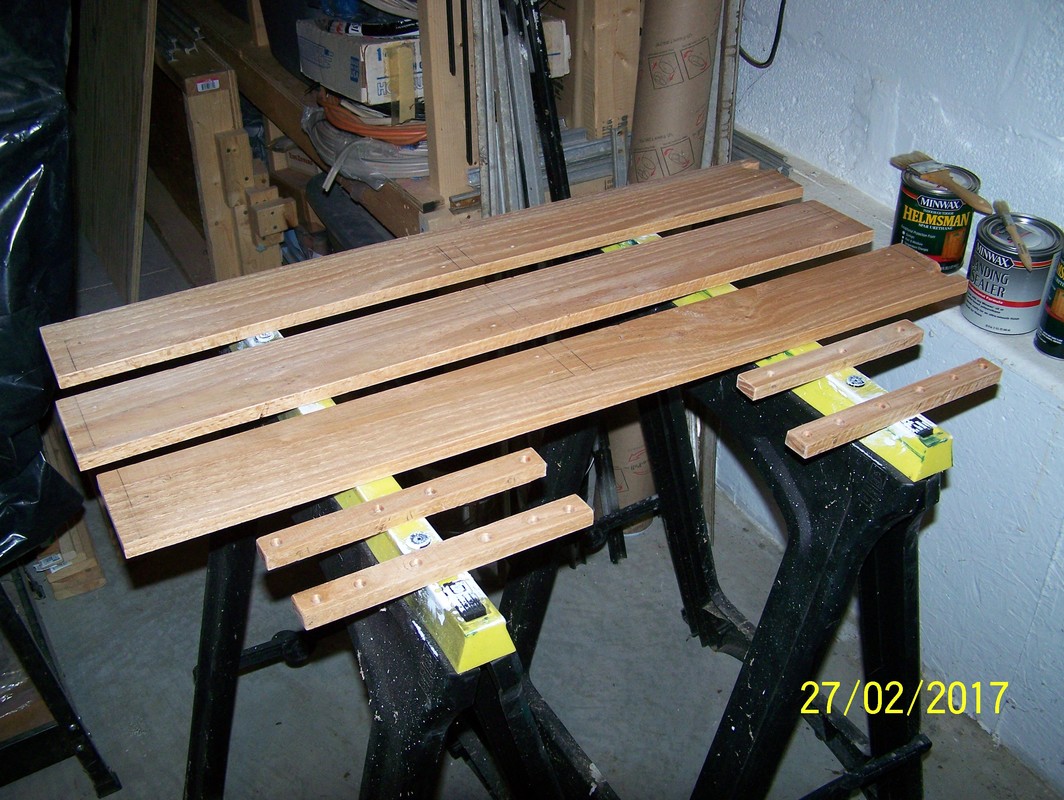
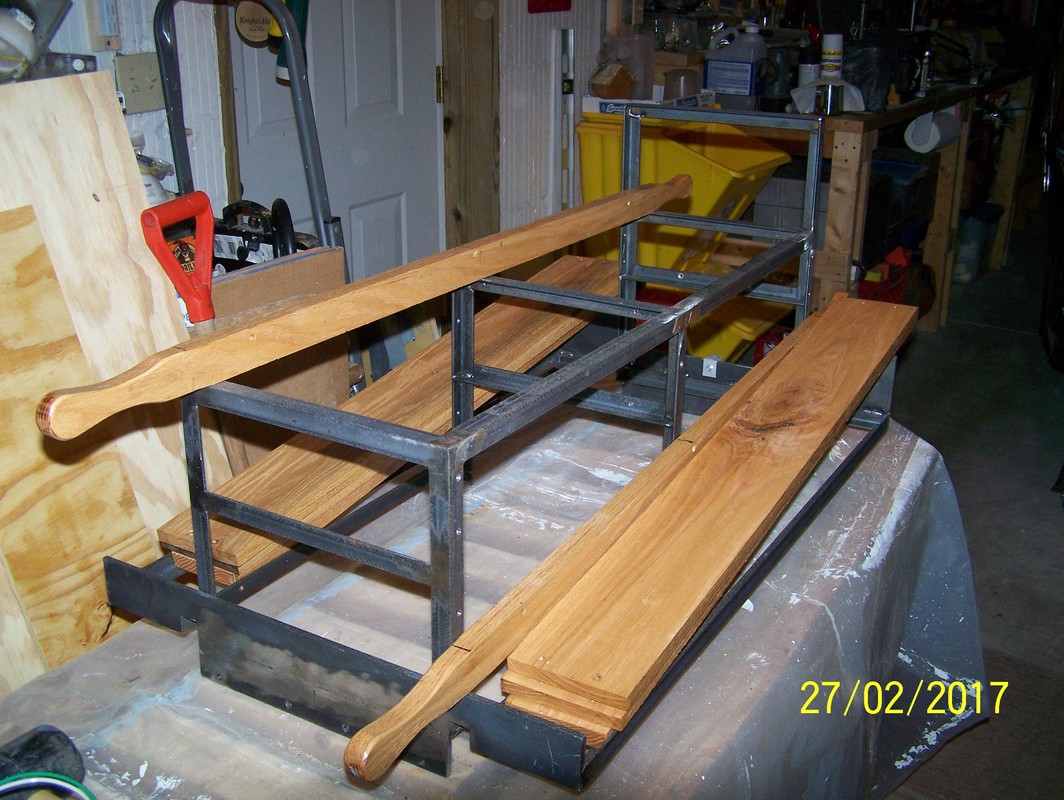
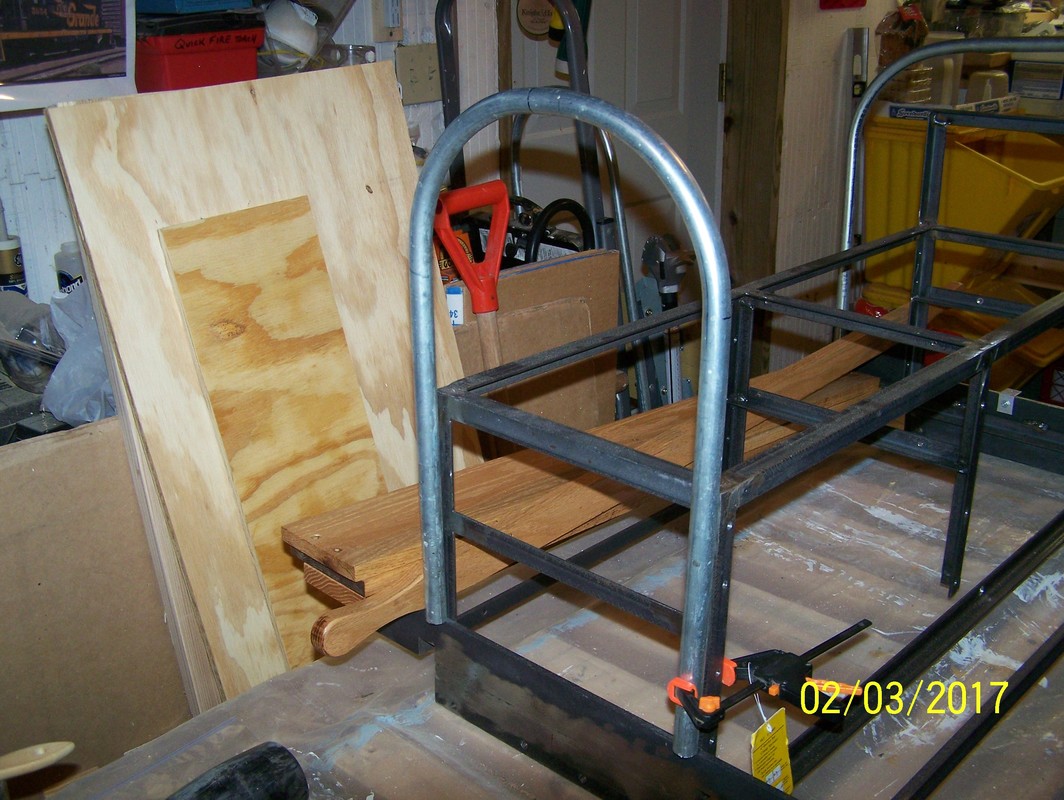
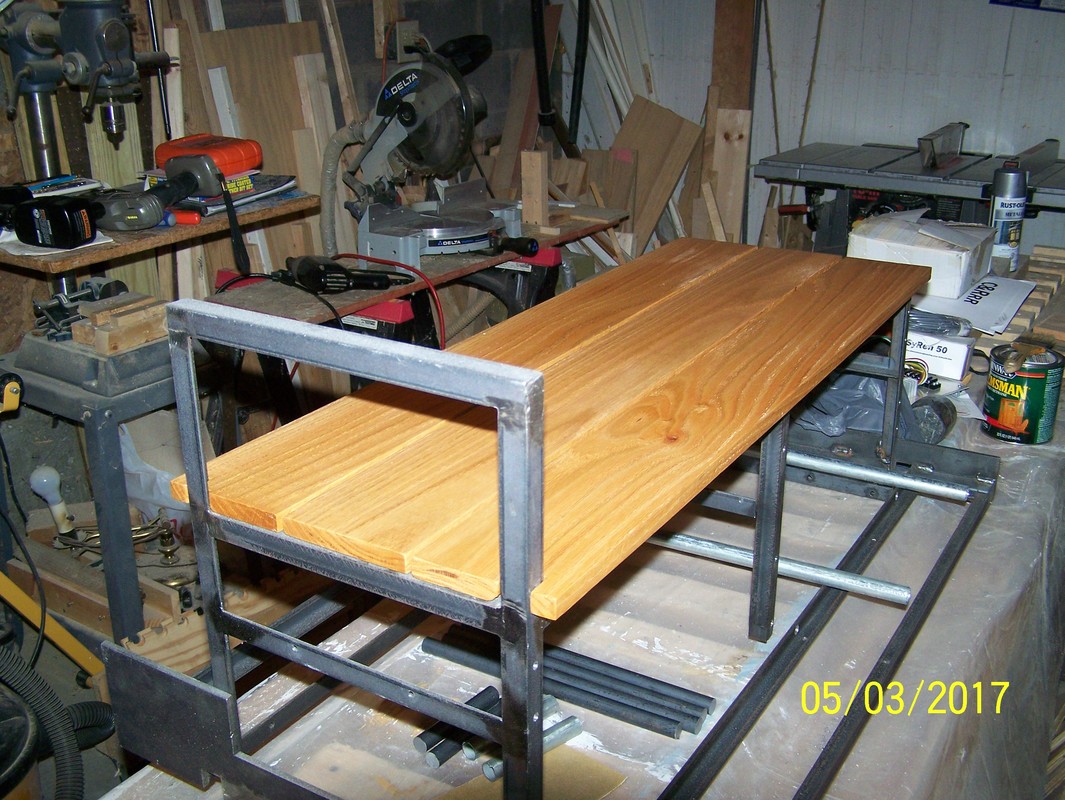
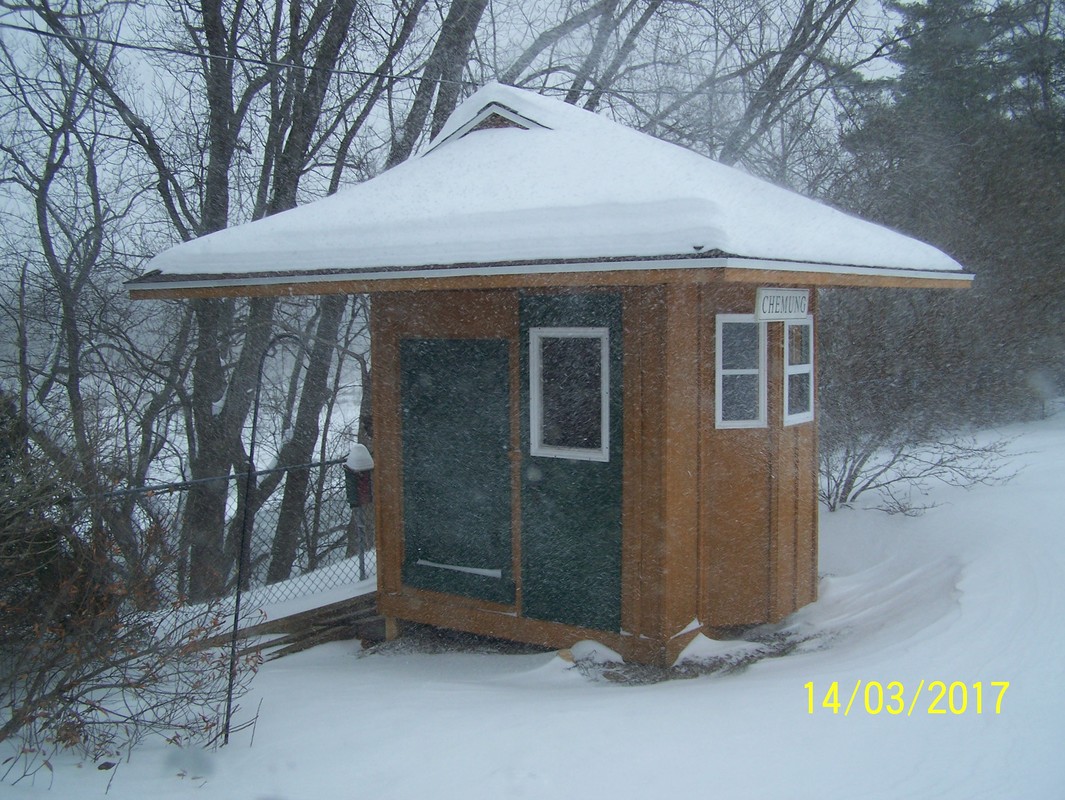
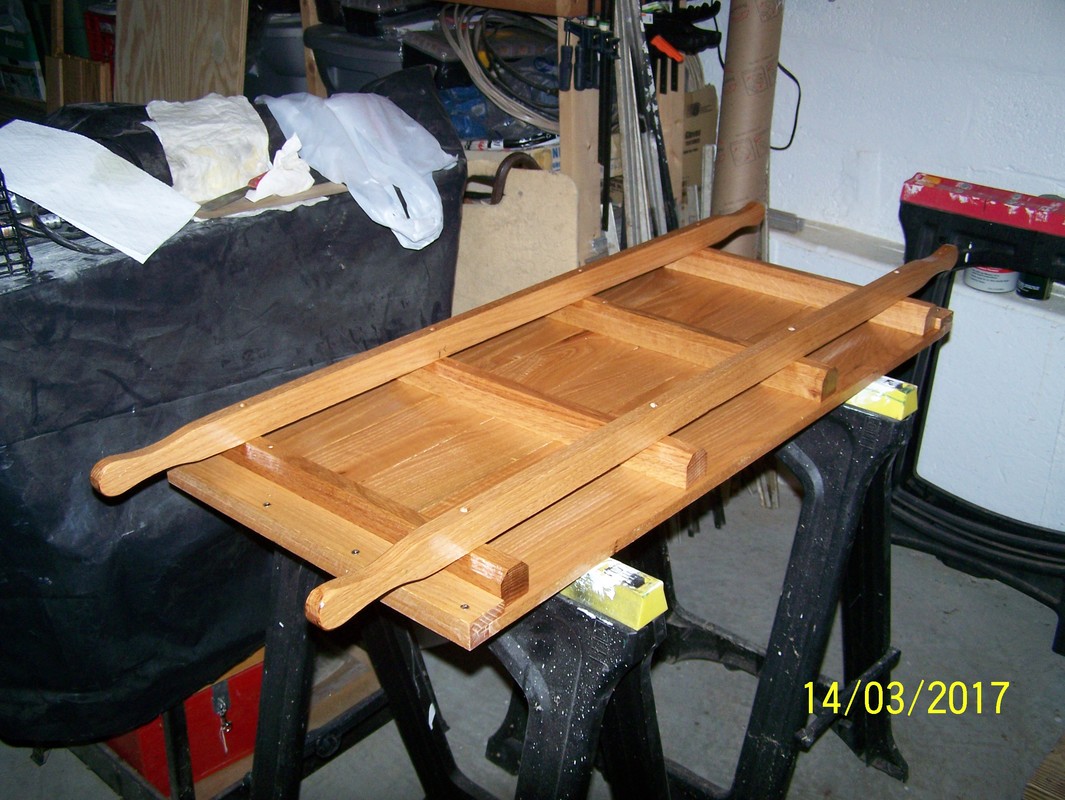
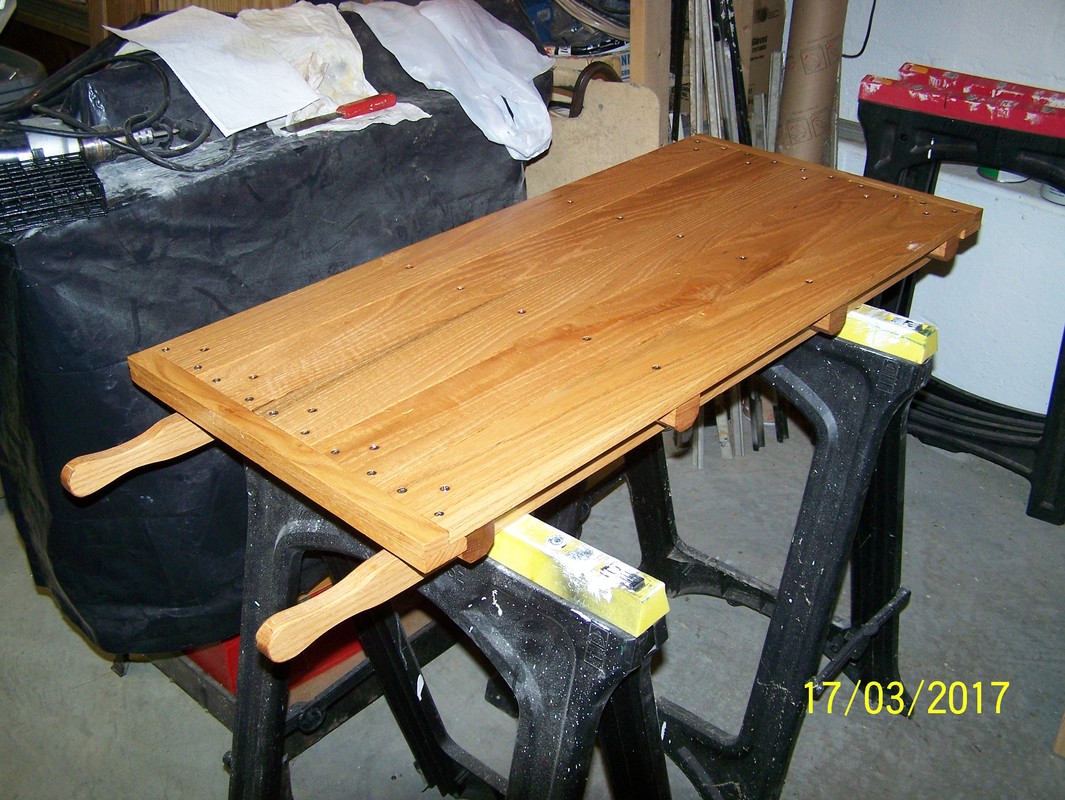
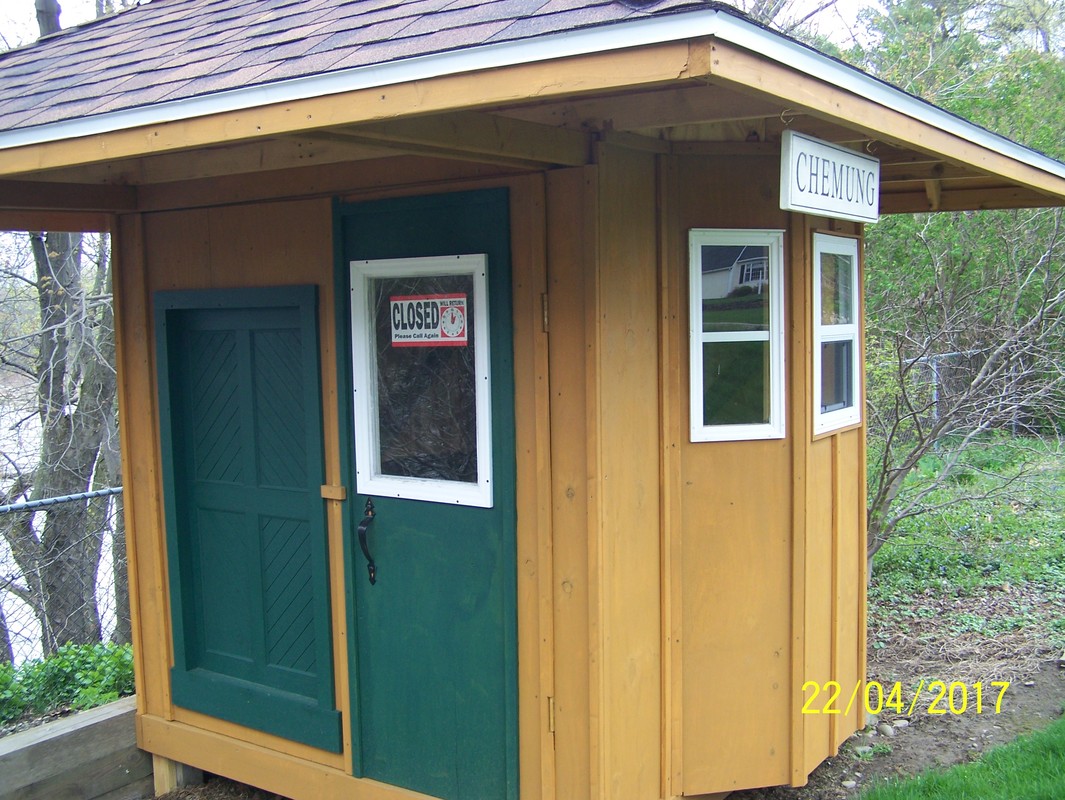
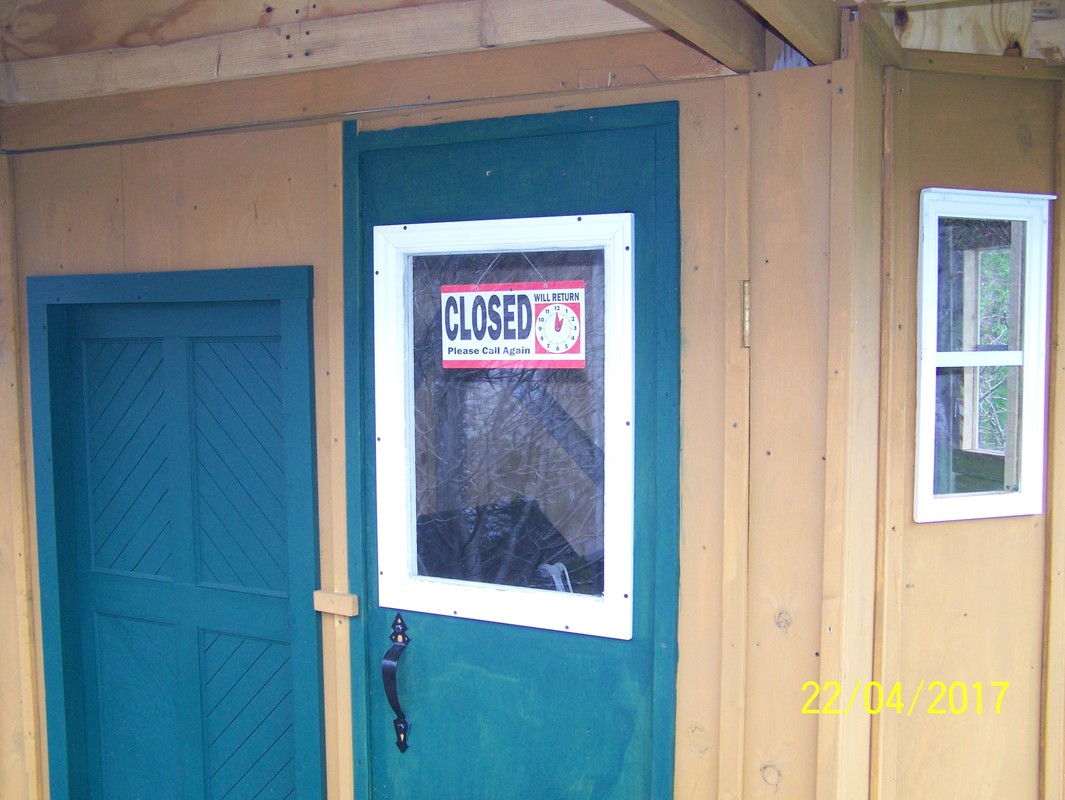
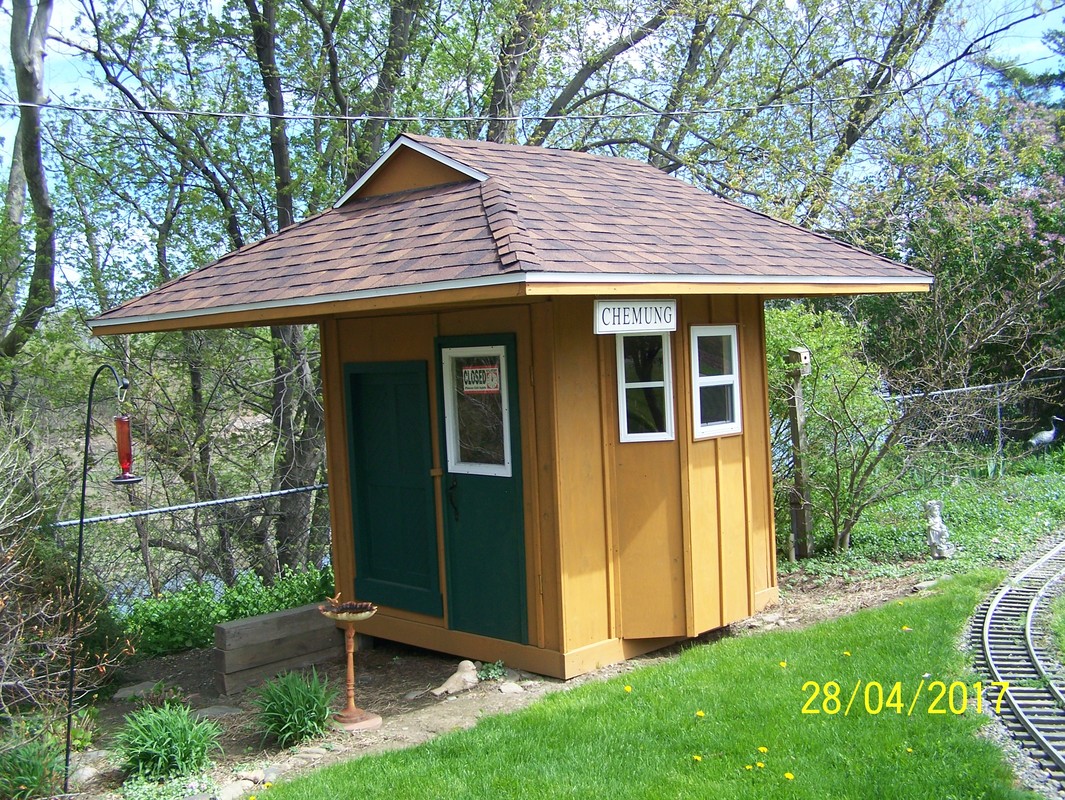
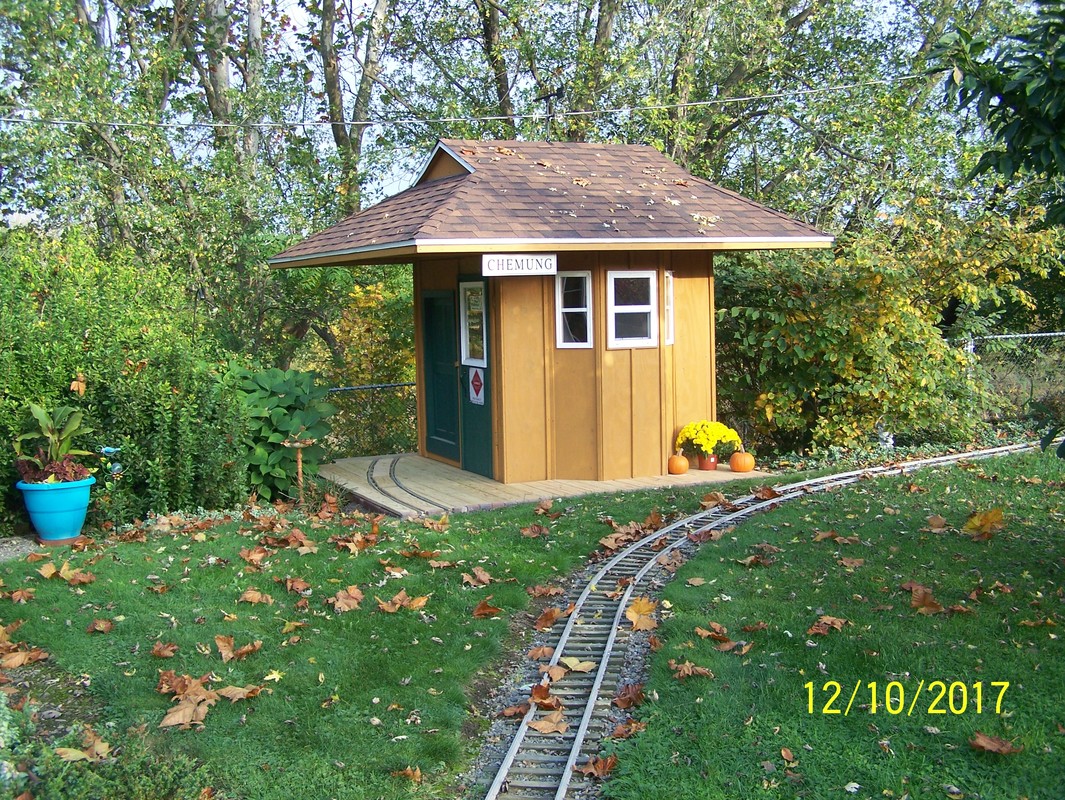
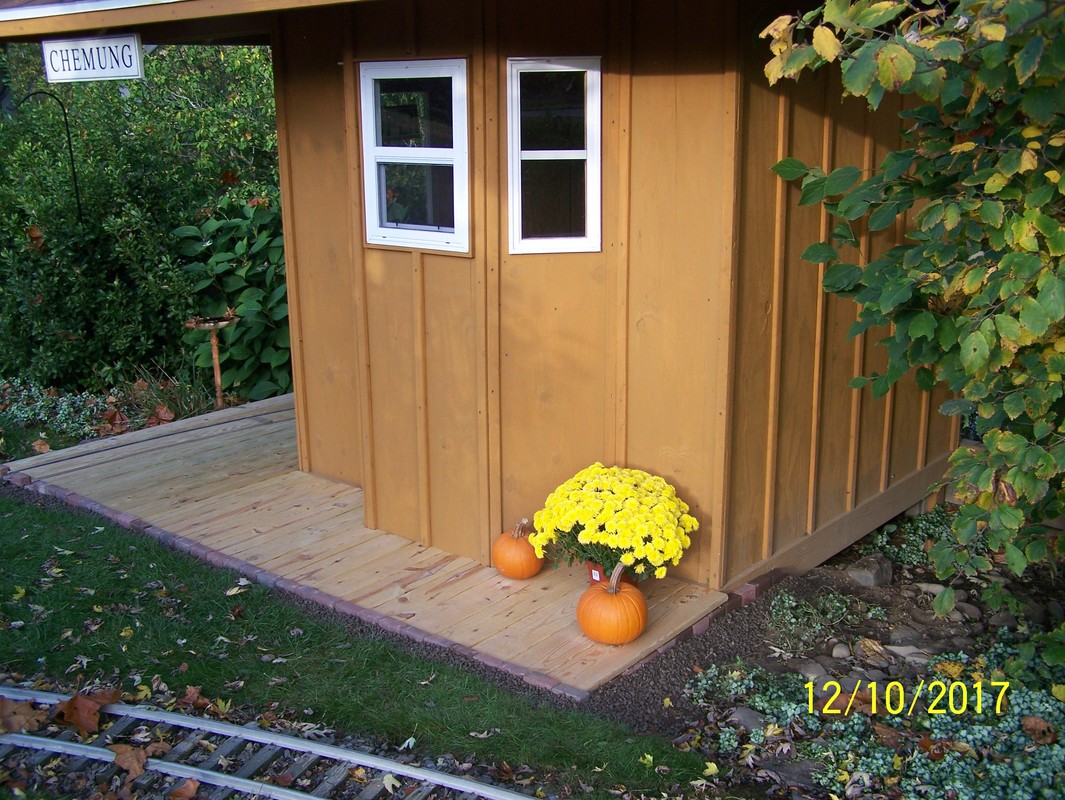
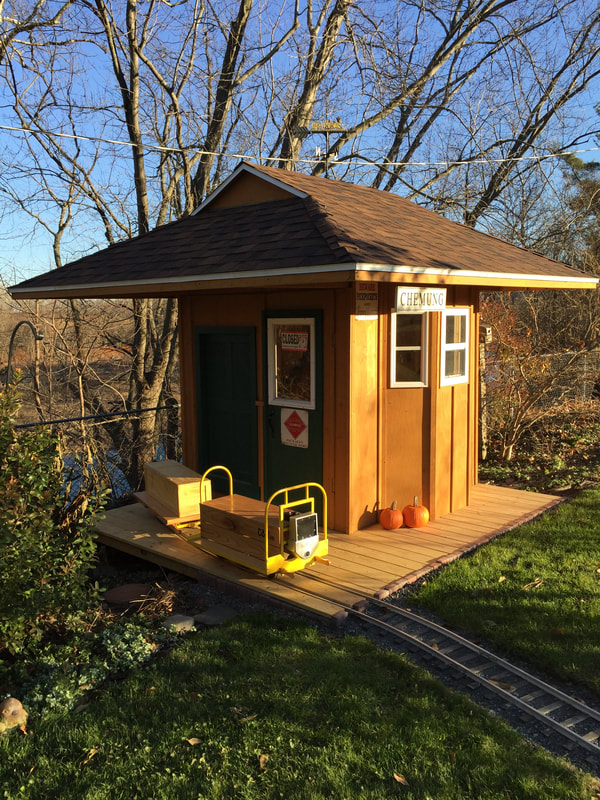
Jan, 2017. Put some pieces of 2x10 together to make the engine housing for the speeder and made the radiator housing with some 1/4x2 poplar. It turned warm for a couple of days so got the mock freight door and frame installed on the station. Then went on to cut and put together the decking and handles for the speeder work car and the speeder body. Also got the speed control mounted in the speeder. Oh, and finished up with getting the ceiling up in the metal shop. Finally got a sign for the station and got it installed on the station but I think it needs to be moved to out by the roof overhang.


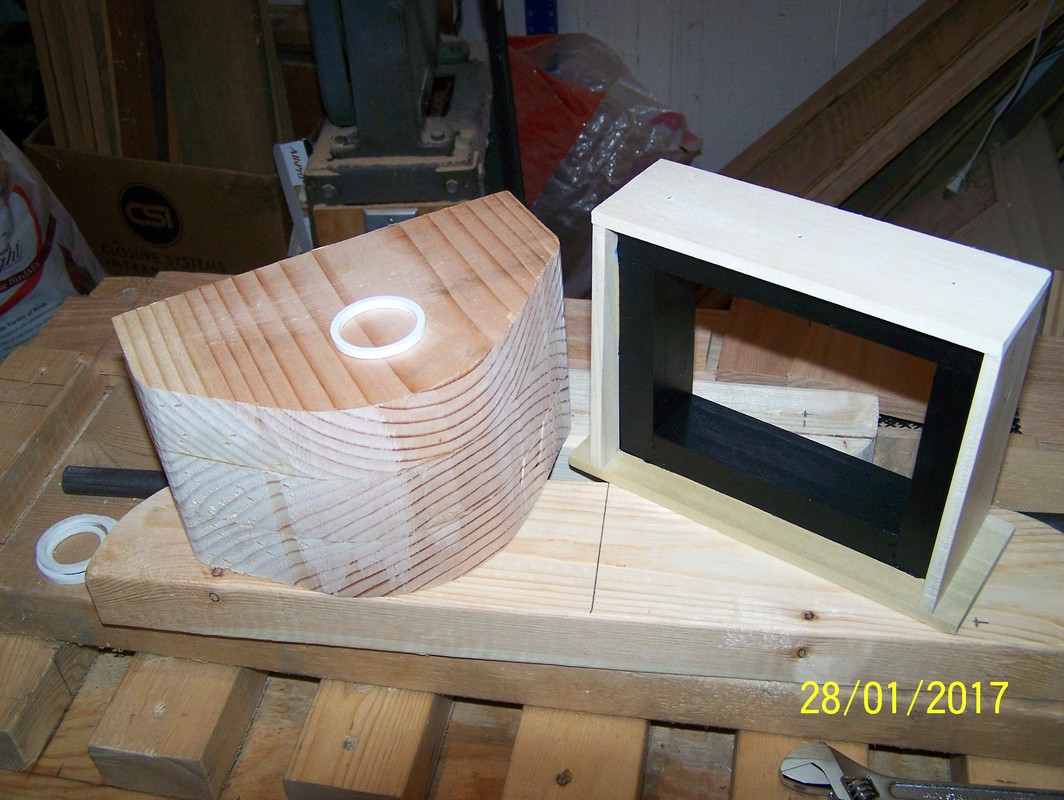
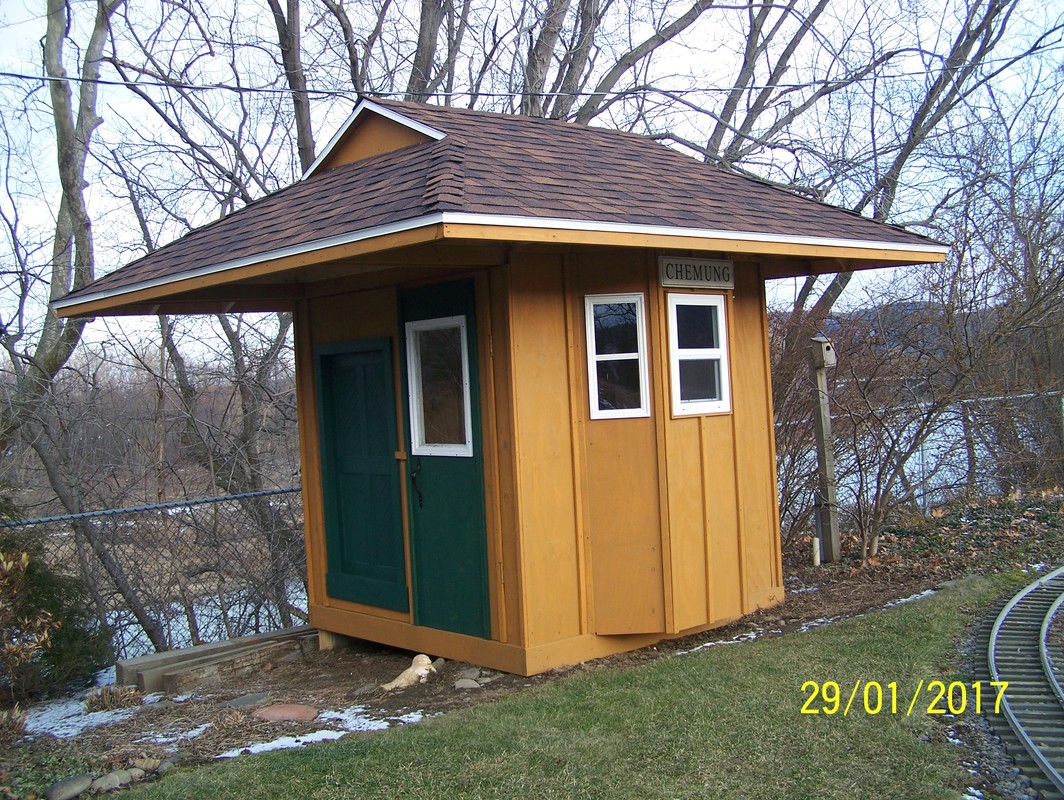
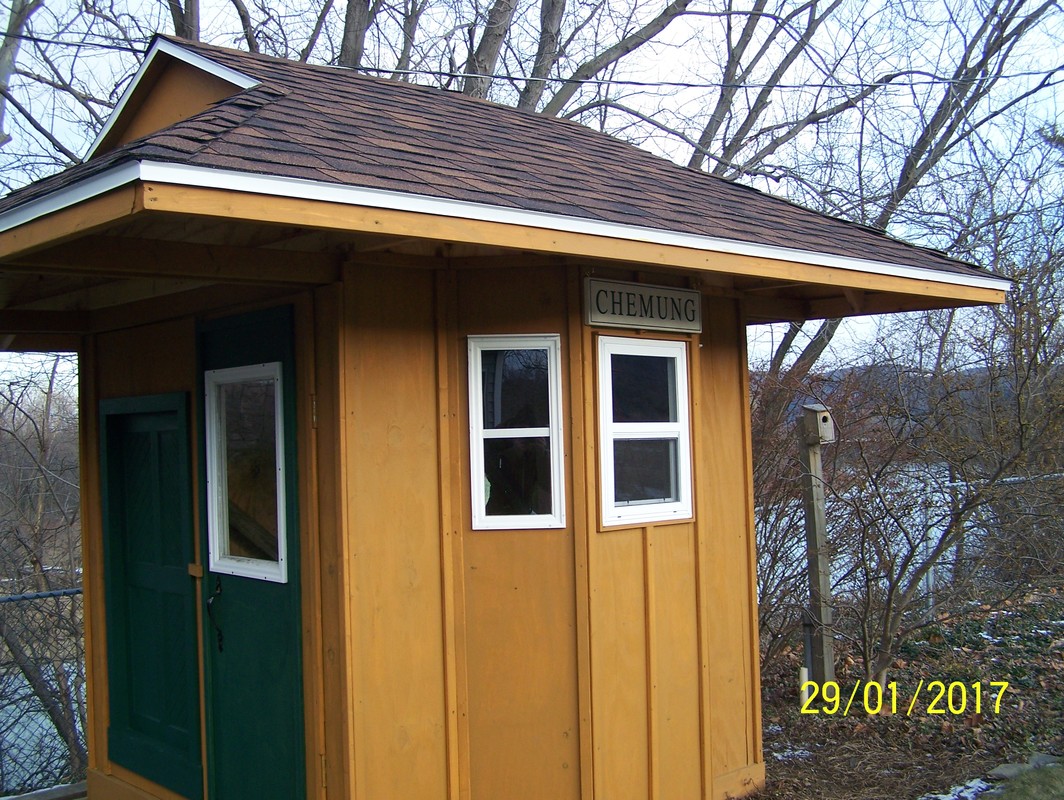
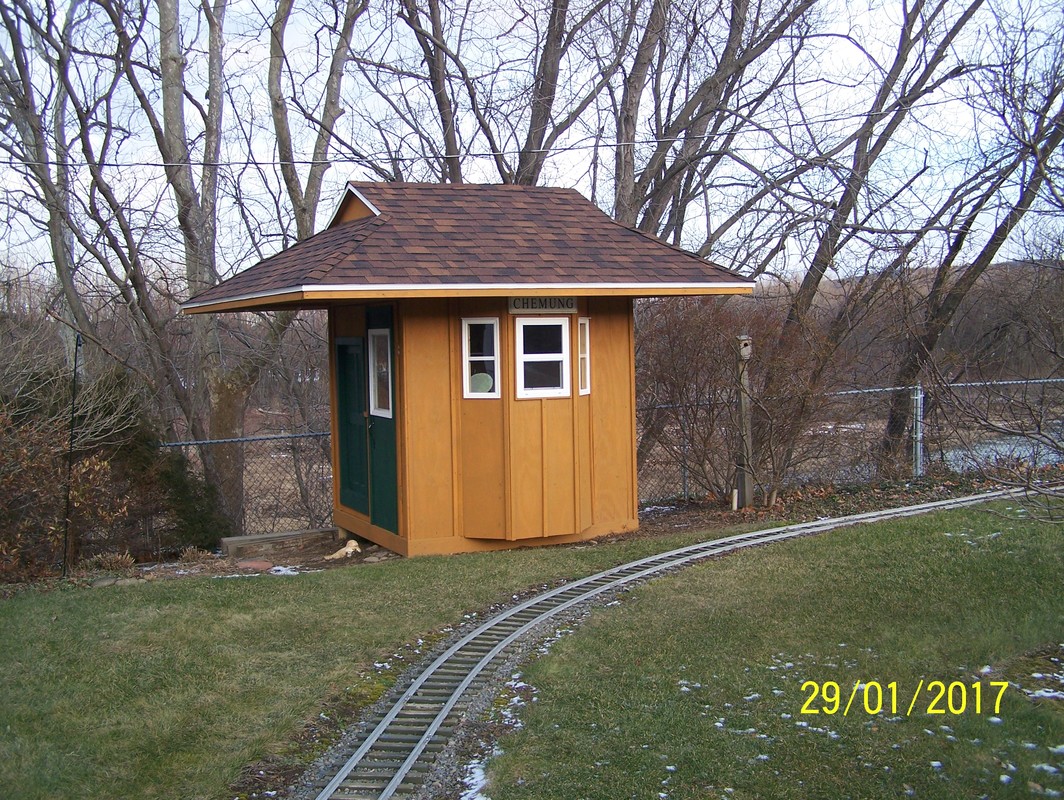
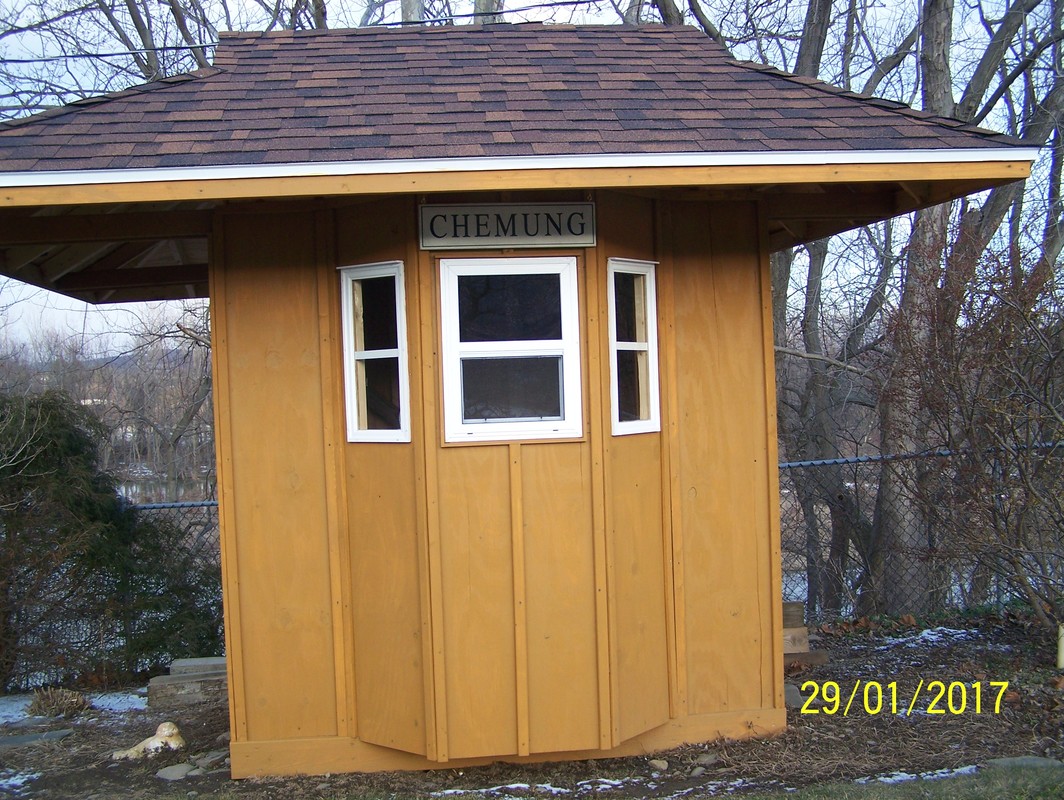
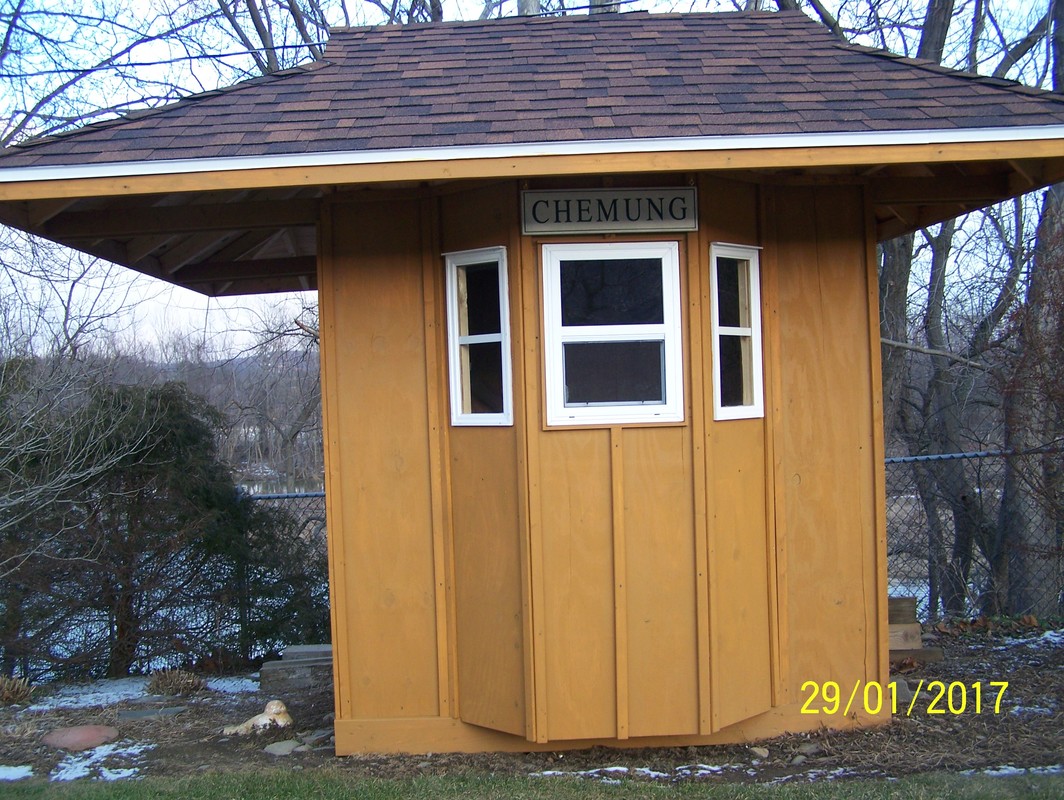
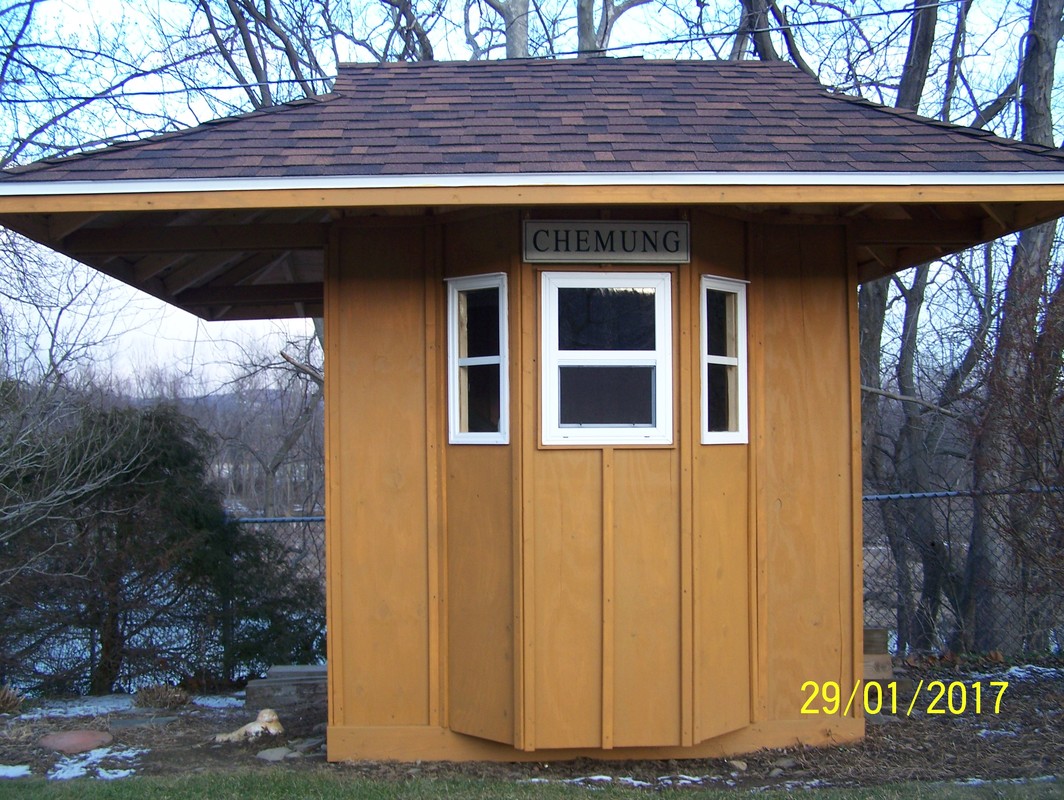
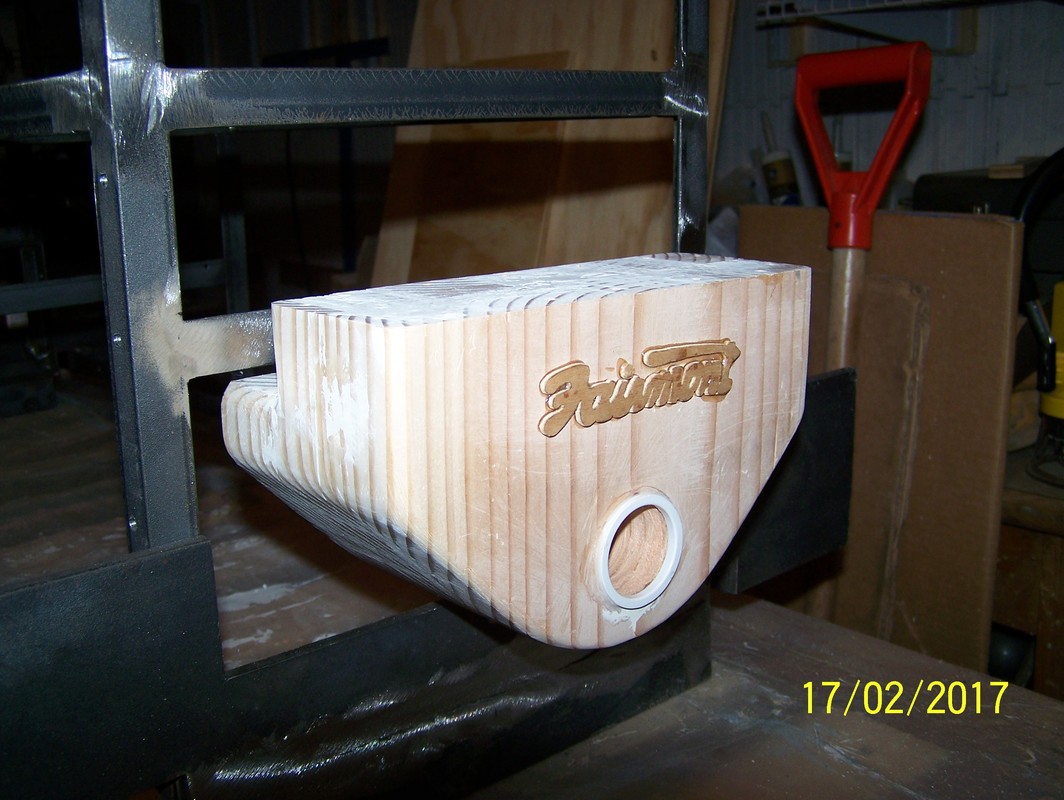
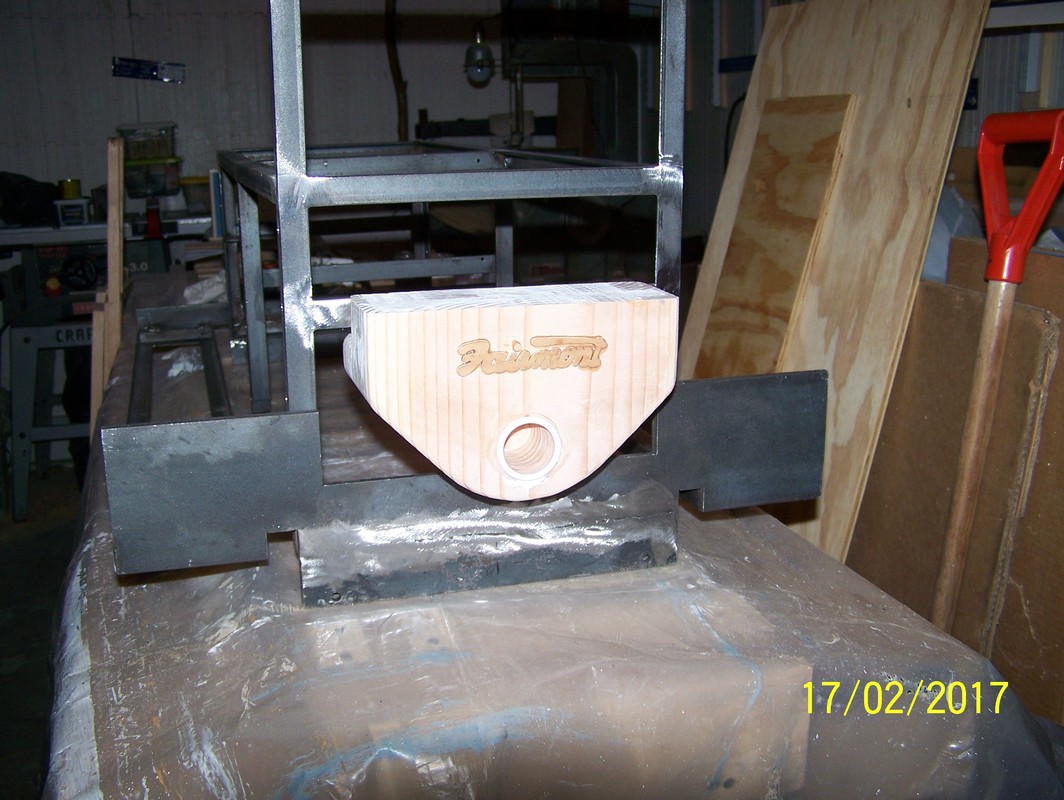
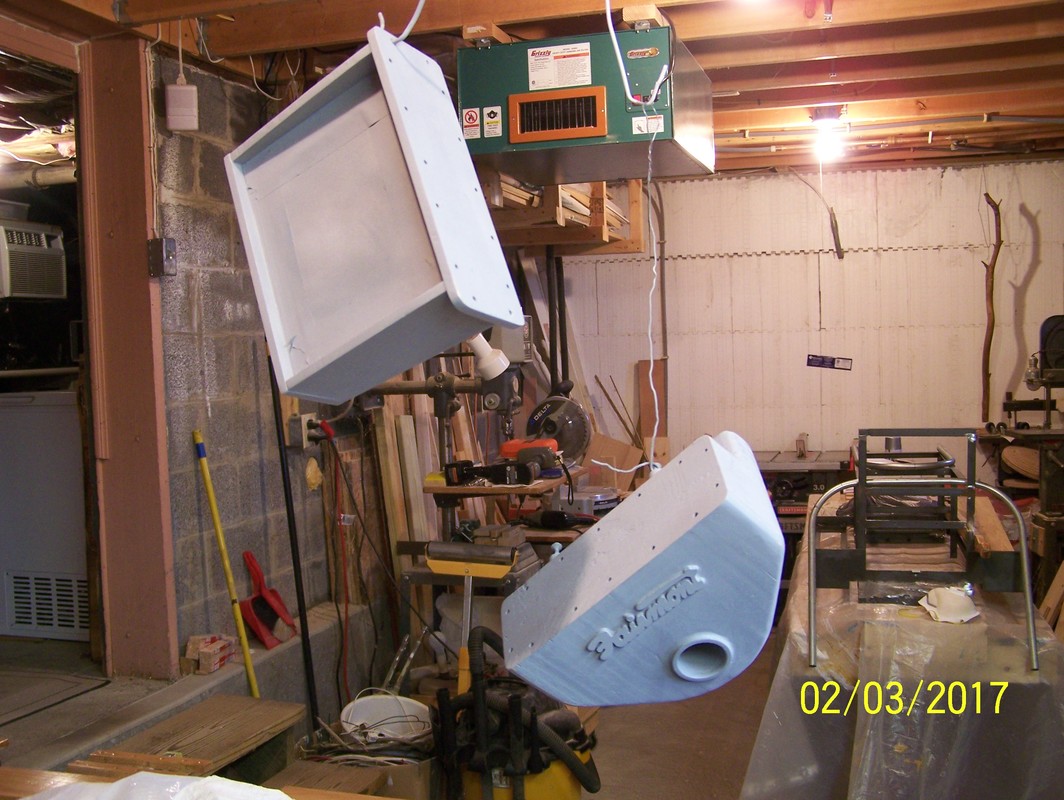
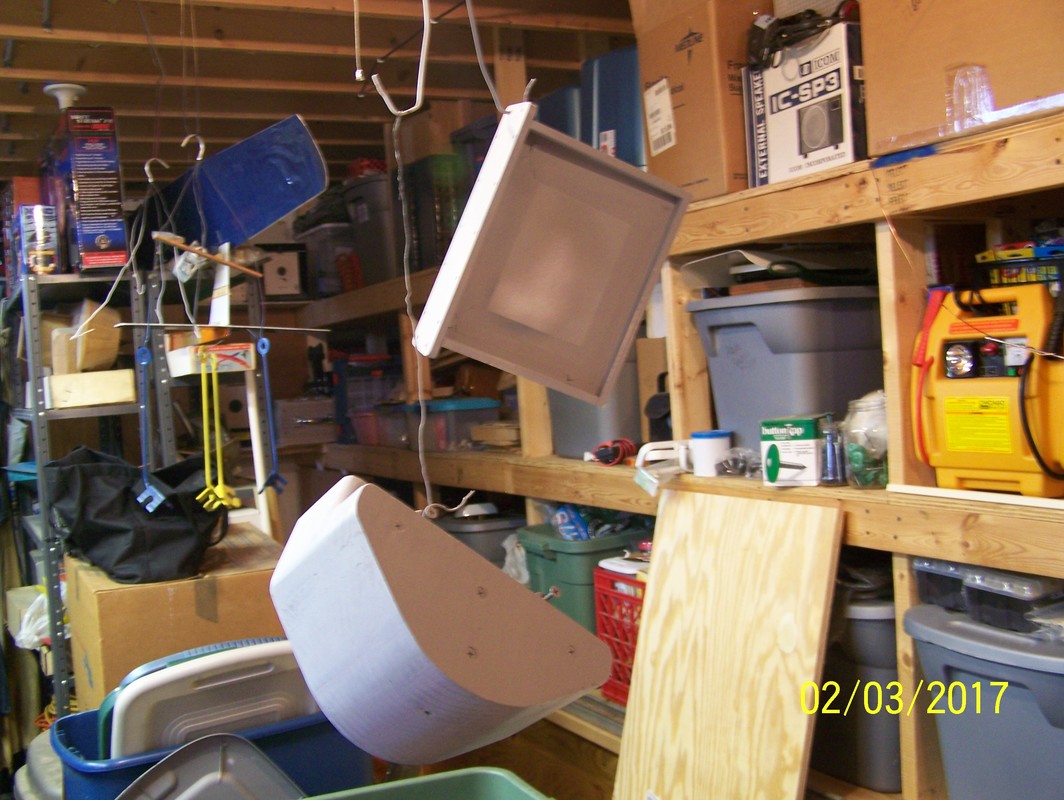
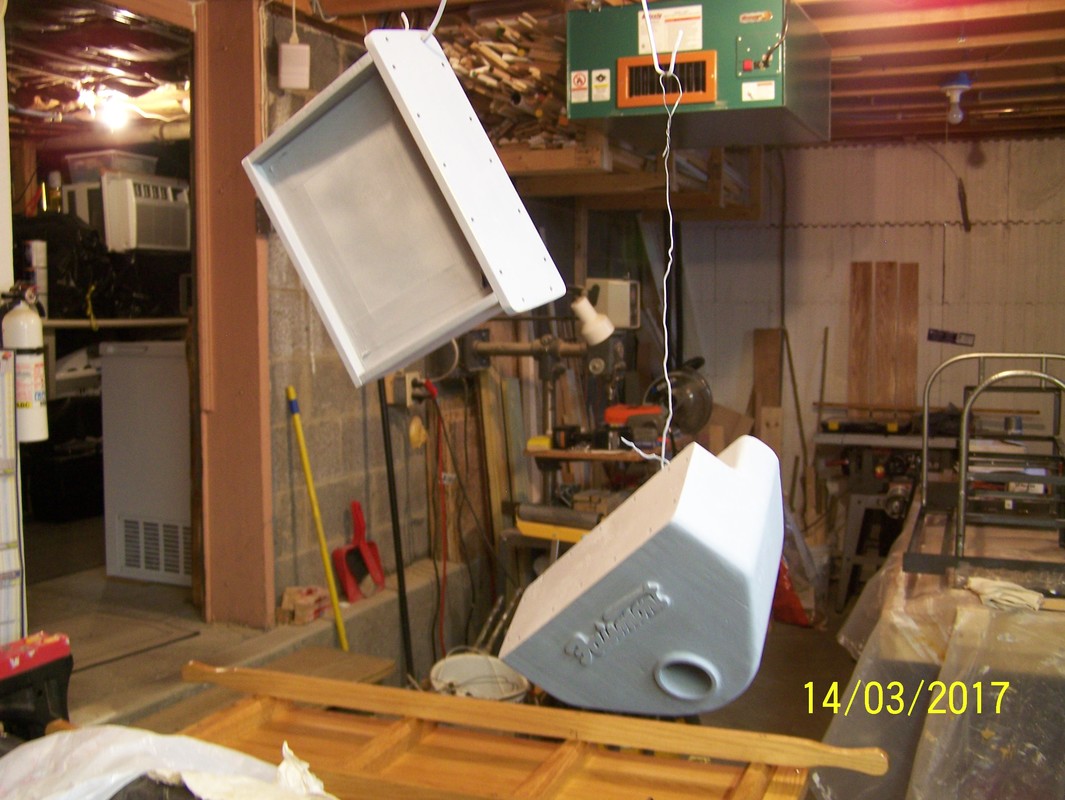
Feb 2017. Had some more warm days, so moved the "Chemung" station sign out to by the overhang edge. Welded a couple of braces to the frame and worked on the engine cowl, making the crank boss and the "Fairmont" lettering and installing them on the cowl. Put a coat of sanding sealer on all the boards, engine cowl and the radiator housing. Plus put a coat of primer on the cowl and housing.

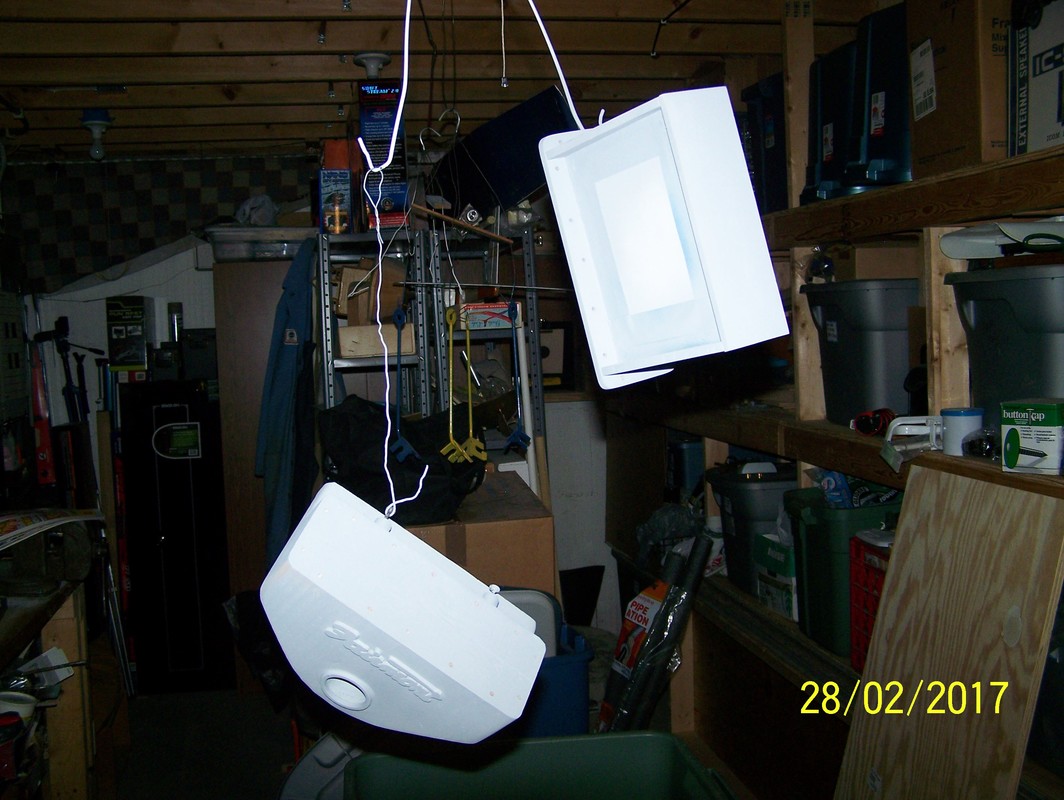
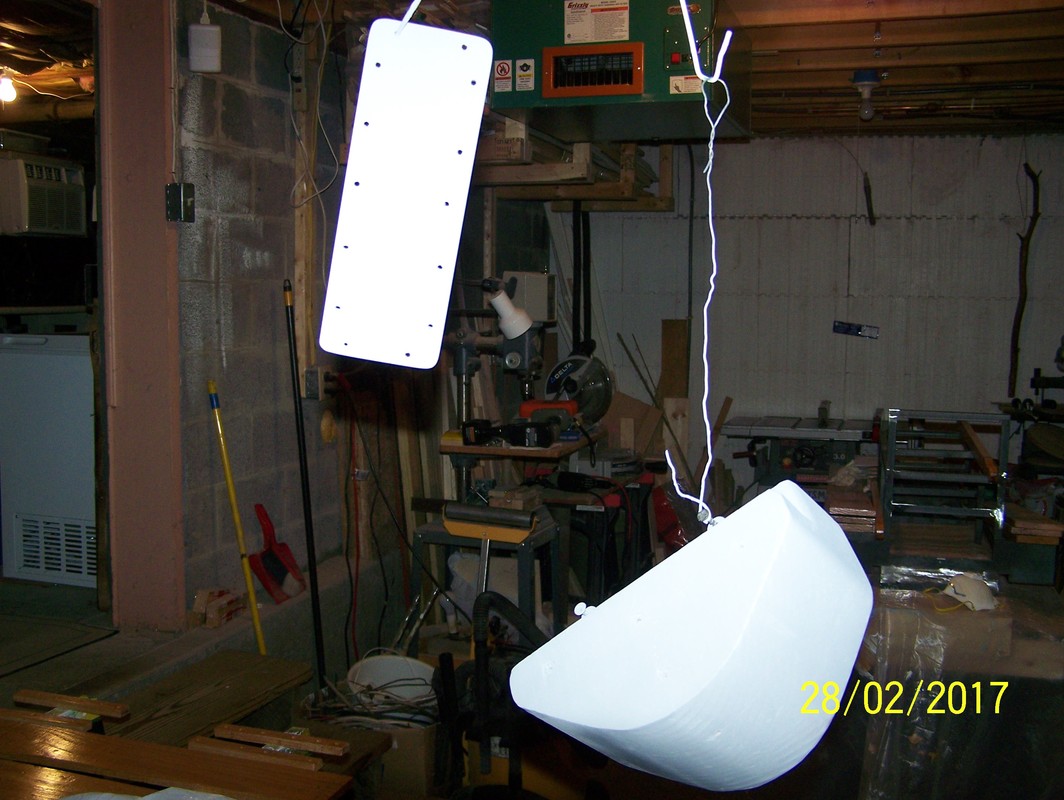
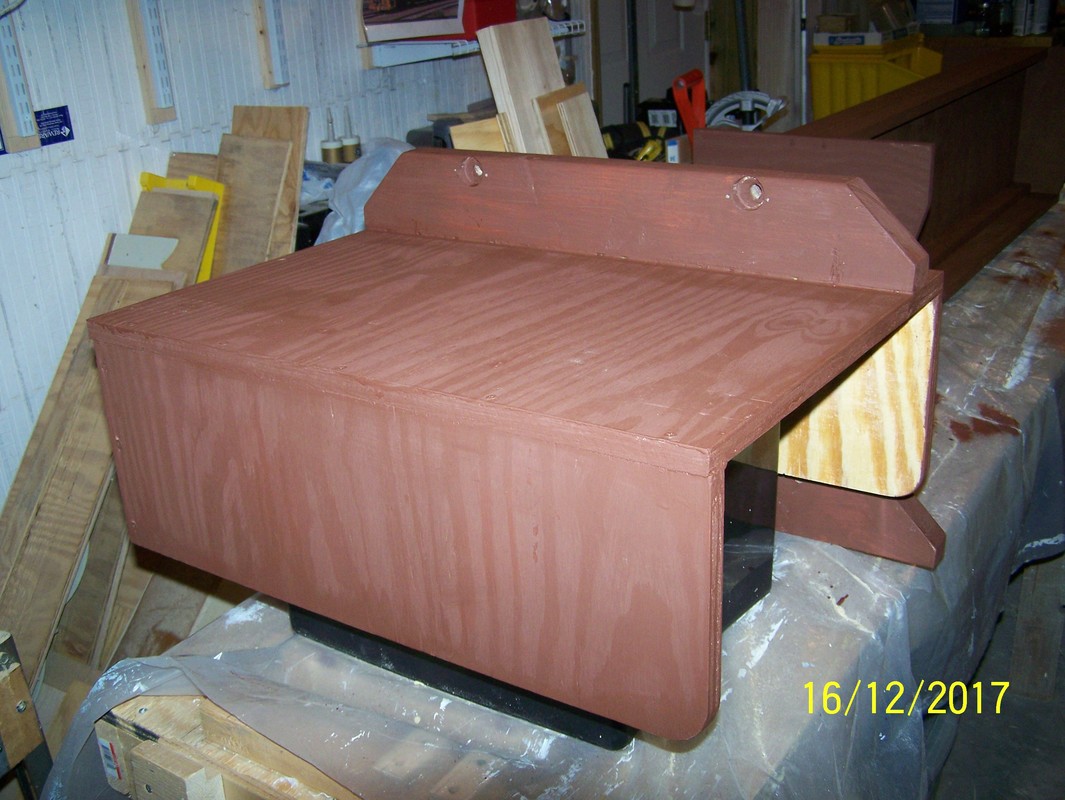
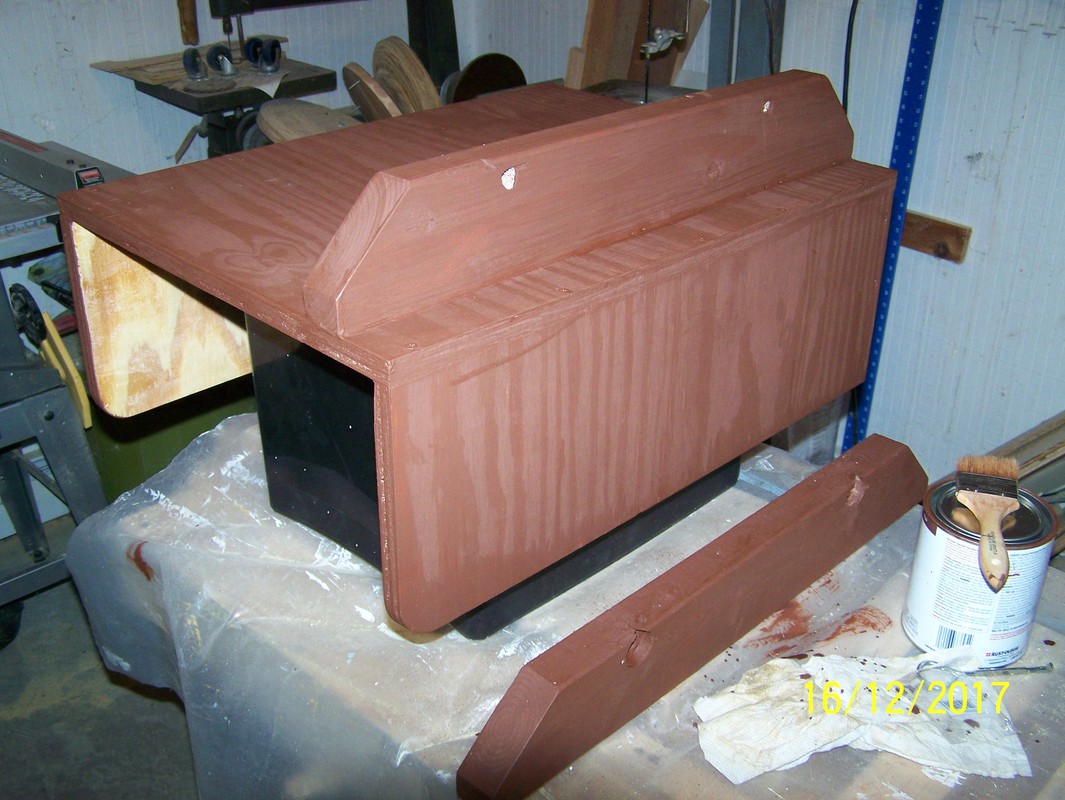
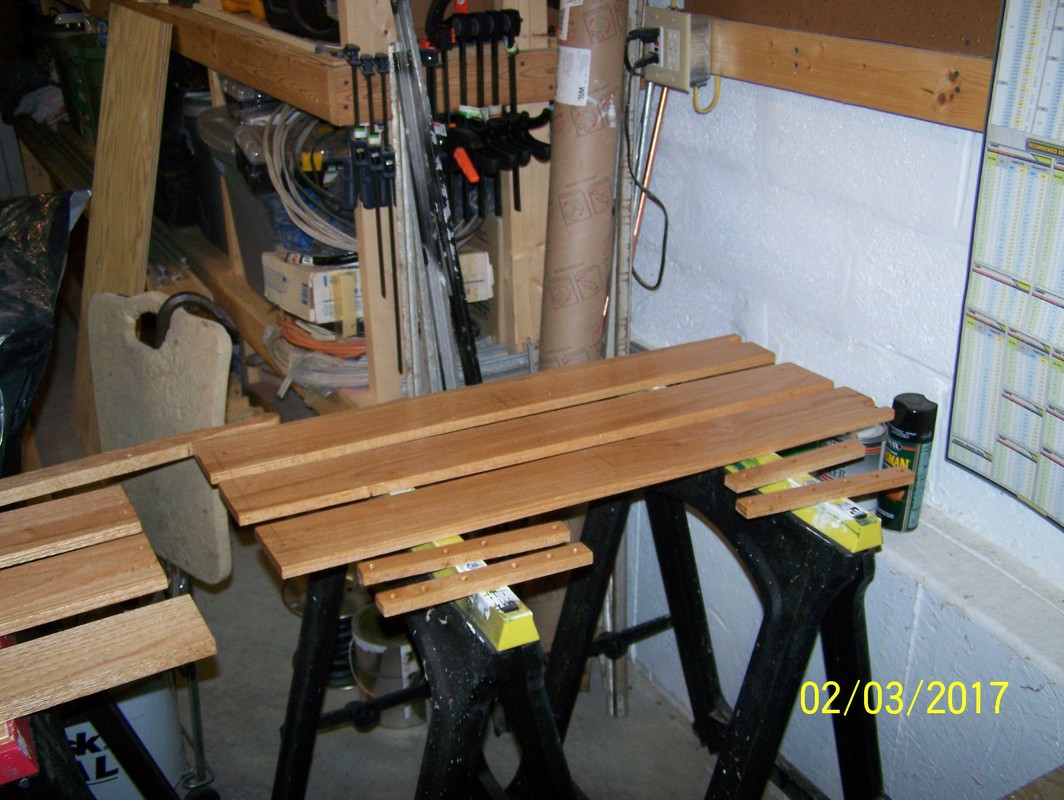
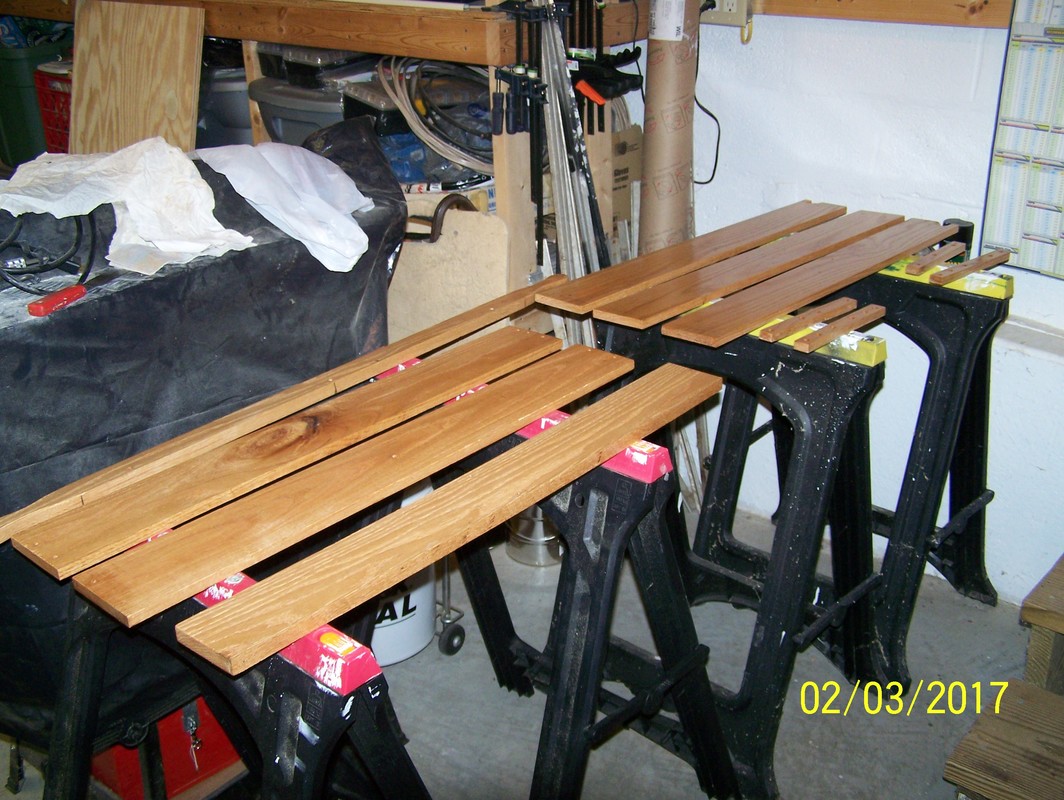
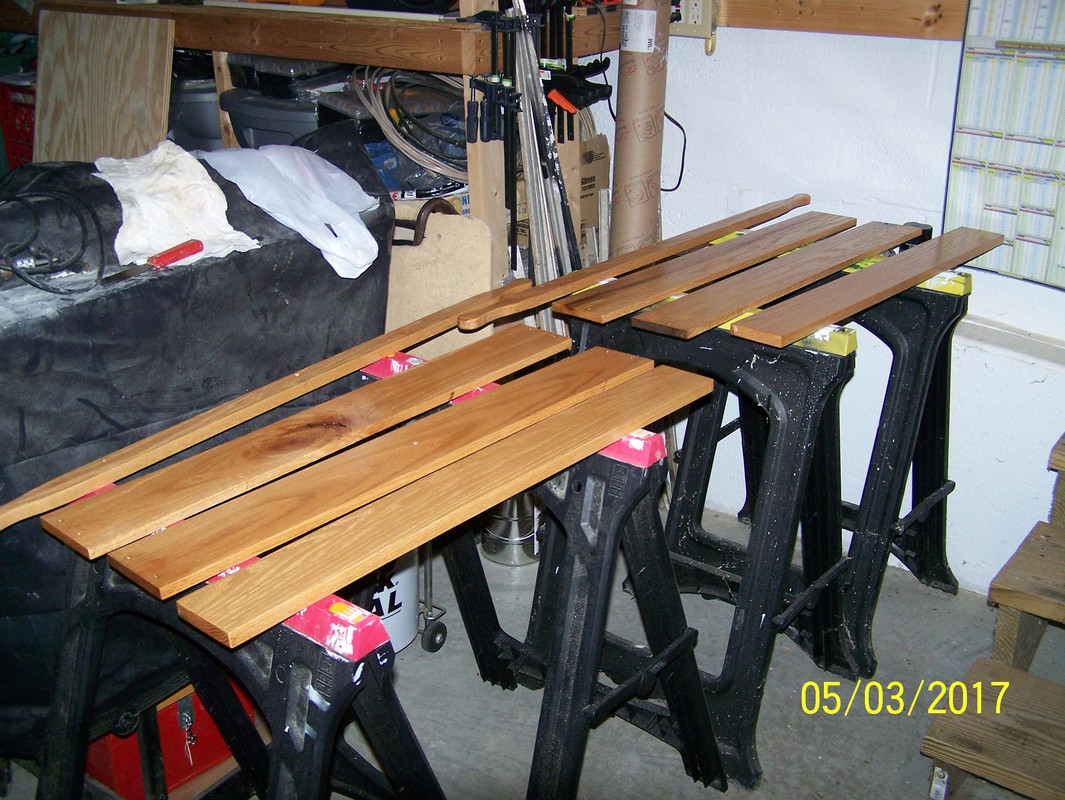
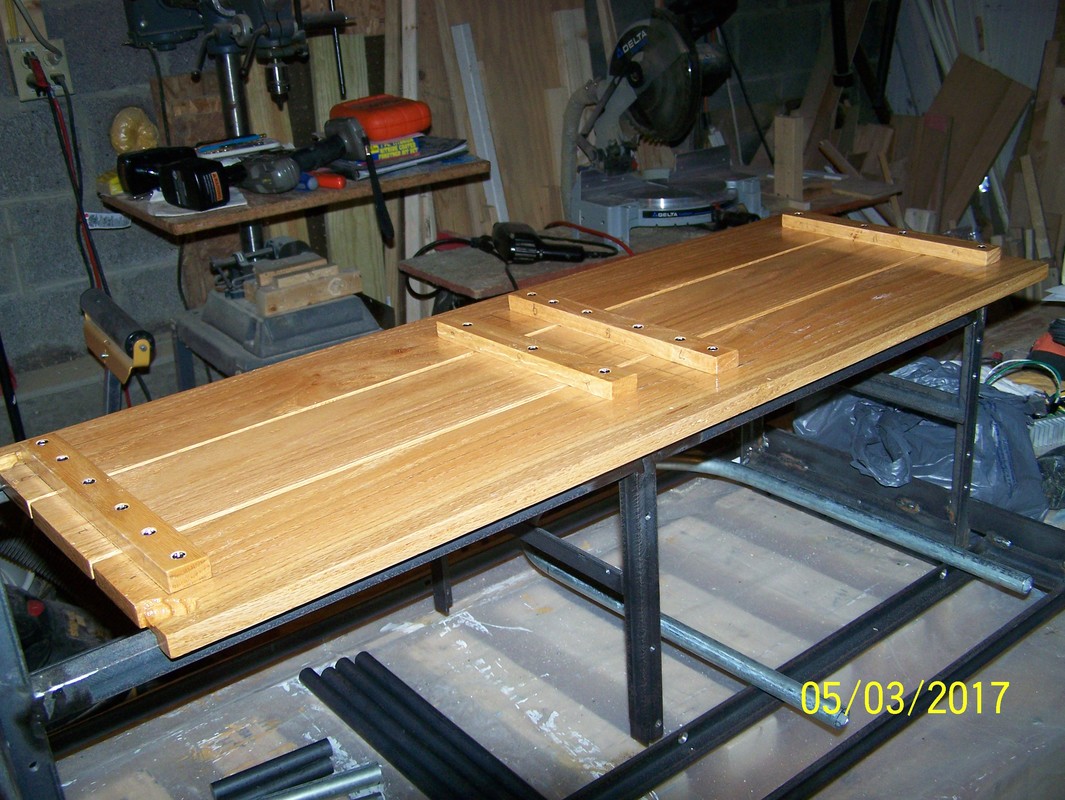
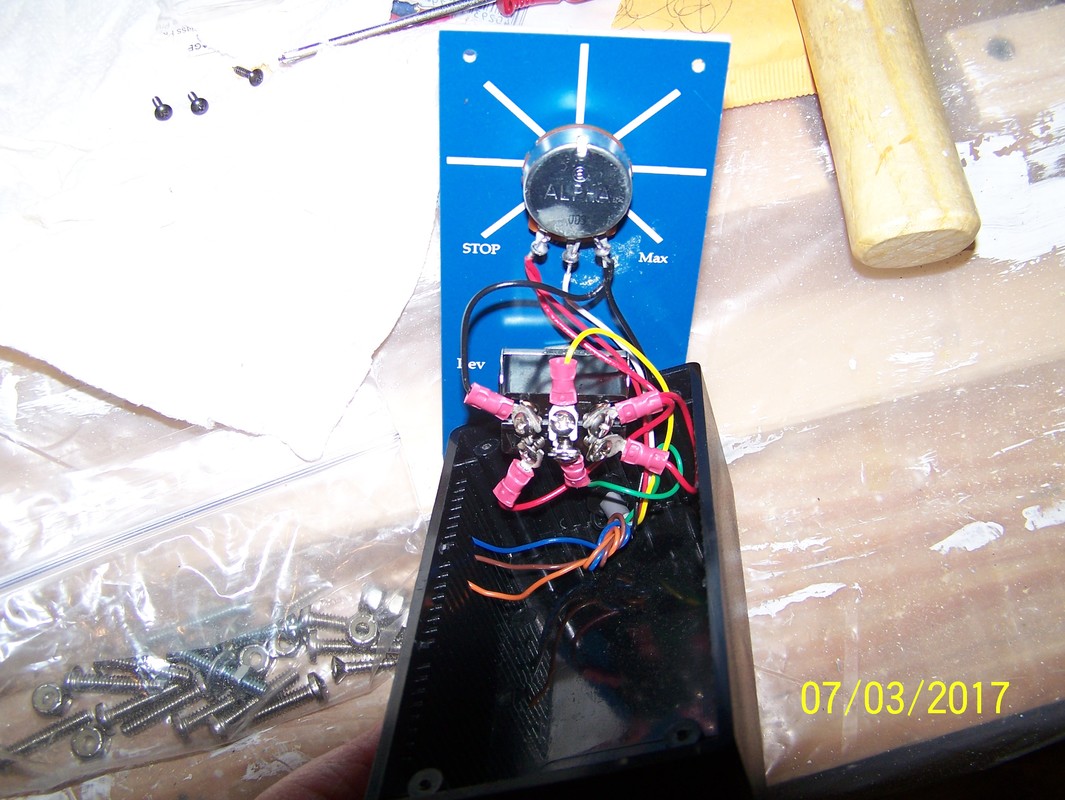
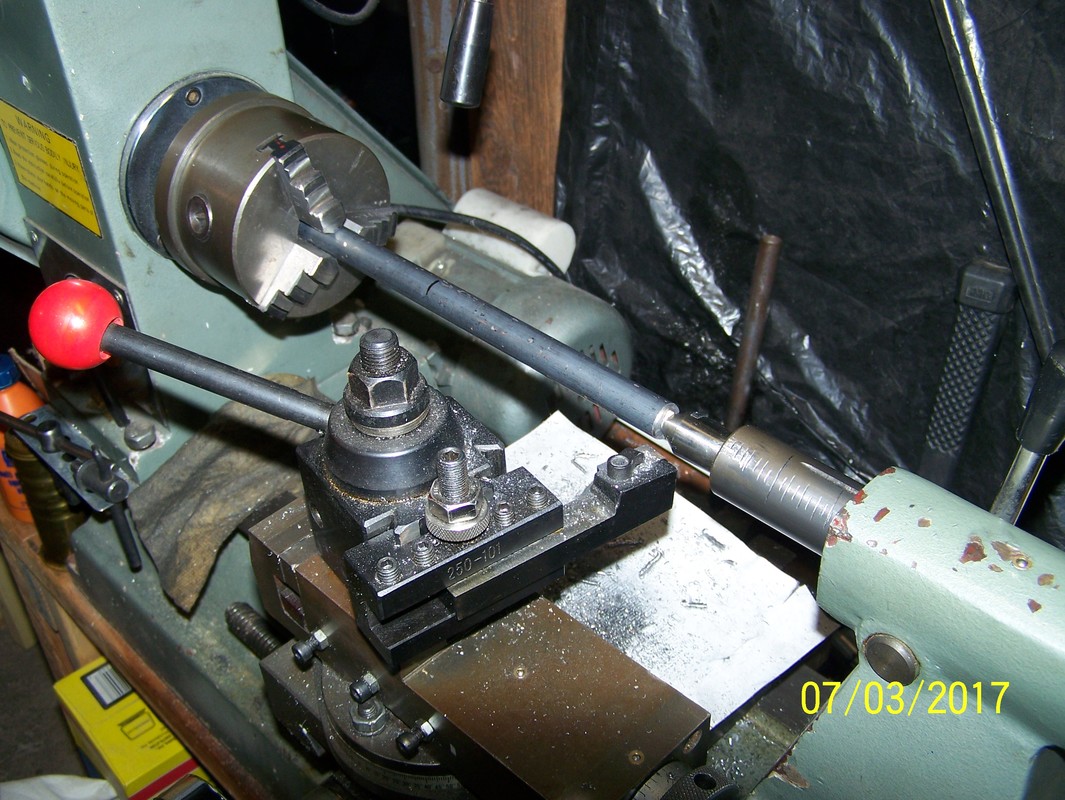
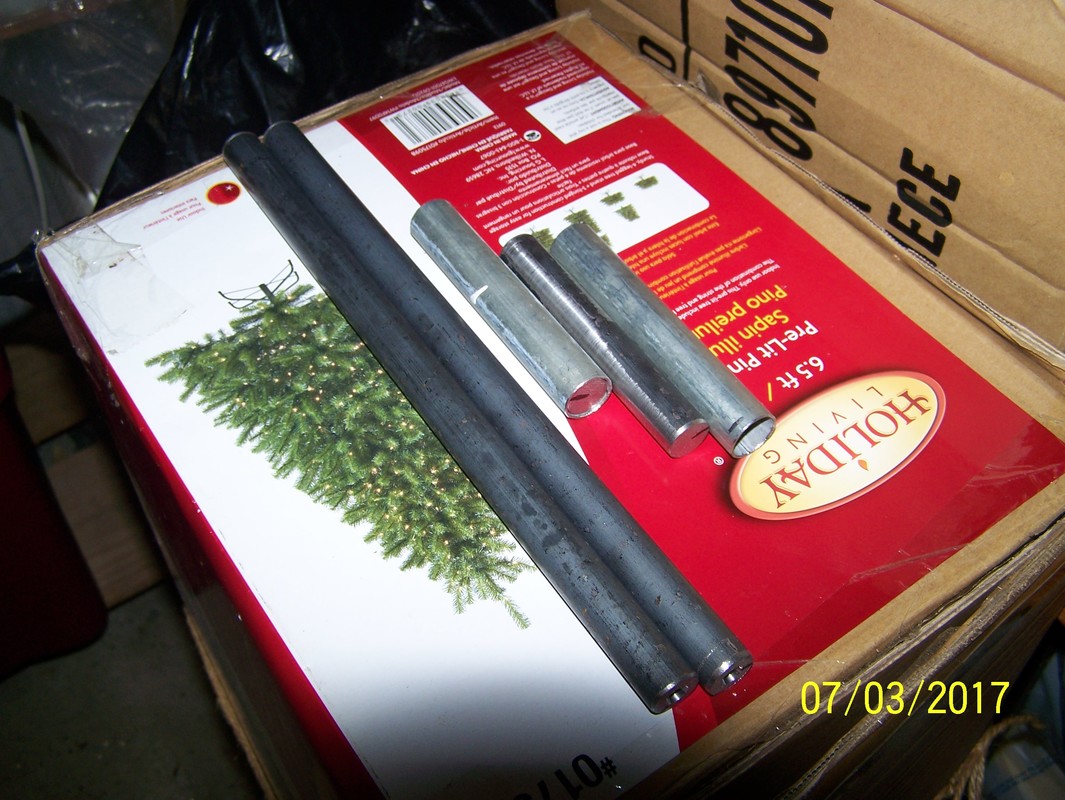
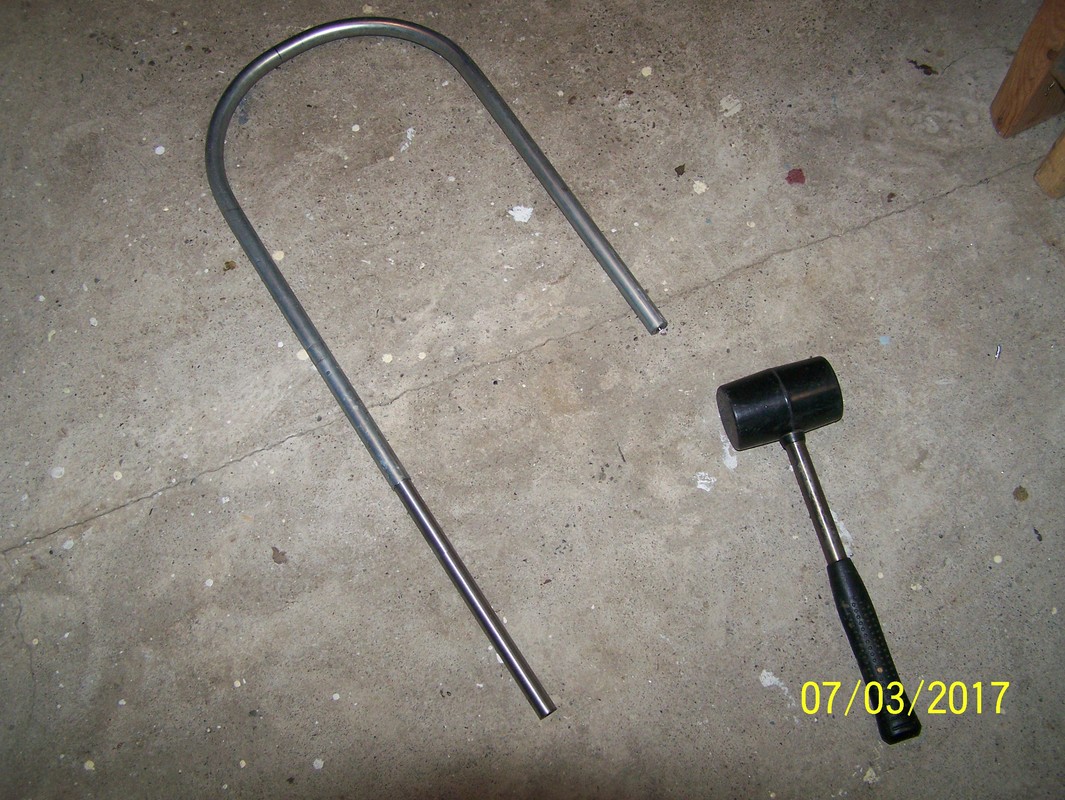
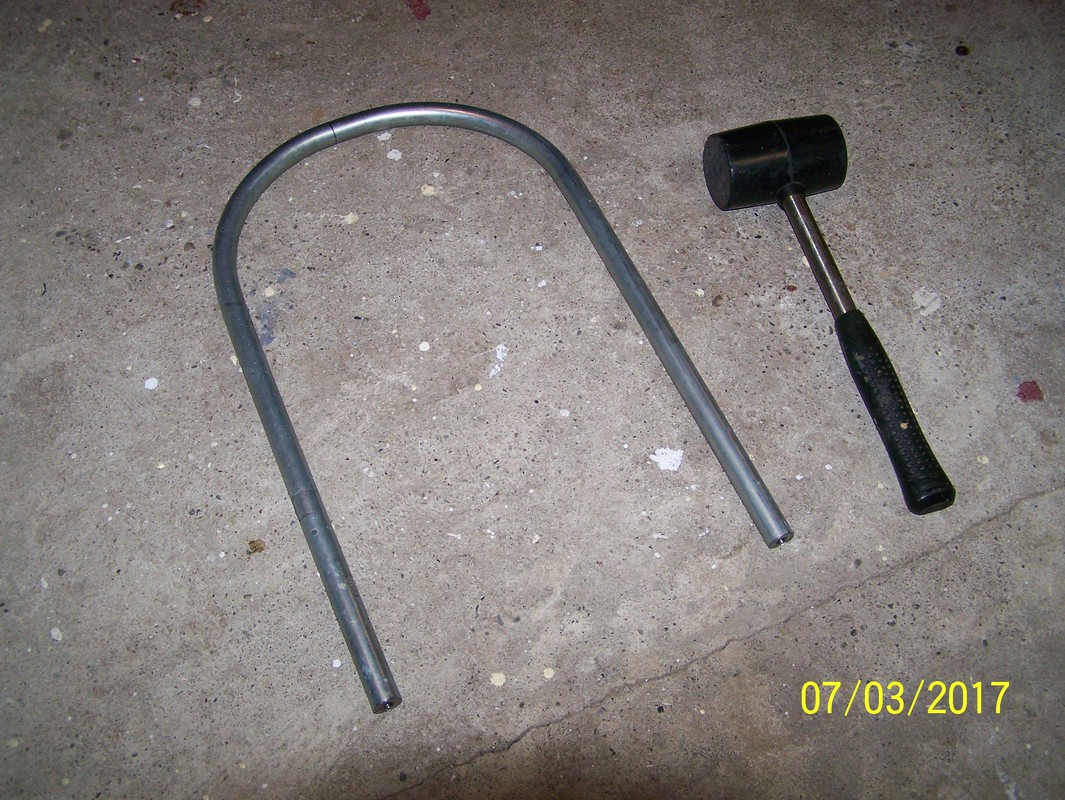
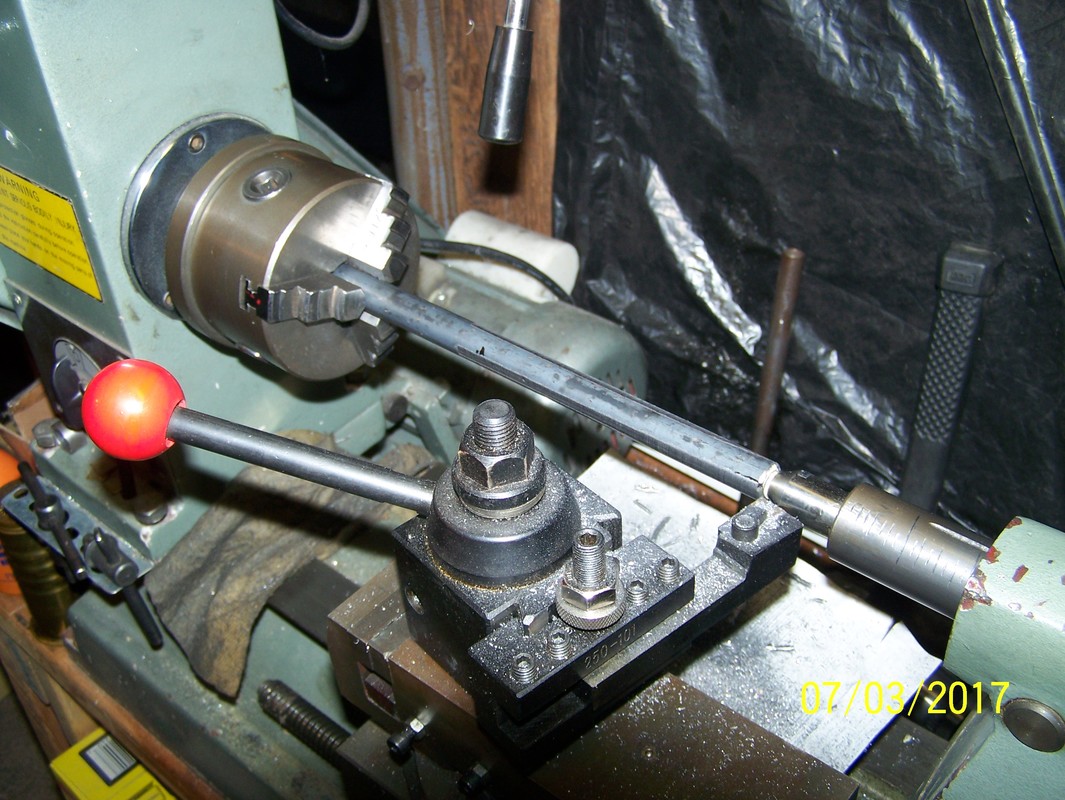
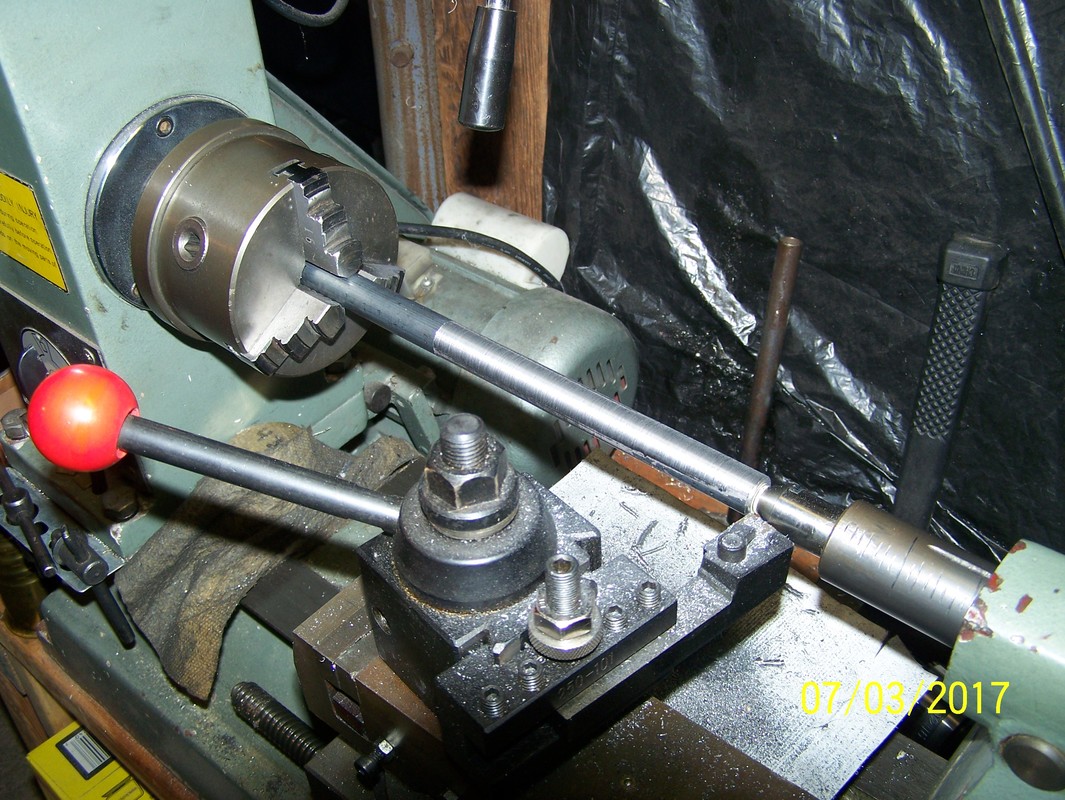
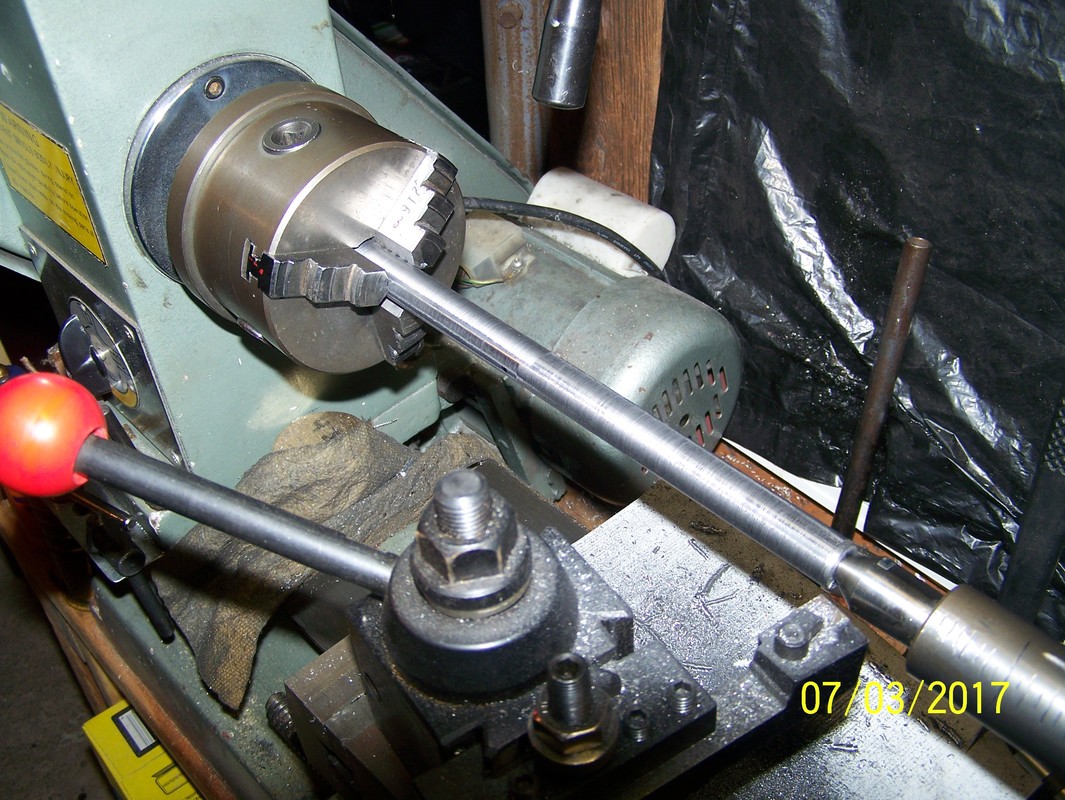
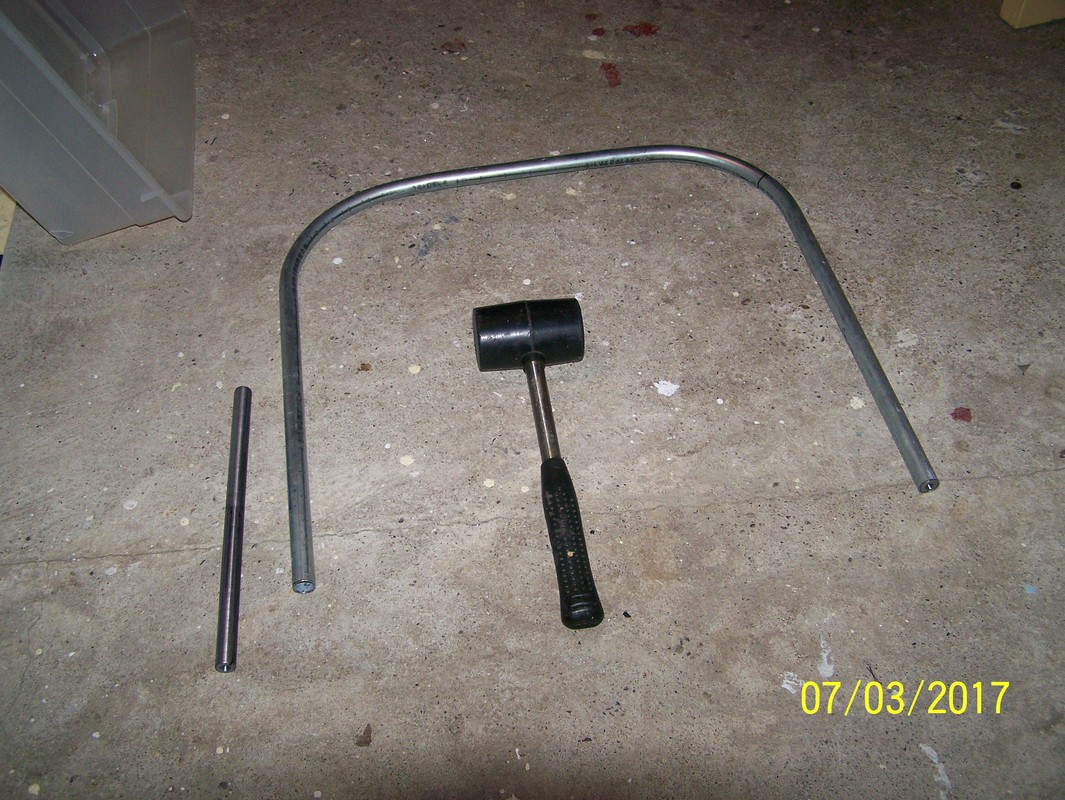
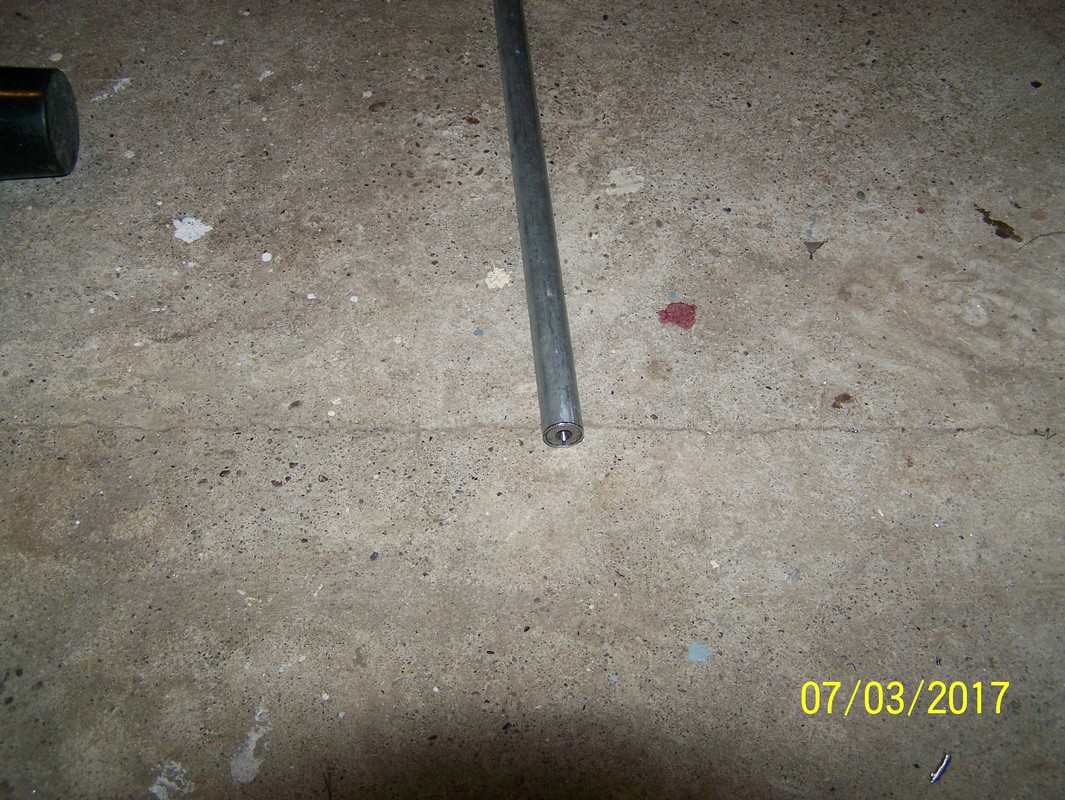
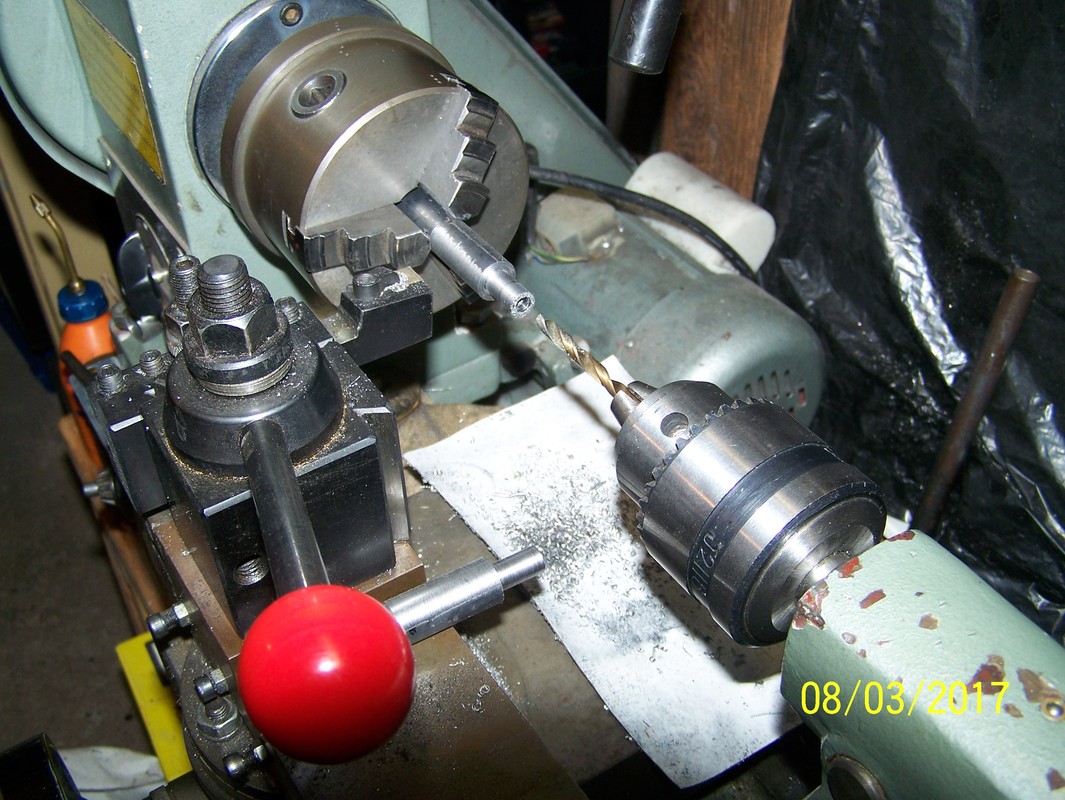
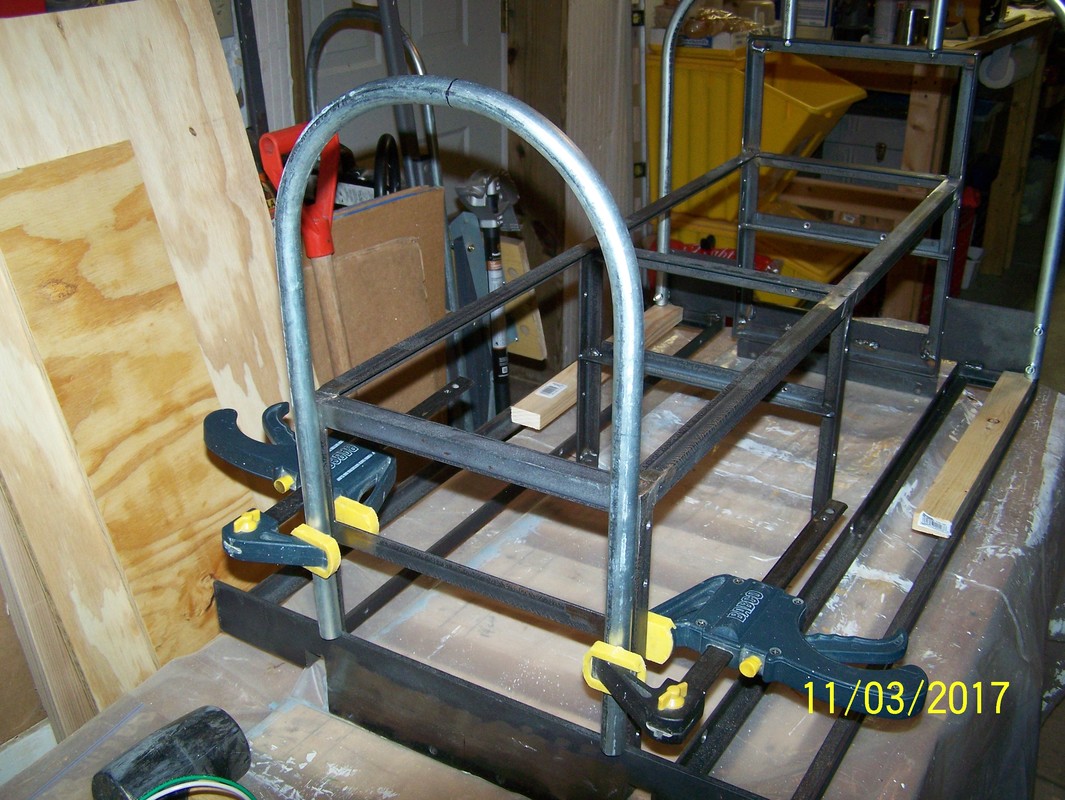
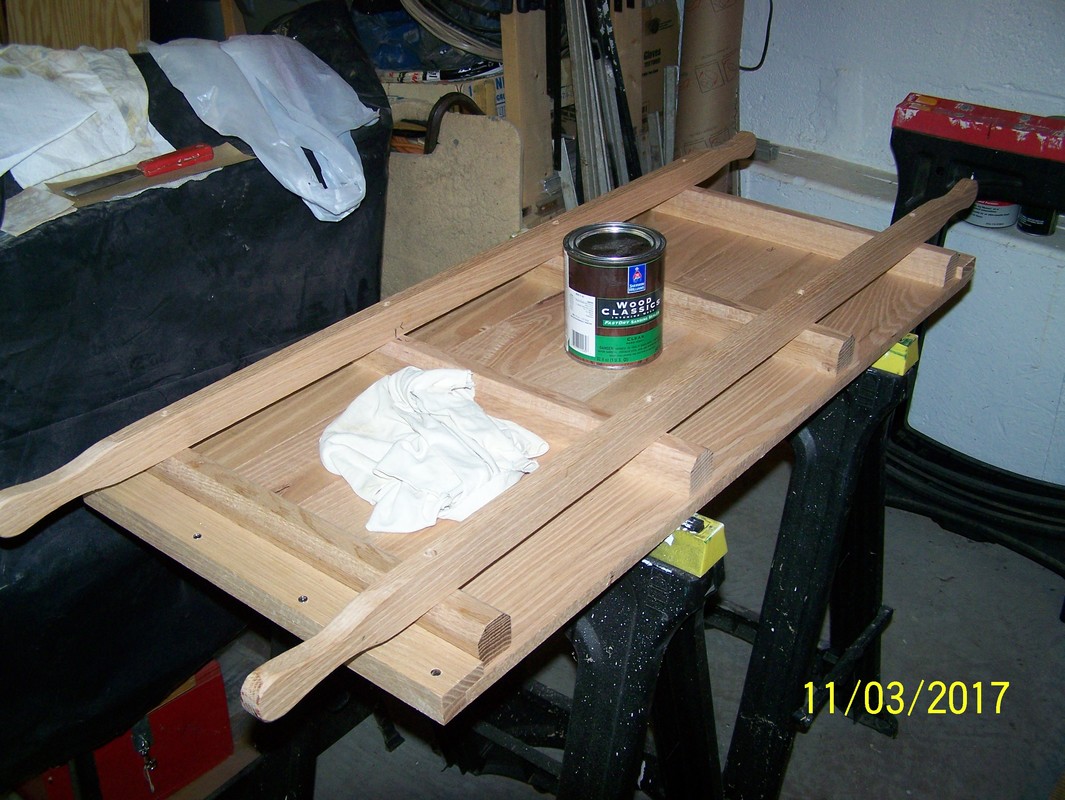
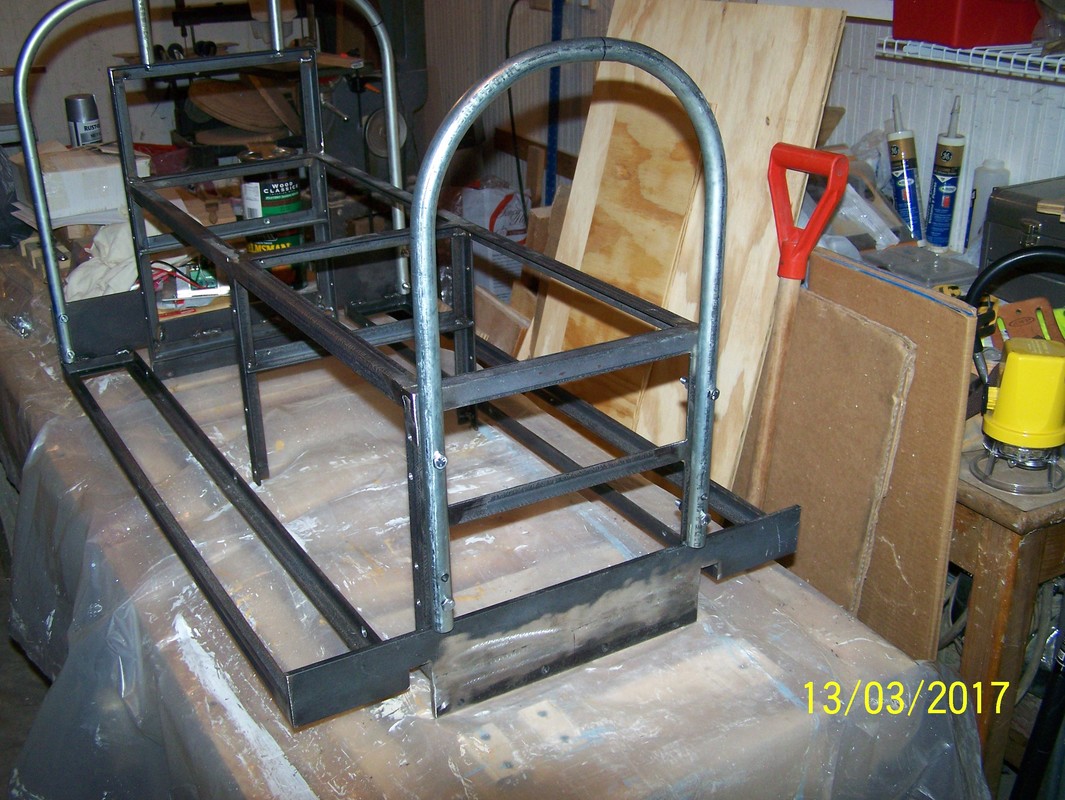
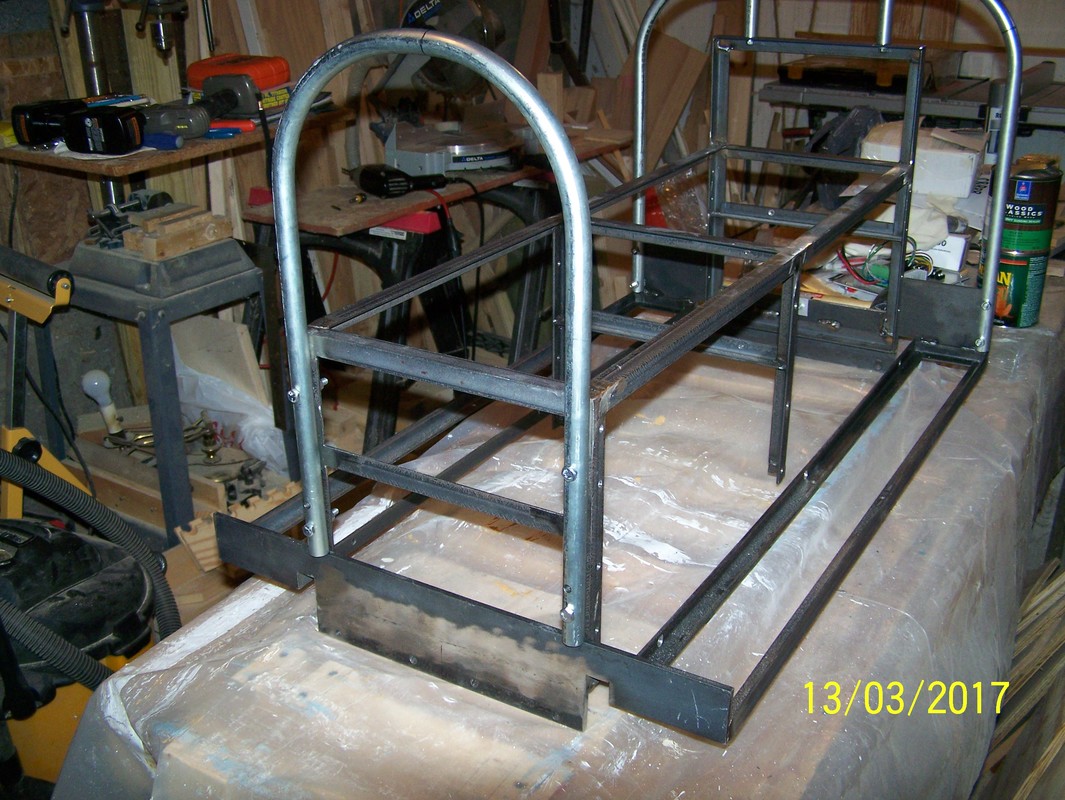
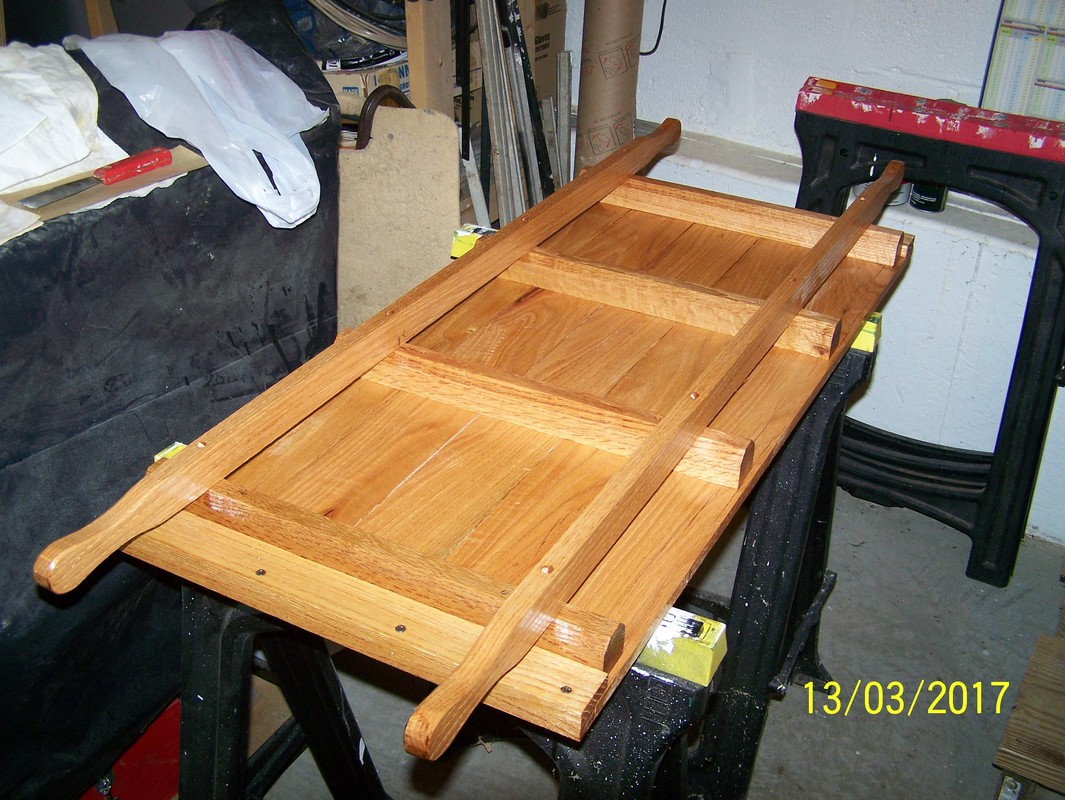
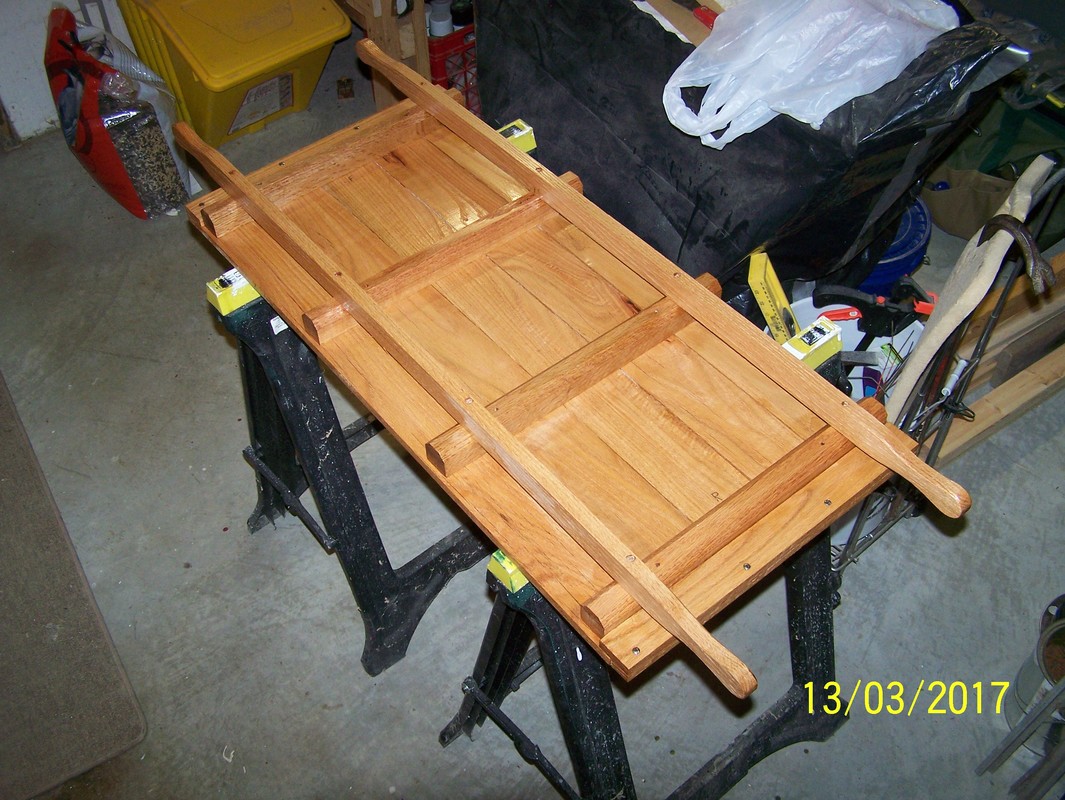
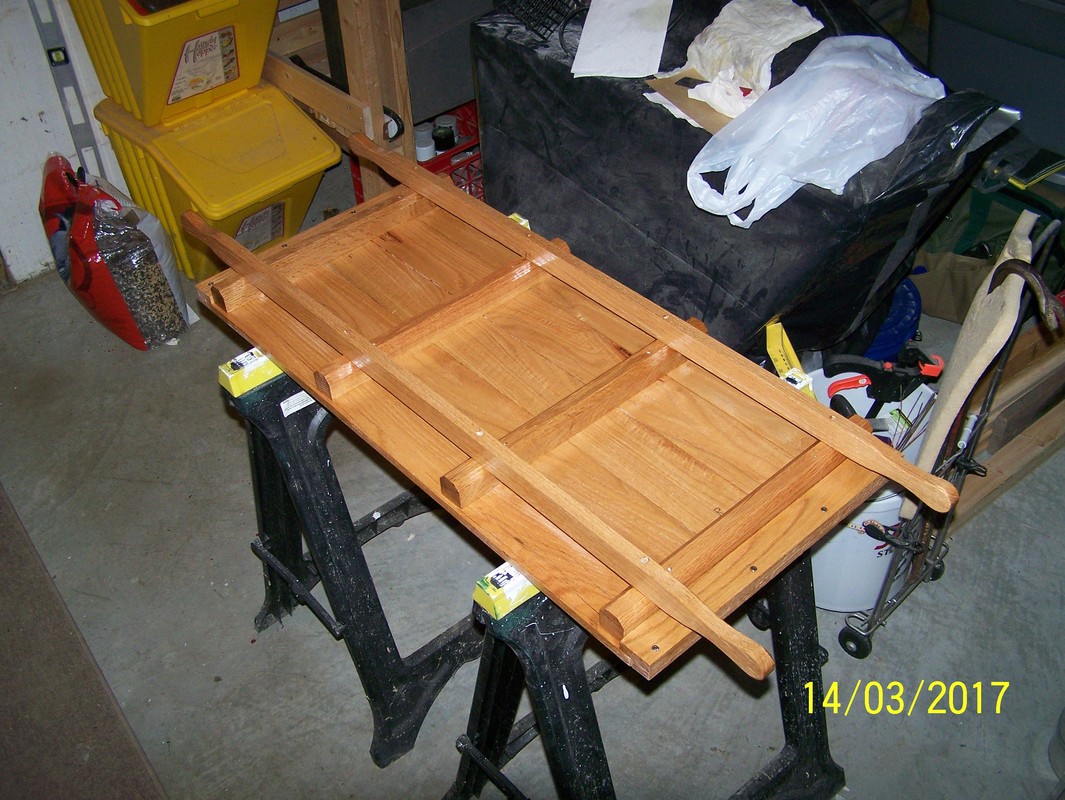
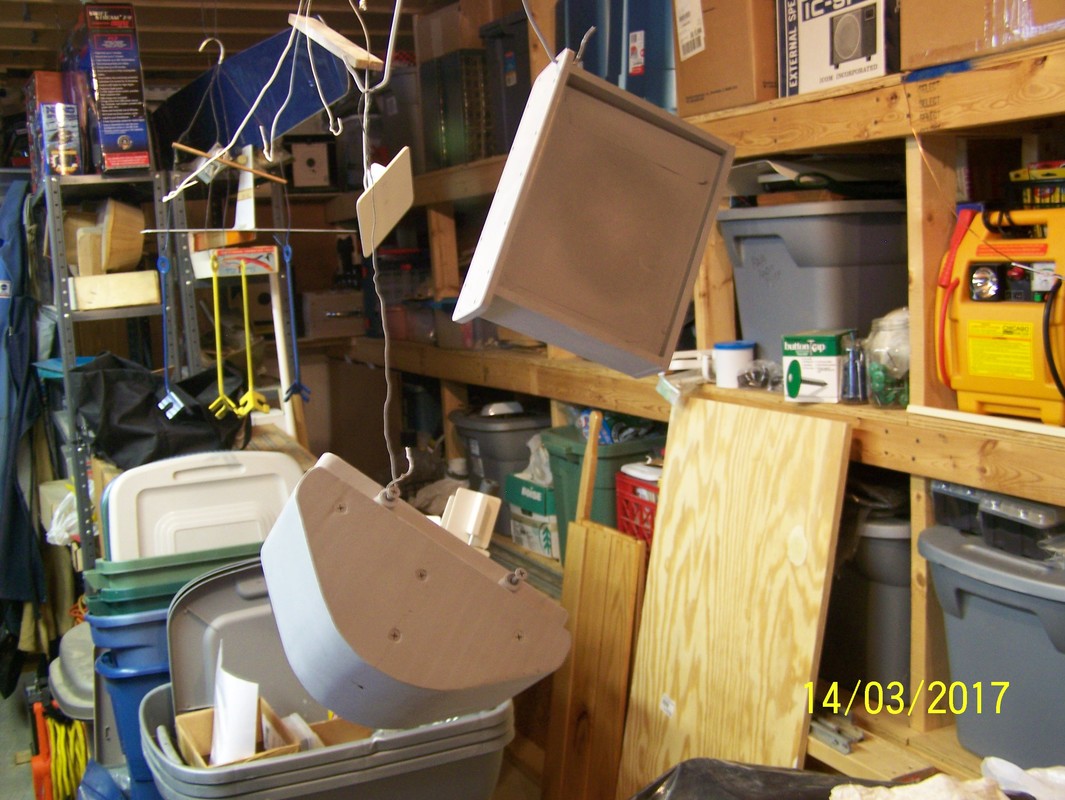
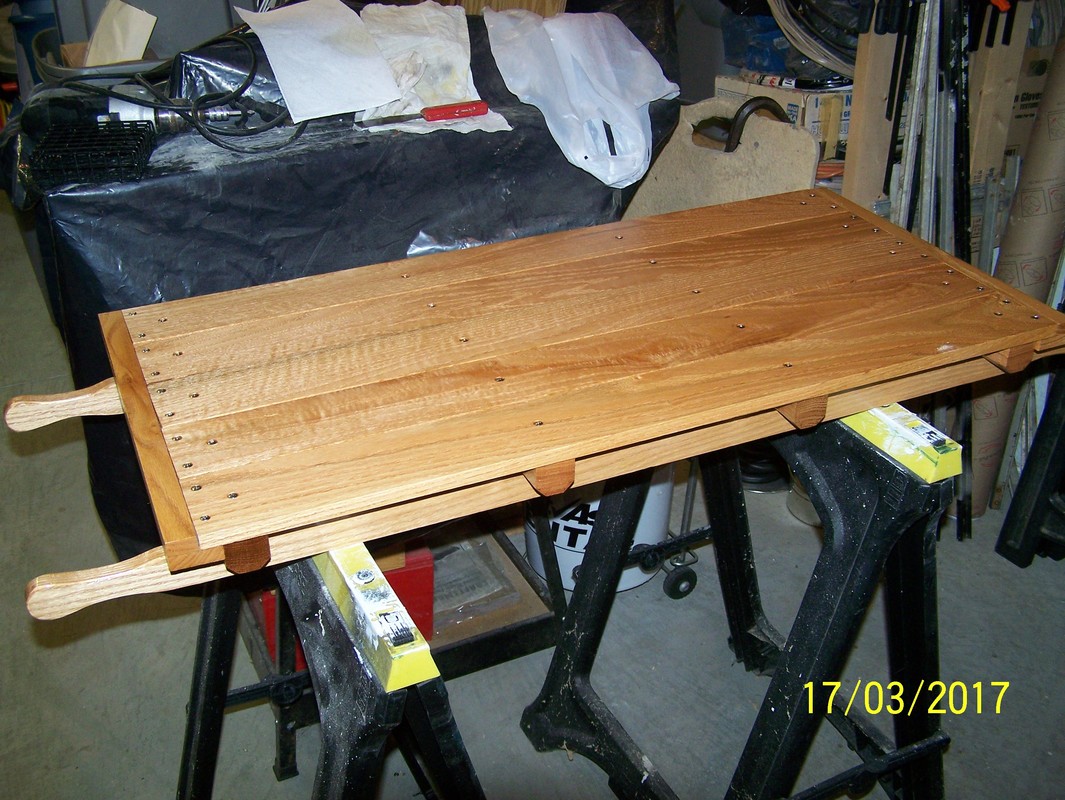
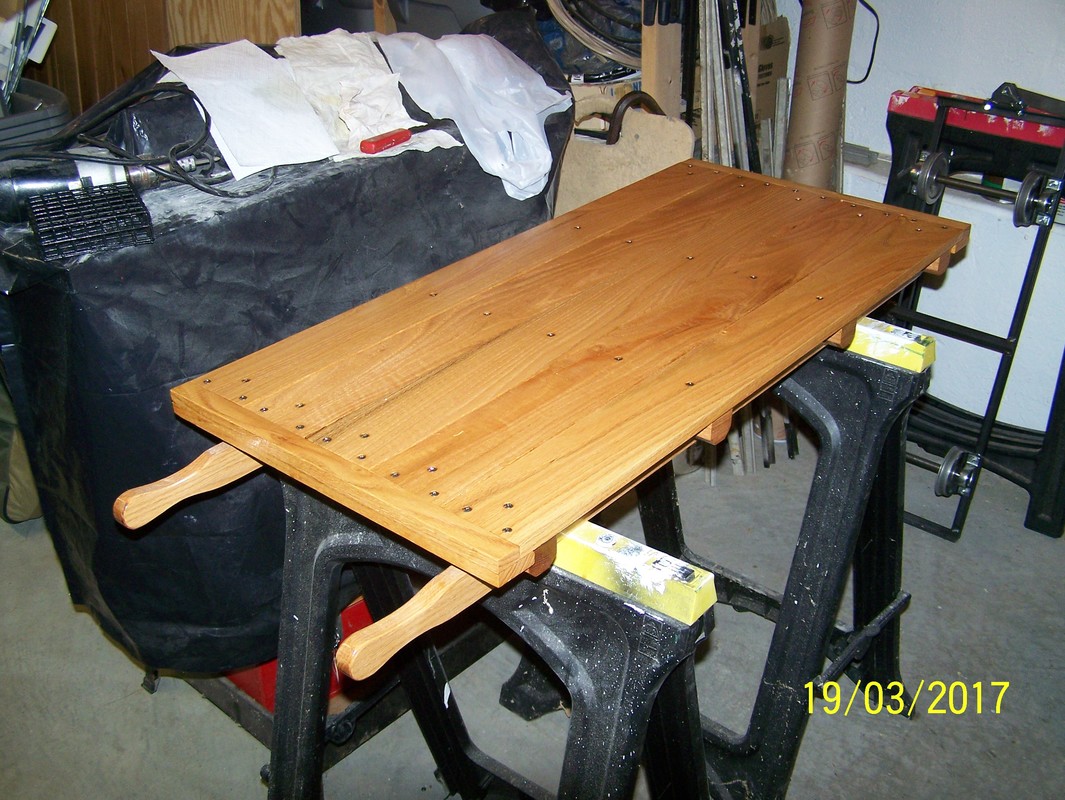
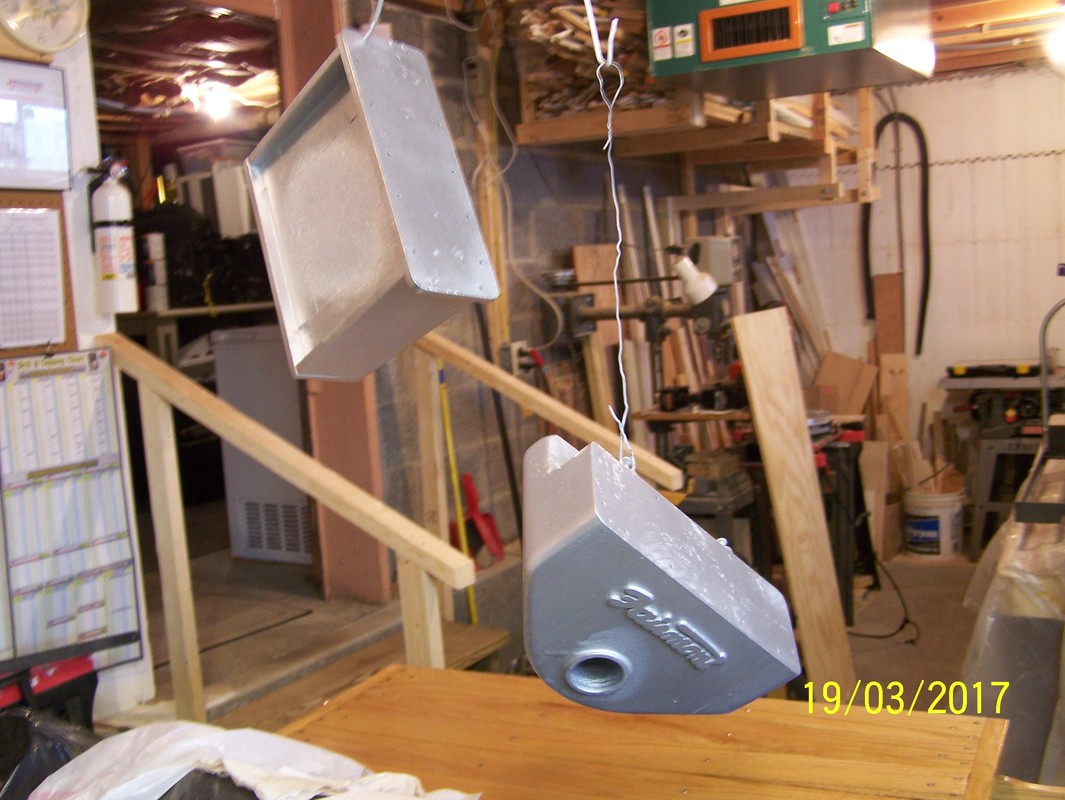
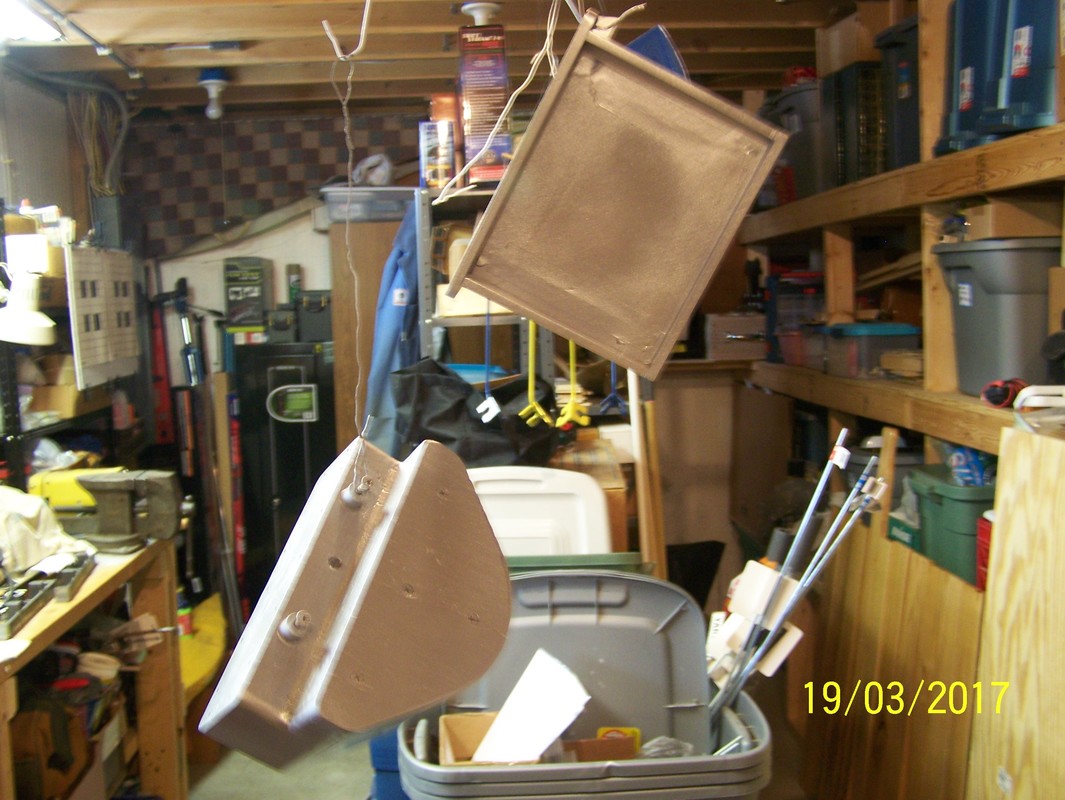
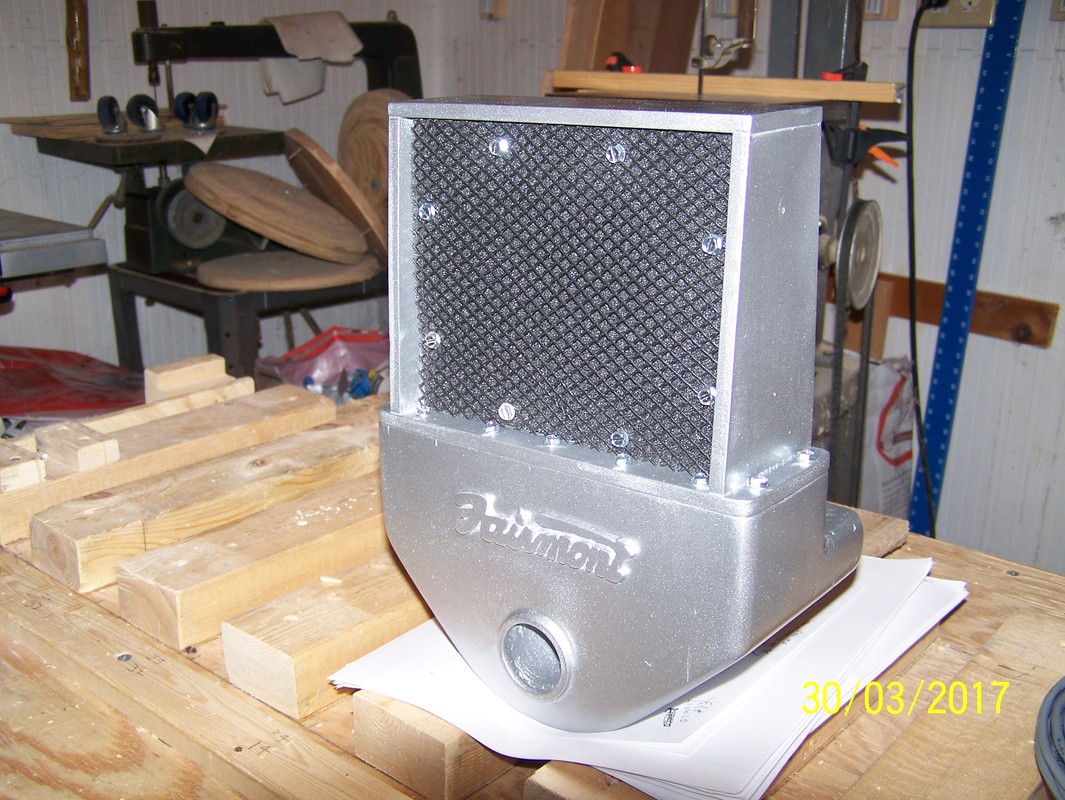
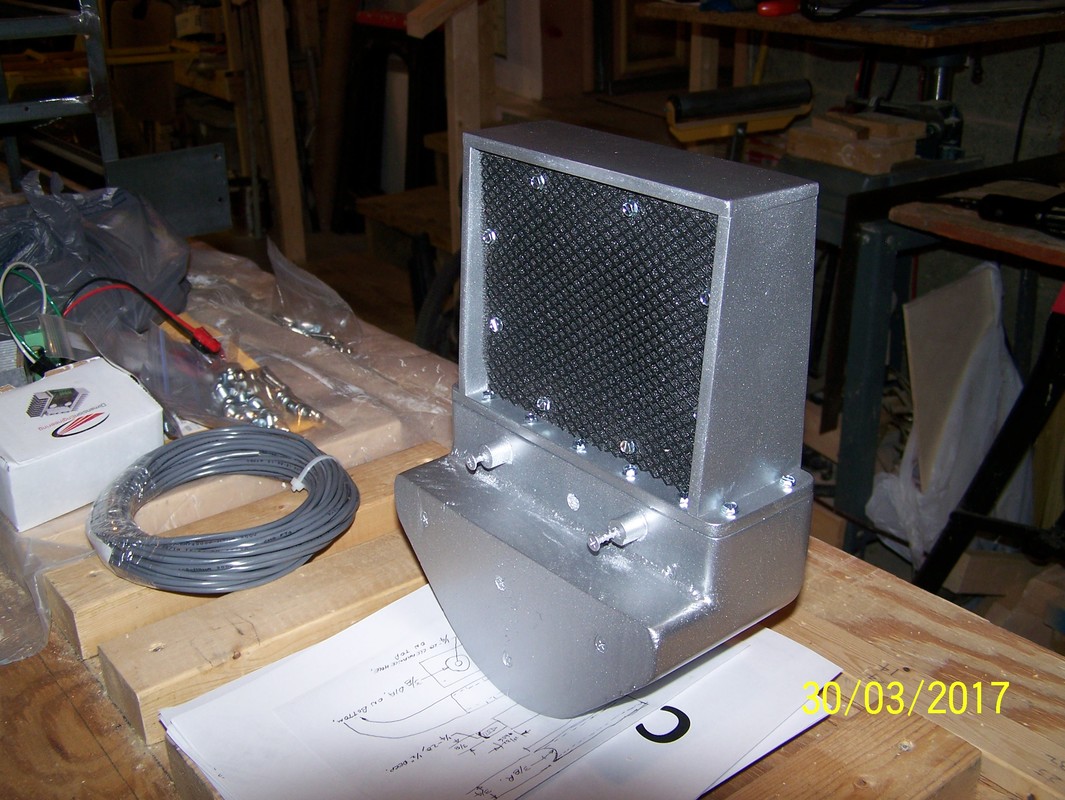
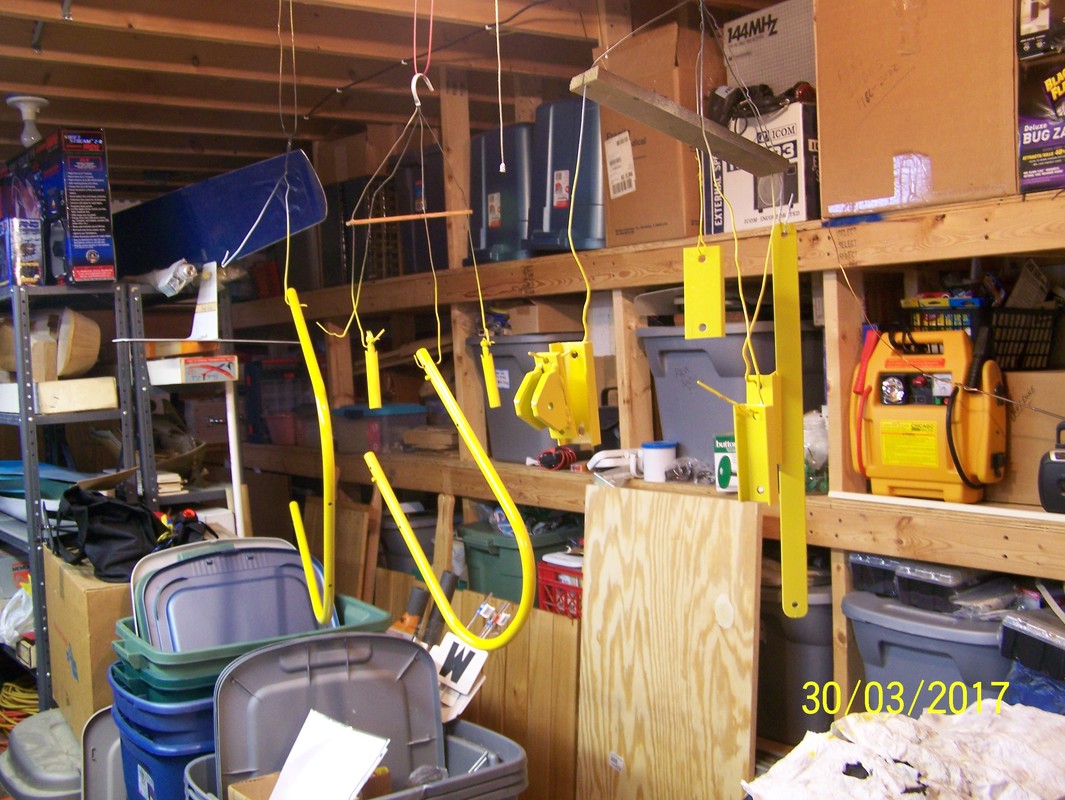
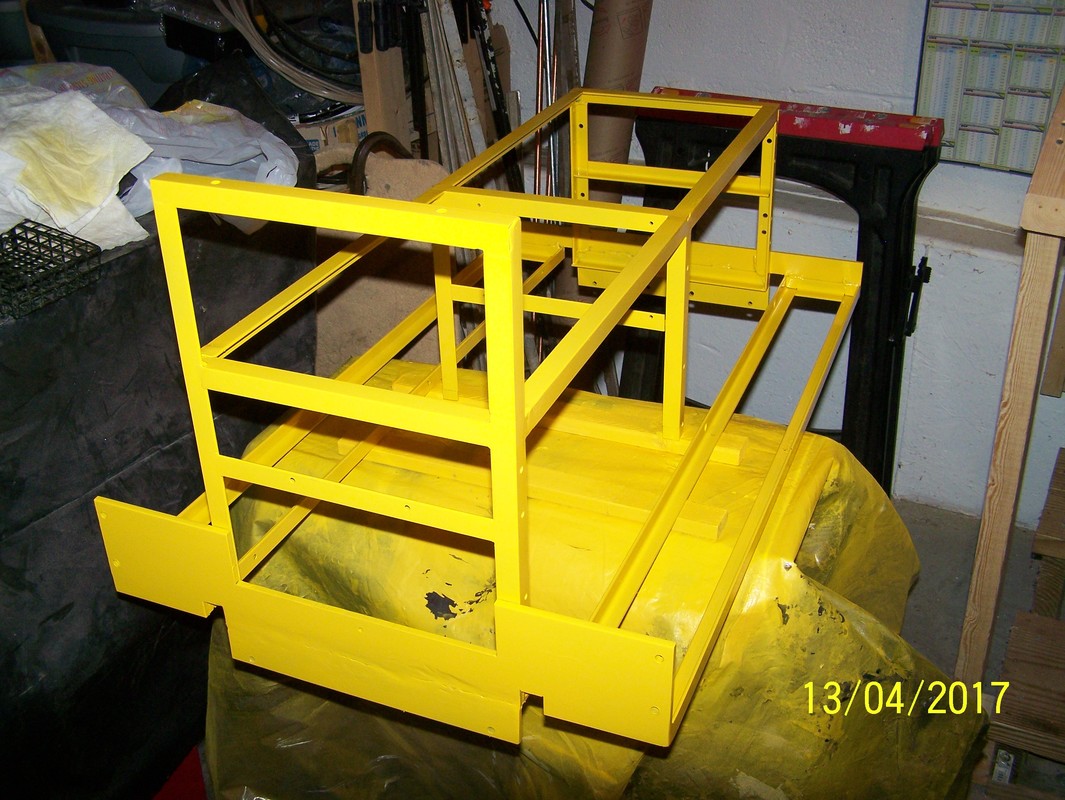
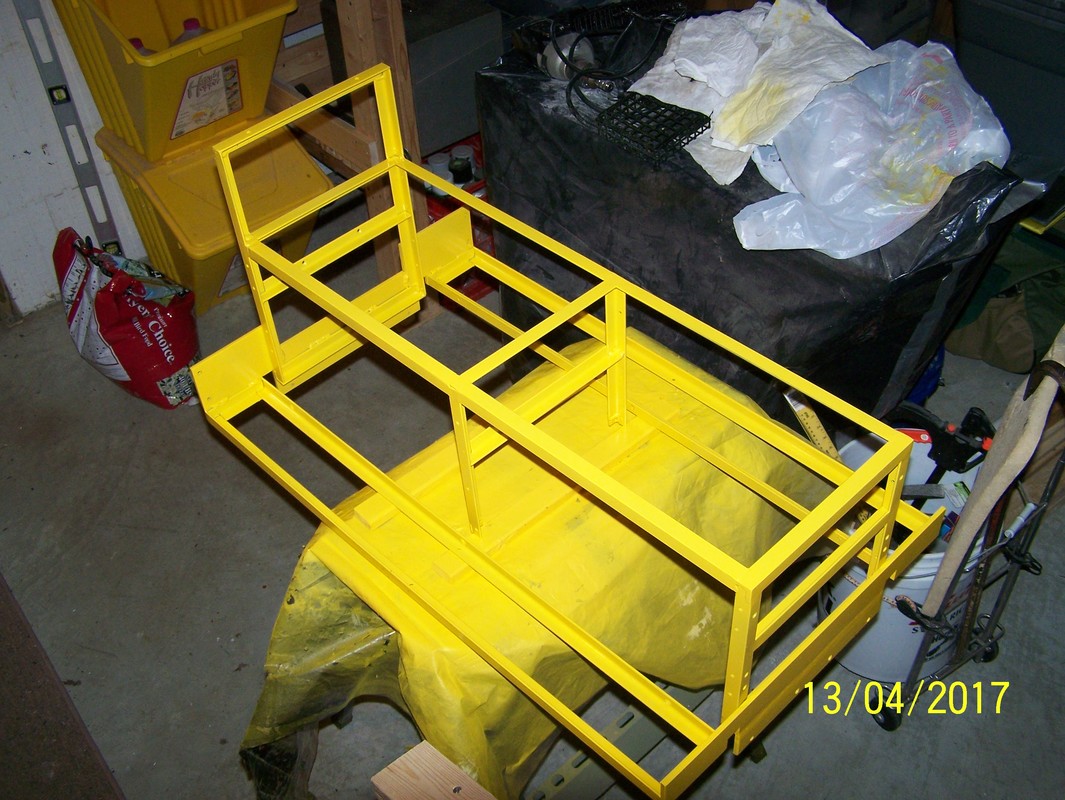
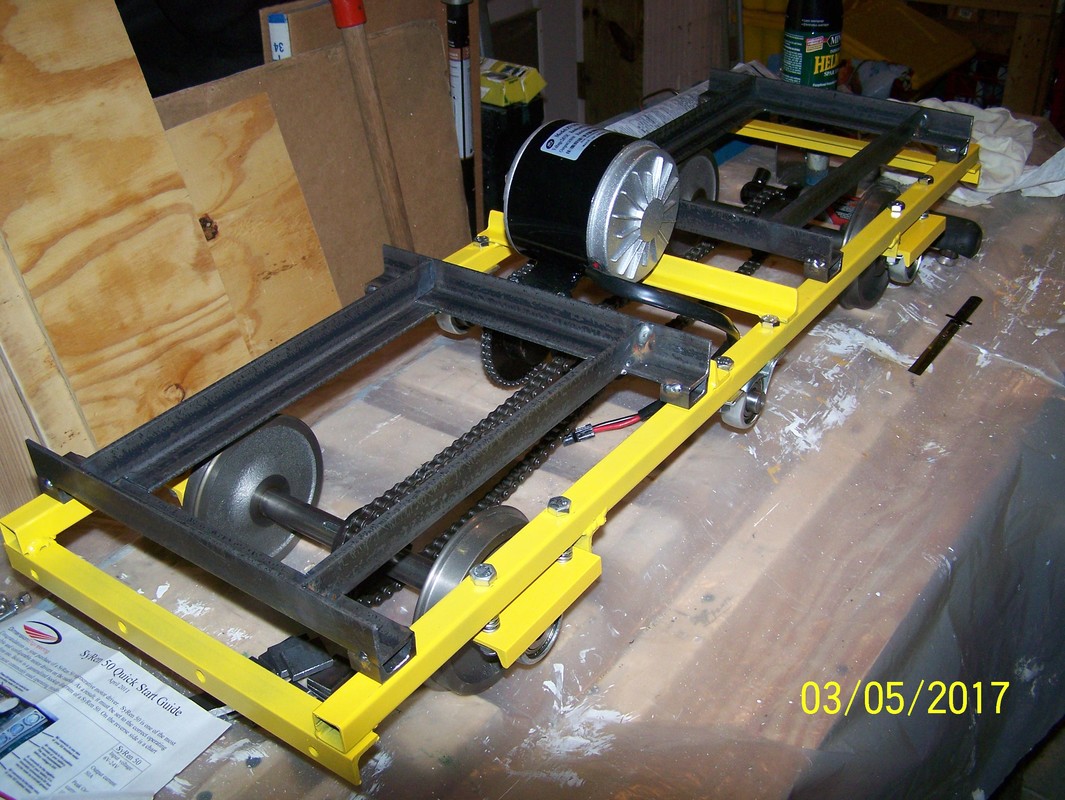
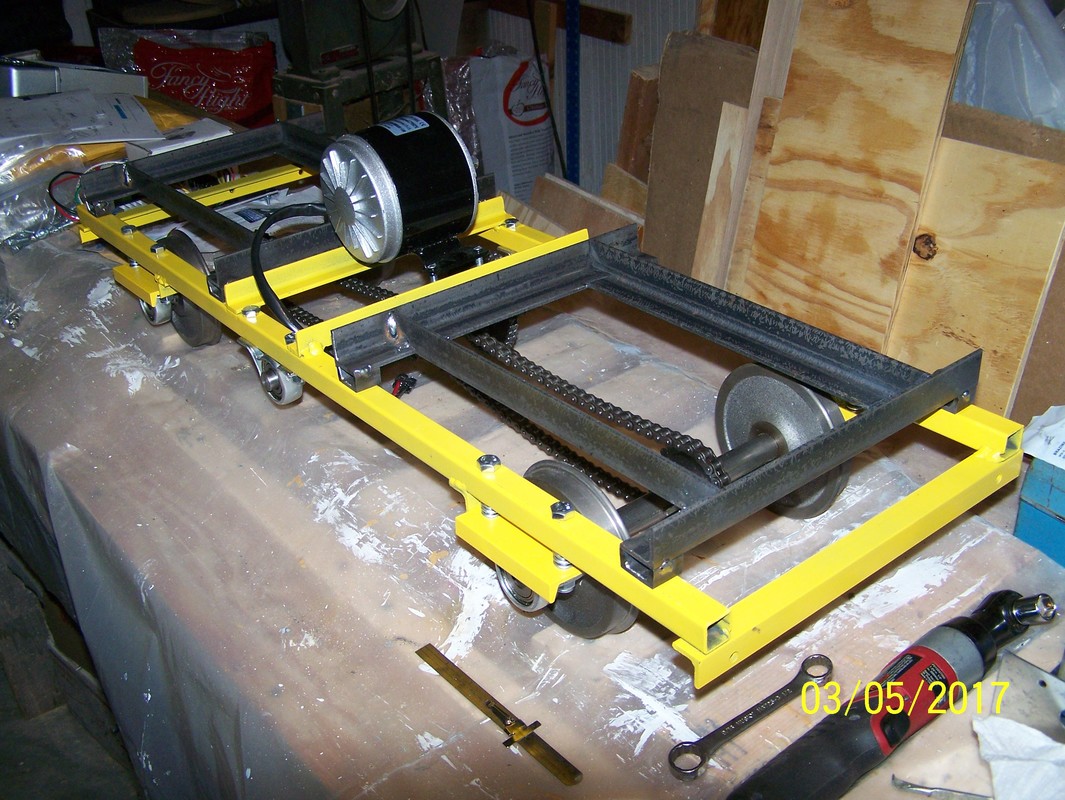
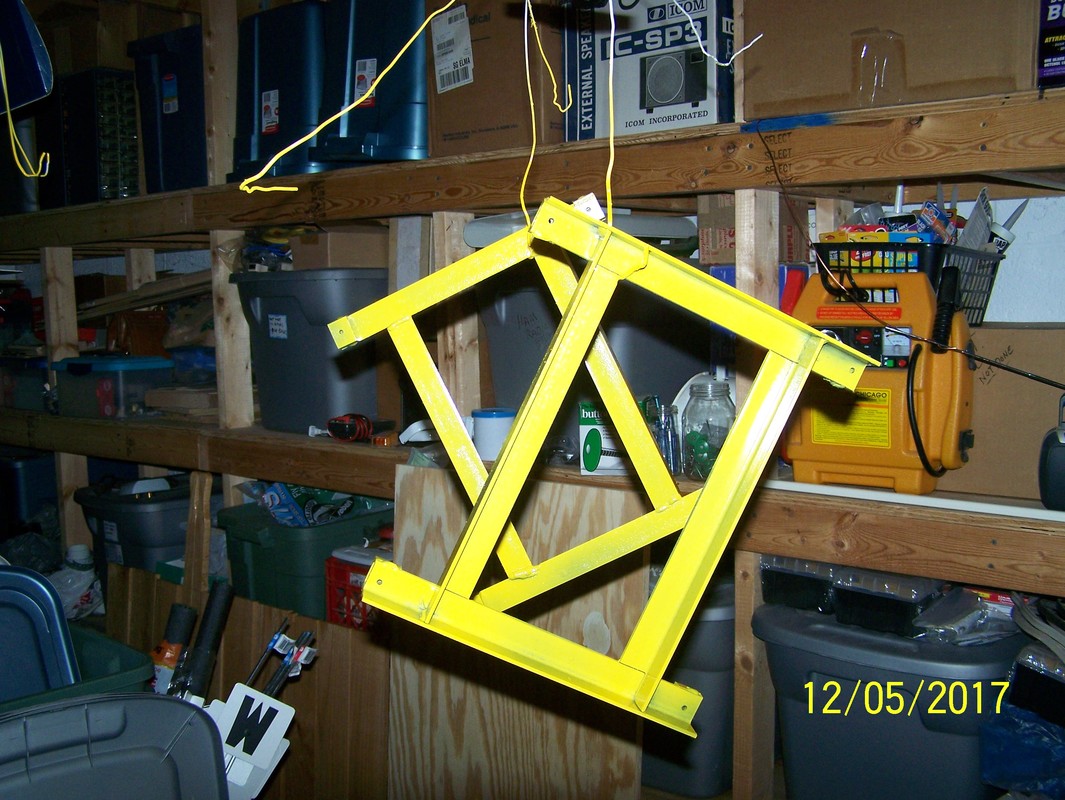
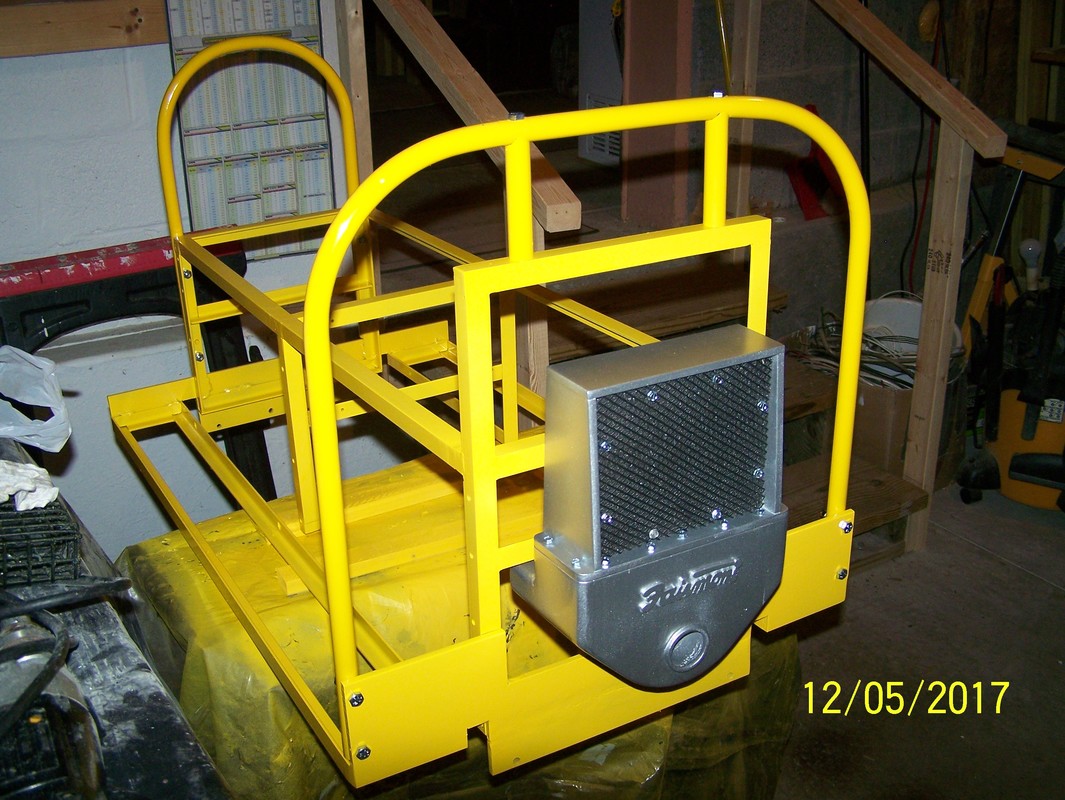
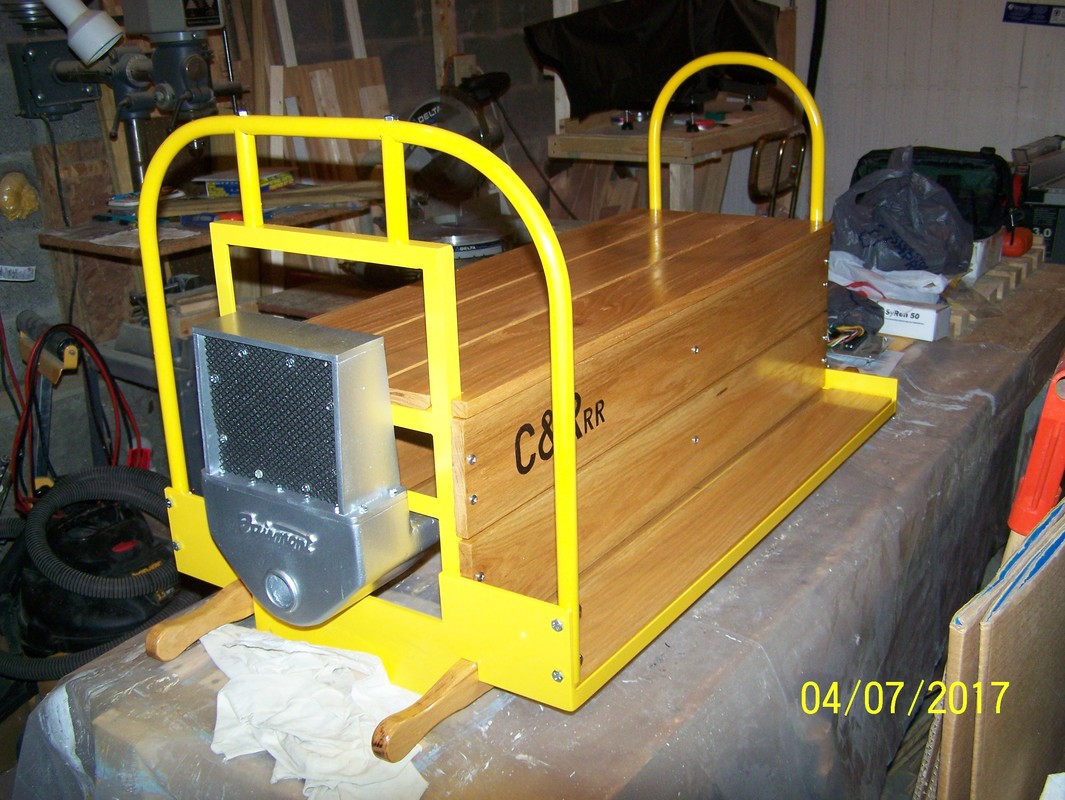
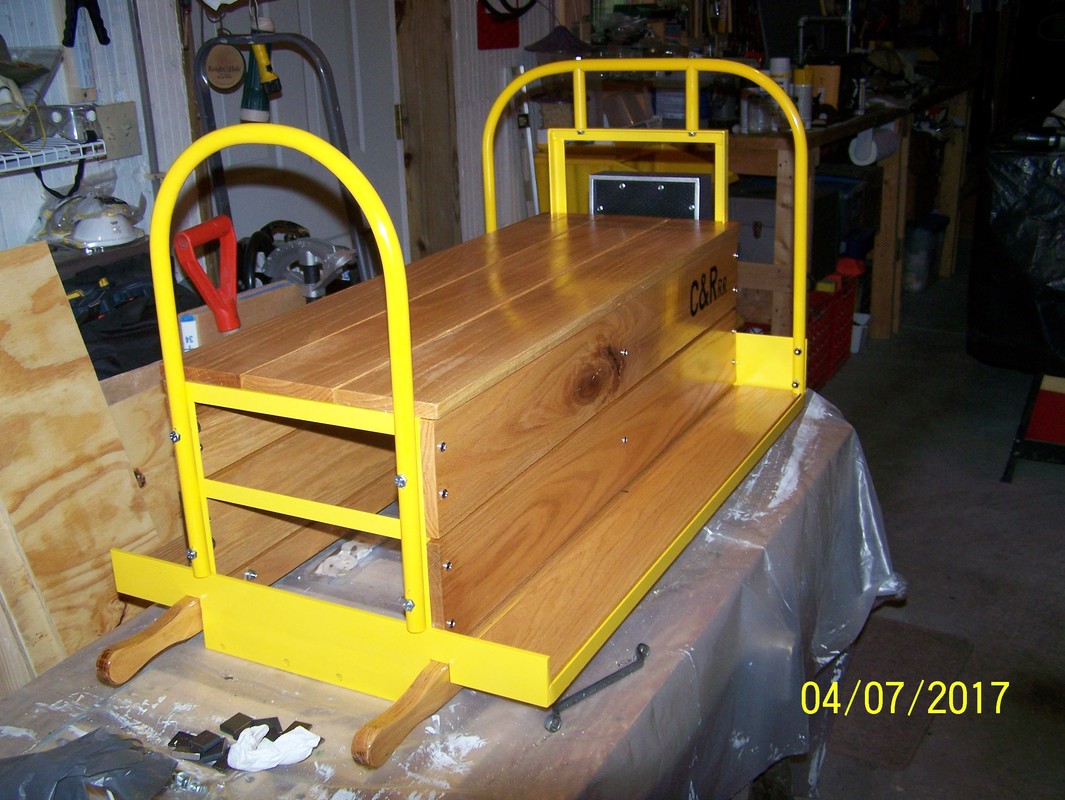
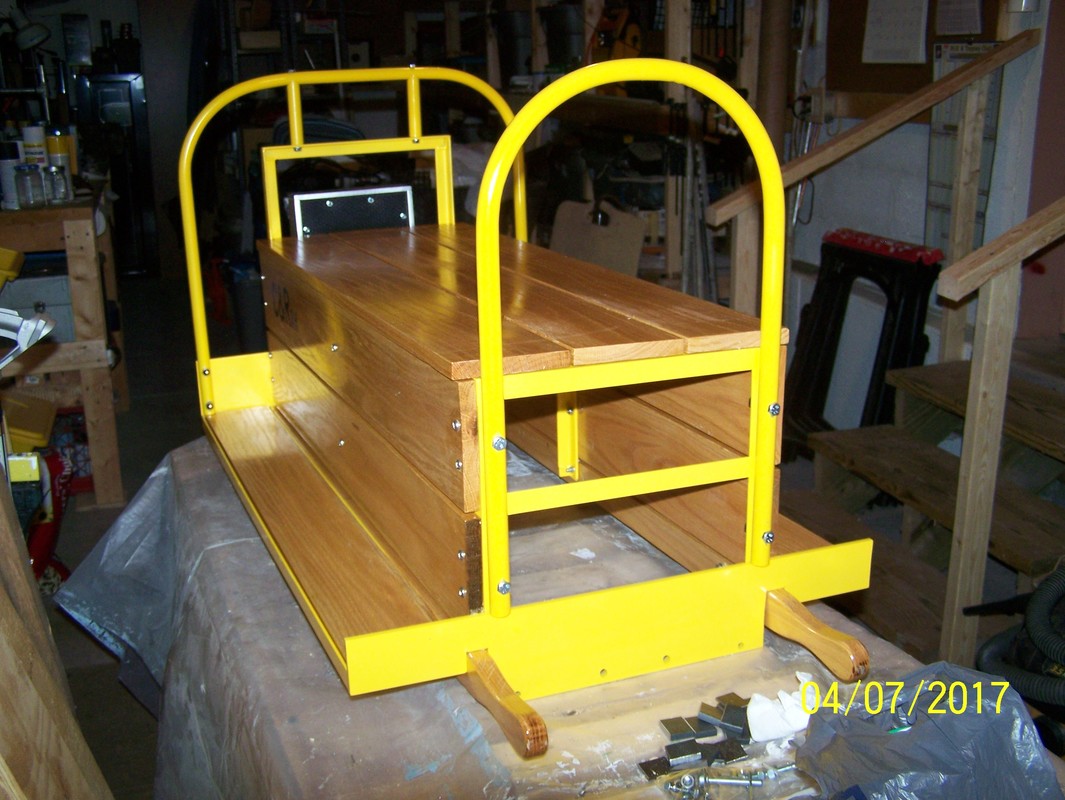
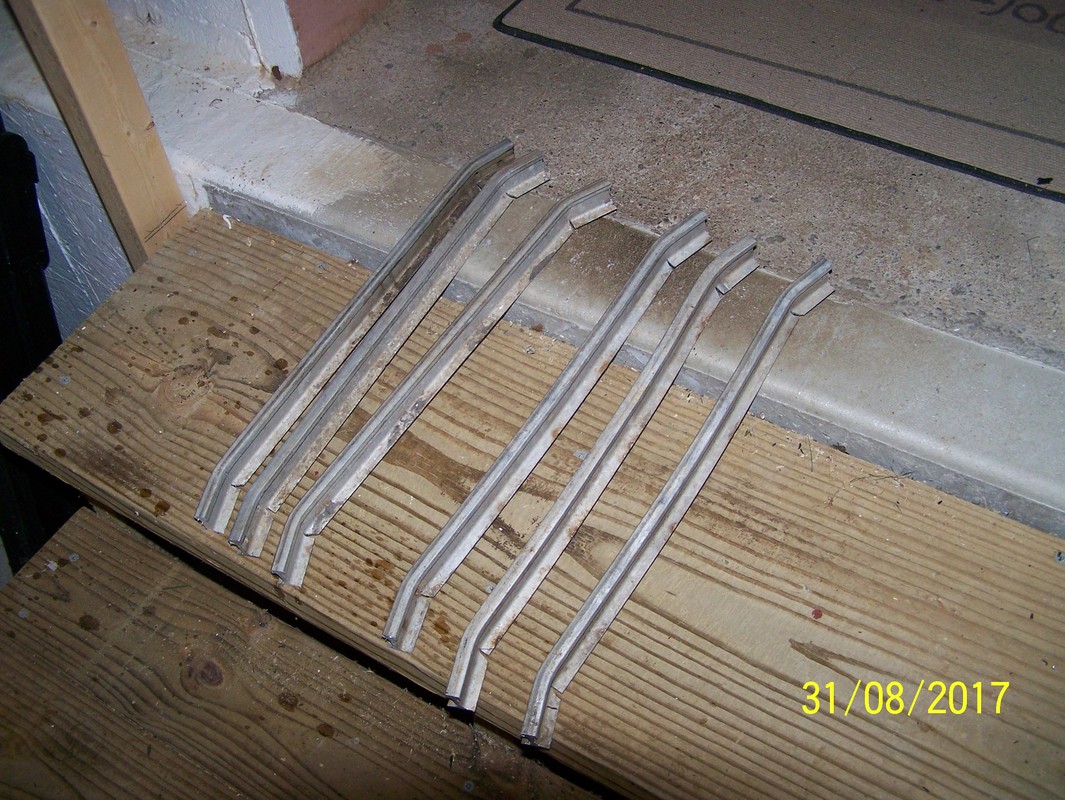
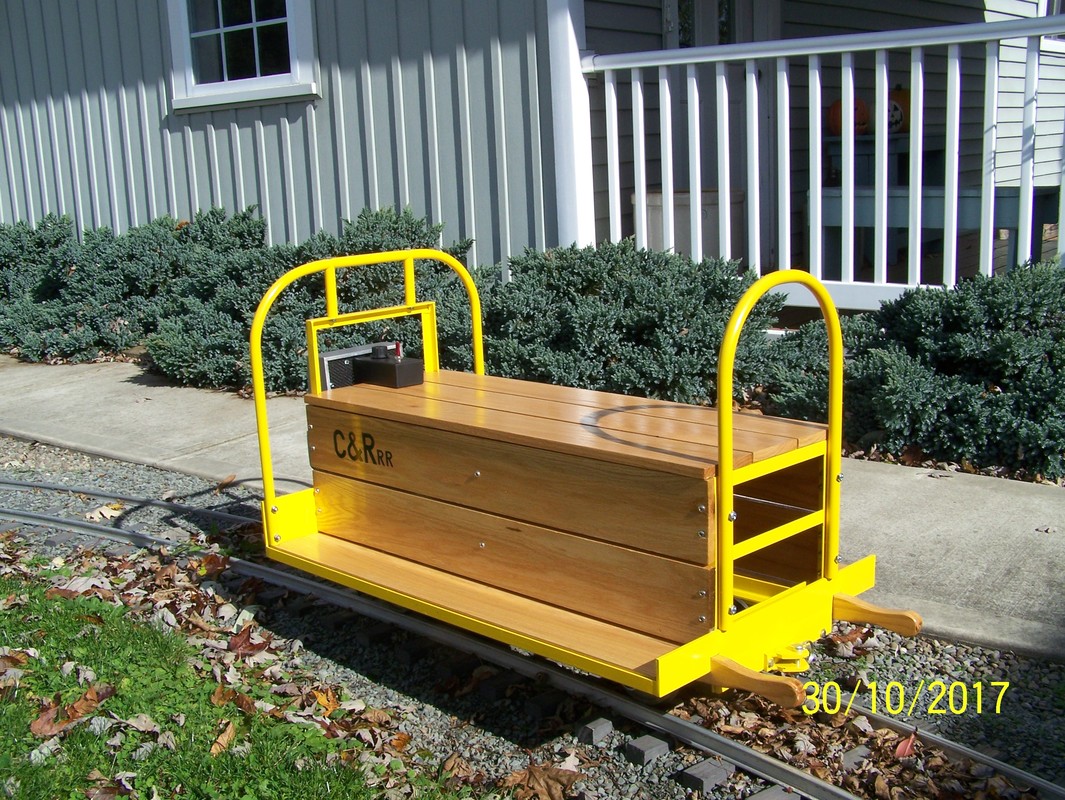
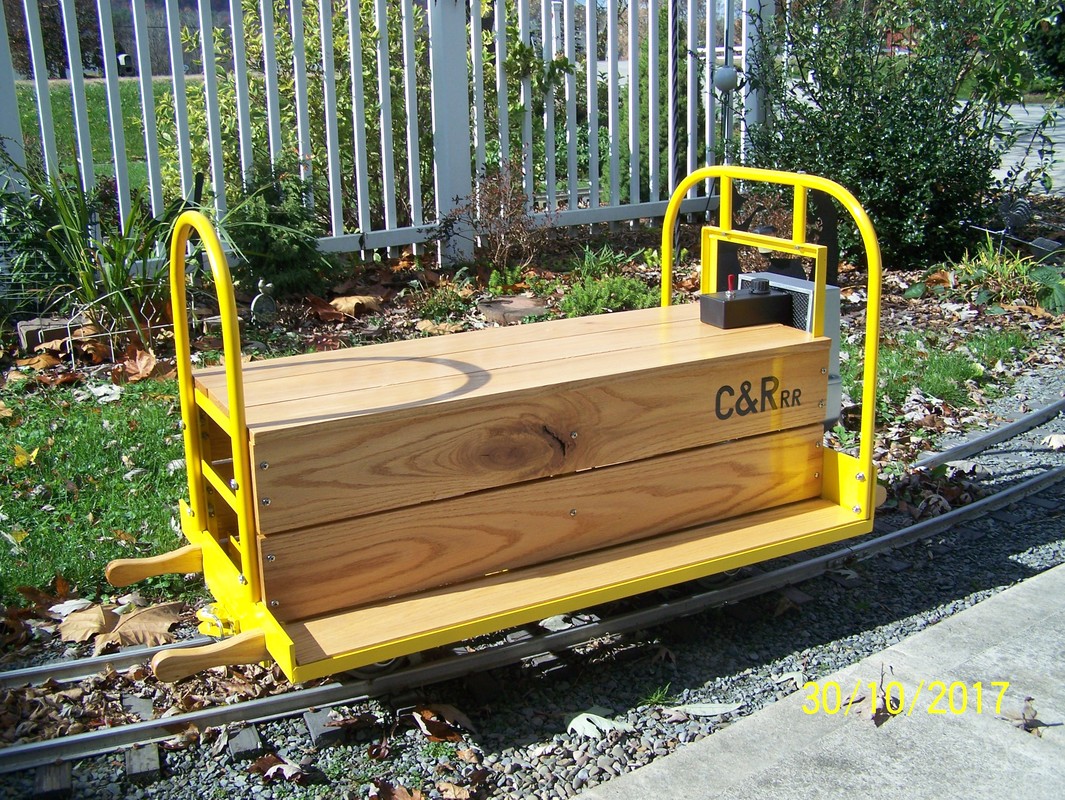
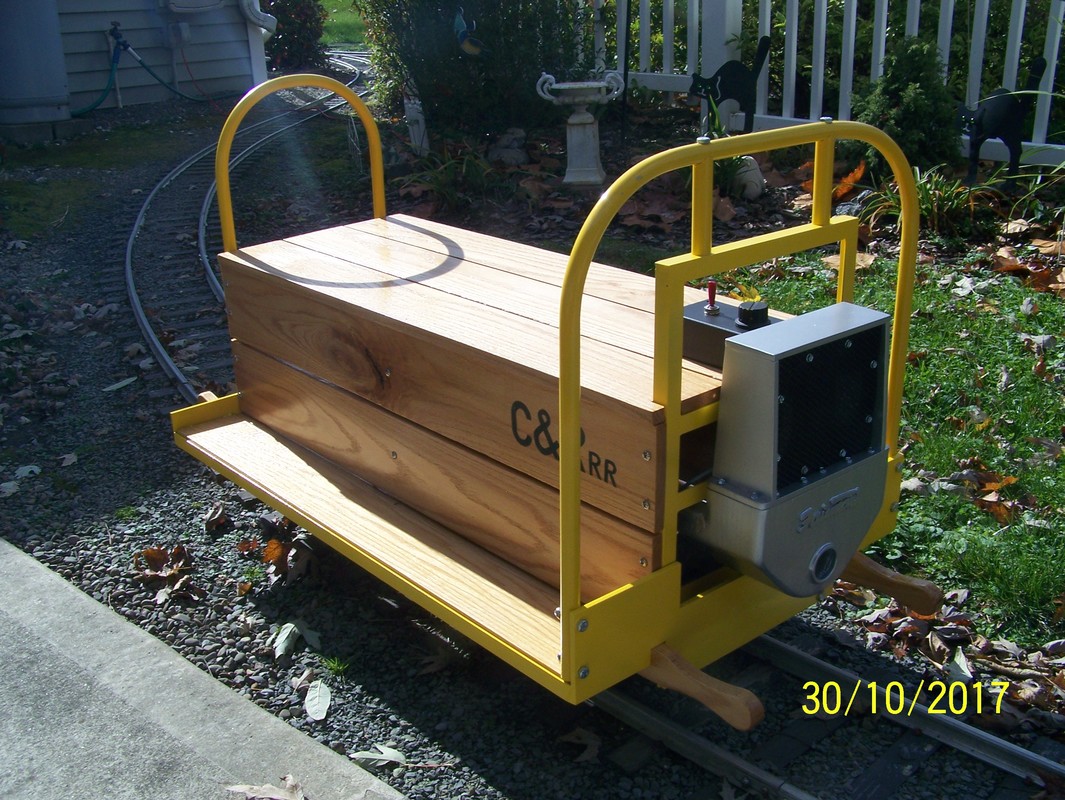
Mar 2017. Started to put the clear coat Spar Polyurethane on the wood pieces and some more primer on the engine cowl. Then bent the electrical conduit and fitted it for the front and rear railings. Got the second coat on all the wood pieces and put the top back together. Took apart the hand held speed controller from the Mini GP9 to get the wiring. Then machined steel rod to go inside for the front and rear railings for support and installed. Next put sanding sealer and clear coat Spar Polyurethane on the speeder work car. Spray painted the engine cowl and radiator housing silver and then put together and installed some black foam behind the expanded plastic front cover to look like a radiator. Next started to paint the frame and railings yellow
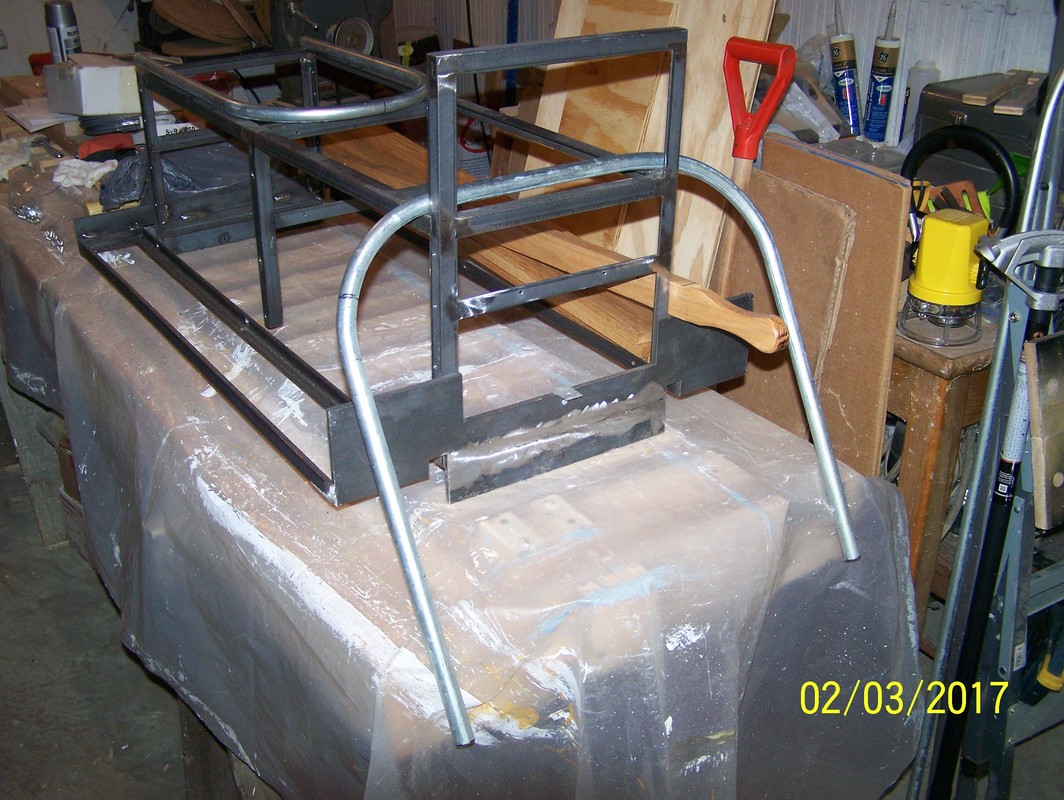
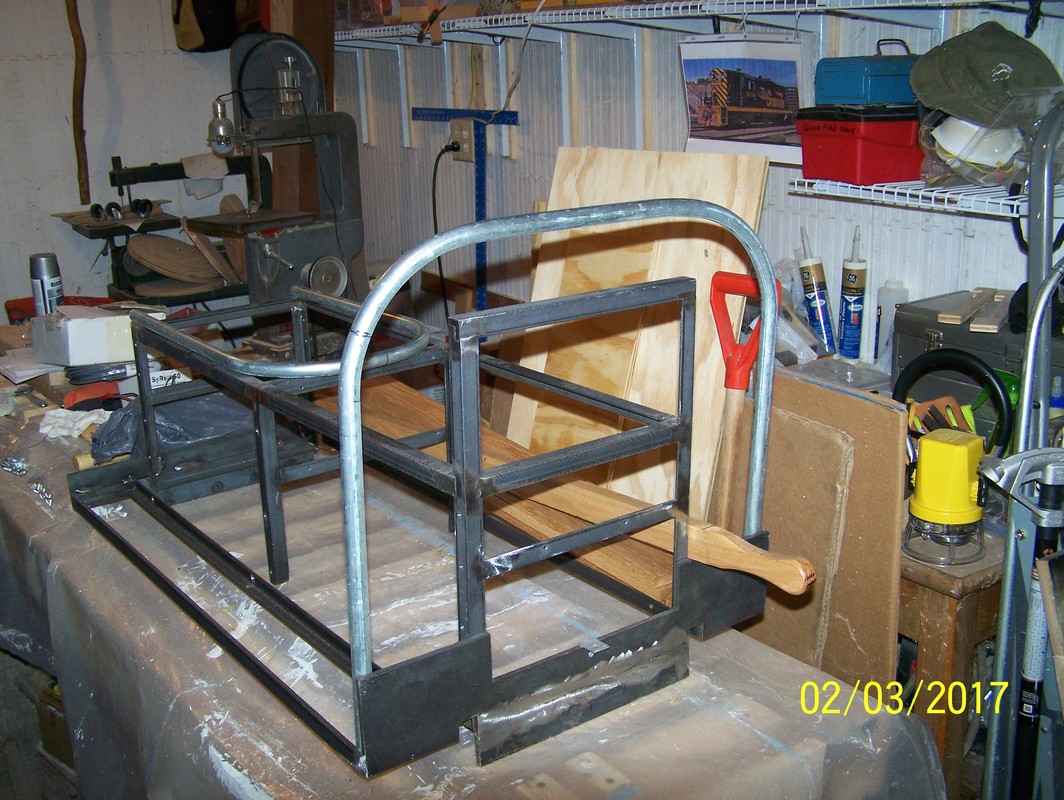

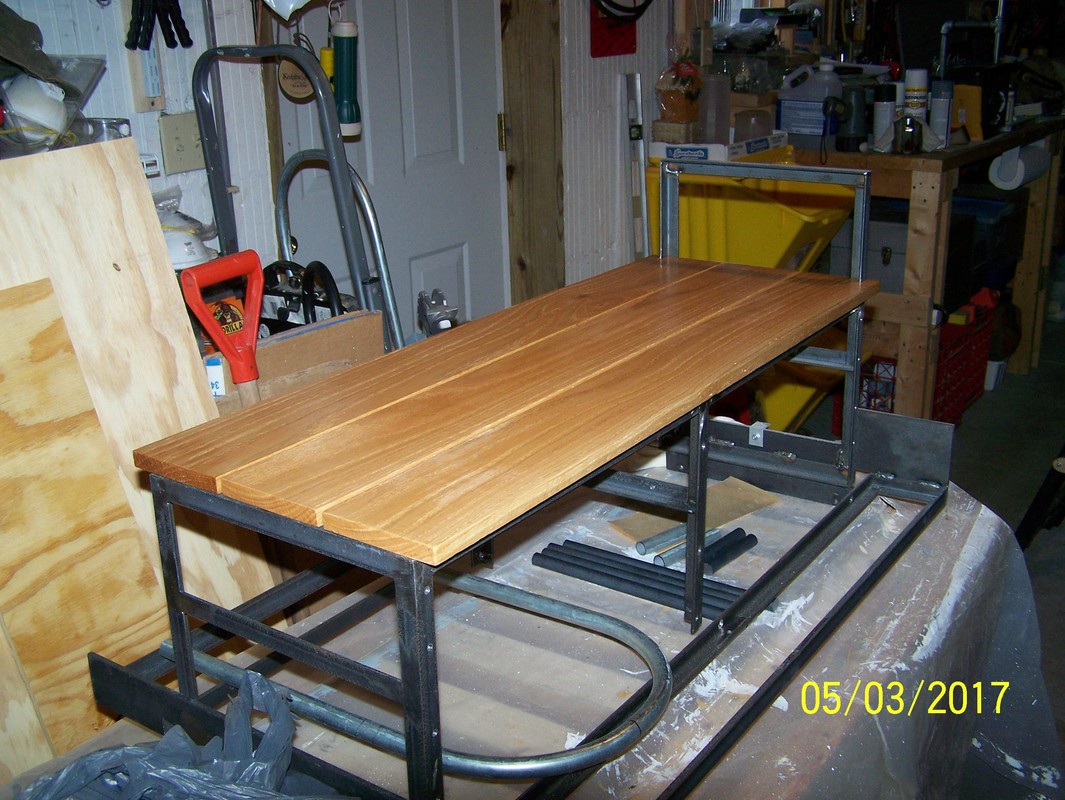
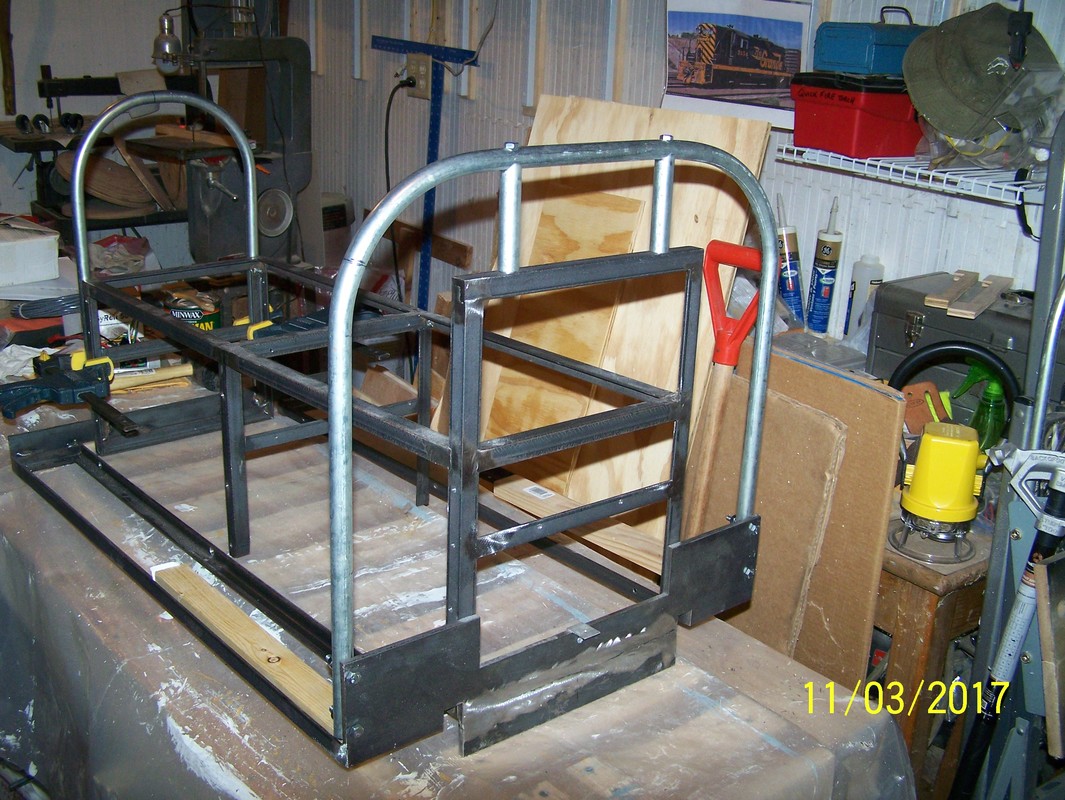
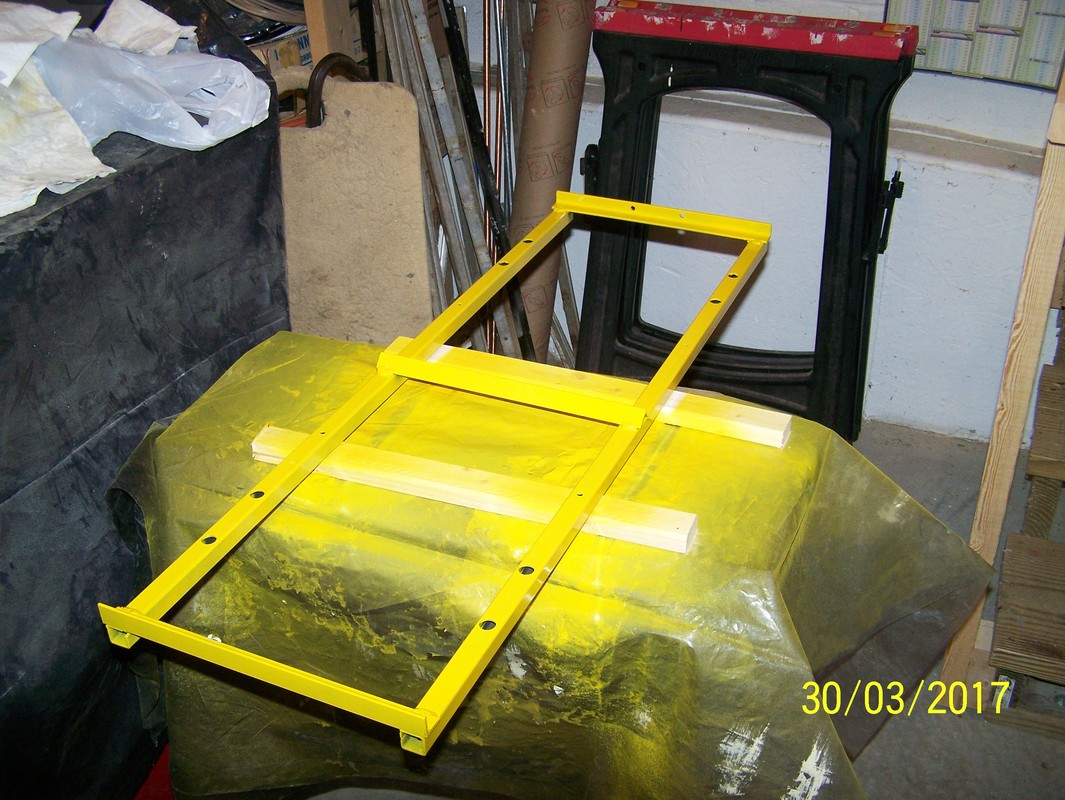
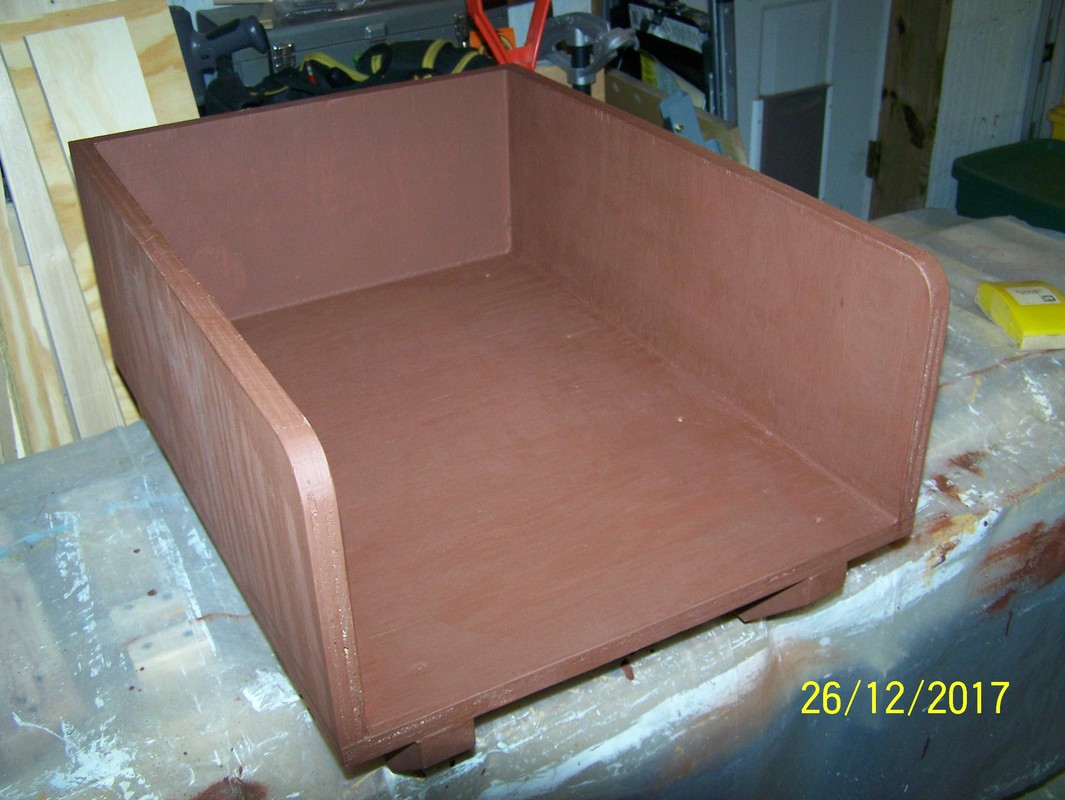
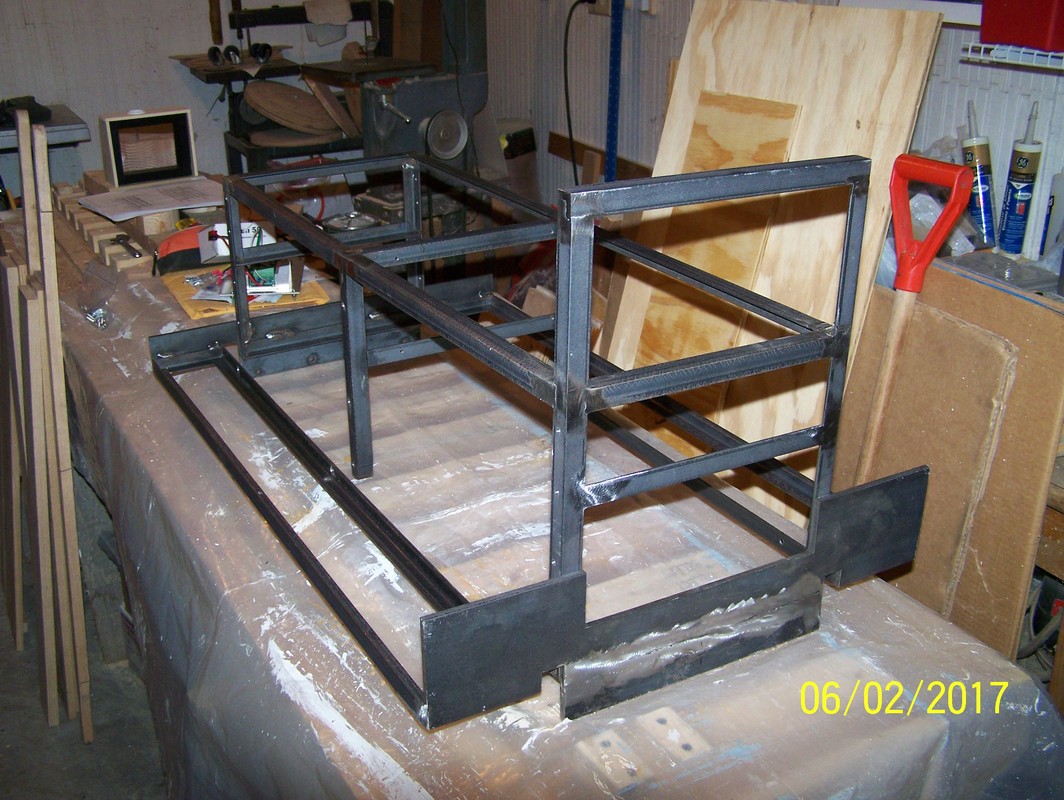
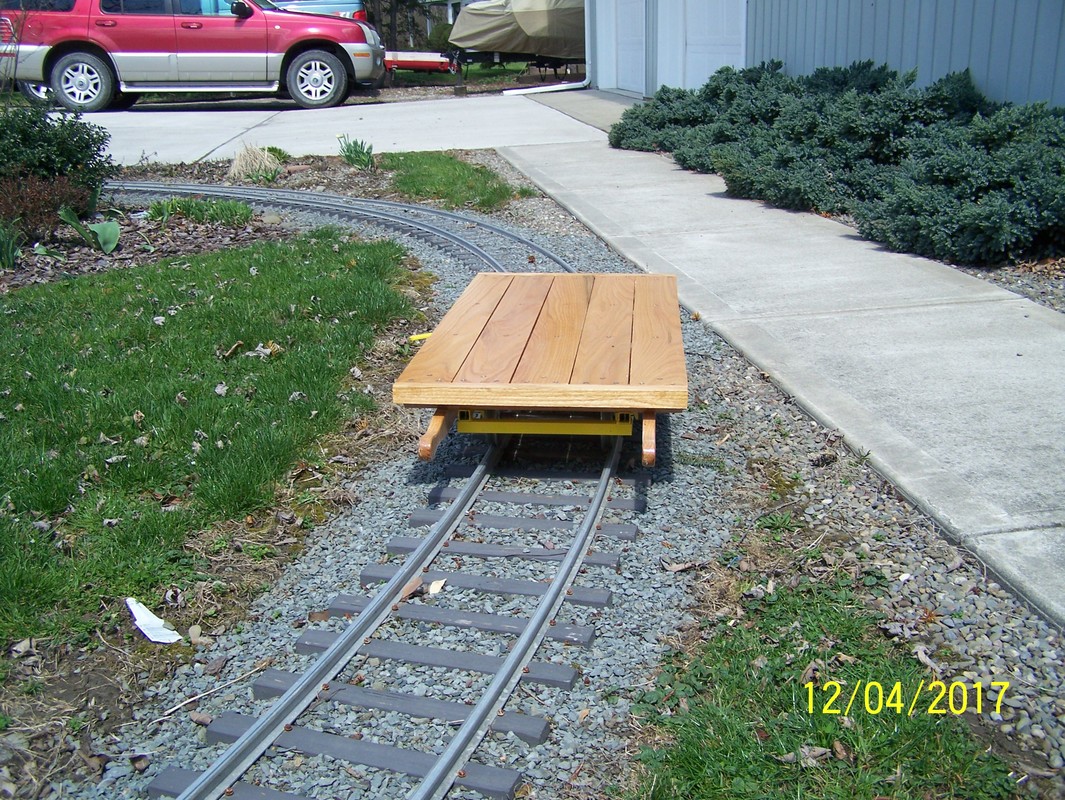
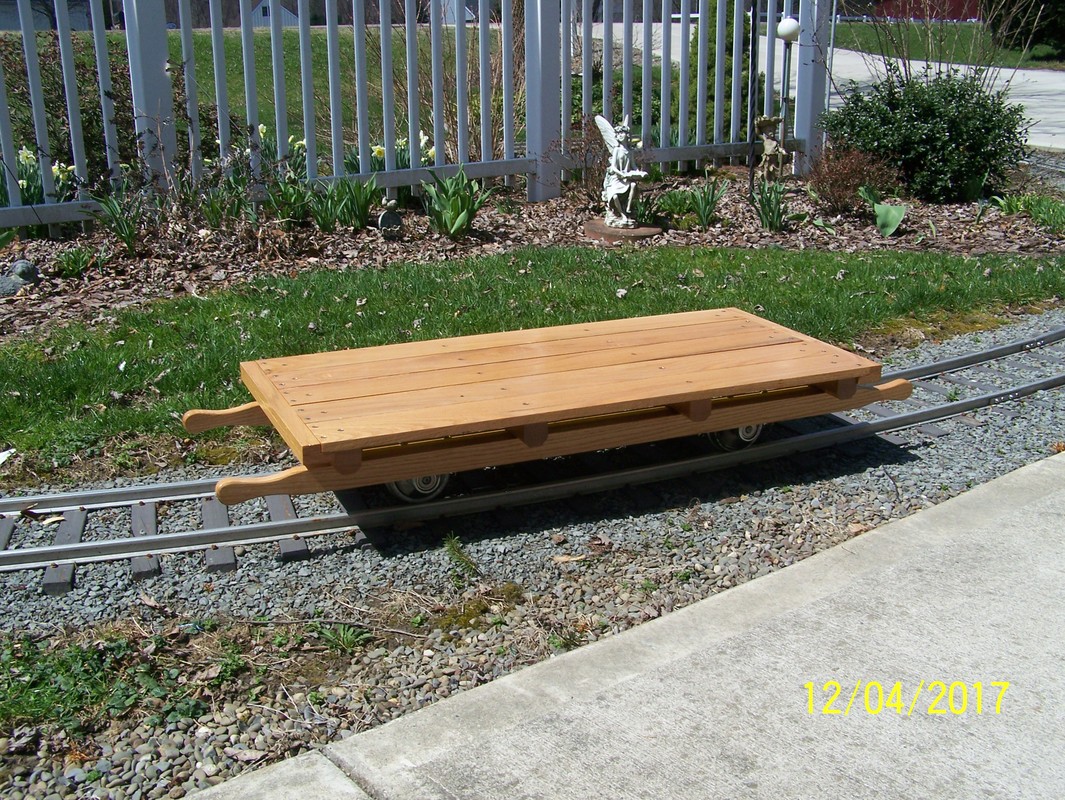
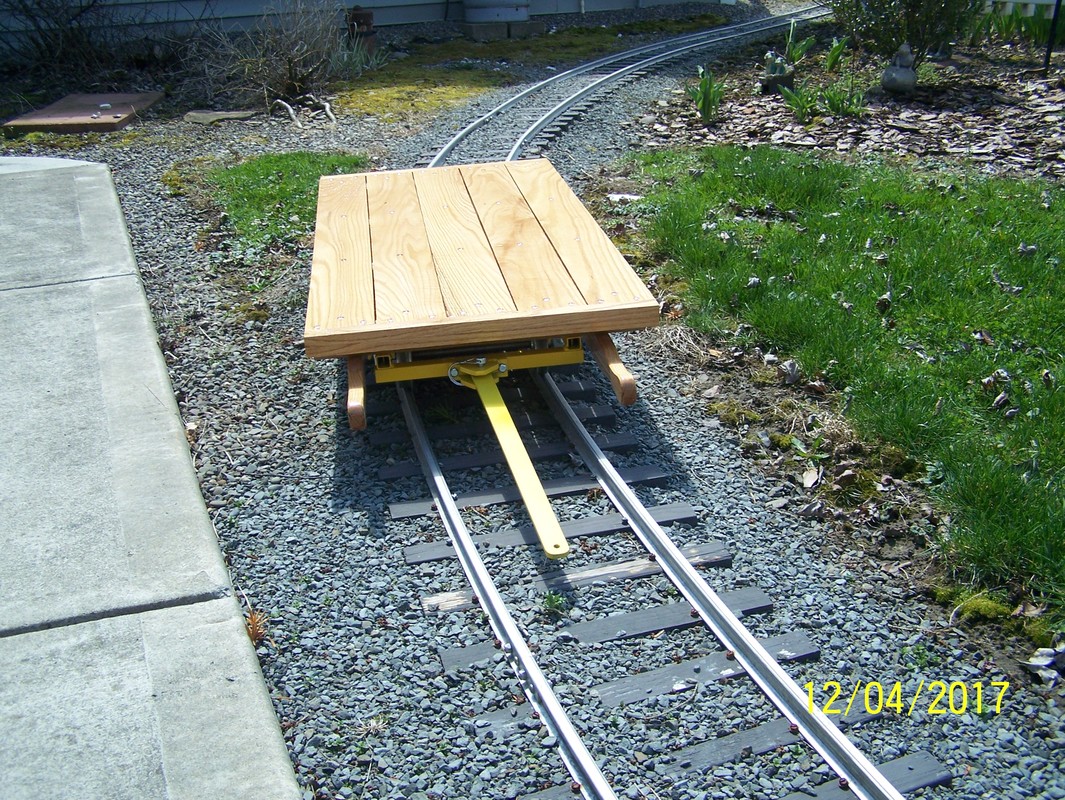
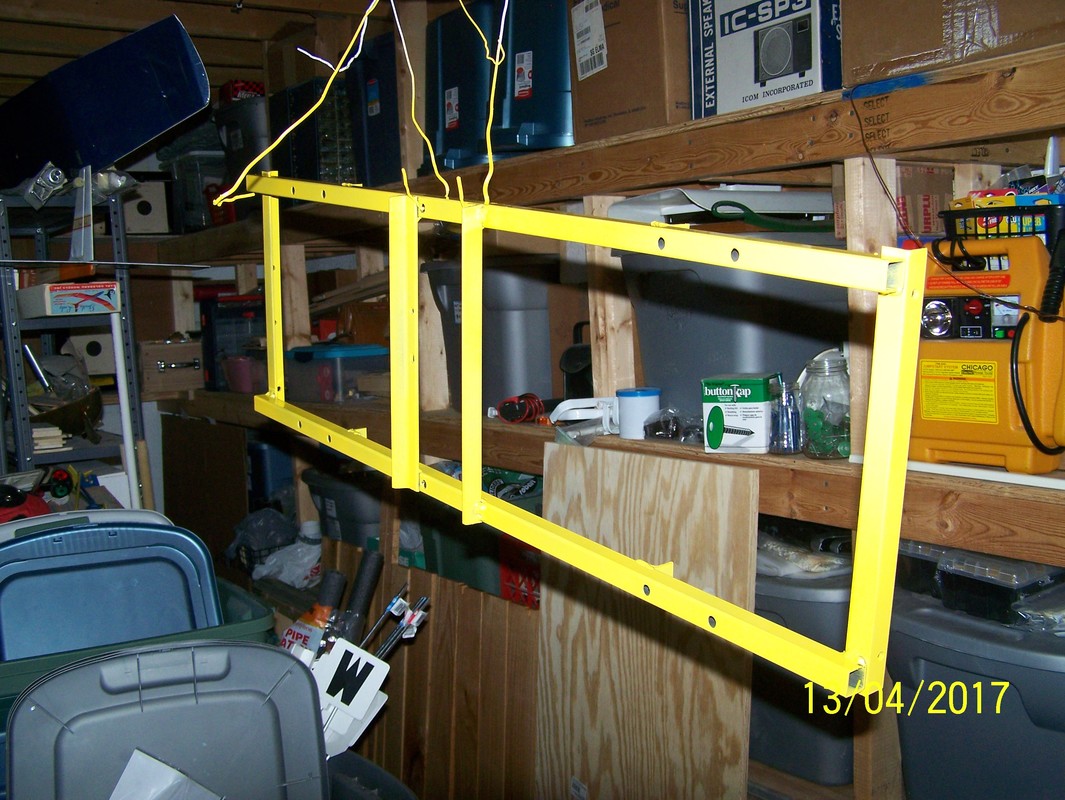
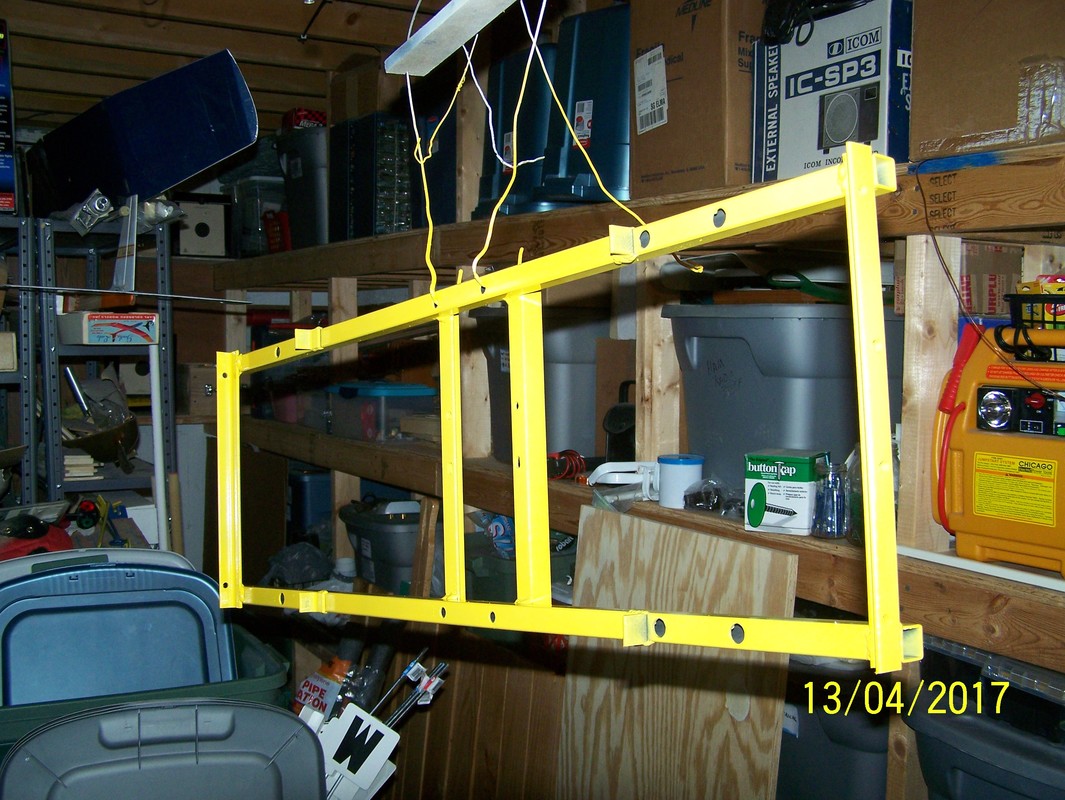
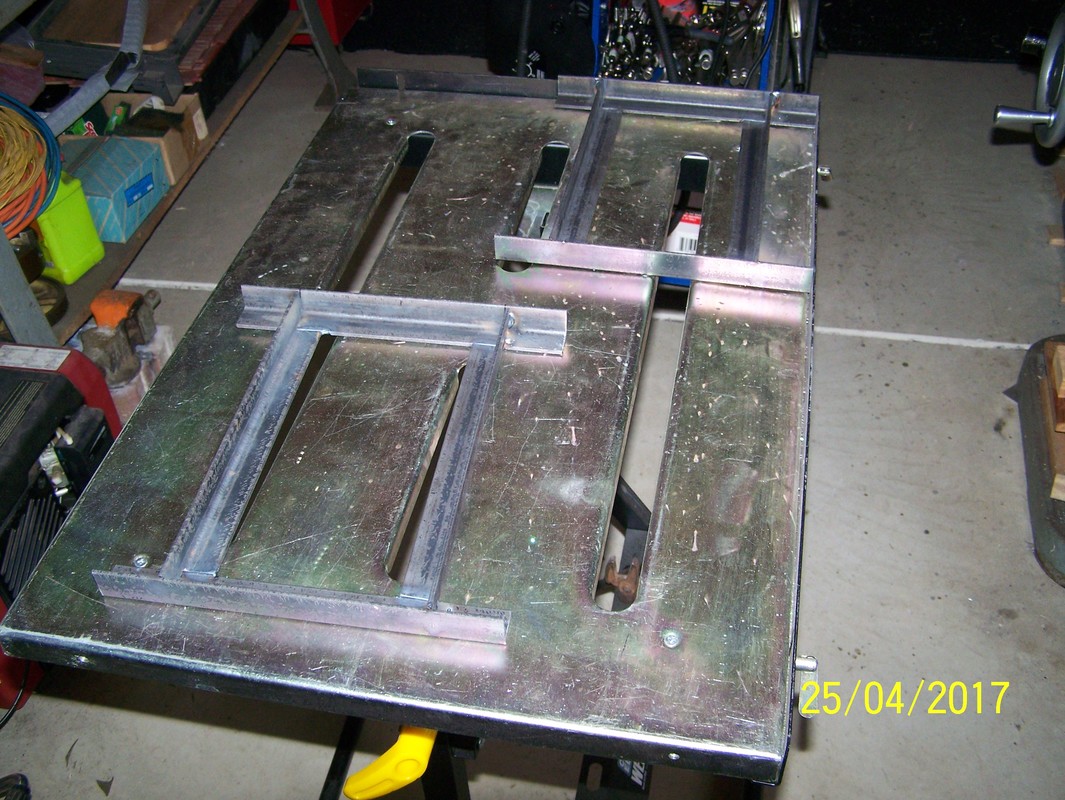
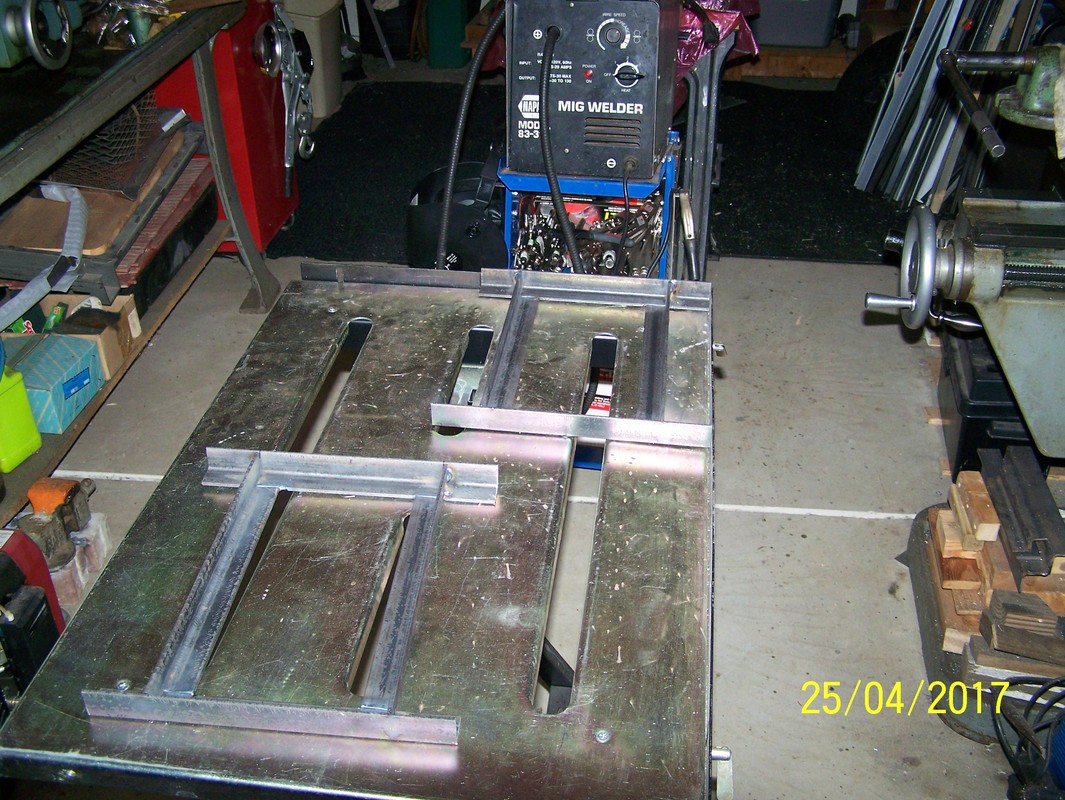
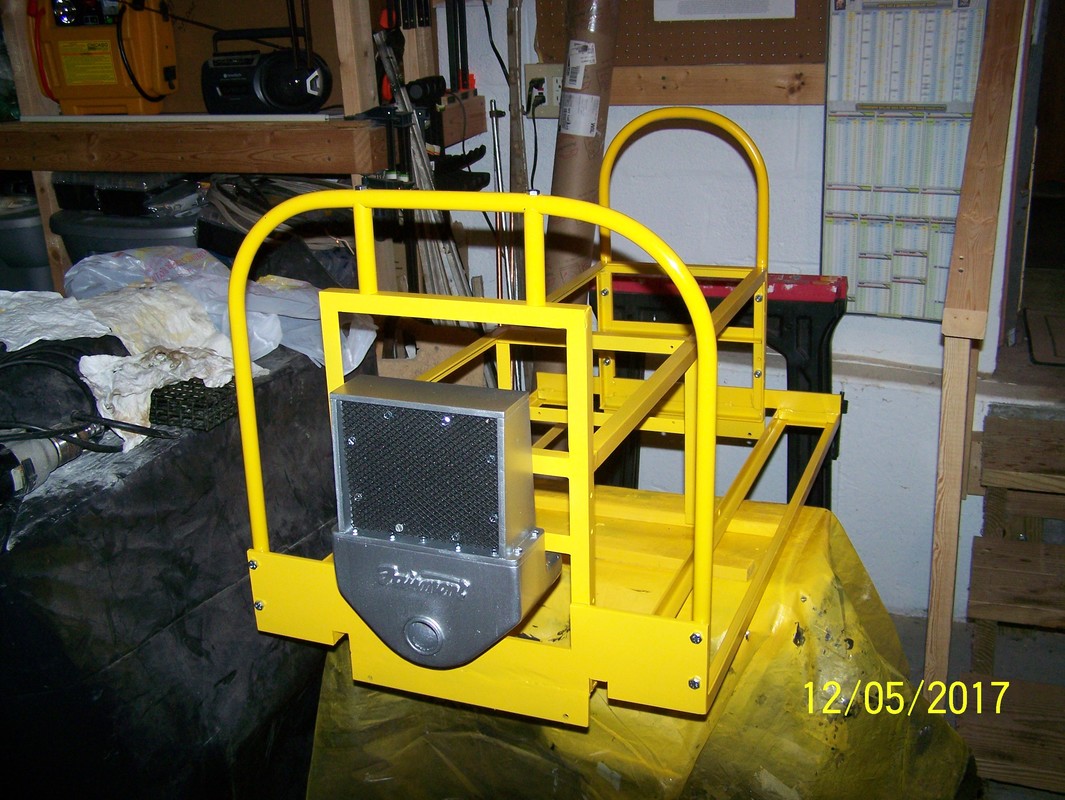
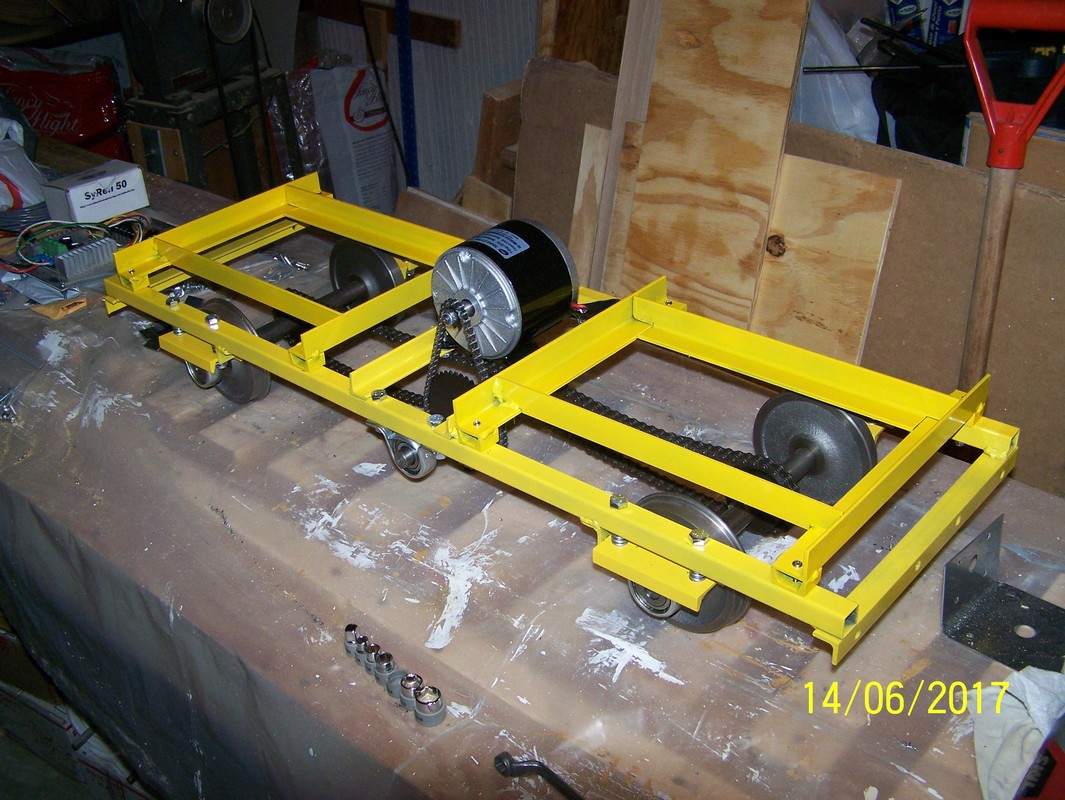
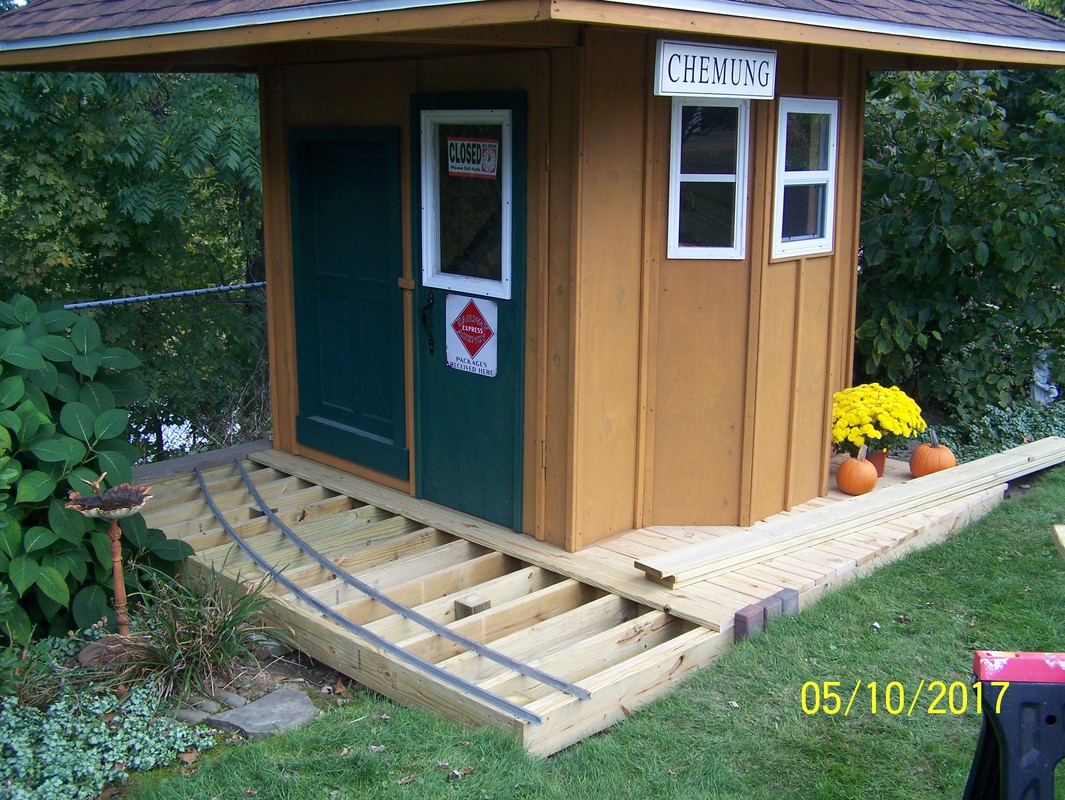
April, 2017. Installed the deck on the speeder work car. Will need to build a center box for people to ride on? Continued to paint the frames yellow. Got a new sign for the station and installed. Next cut and welded up the battery trays.

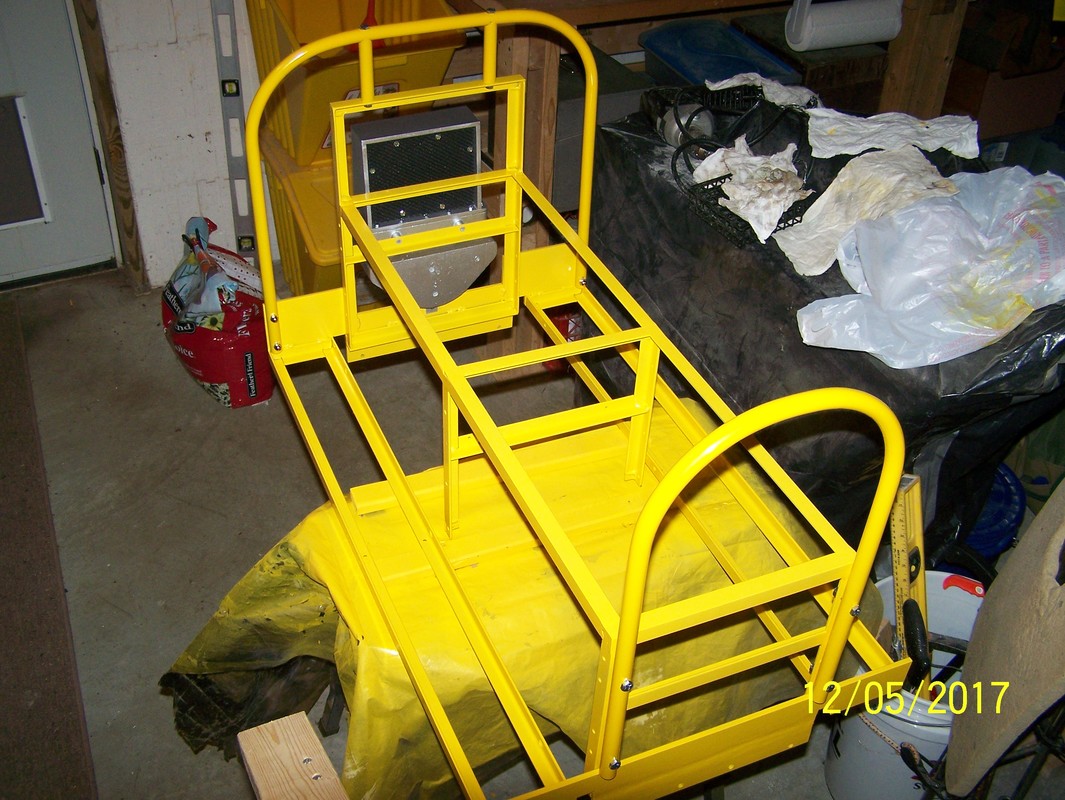
May, 2017. Installed the battery trays and then painted them yellow. Started to put the main body together.

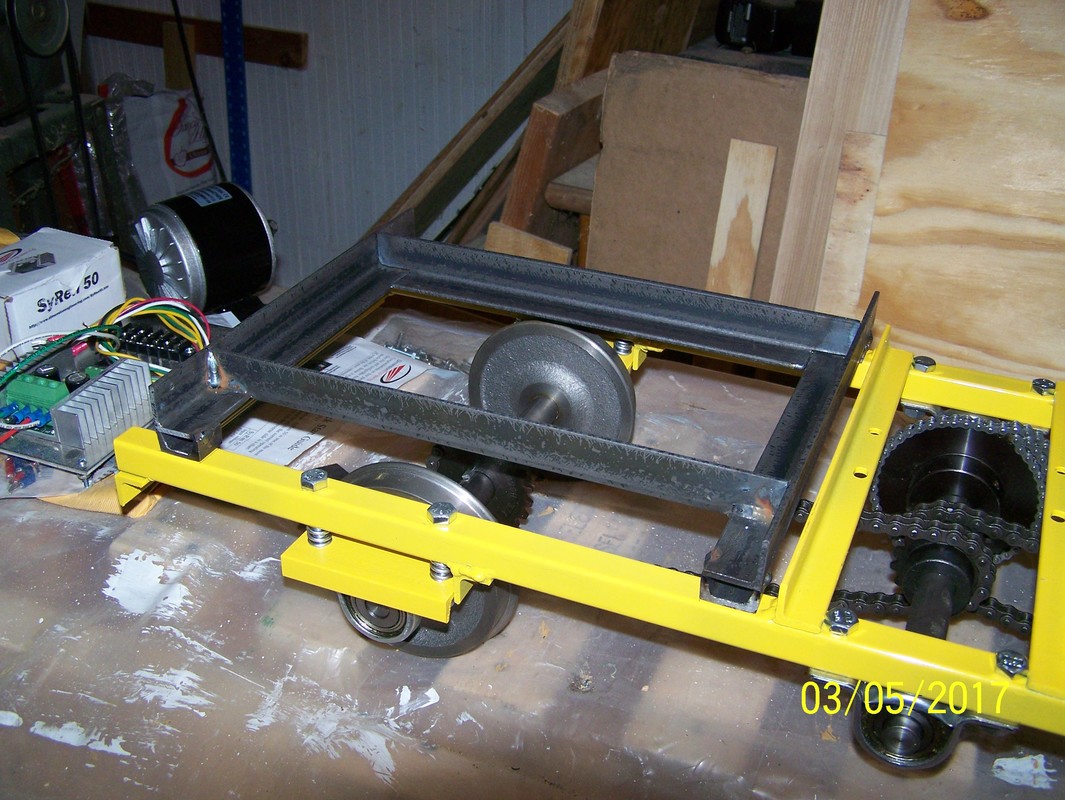
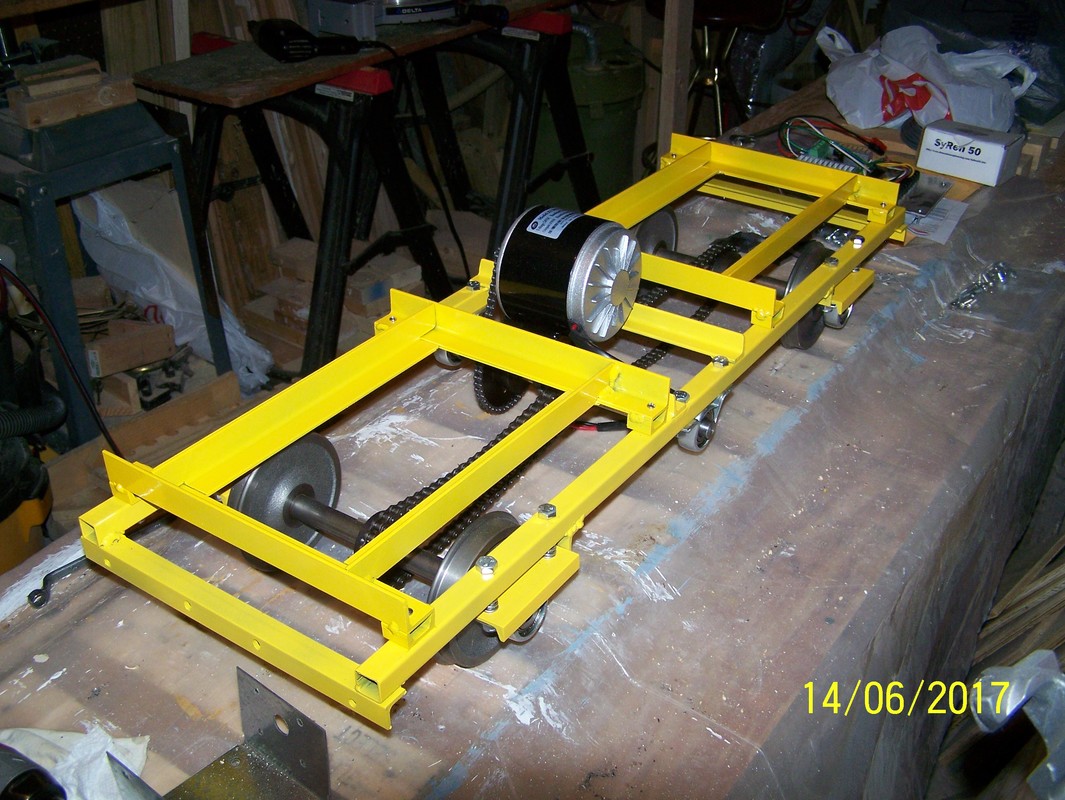
June, 2017. Installed the painted battery trays and then took a vacation to White Creek Railroad, in Michigan, to run trains for family and friends.


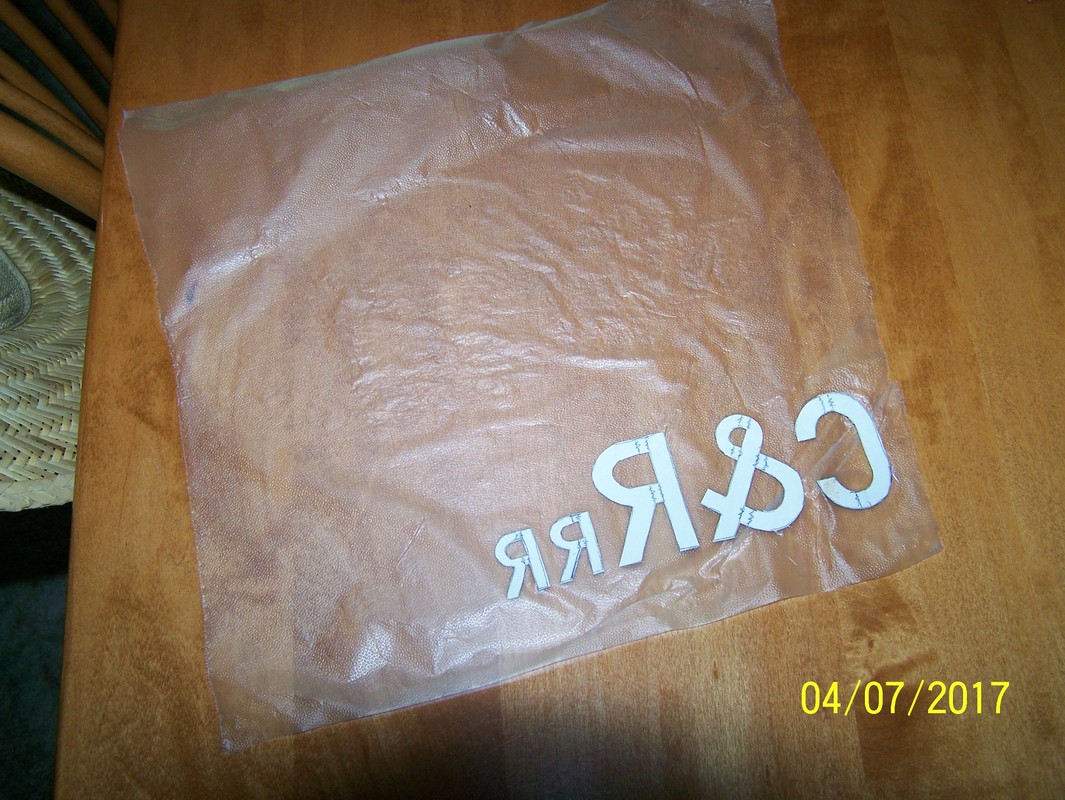
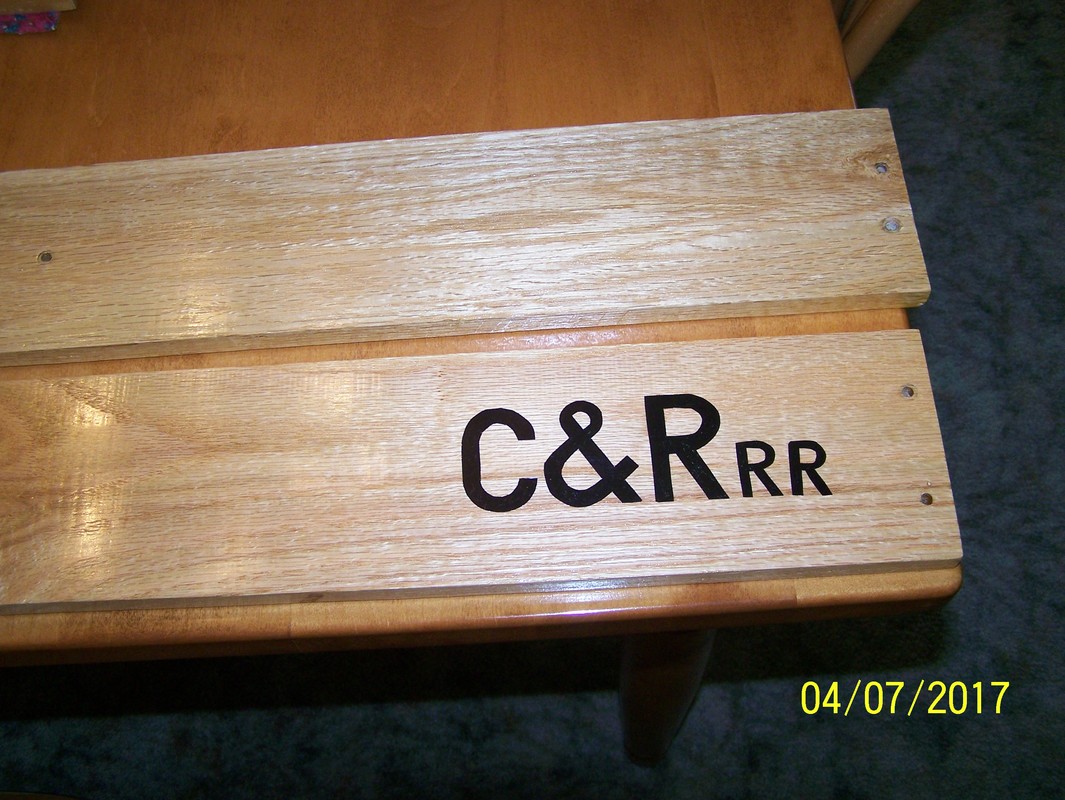
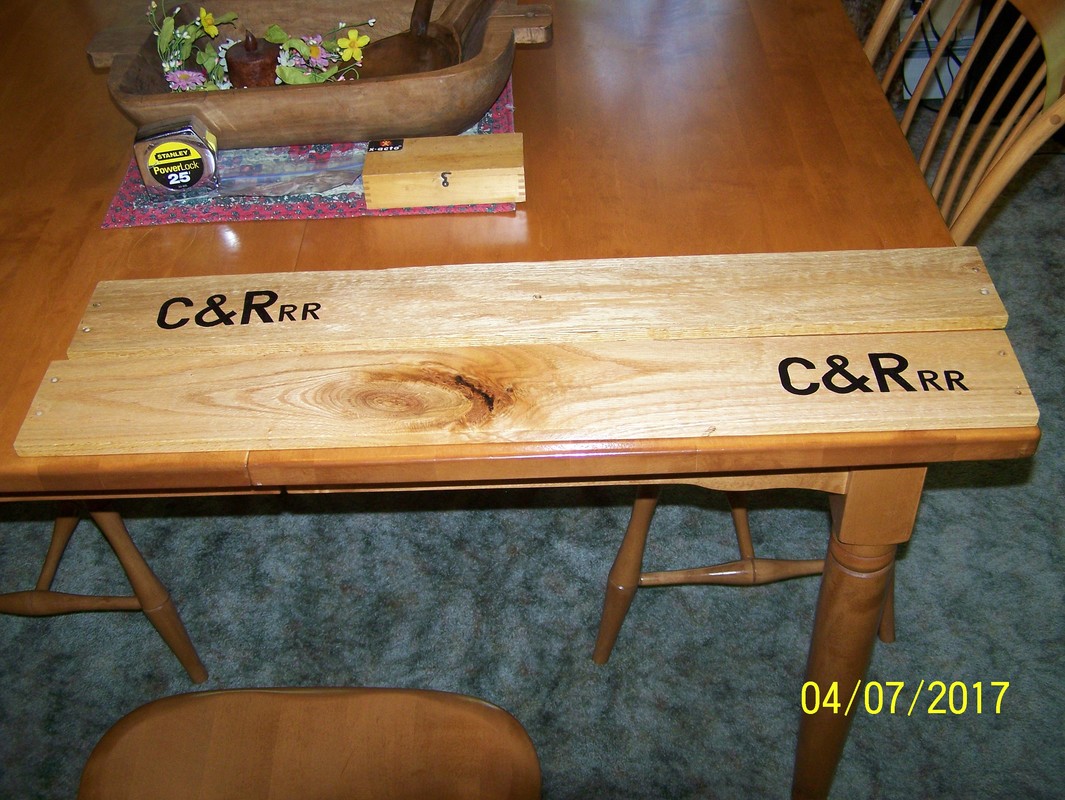
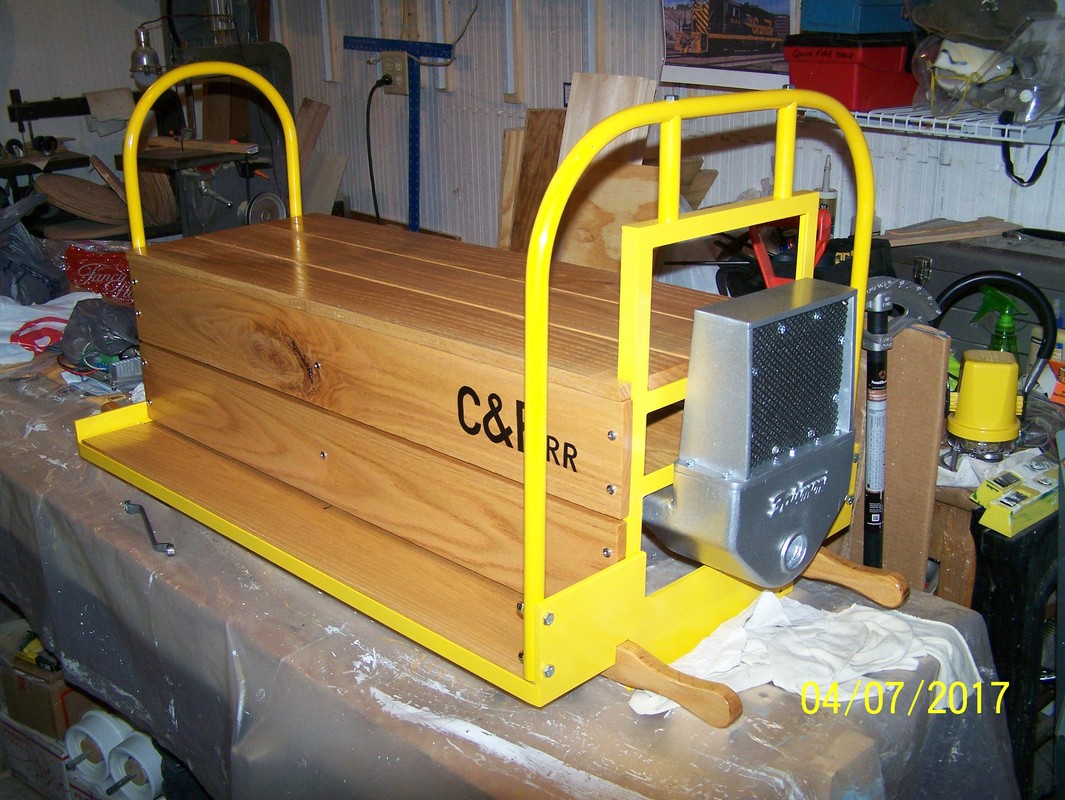
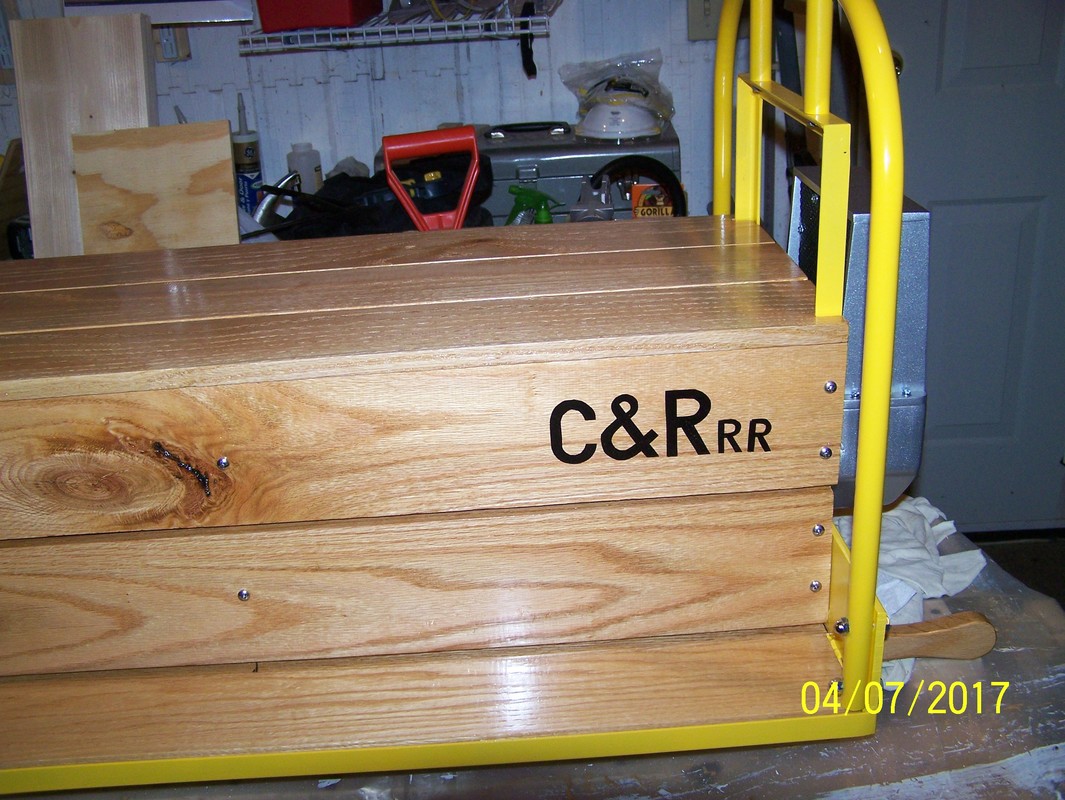
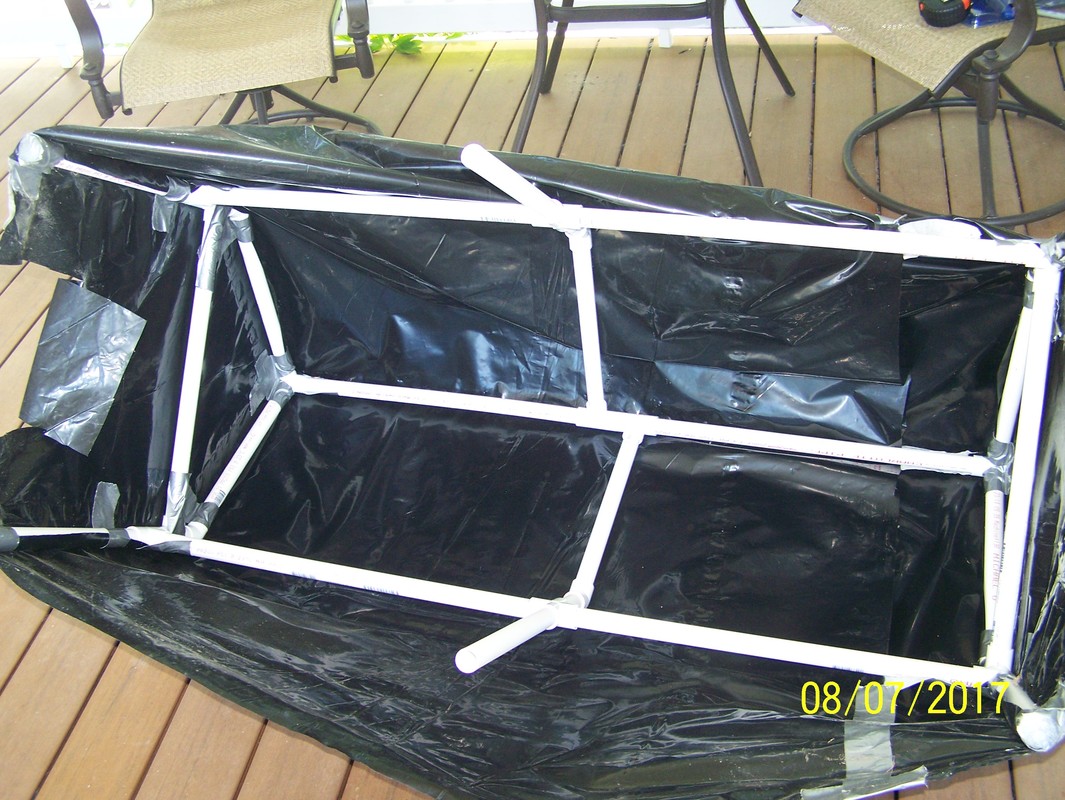
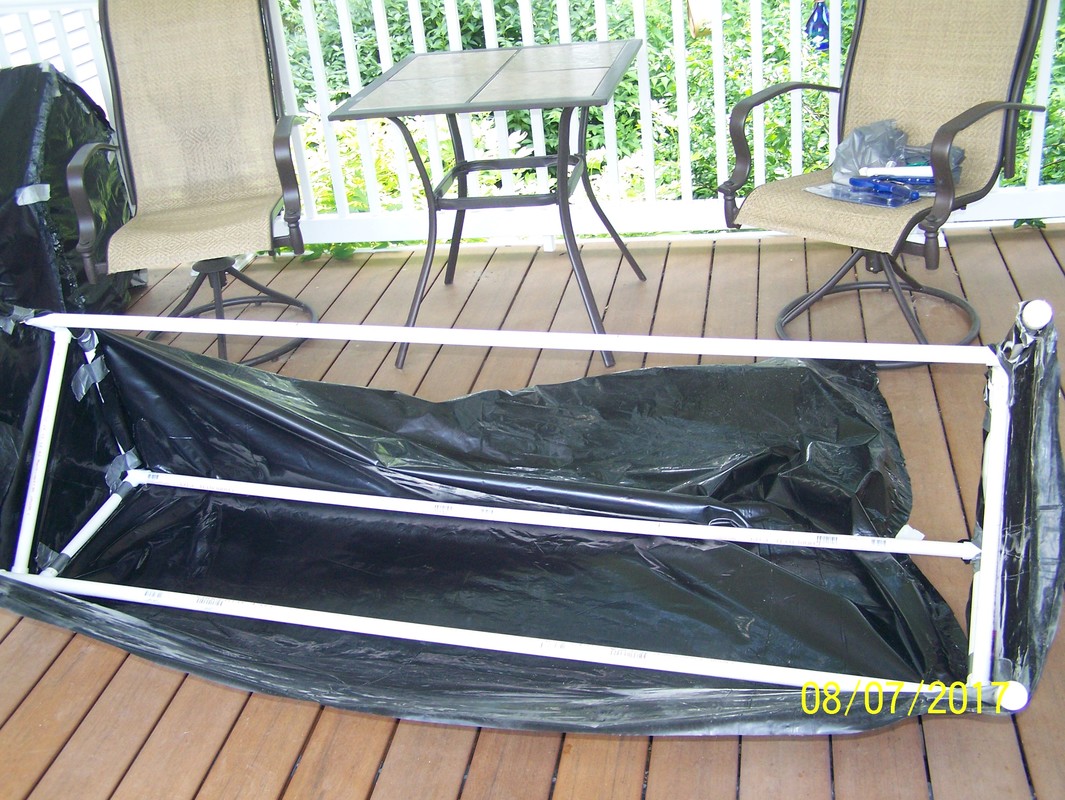
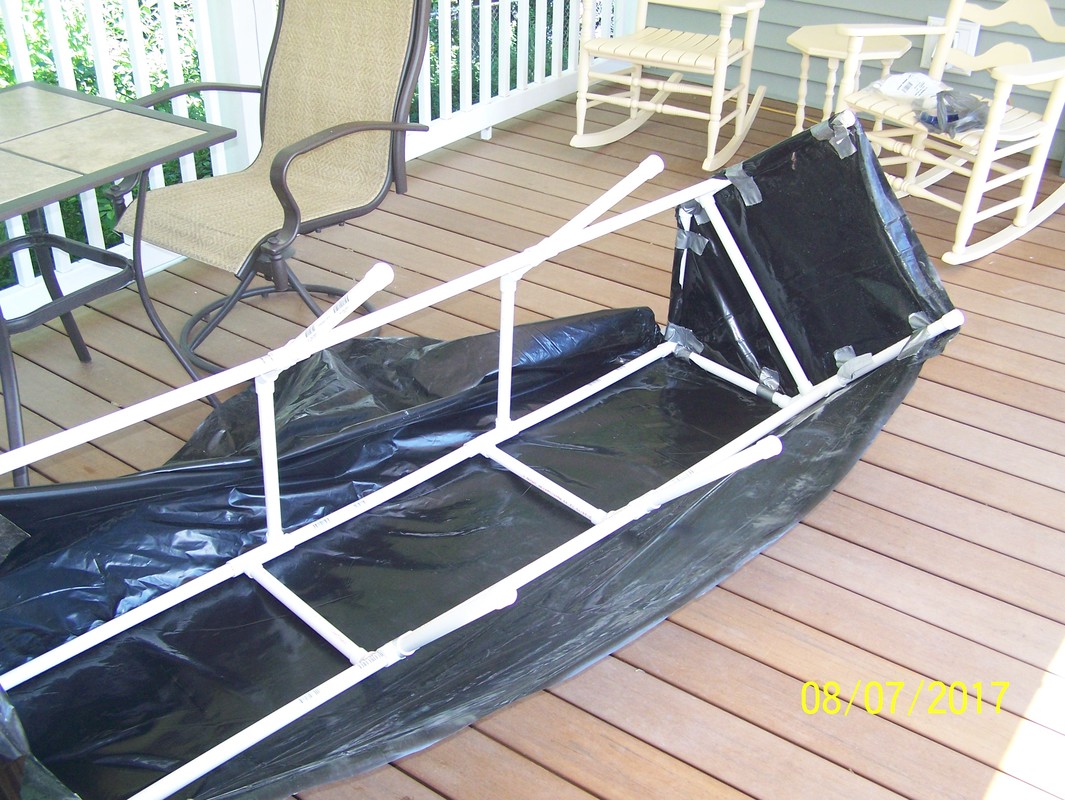
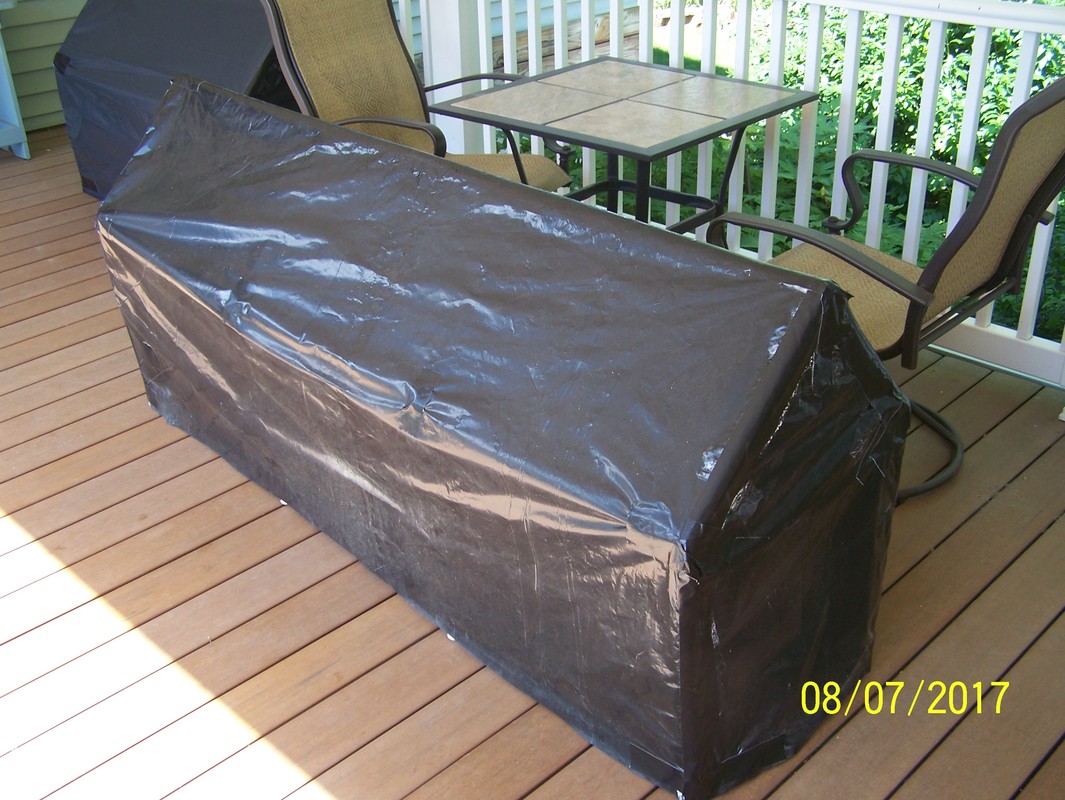
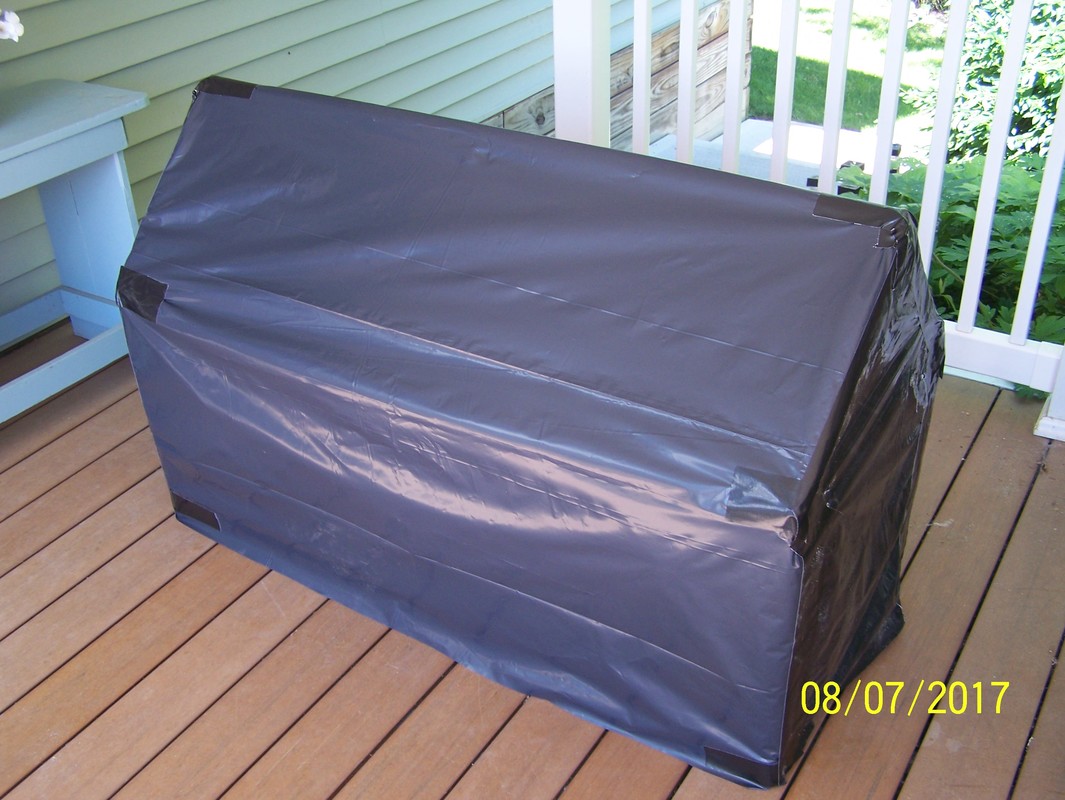
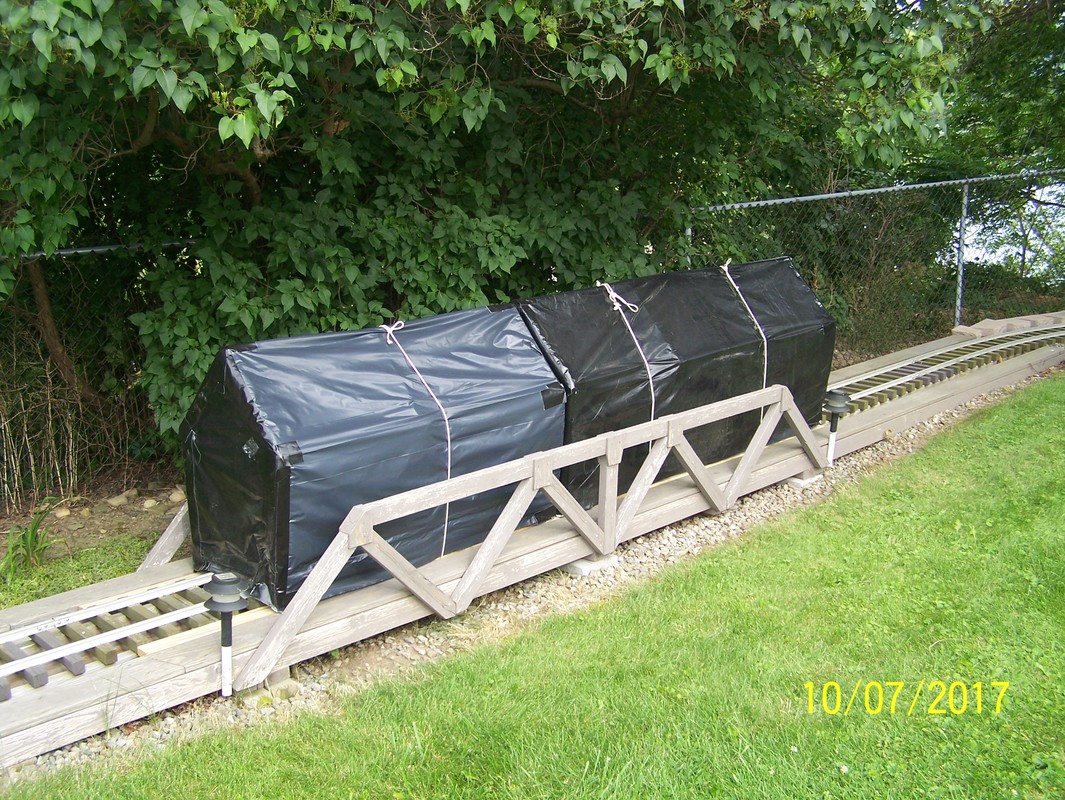
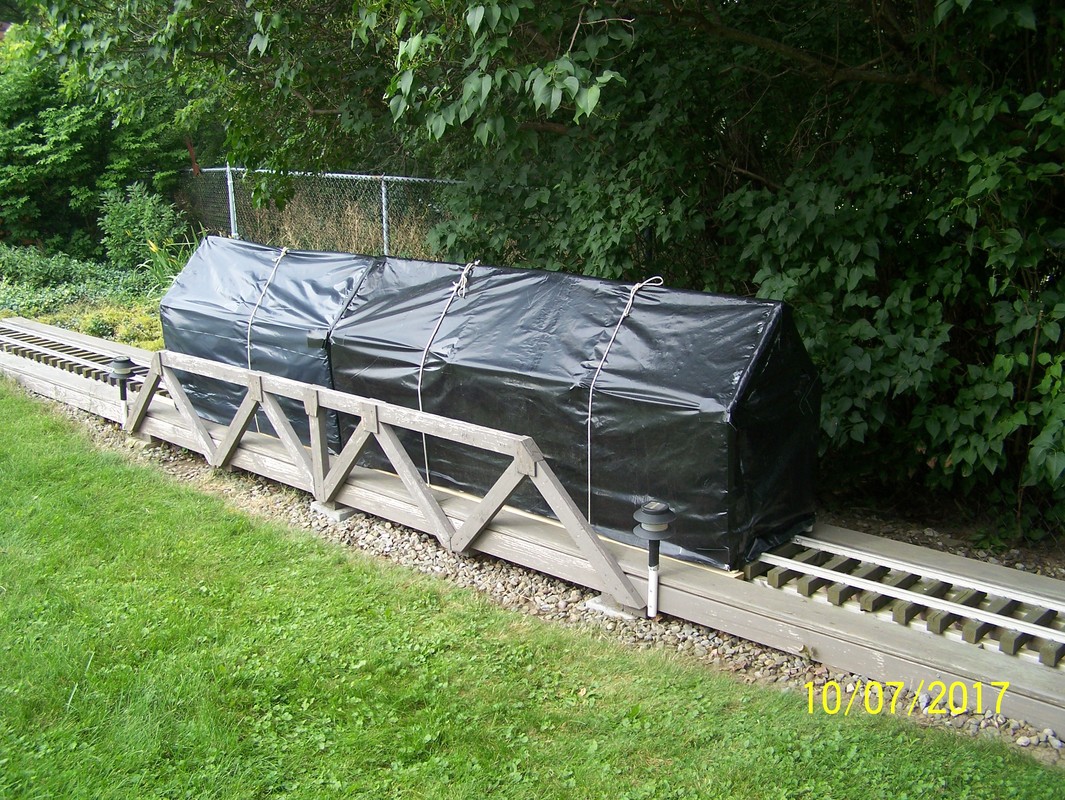
July, 2017. Cut out lettering for the speeder and installed on the side boards. Also modified the storage tents for the outside storage for more support for them. Then put some new covering on the small one.


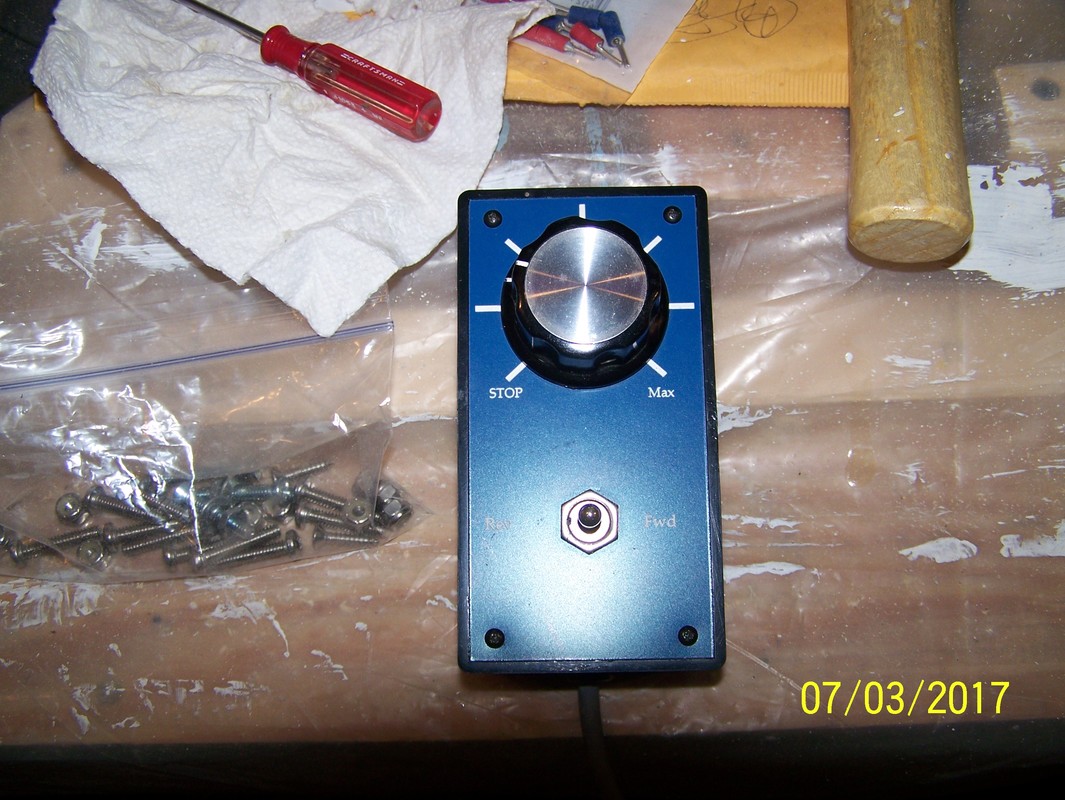
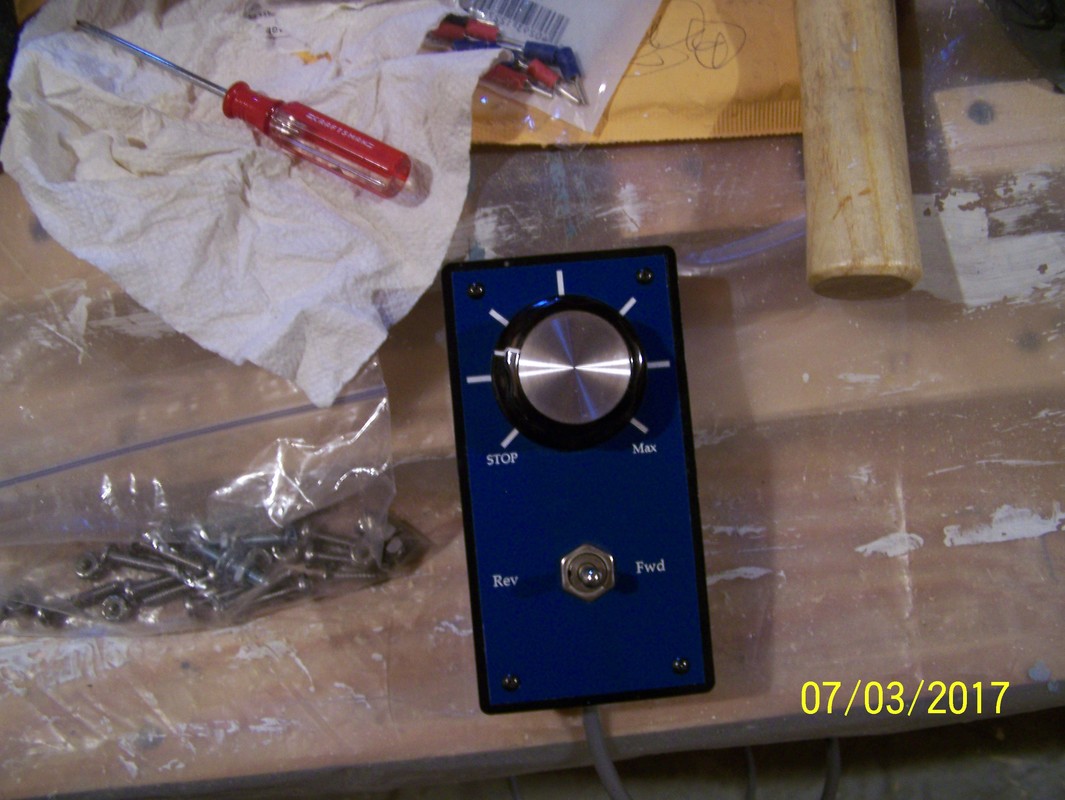
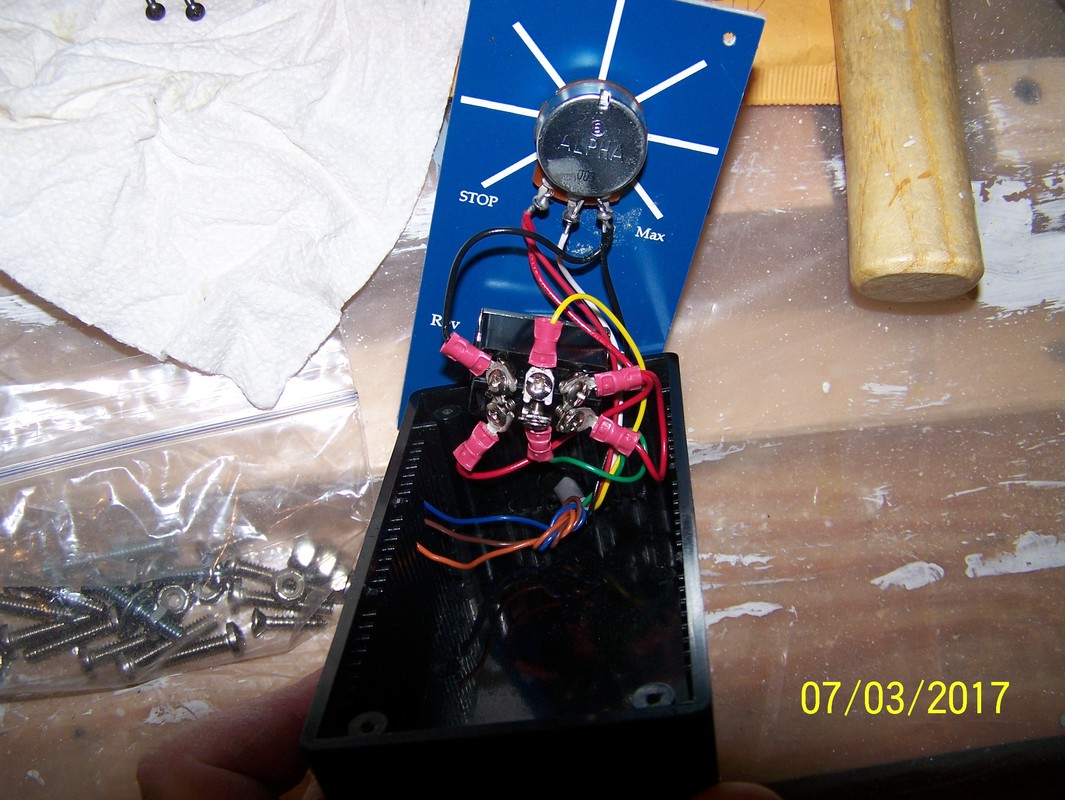
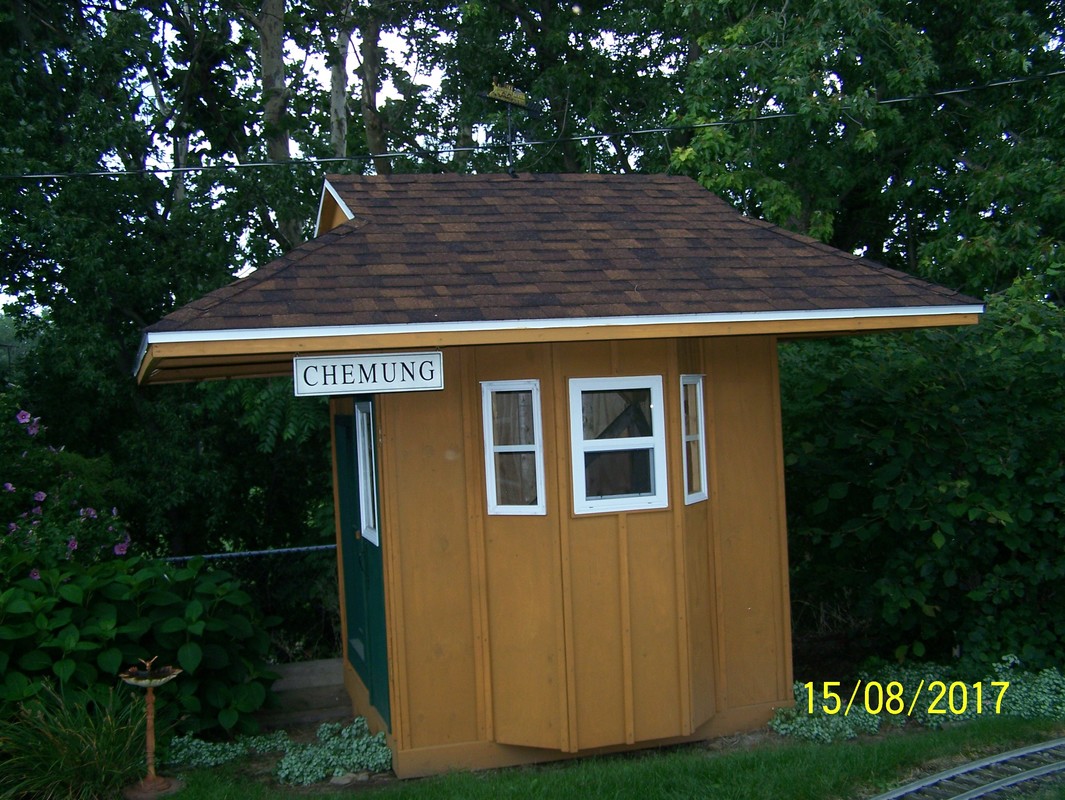
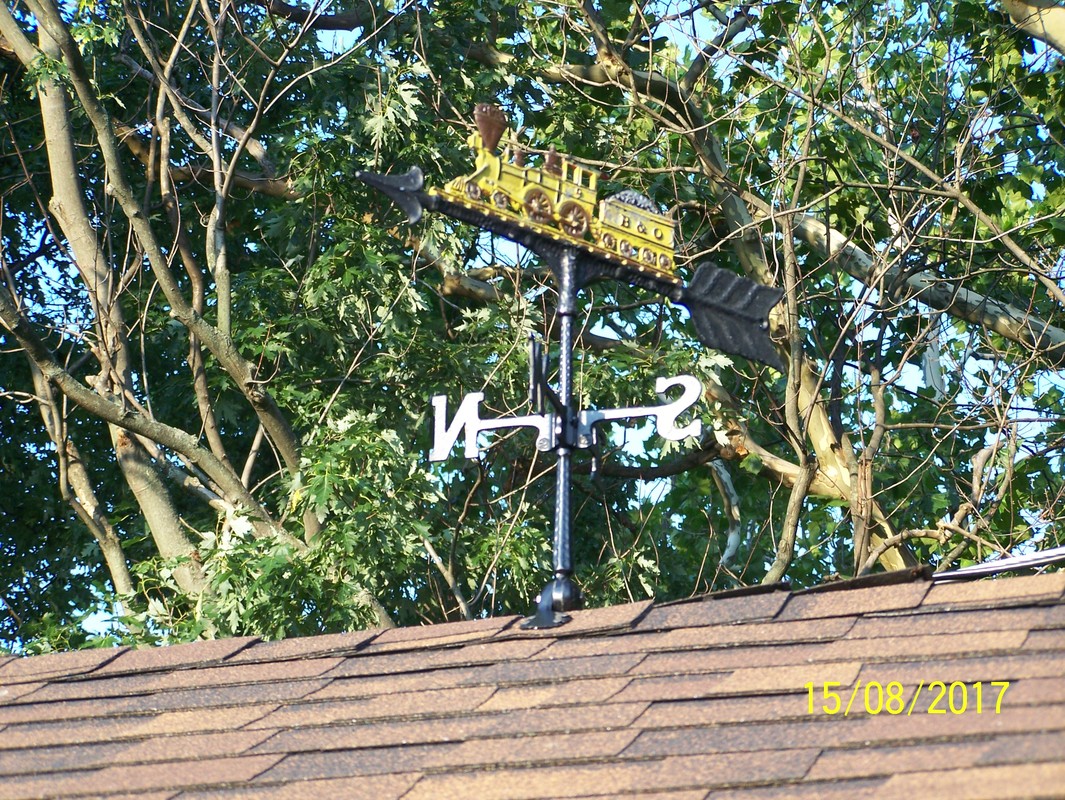
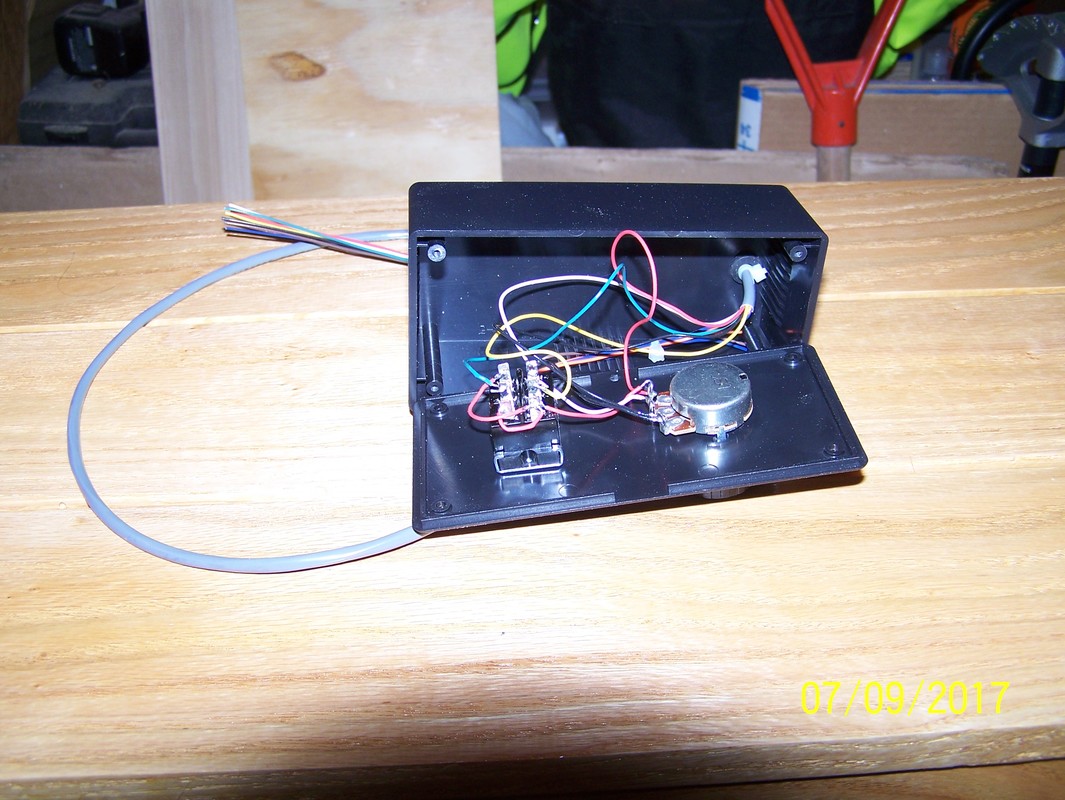
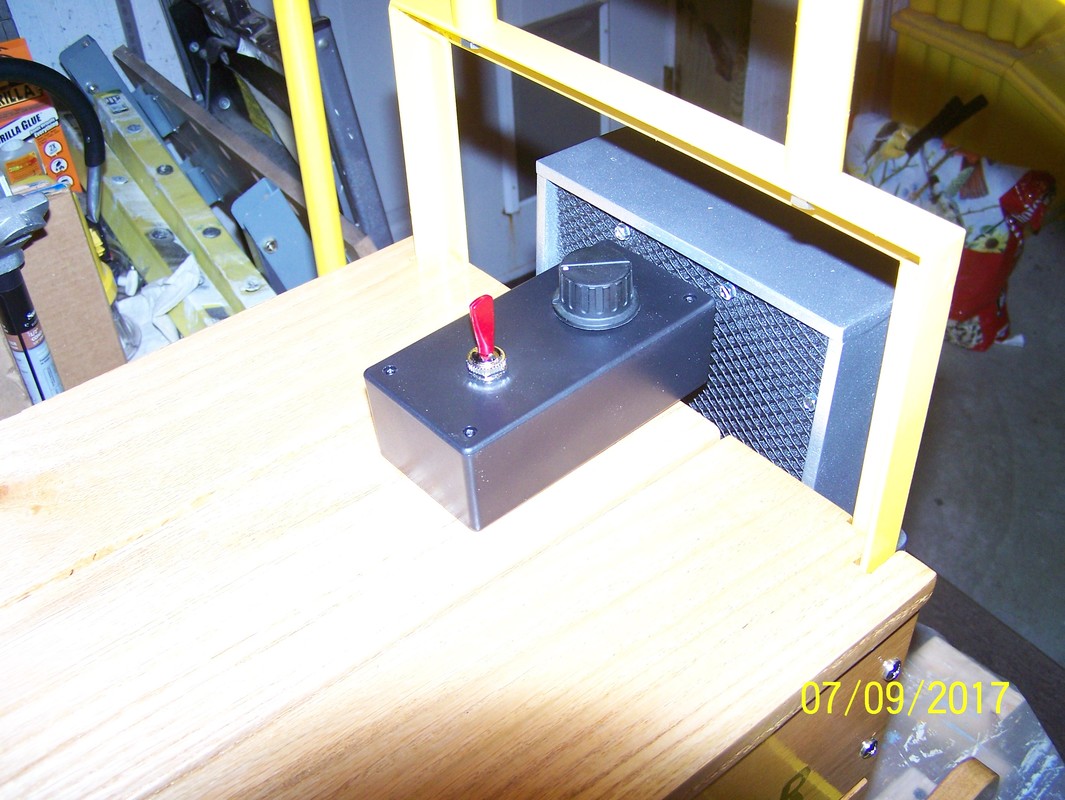
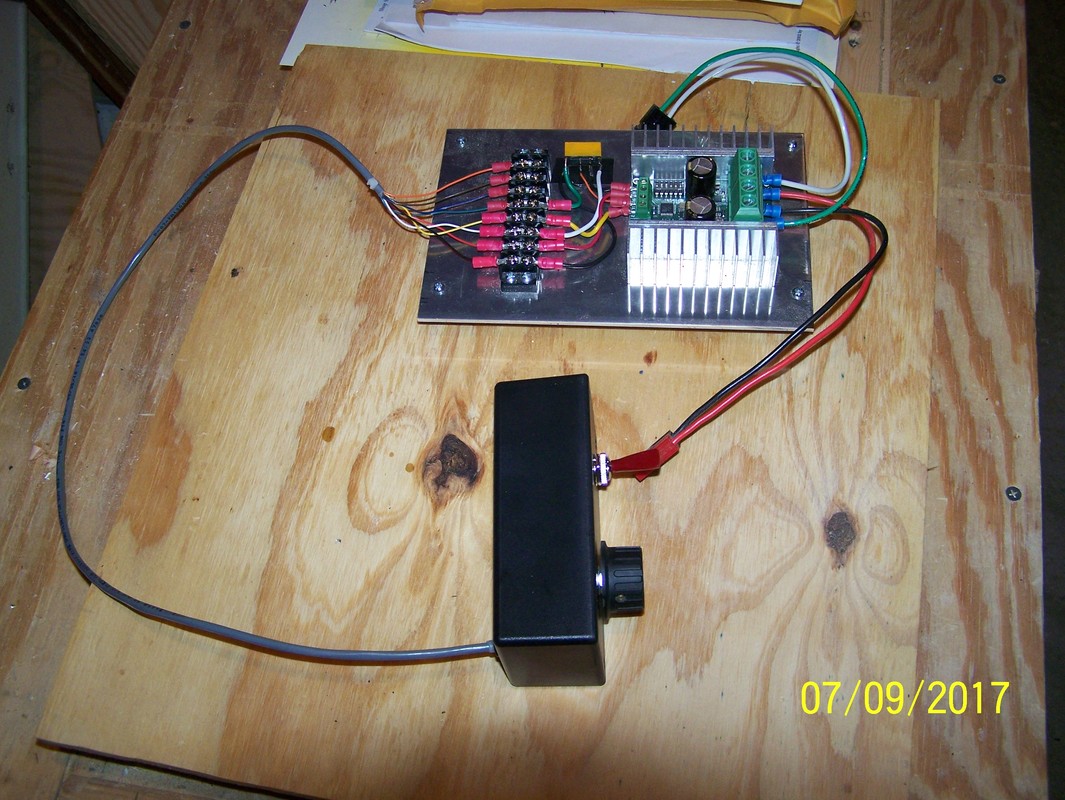
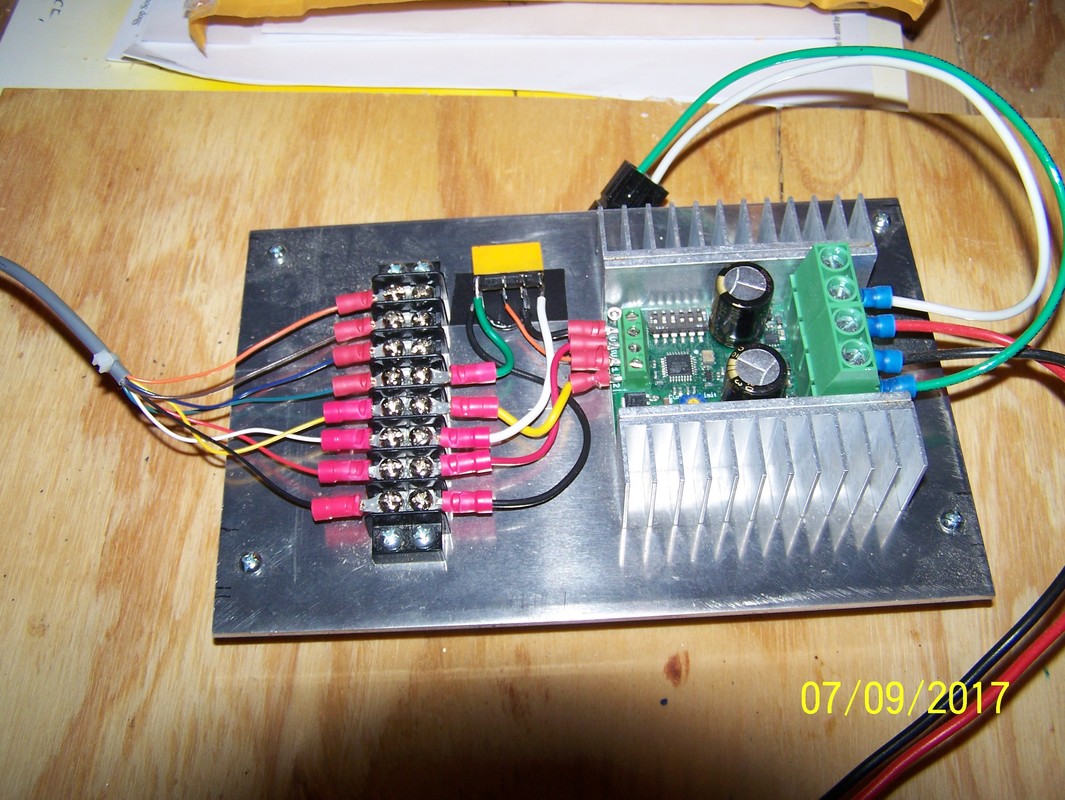
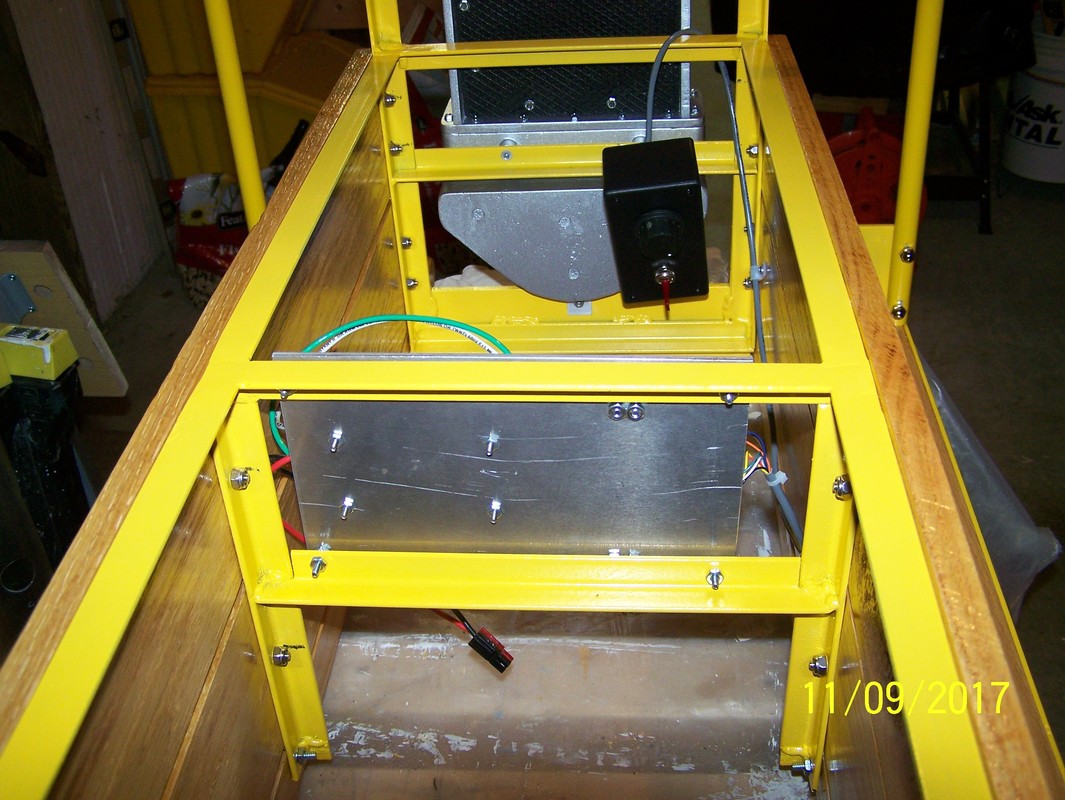
Aug, 2017. Installed a new weather vane in the station. (Note; it is from my uncle Spud Ensing's house. He is the person that got me interested in modeling.) Bent some guard rails for the switches, mounted the resister pot and switch on the speeder hand held controller and made a rail rack for storage of a new engine.

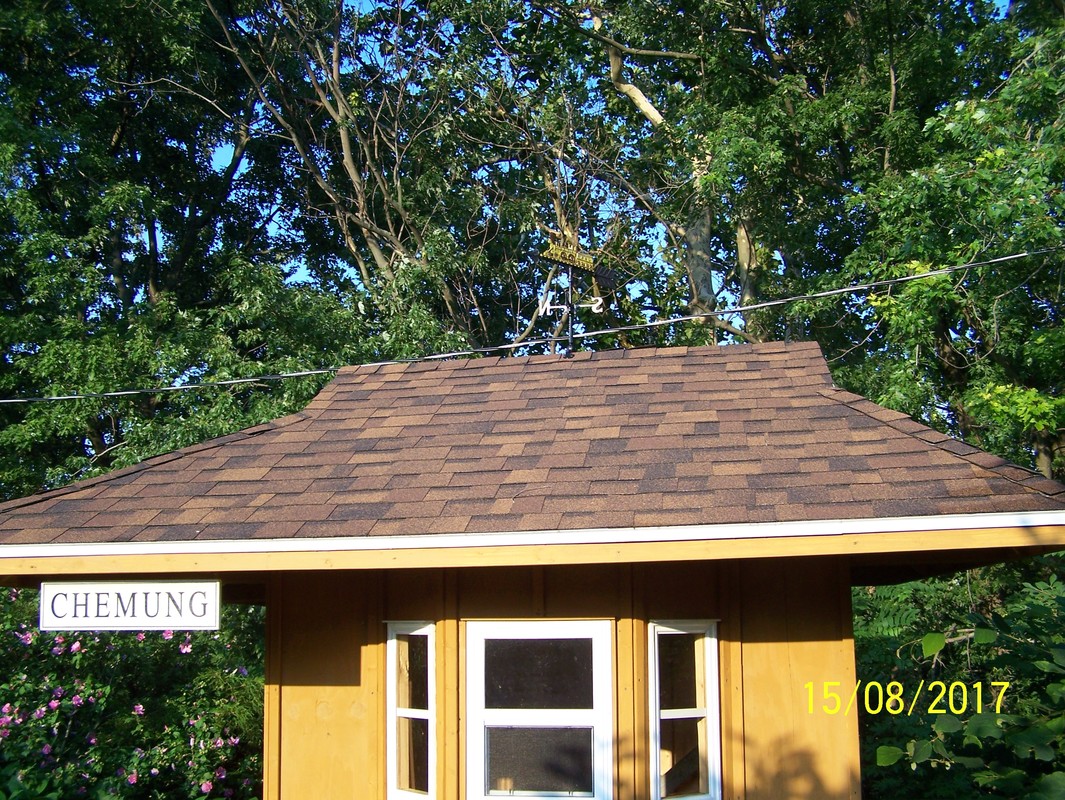

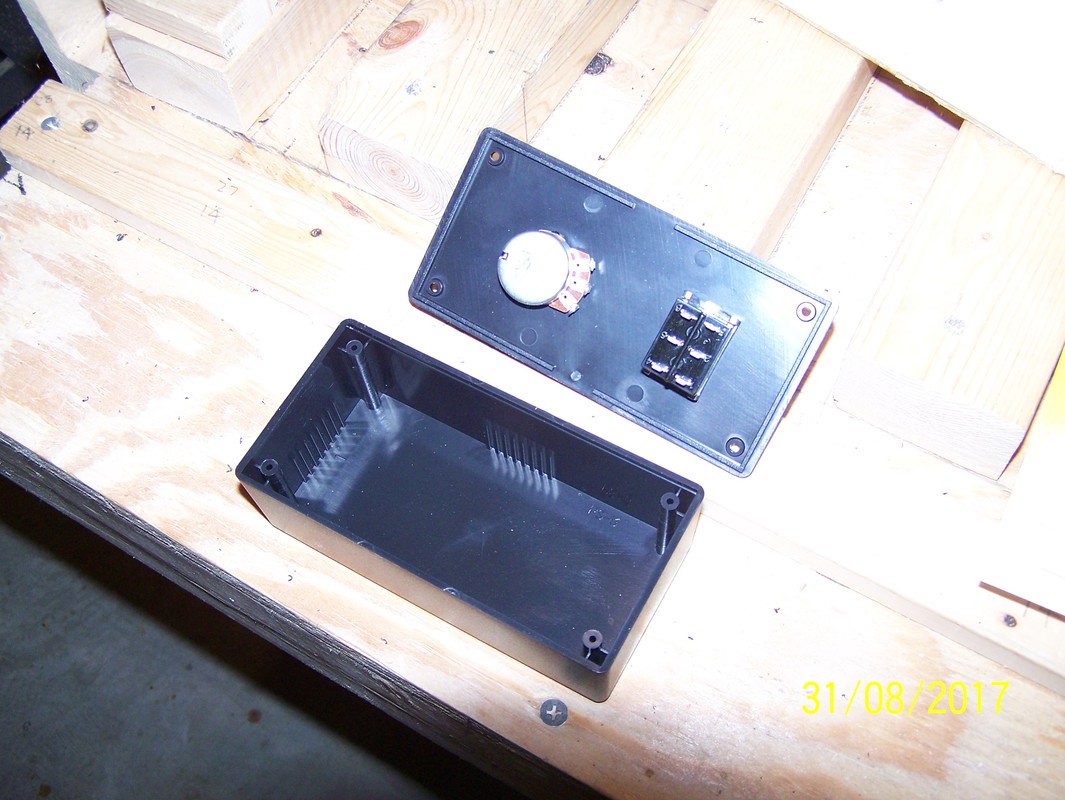
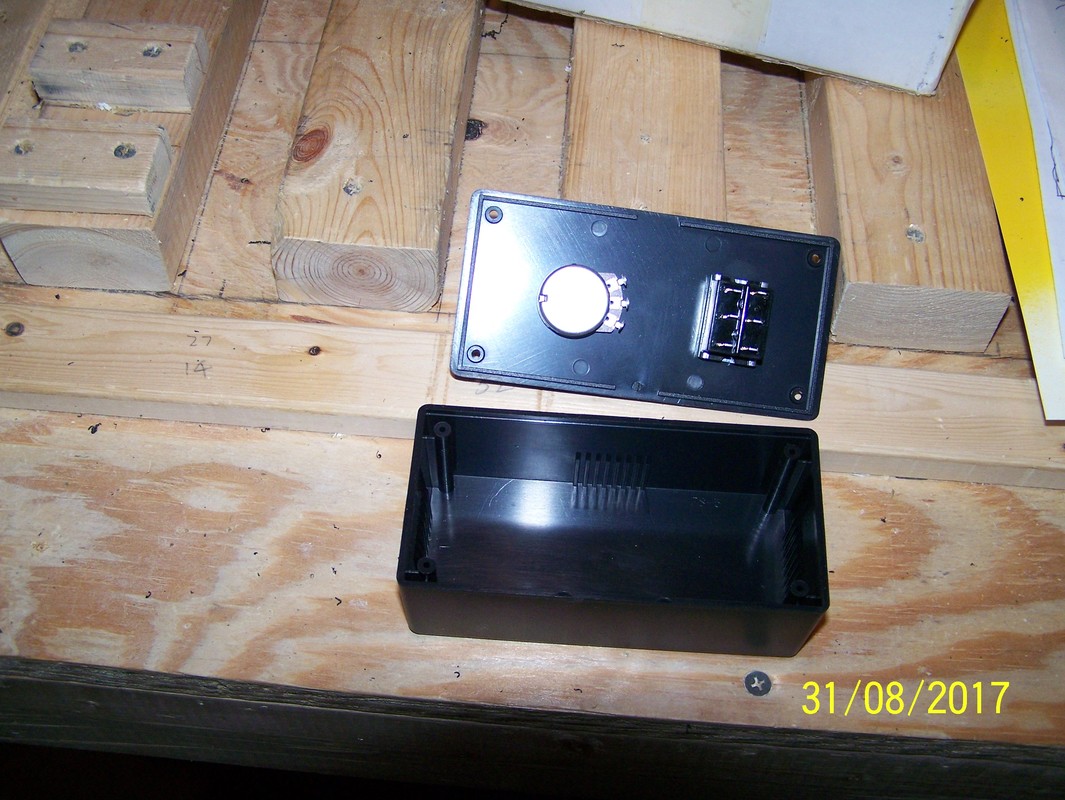
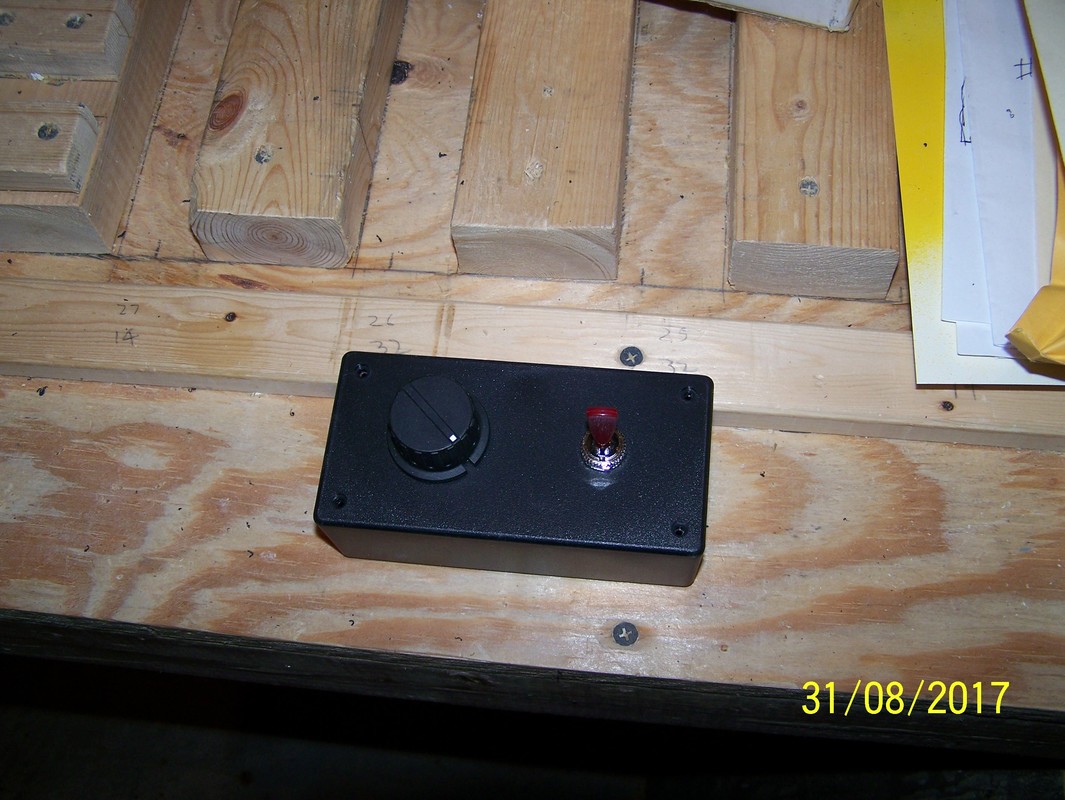
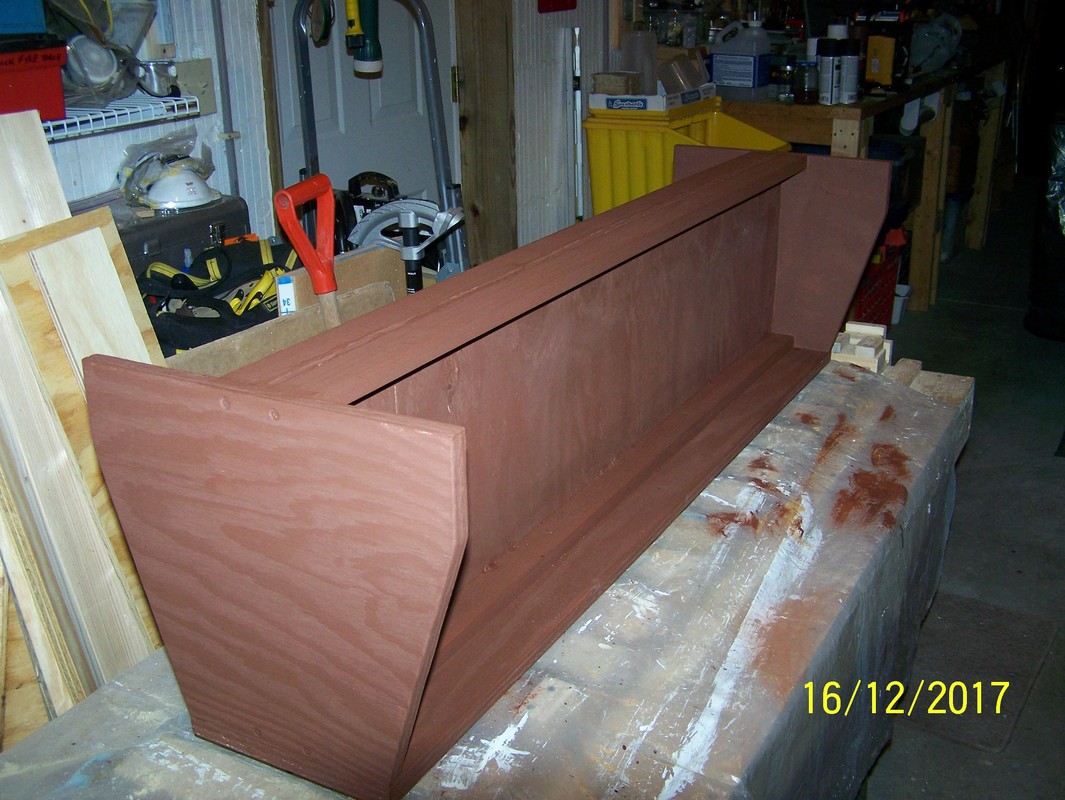
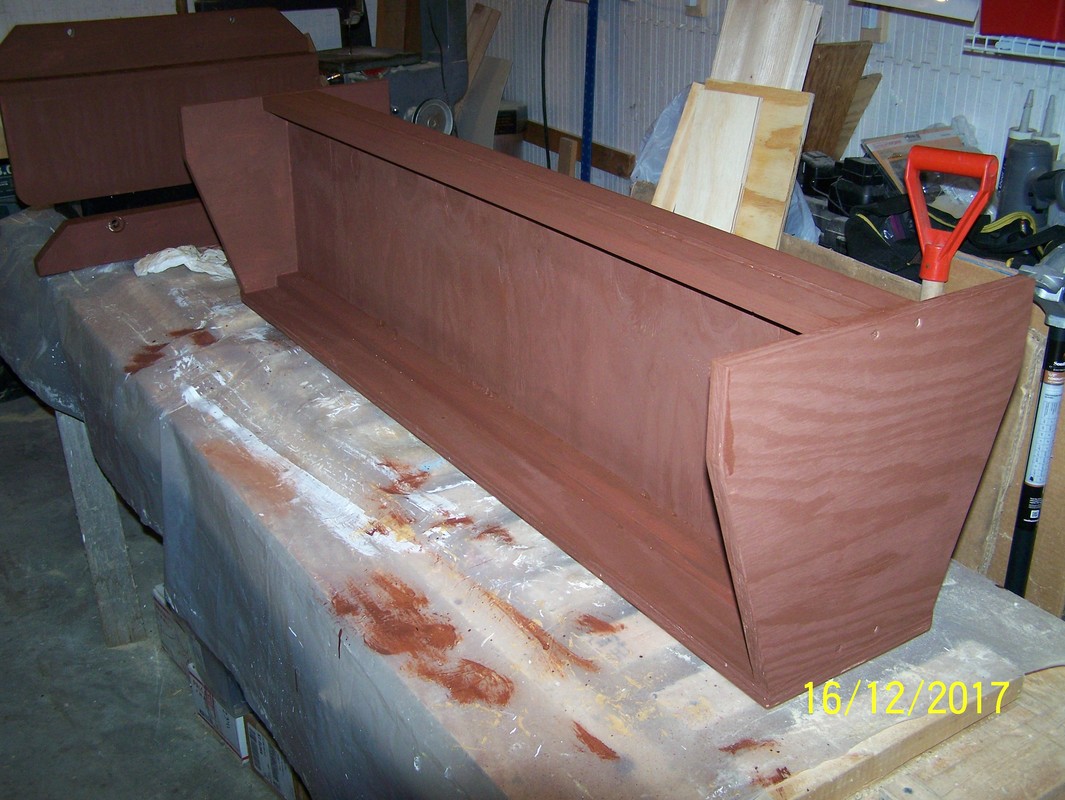
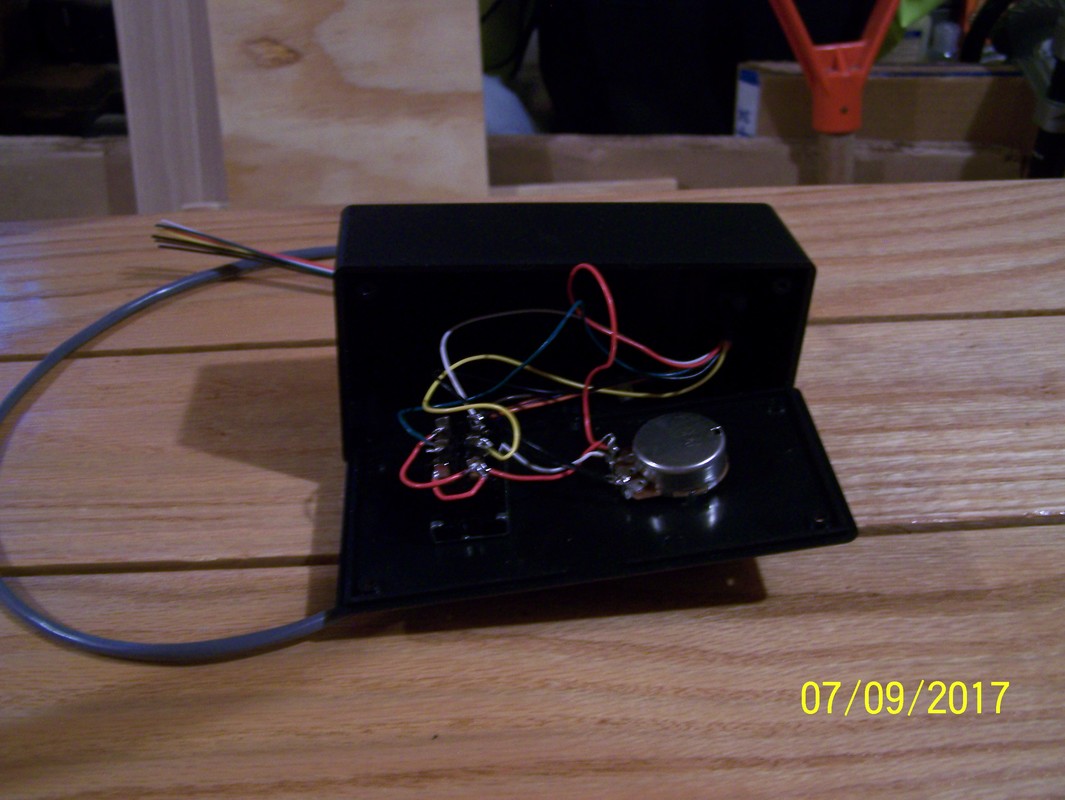
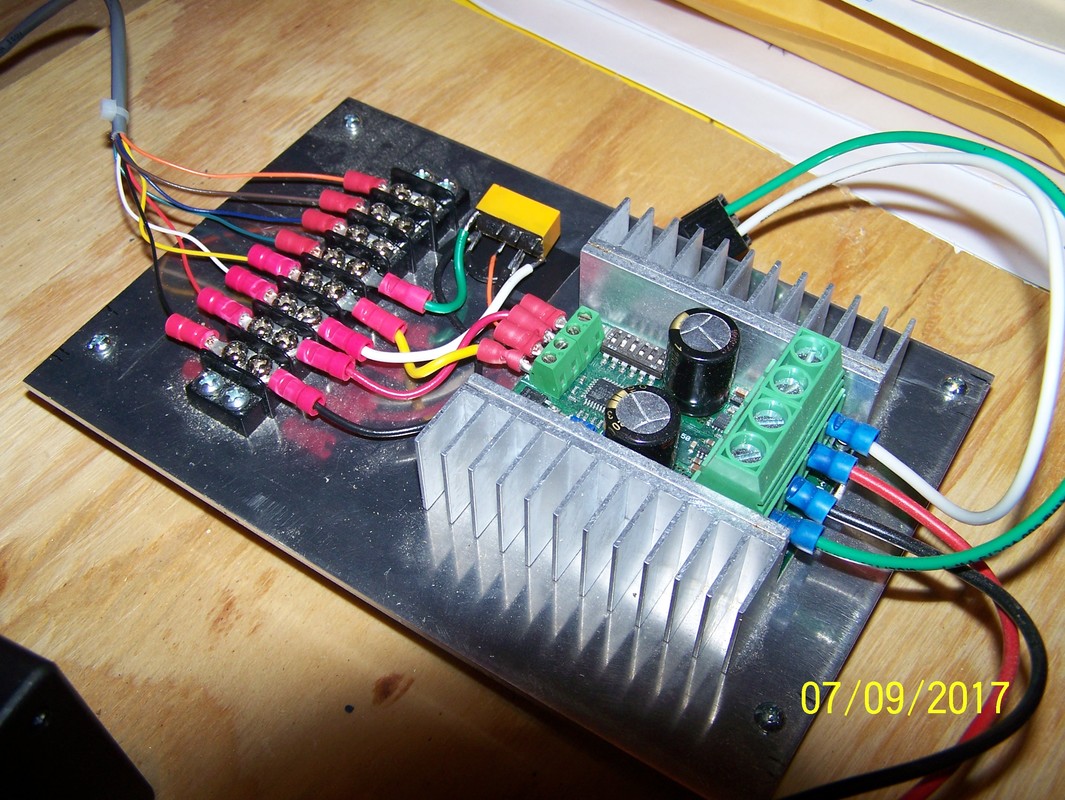
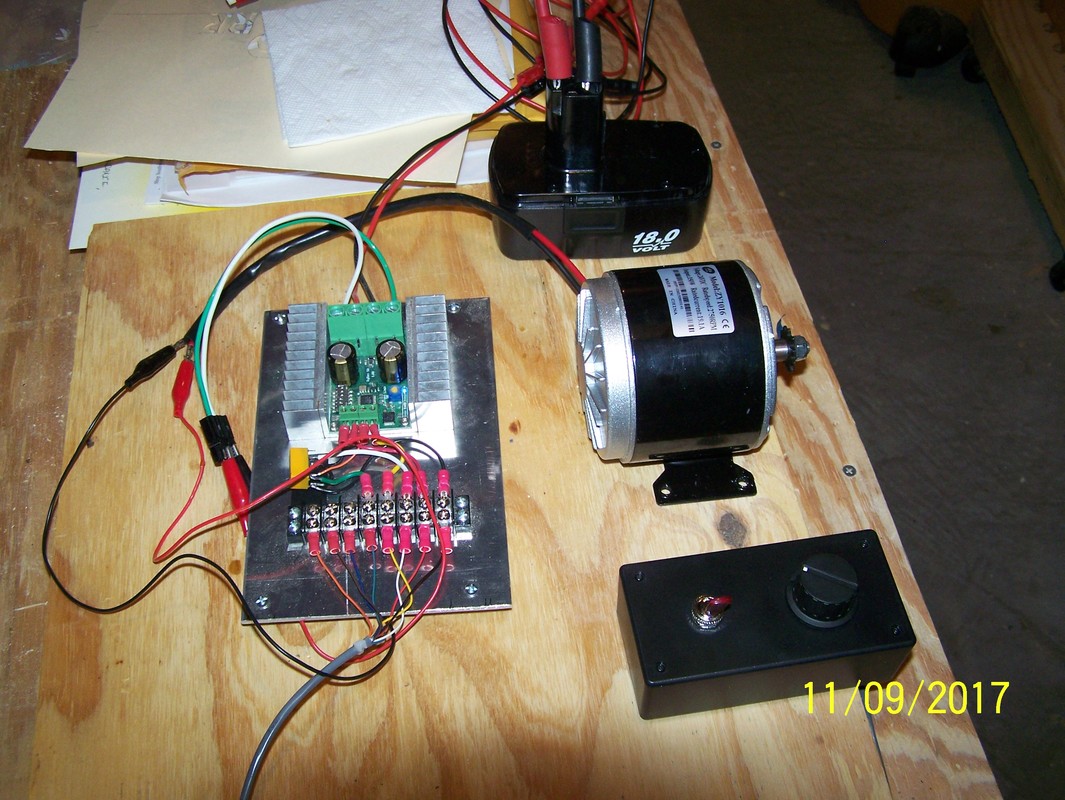
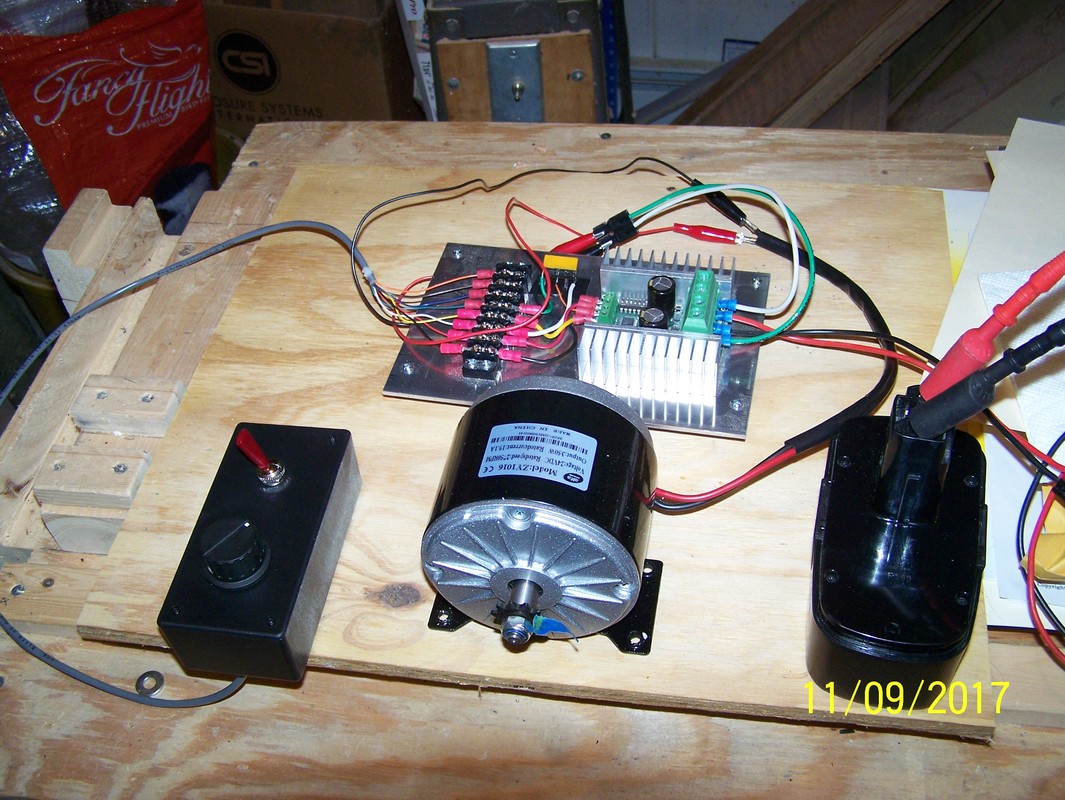
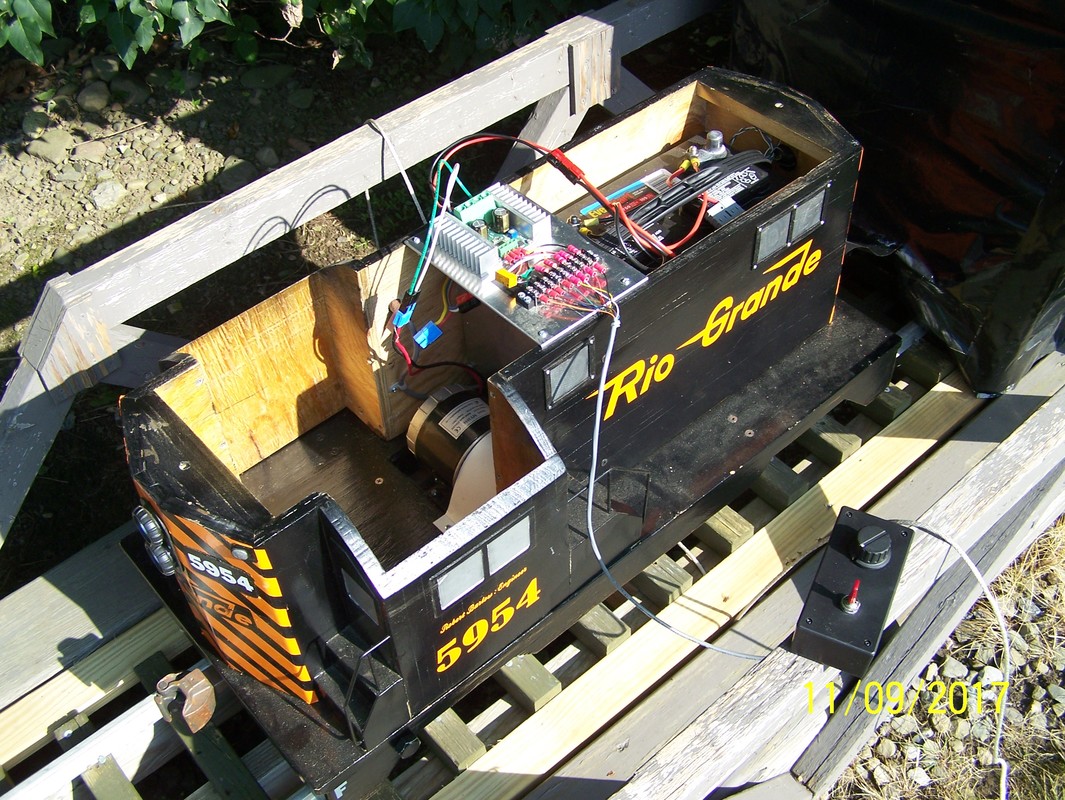
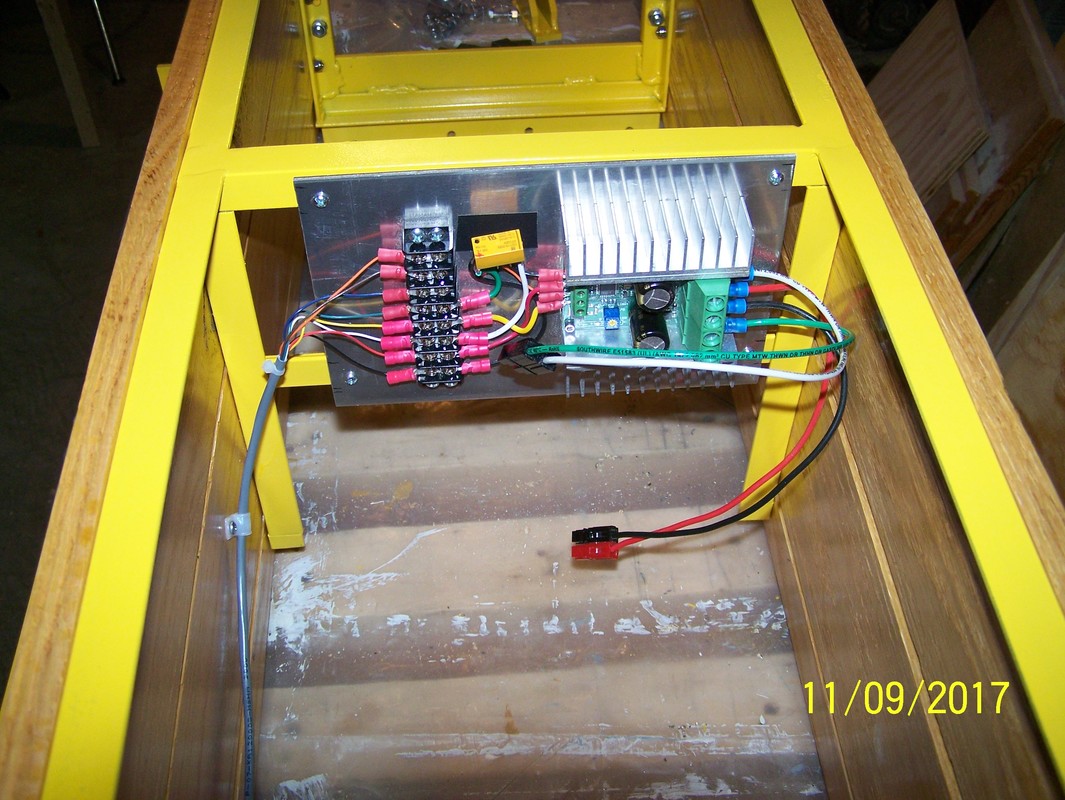
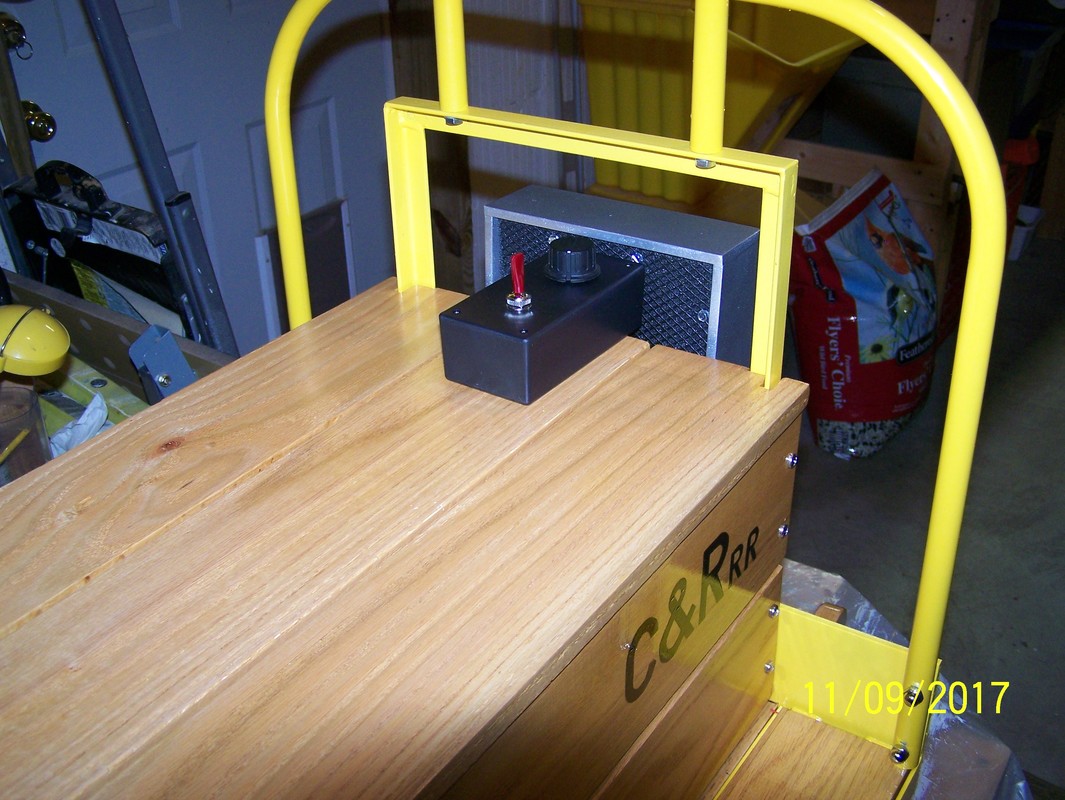
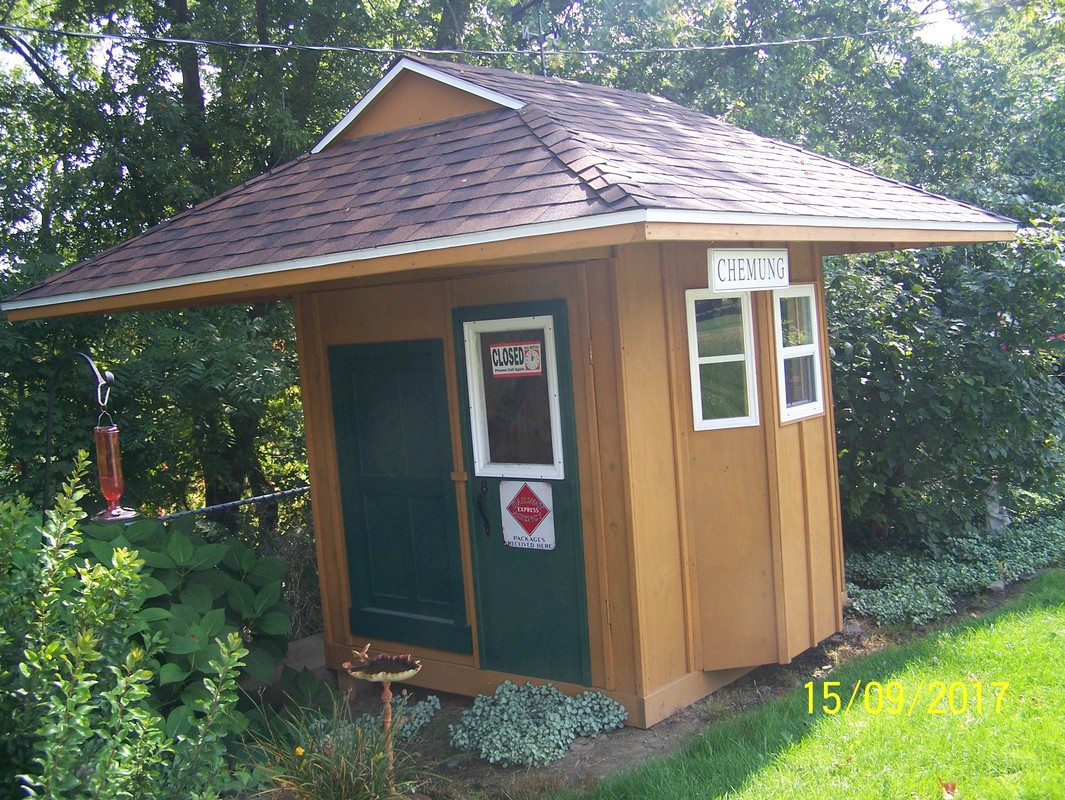
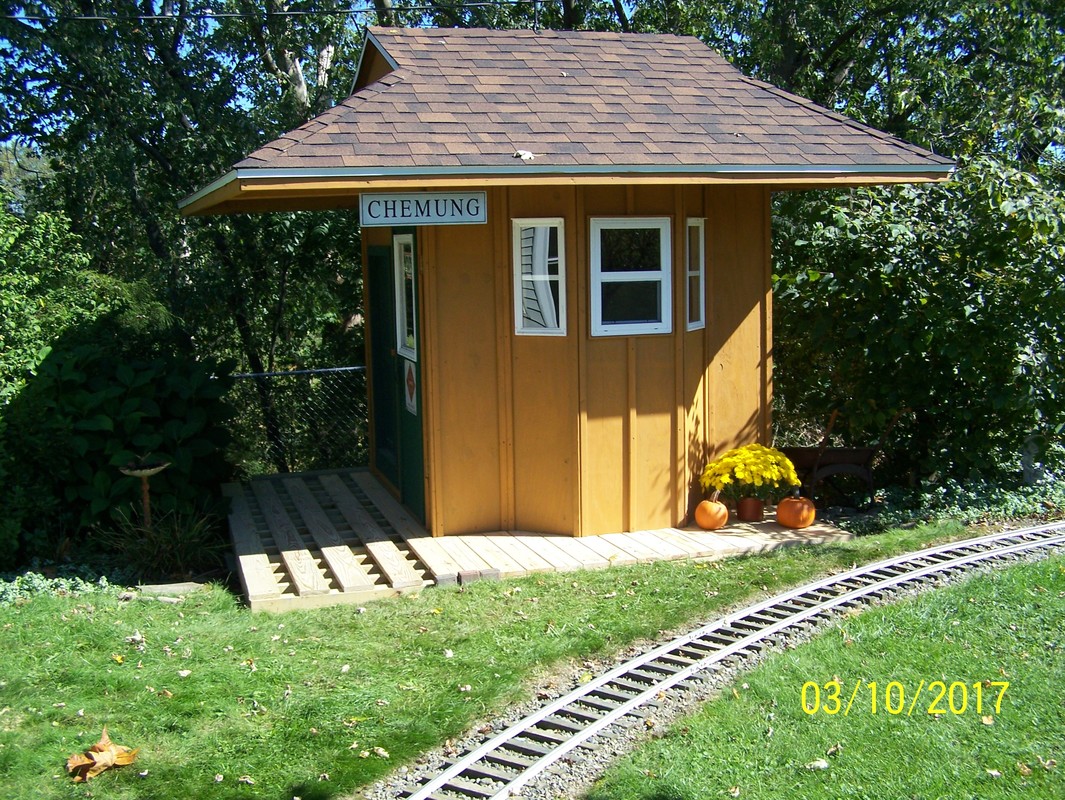
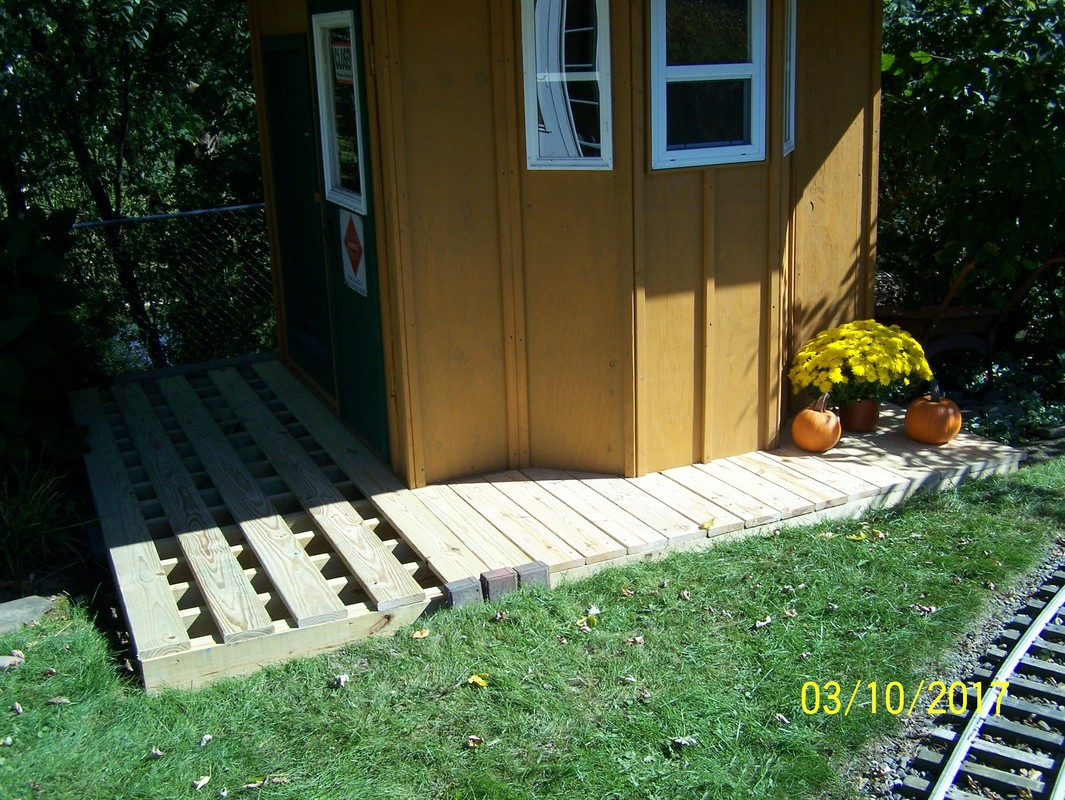
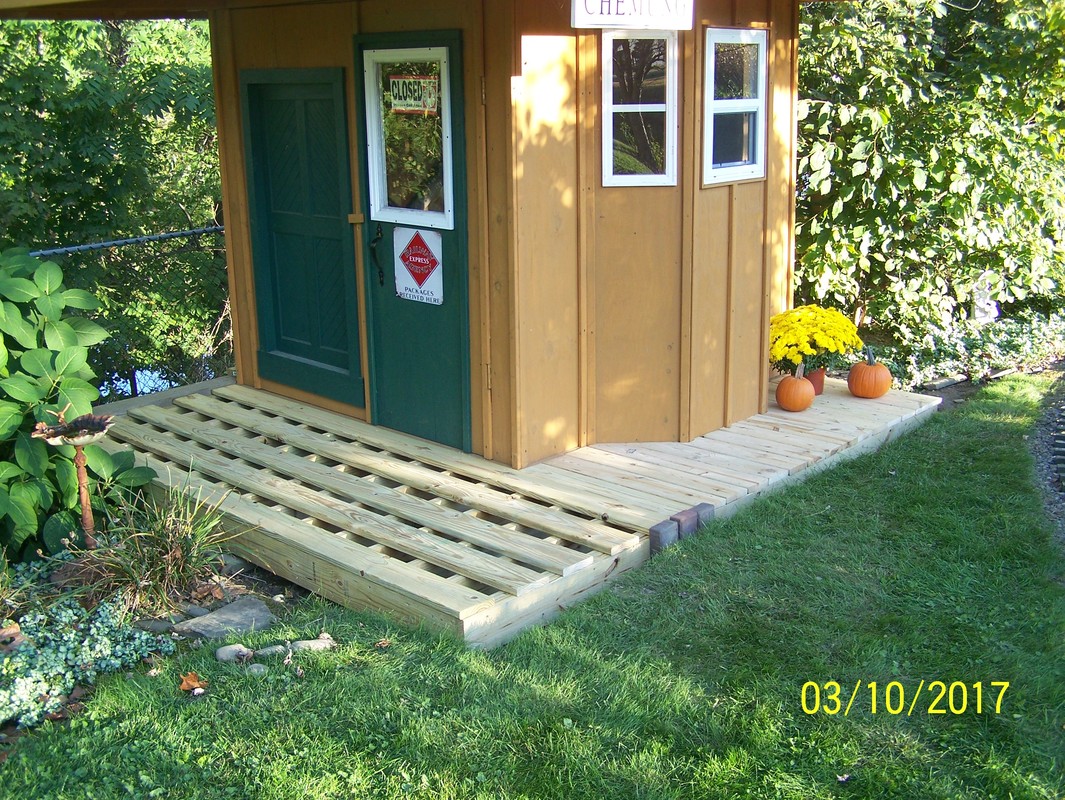
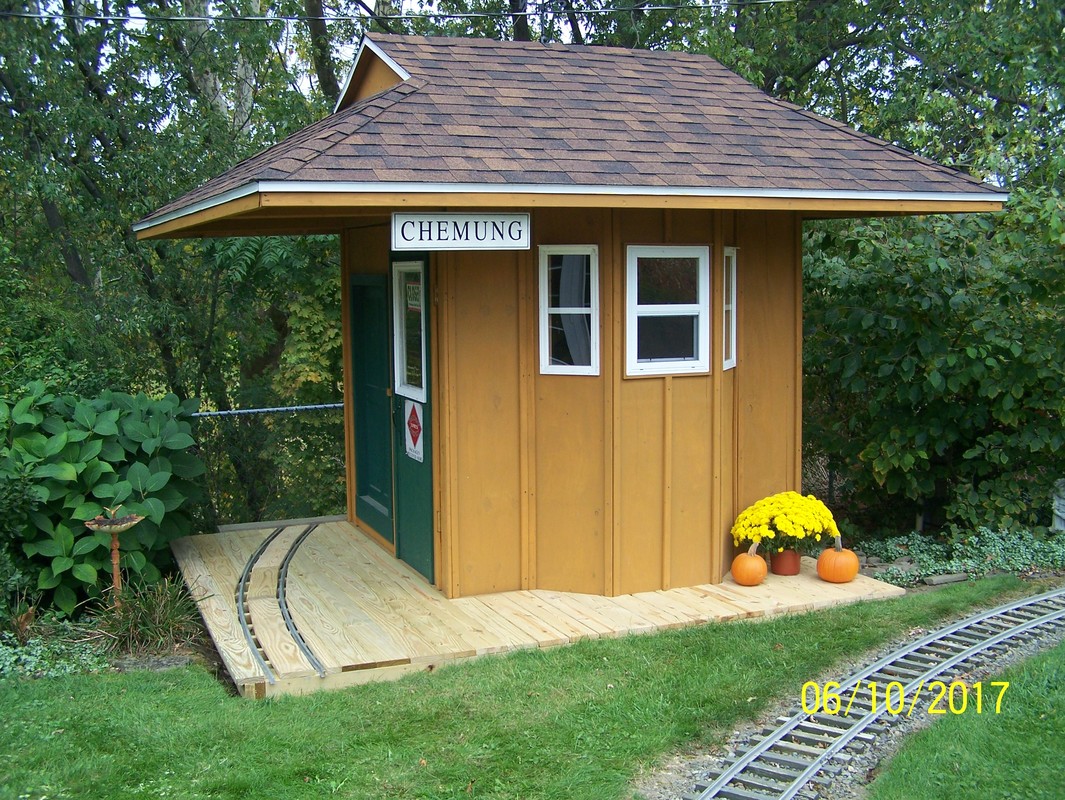
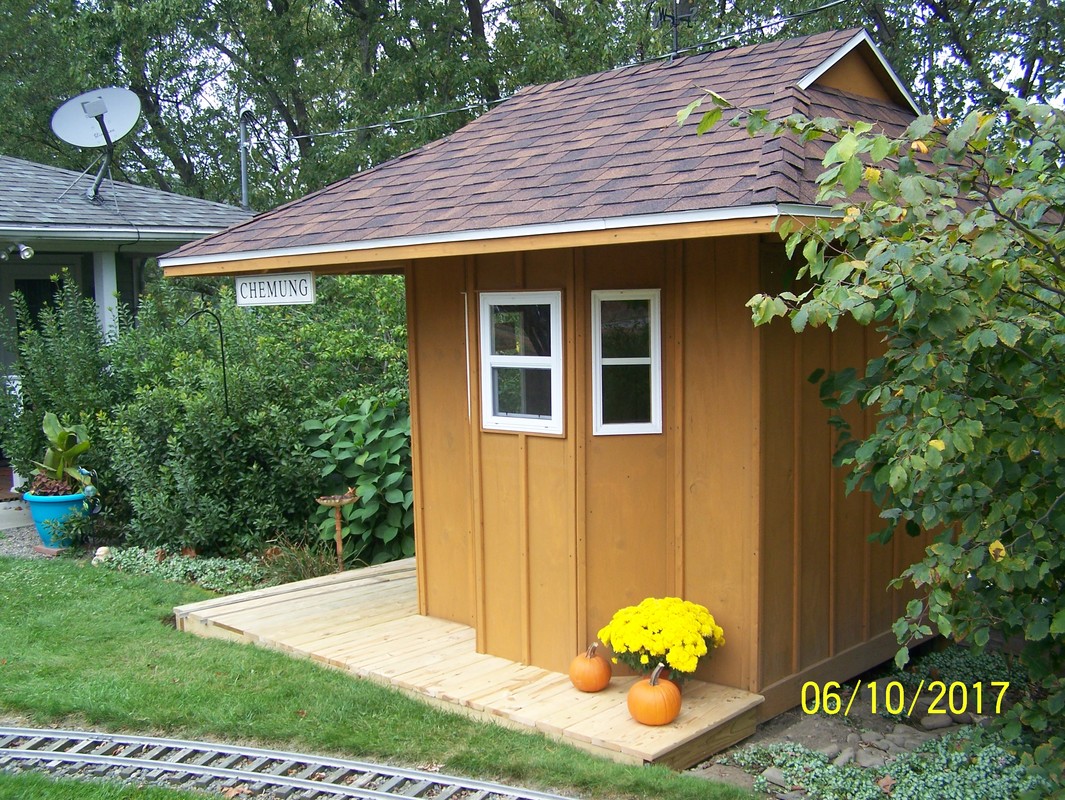
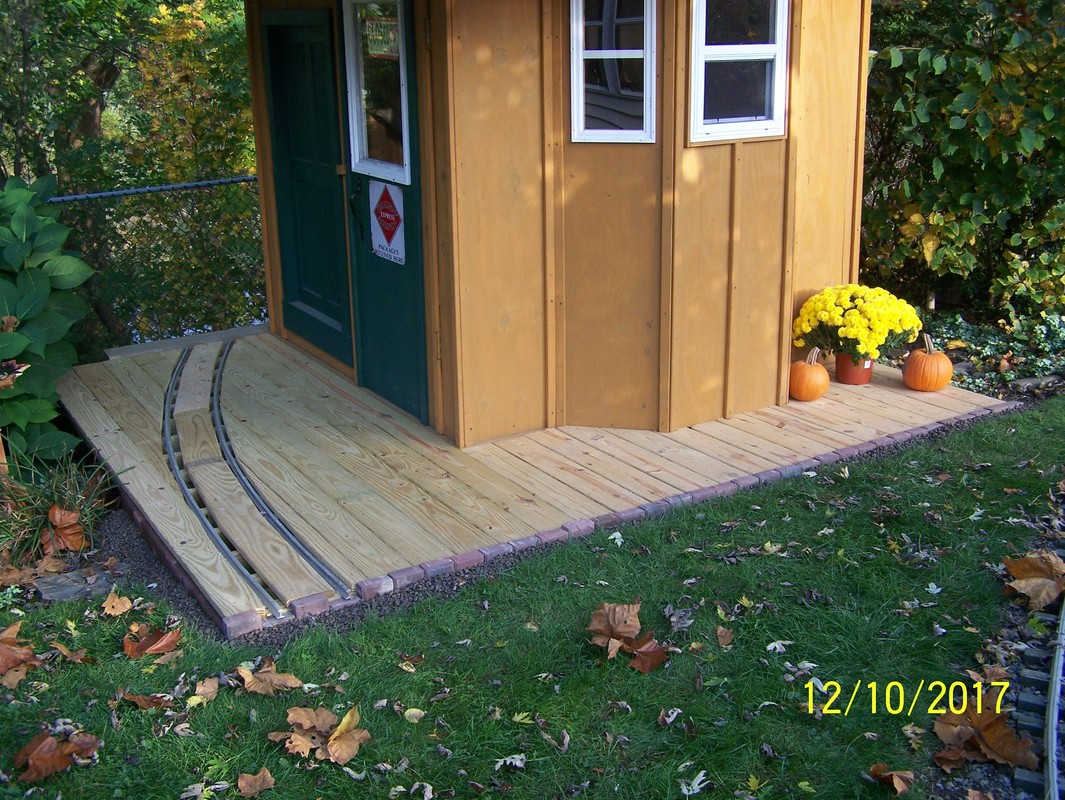
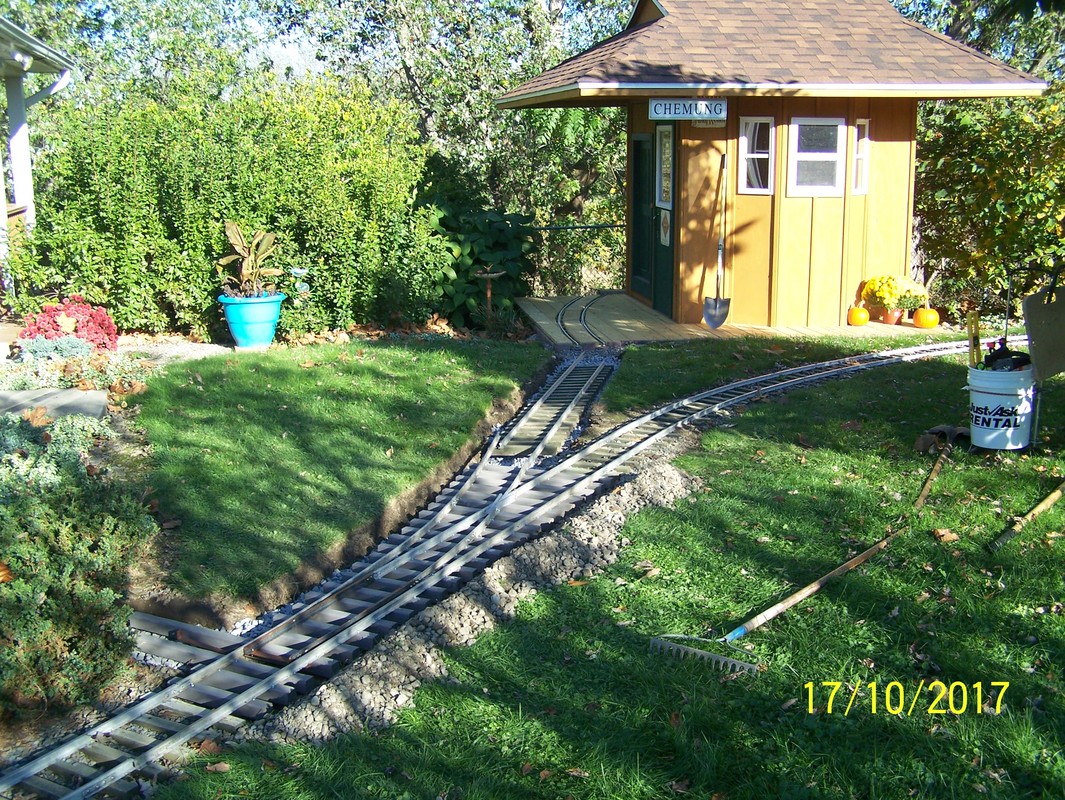
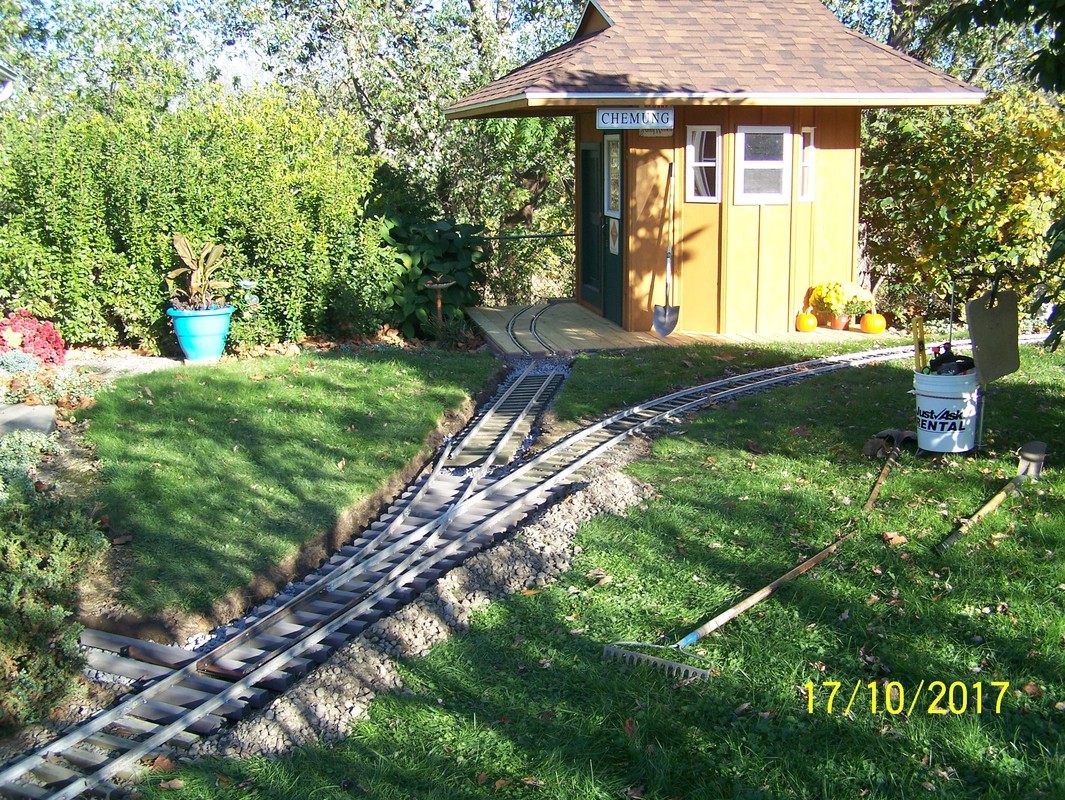
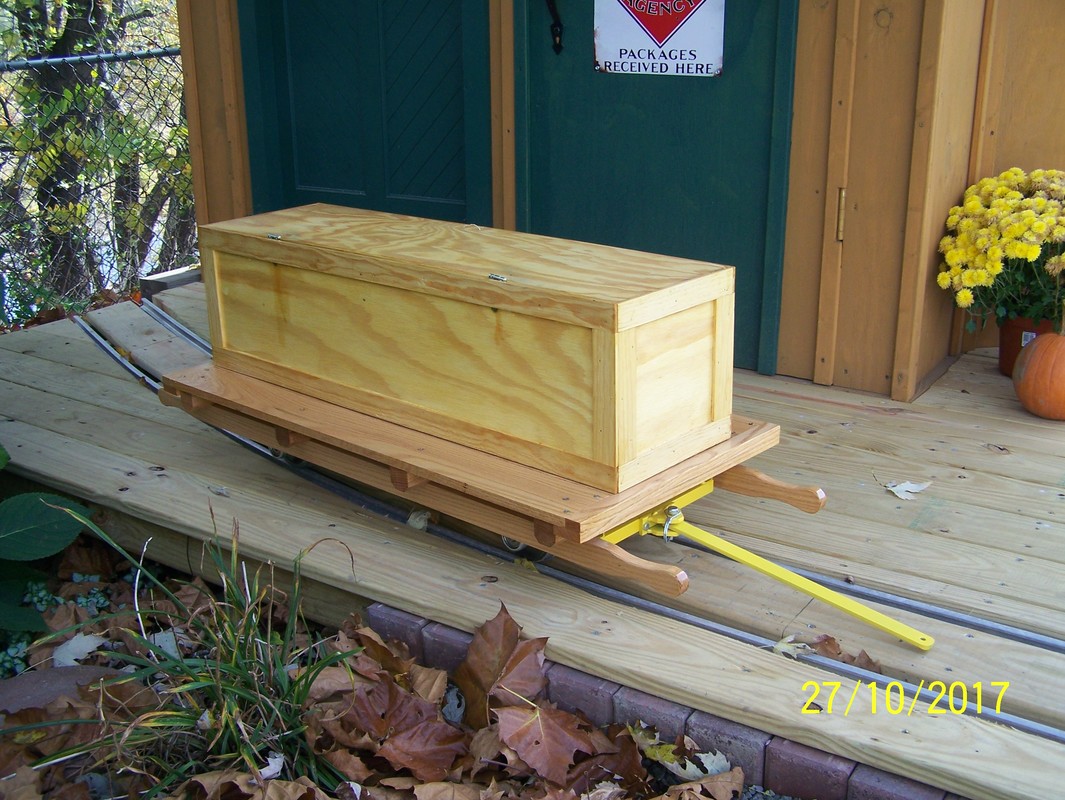
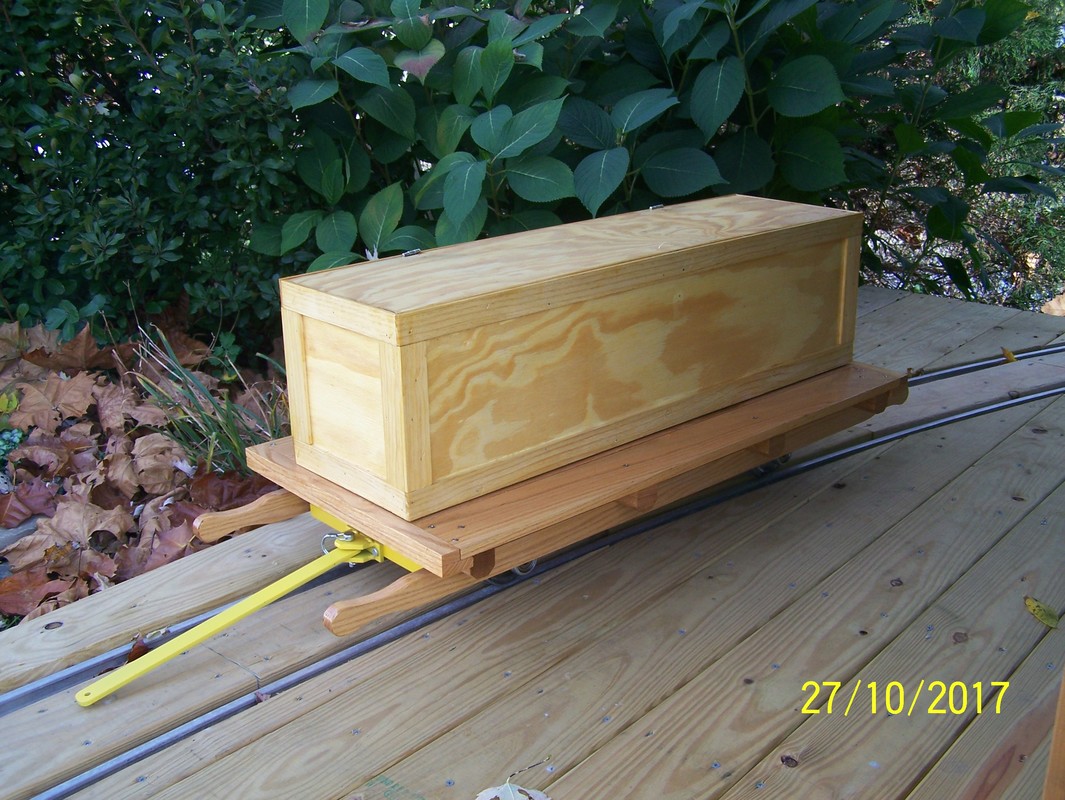
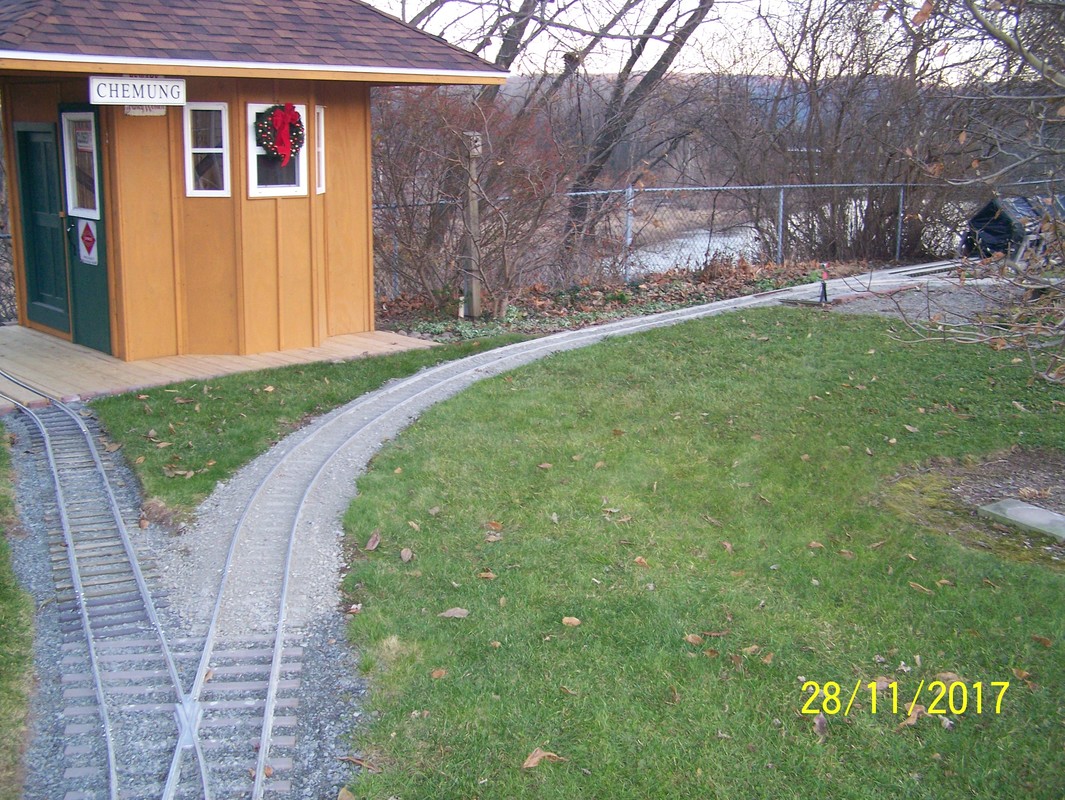
Sept, 2017. Wired up the hand held controller and the speed controller. Tried it out with a drill battery and then on the Mini GP9. Worked all OK. Installed it into the speeder body. Also built a box, ride on or tool storage, for the speeder work car and started to build the deck on the station shed. Oh and got a new sign for the station shed, "Railway Express".


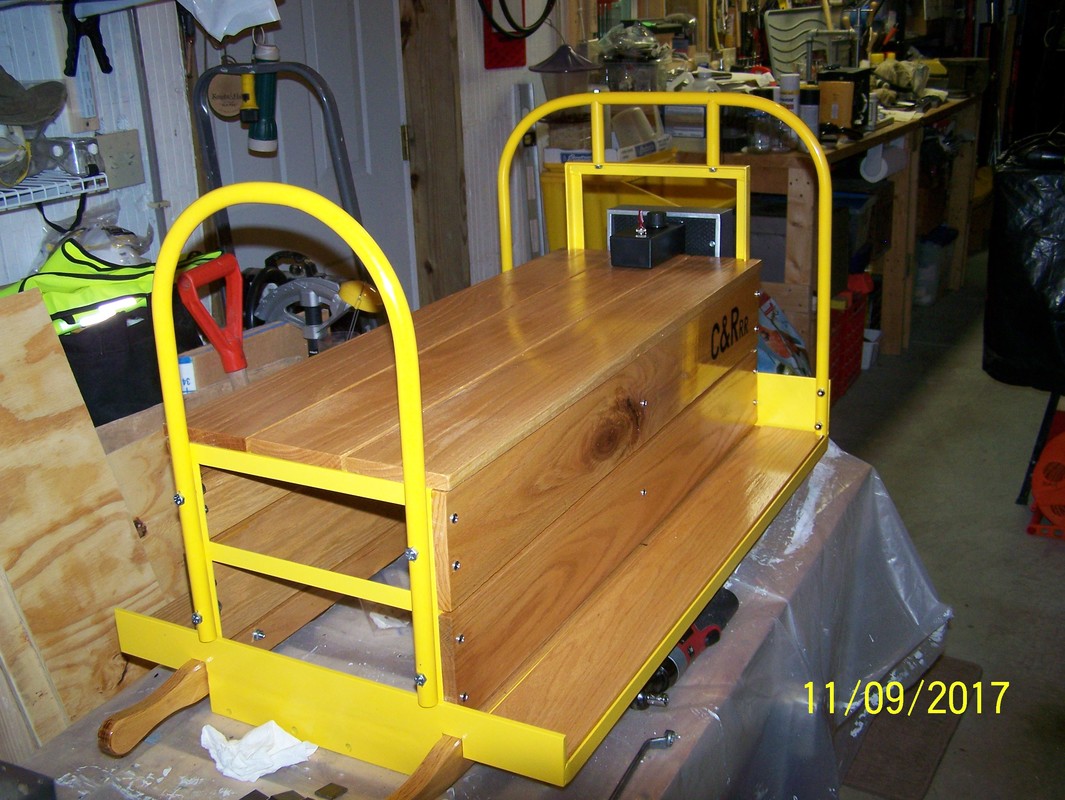
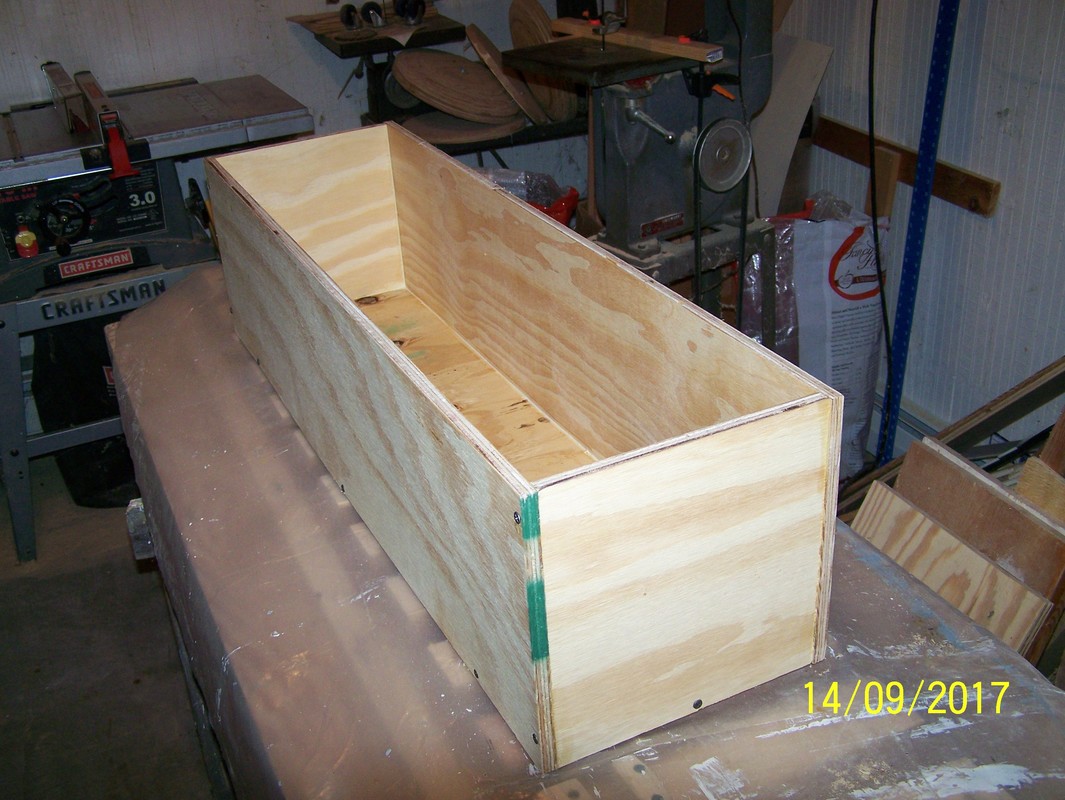
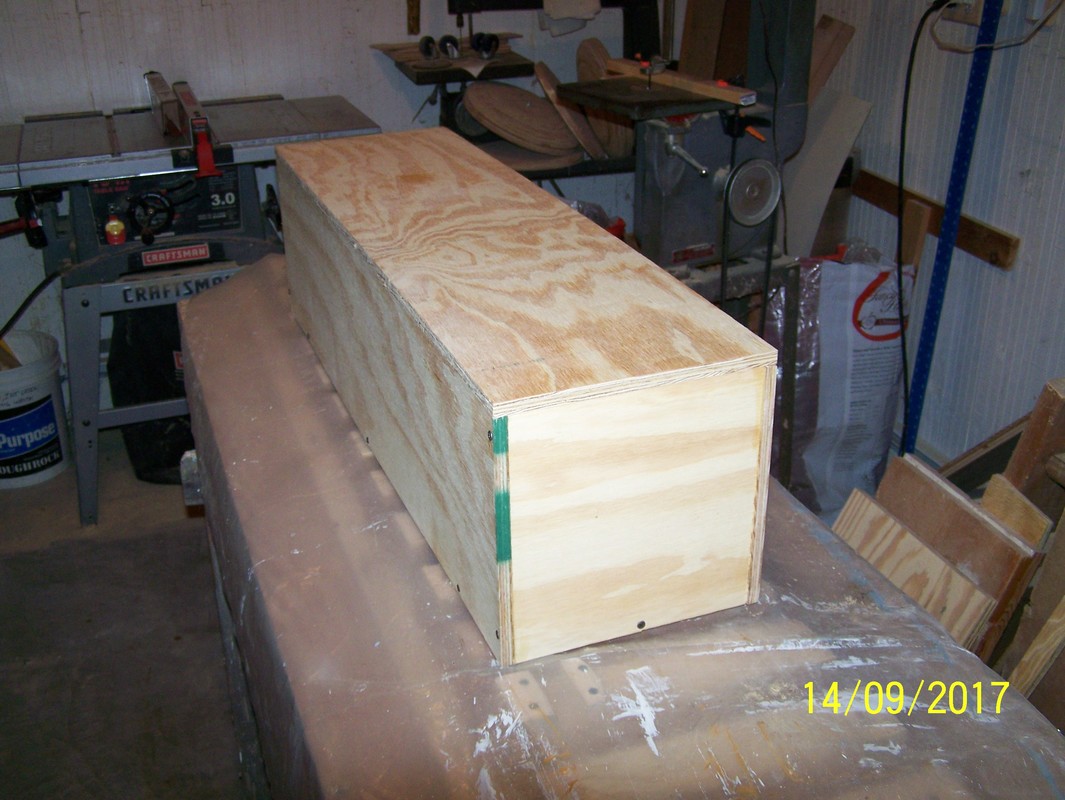
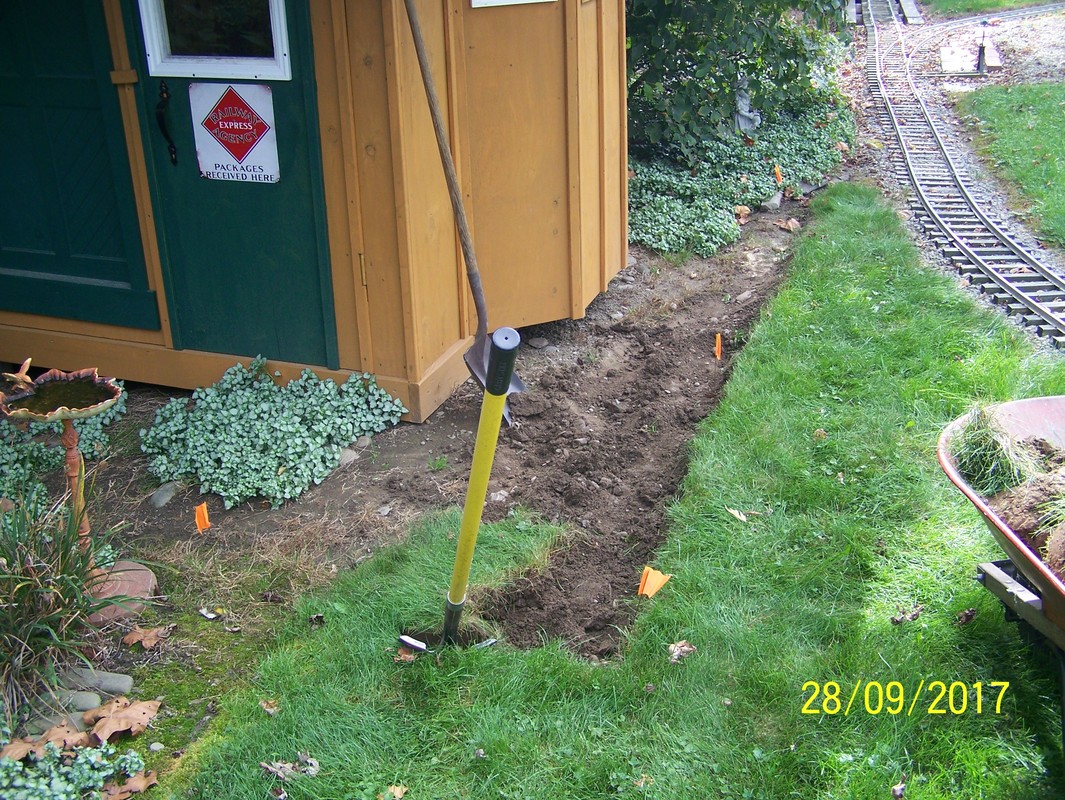
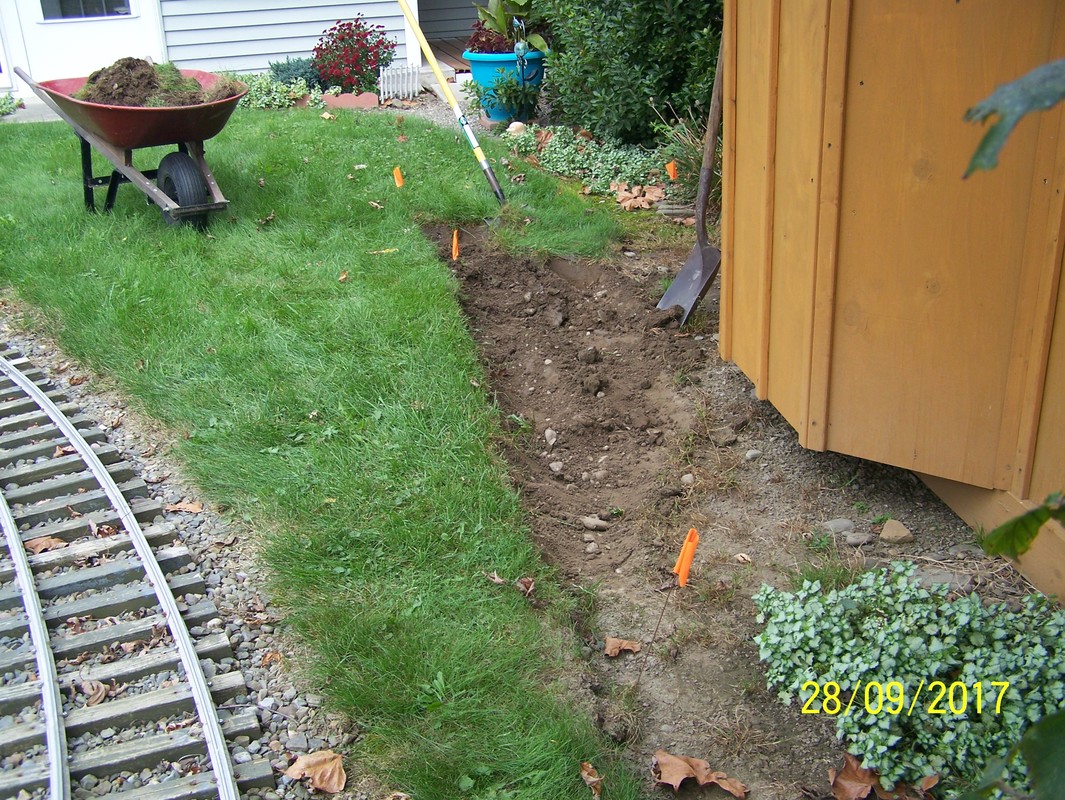
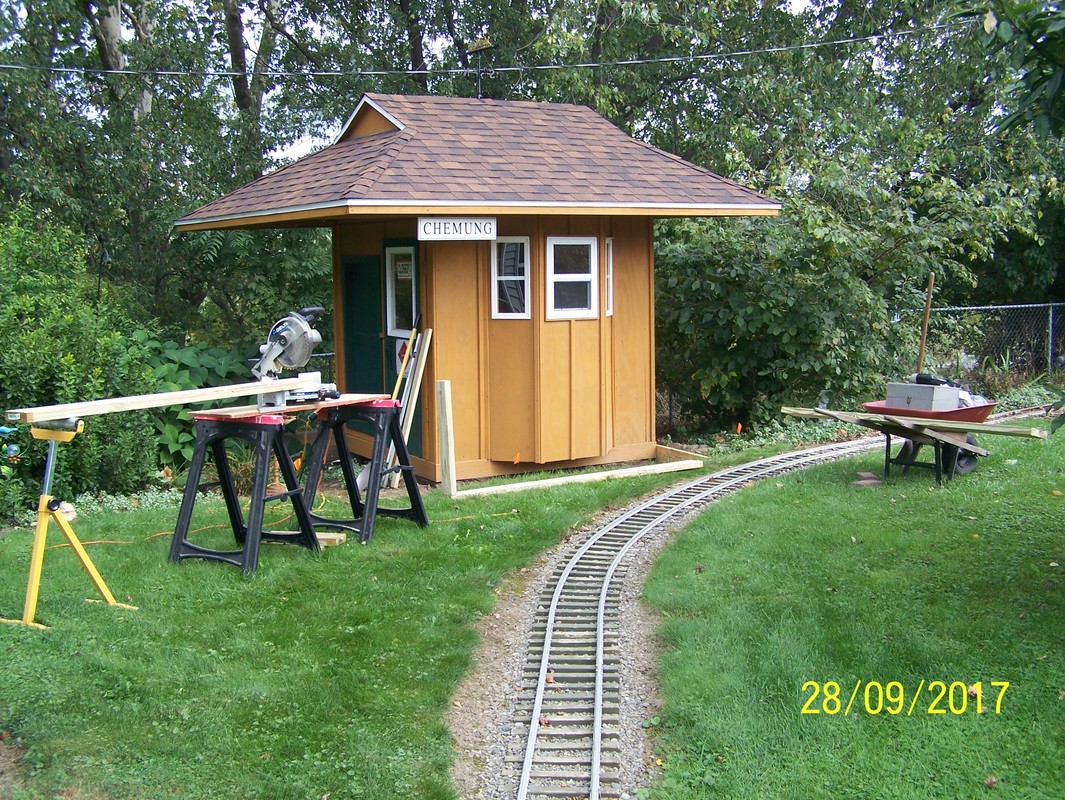

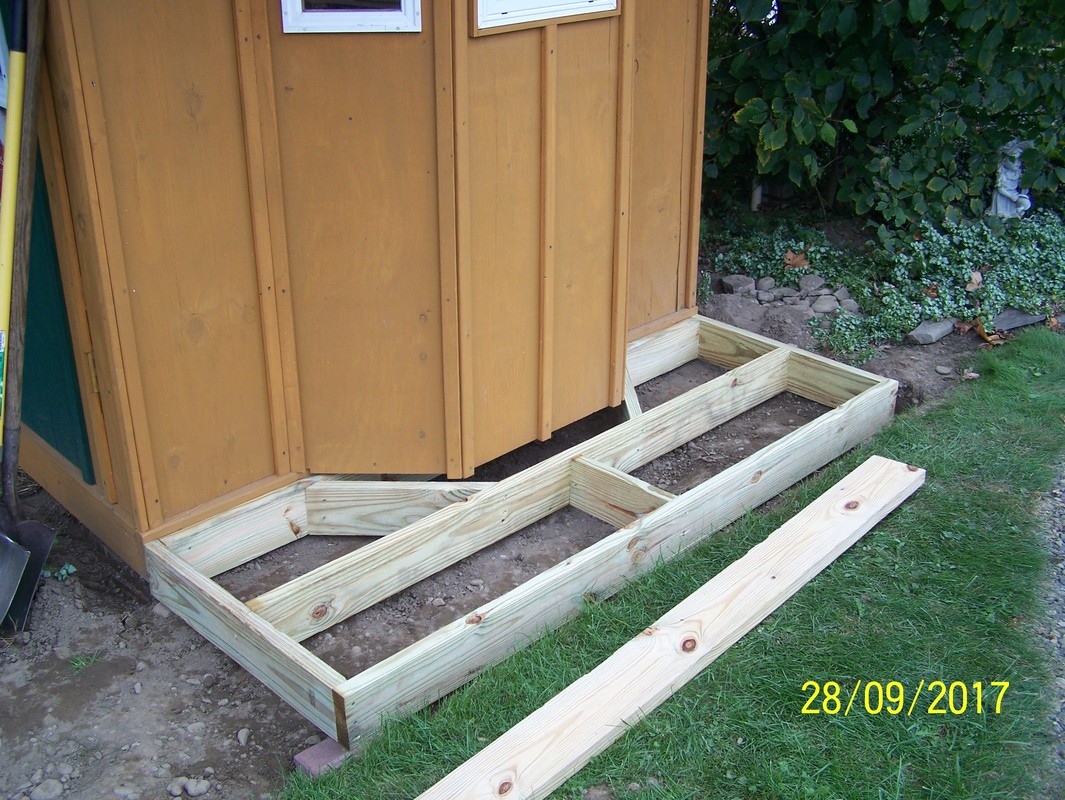
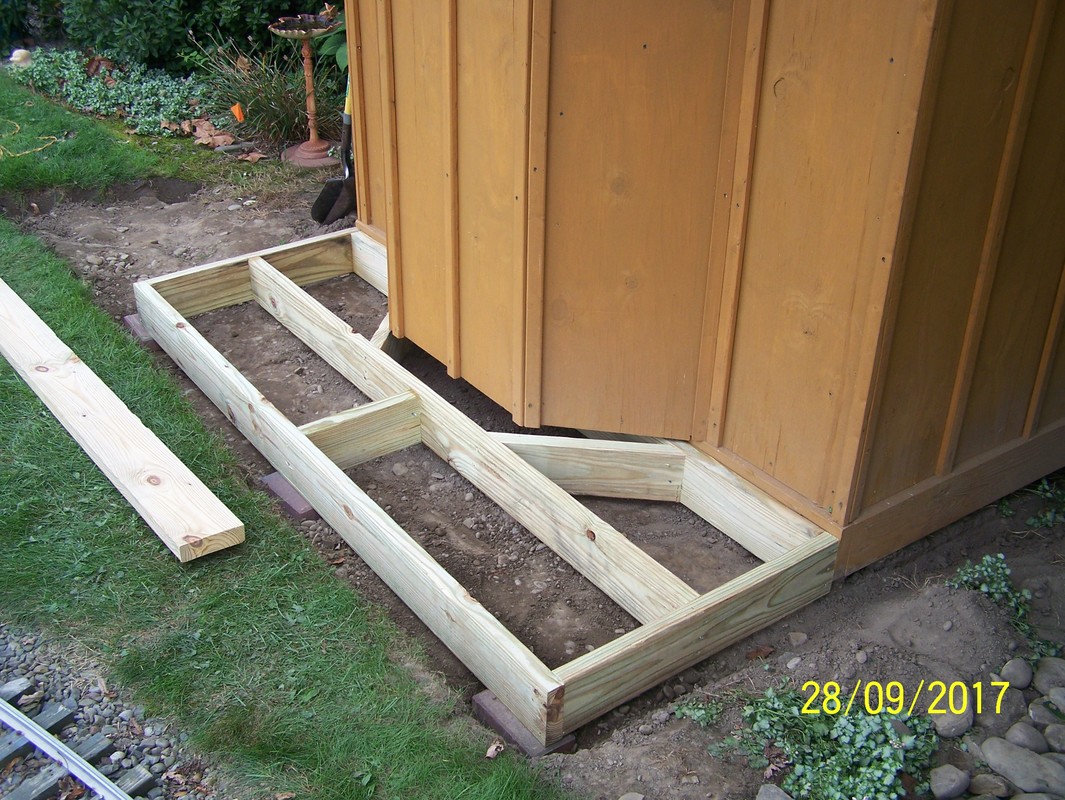
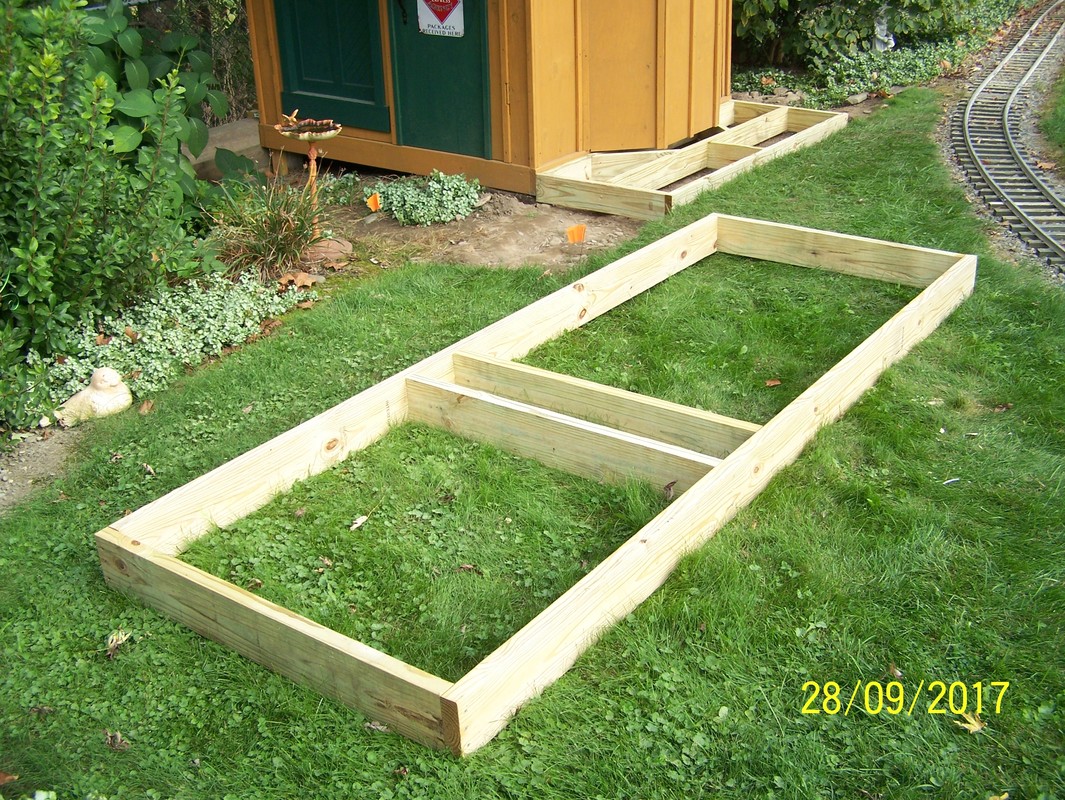
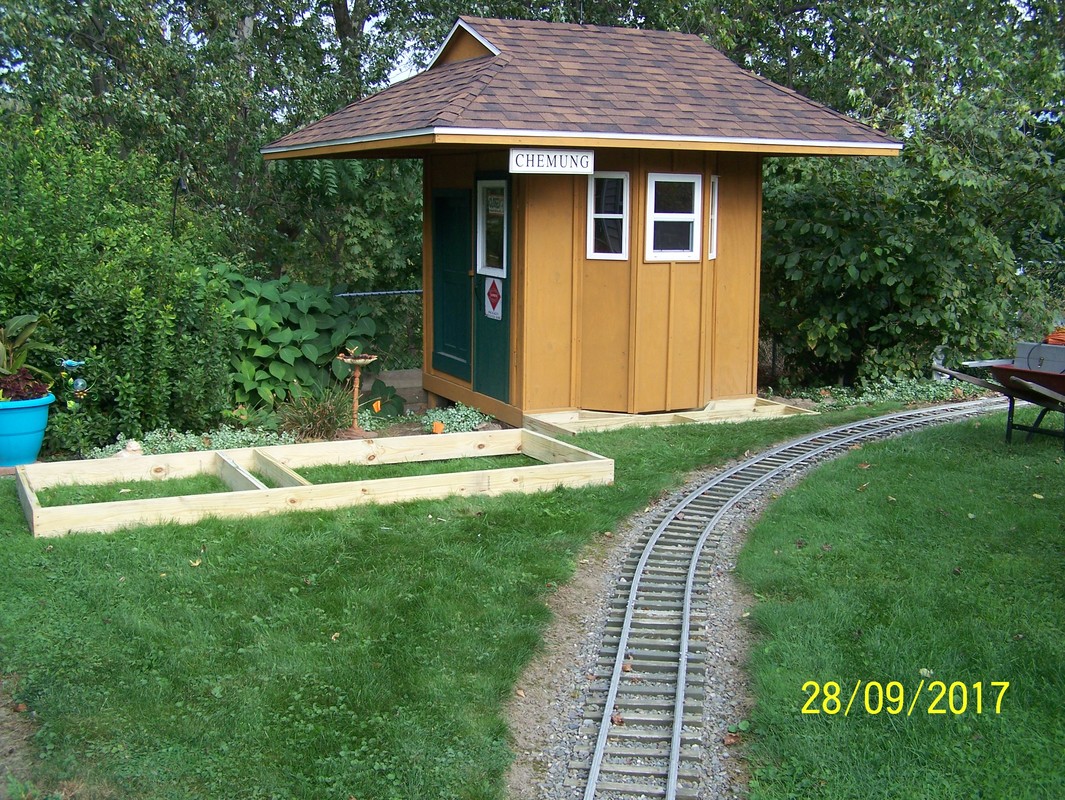
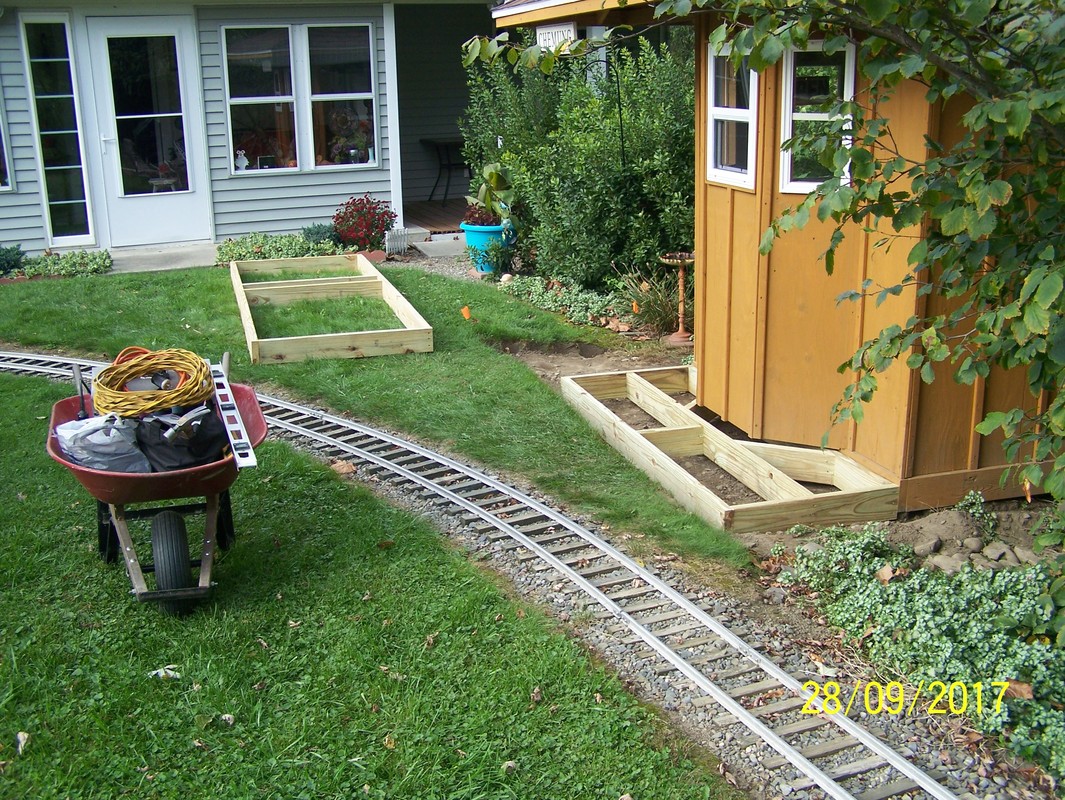
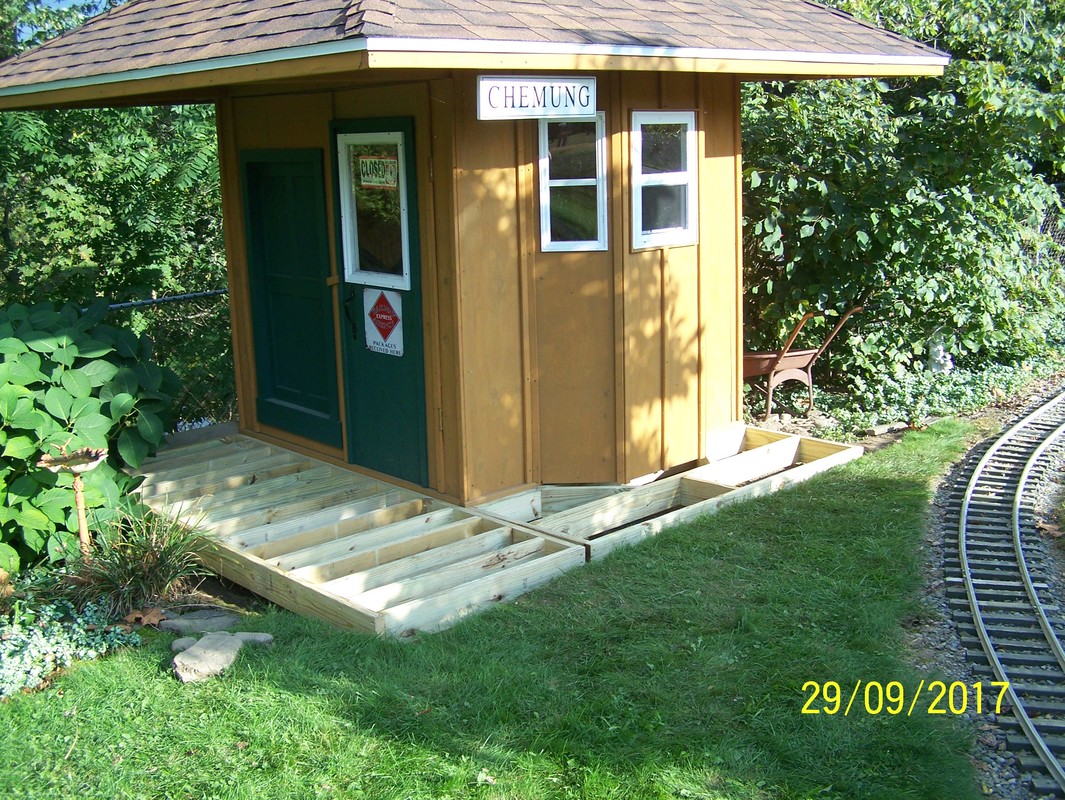
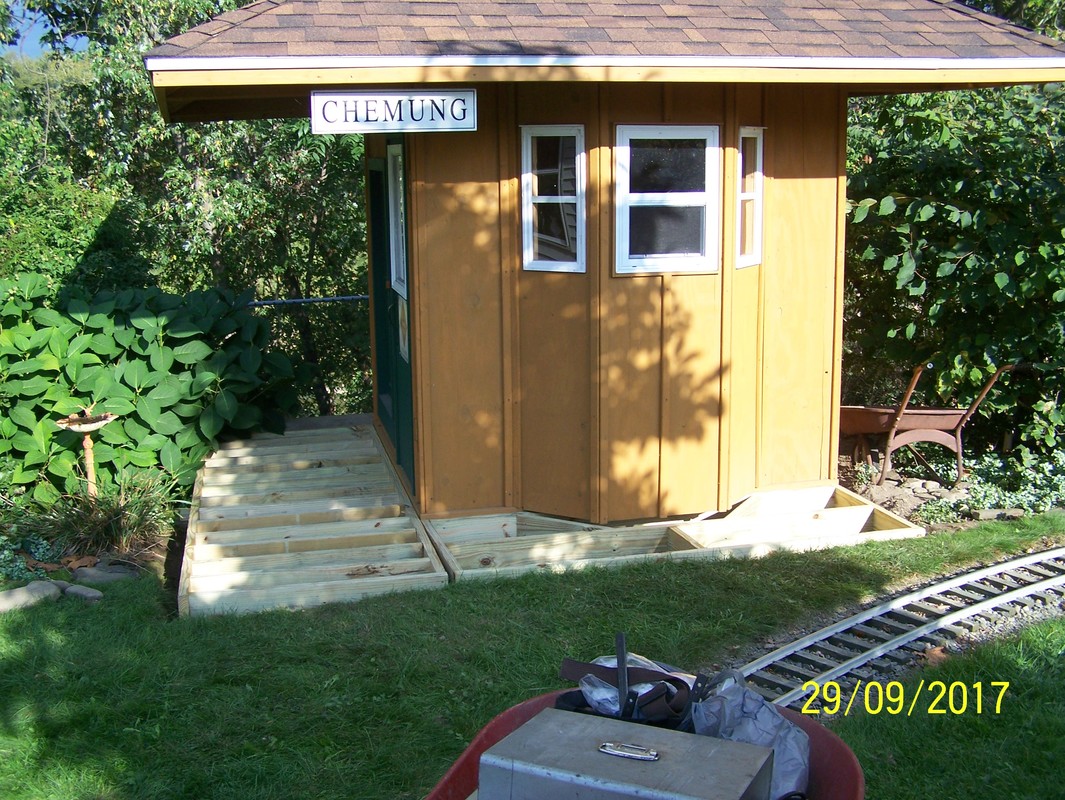
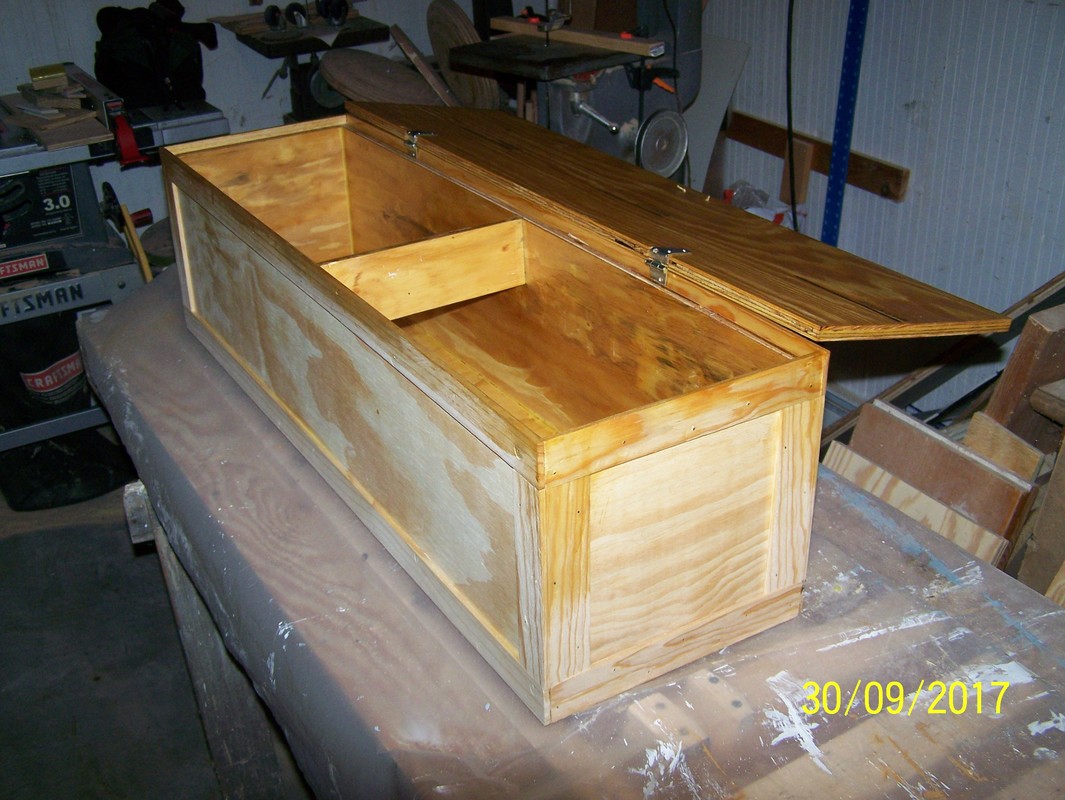
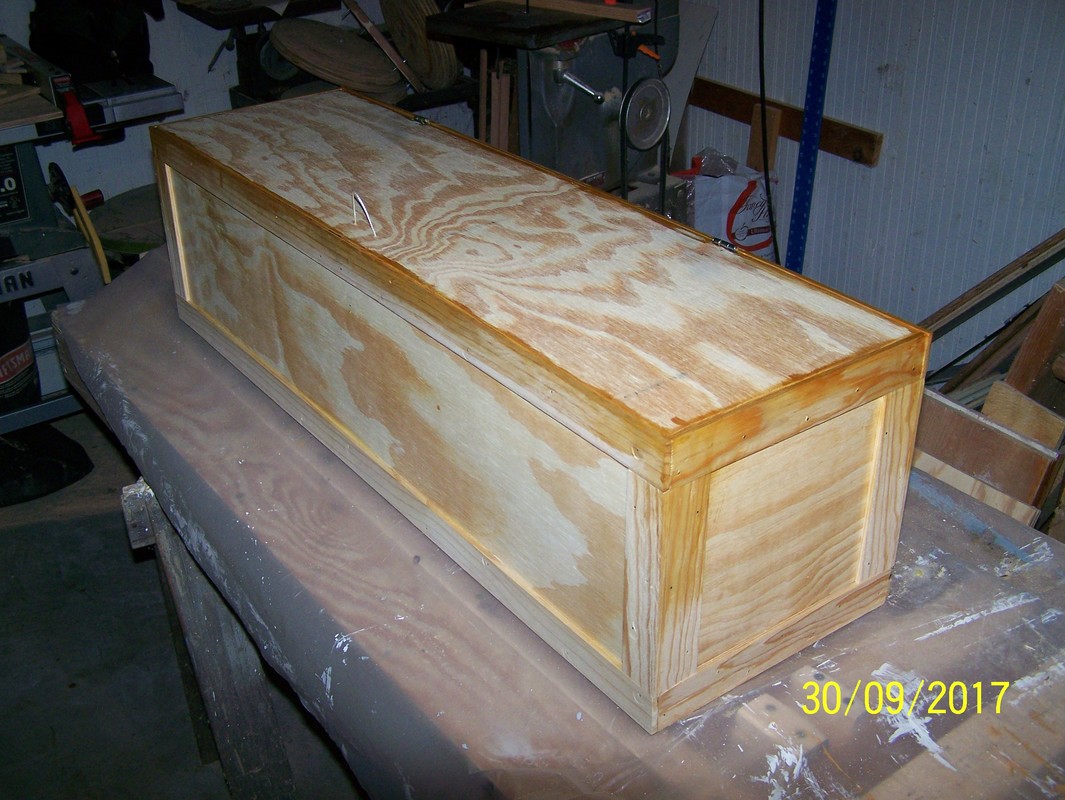
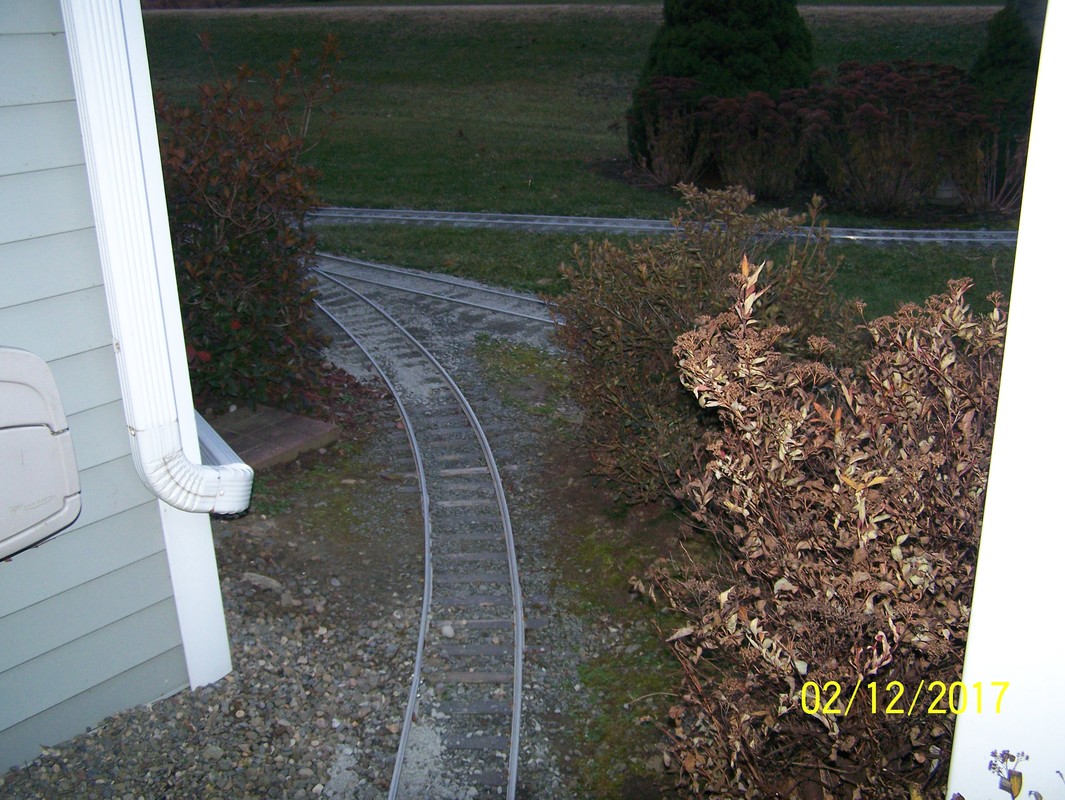
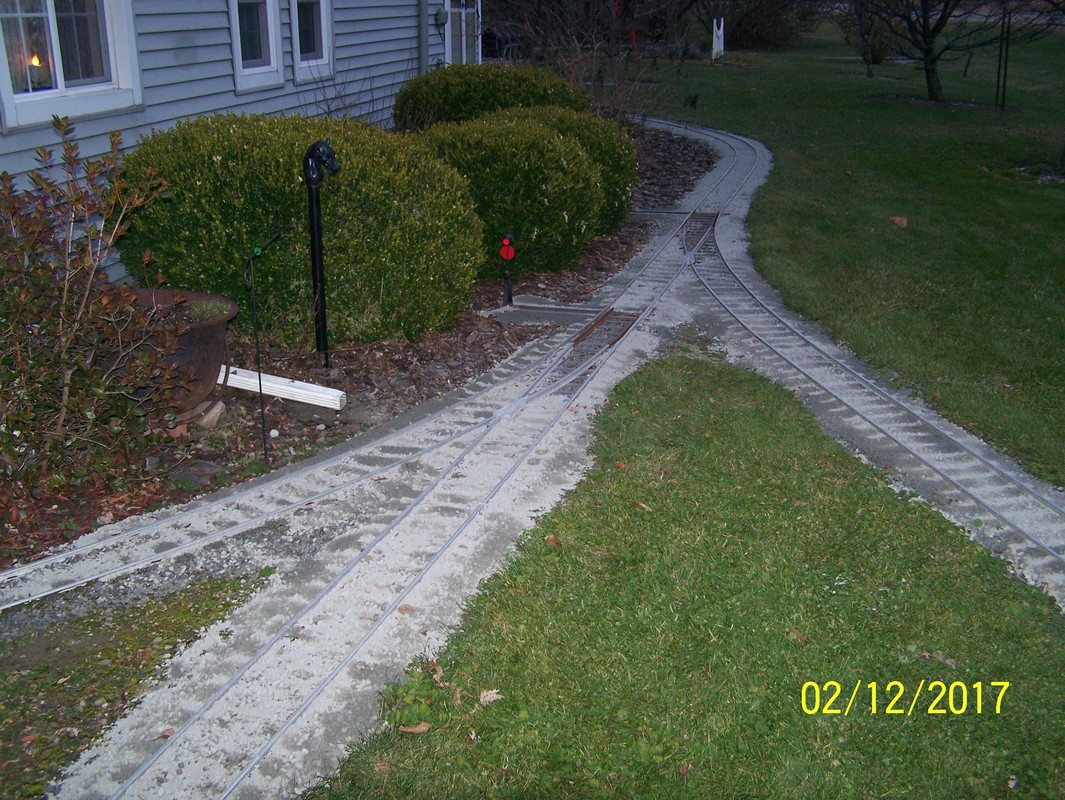
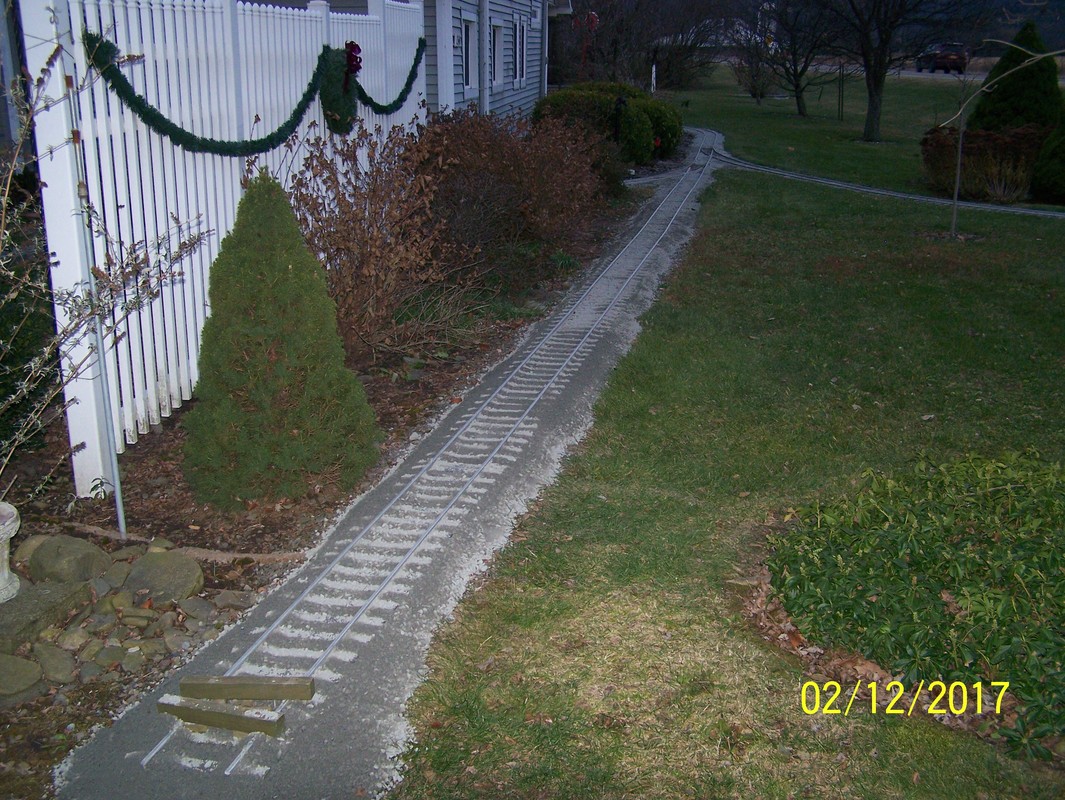
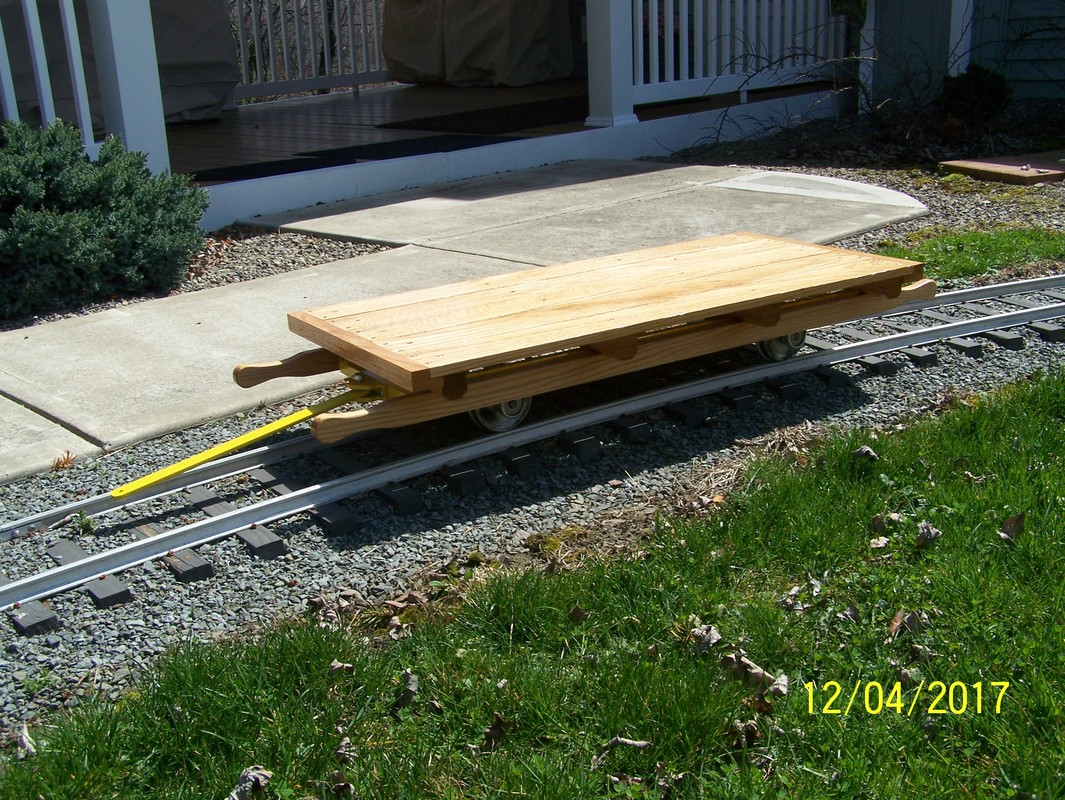
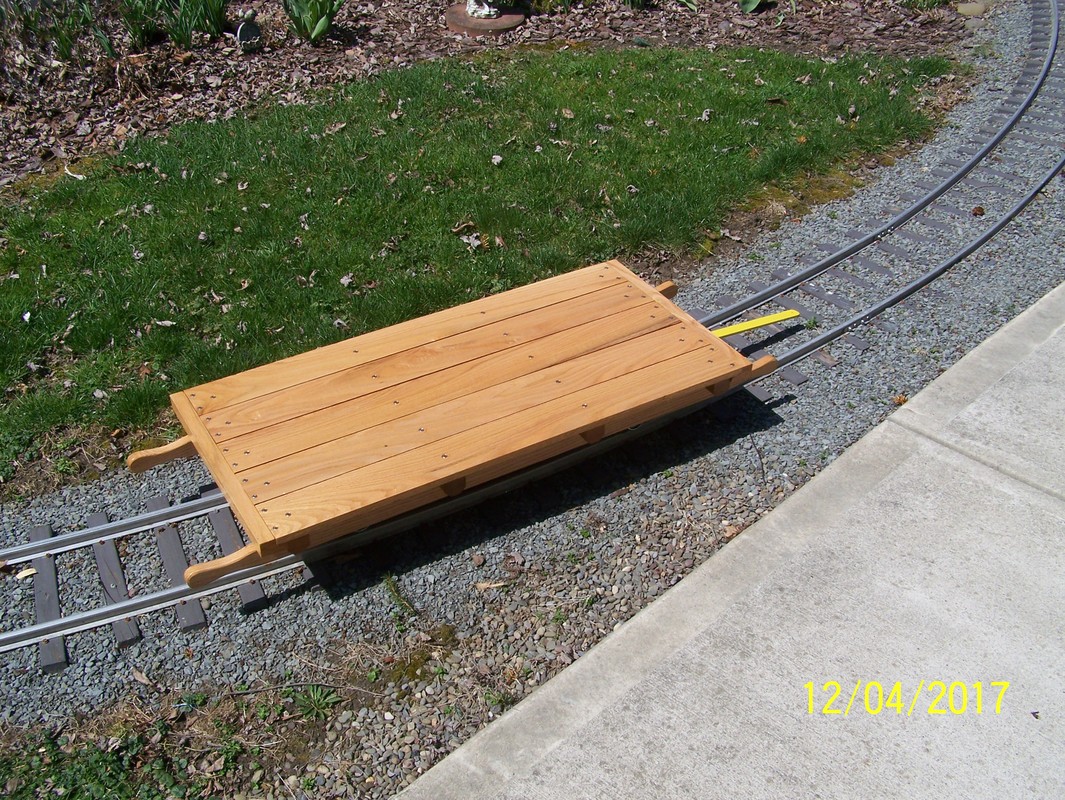
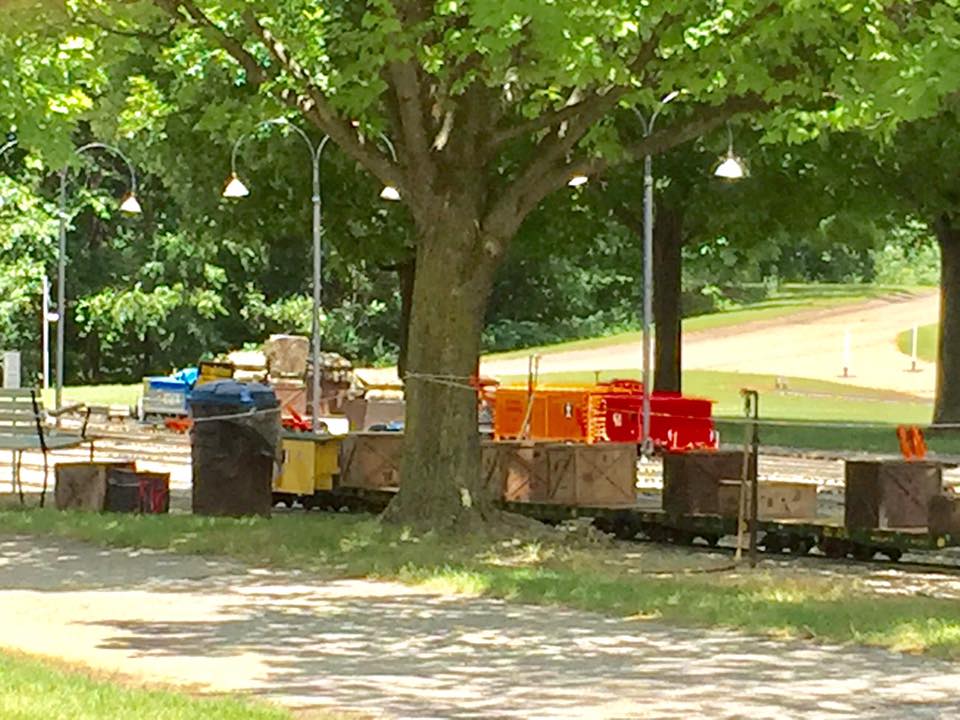
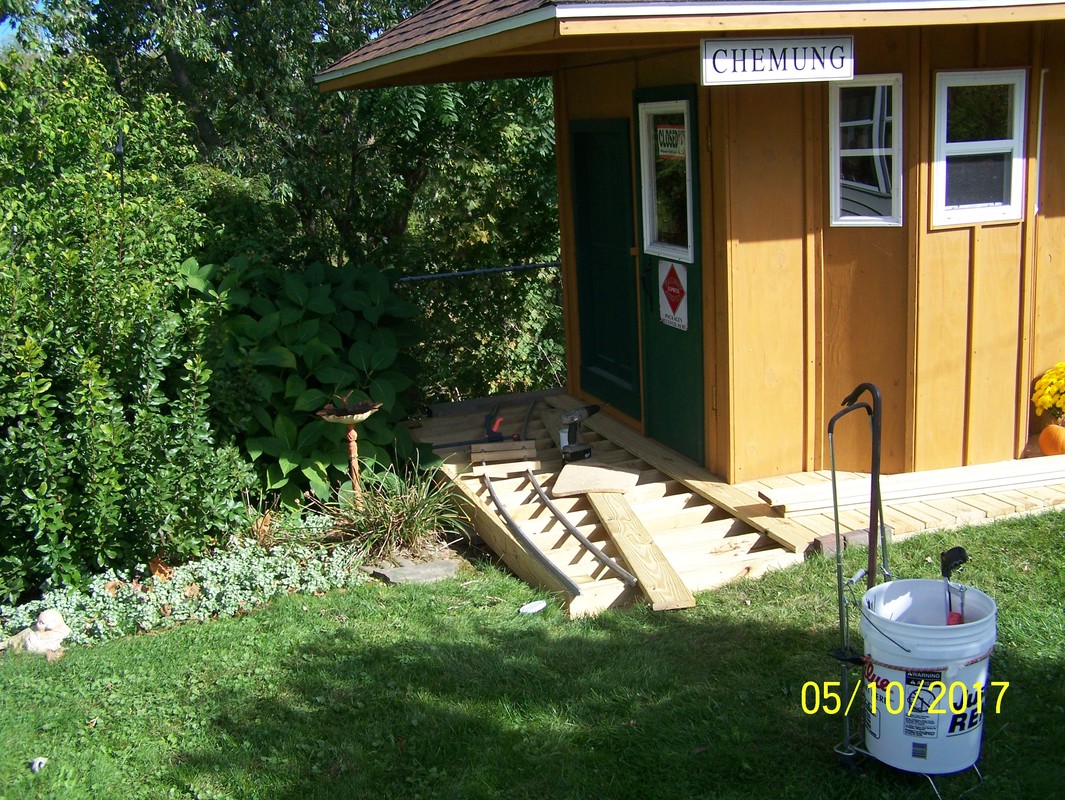
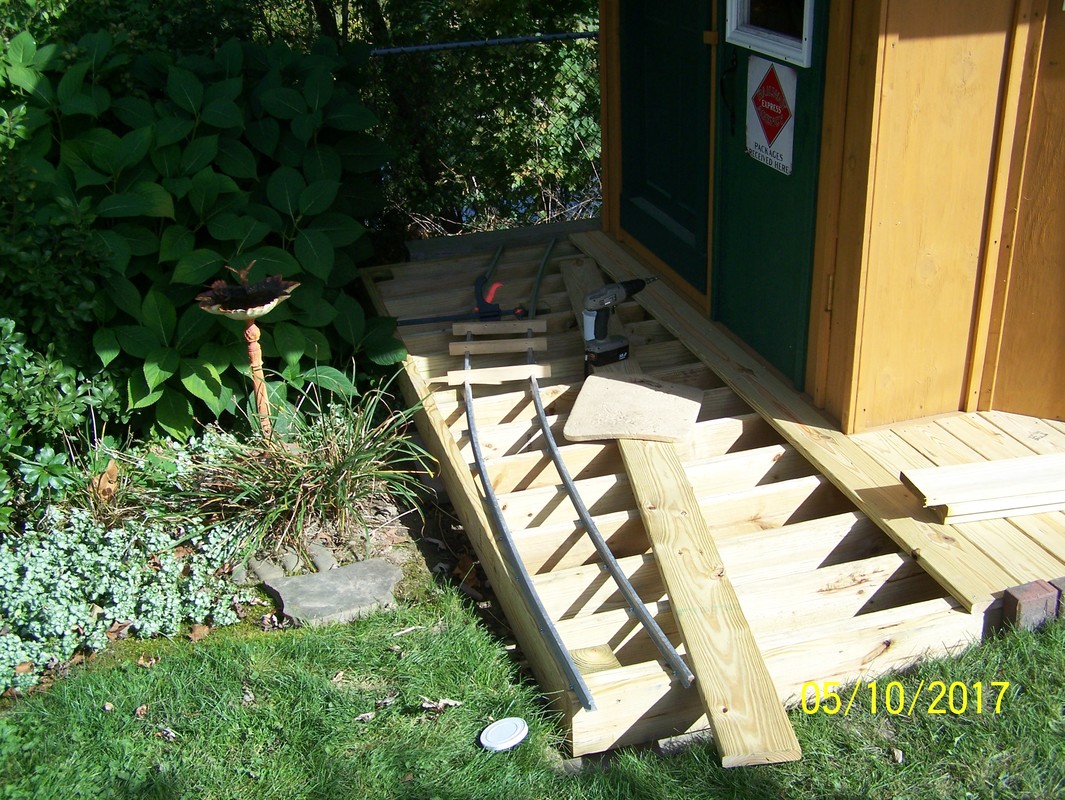
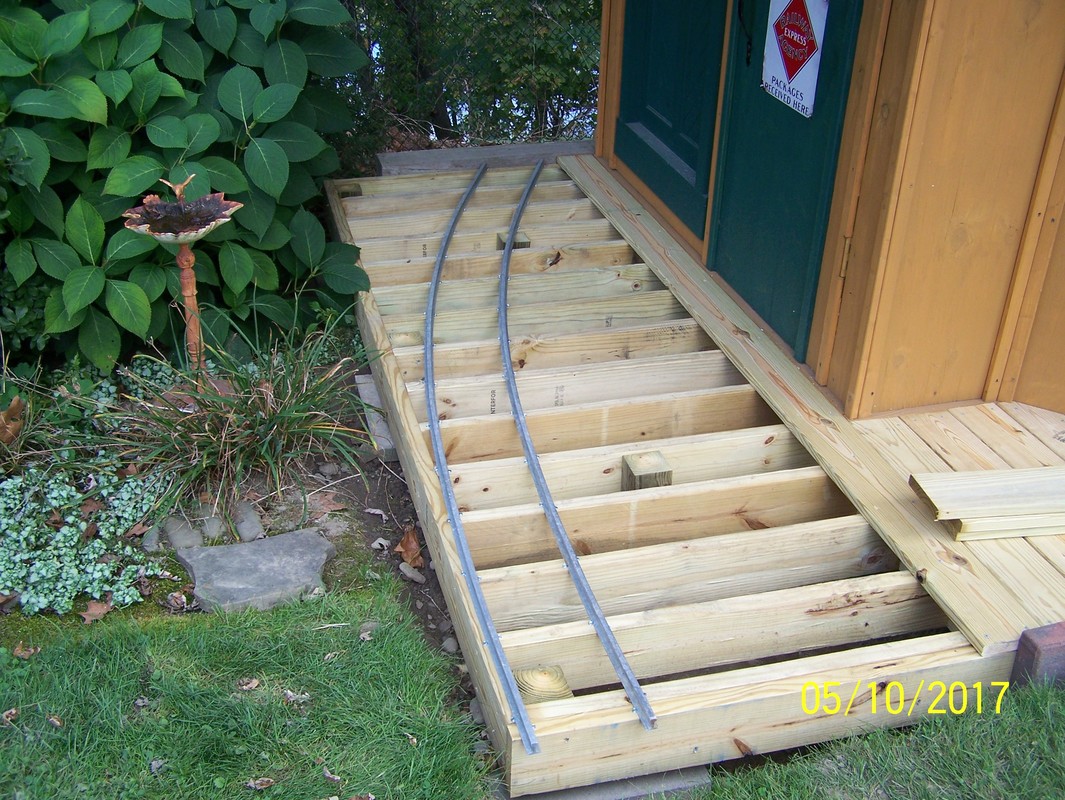
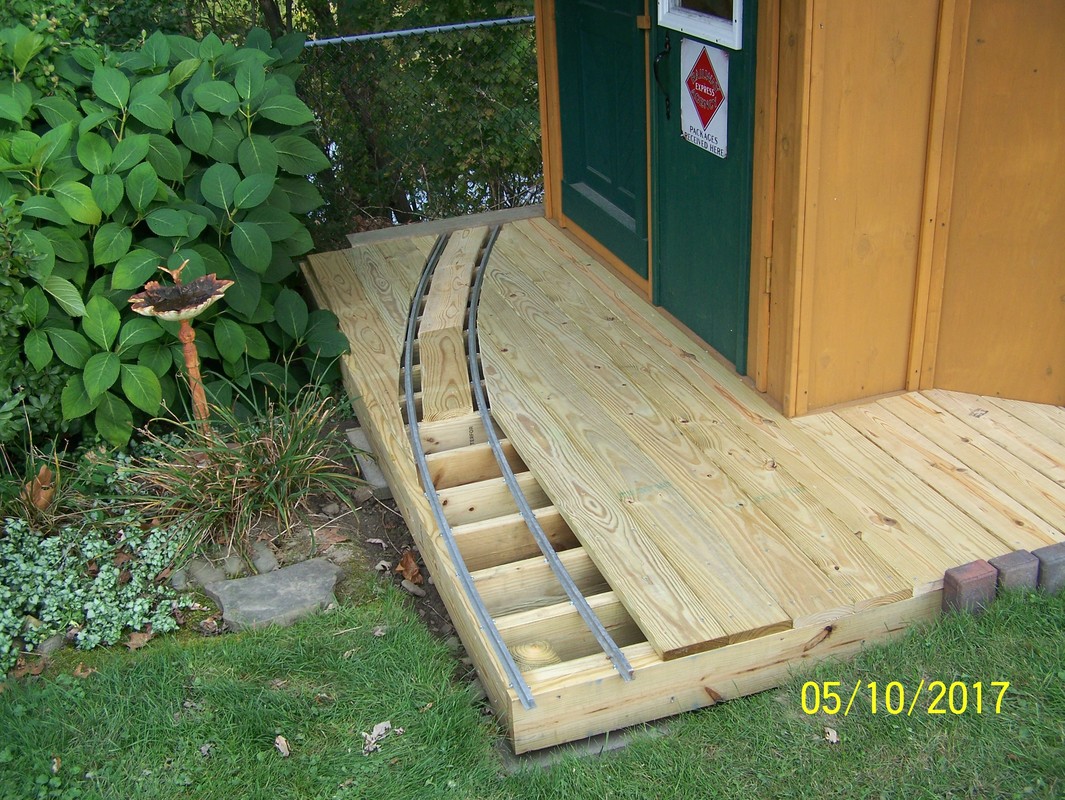
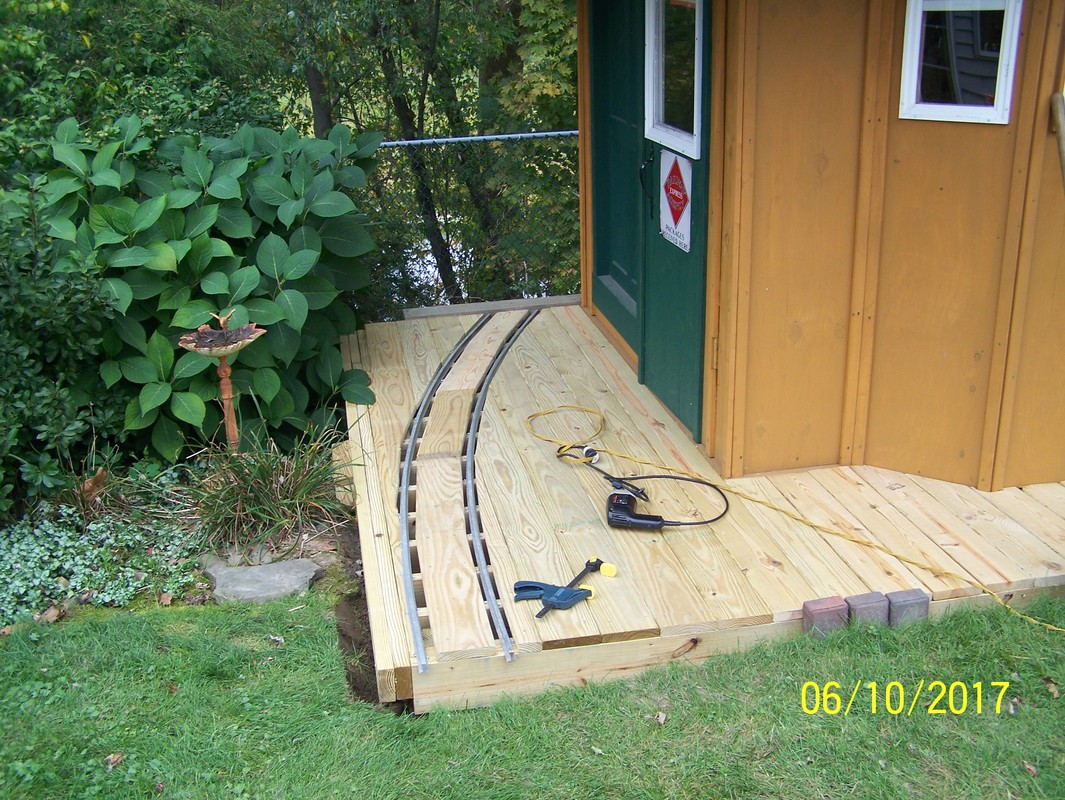
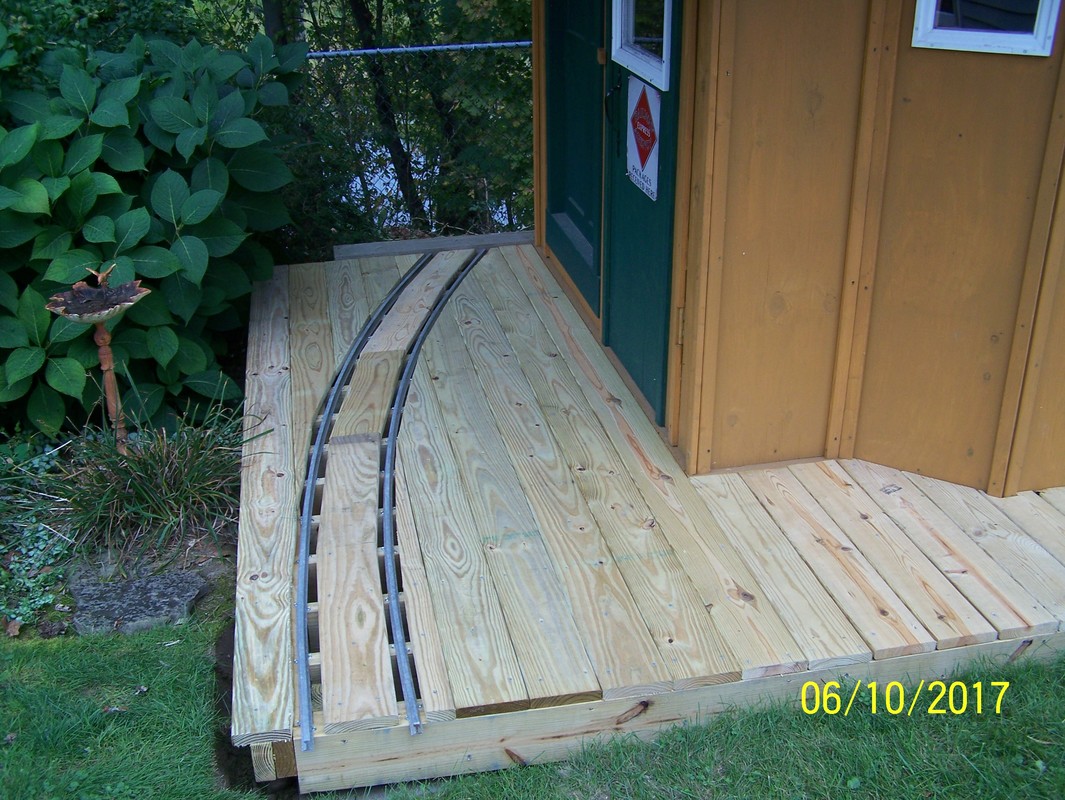
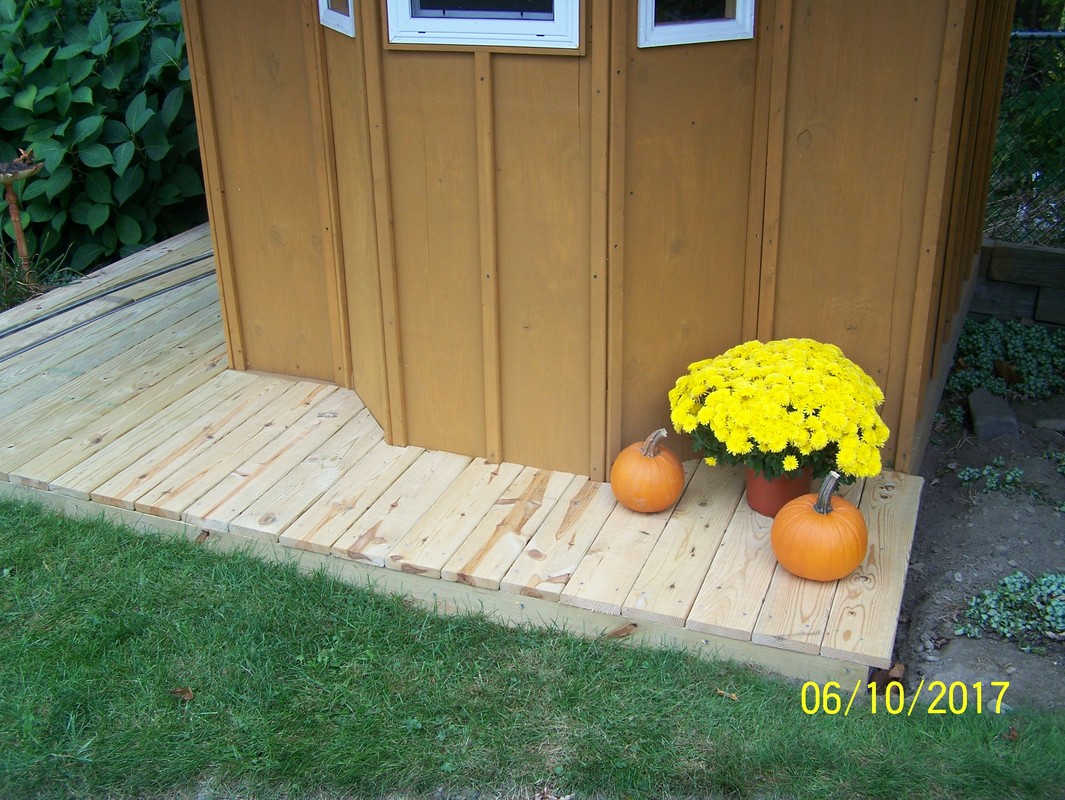
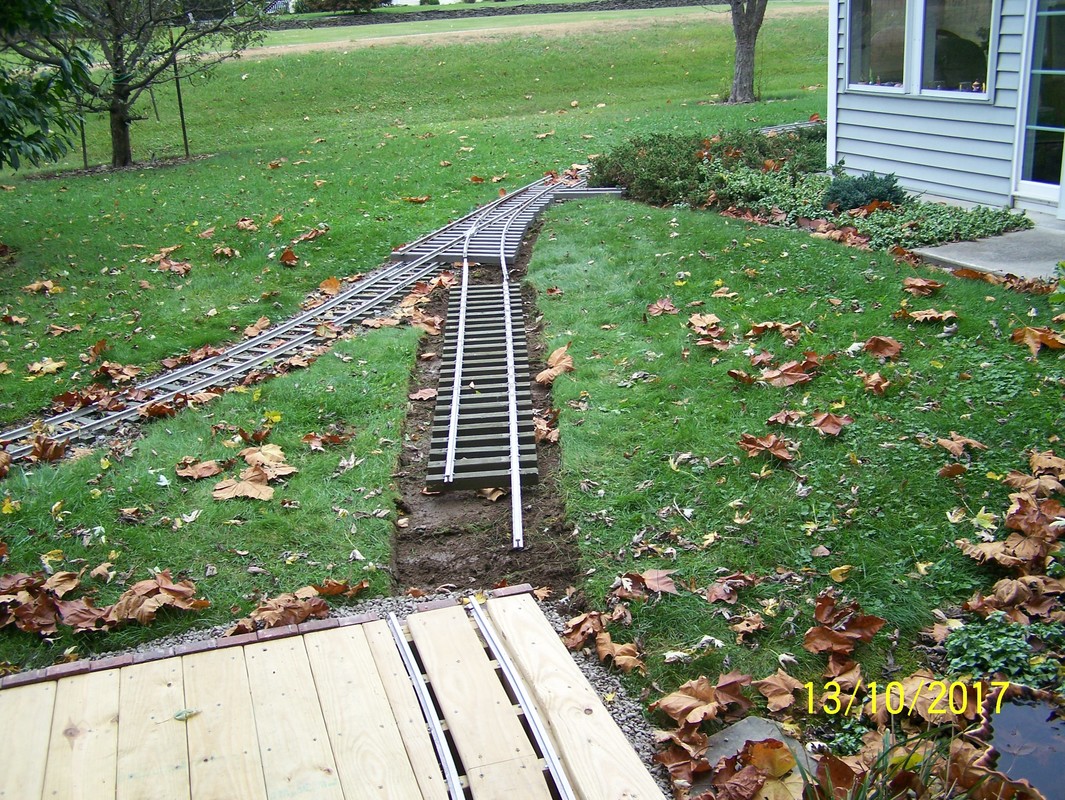
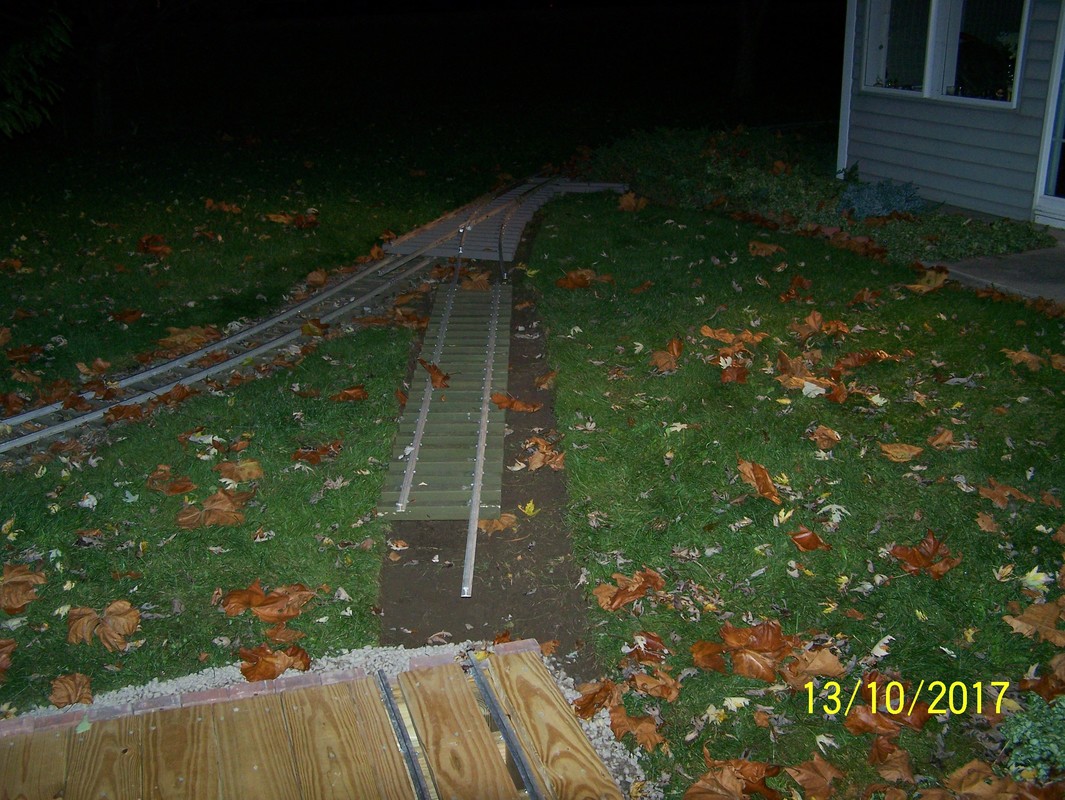
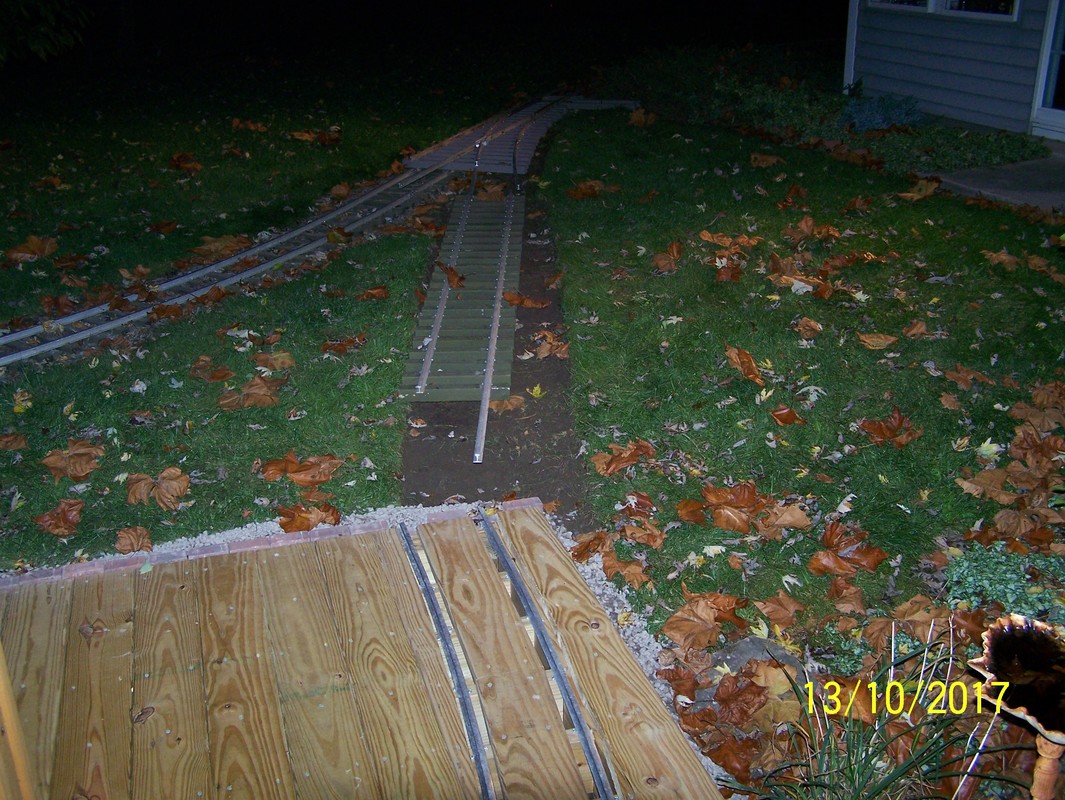
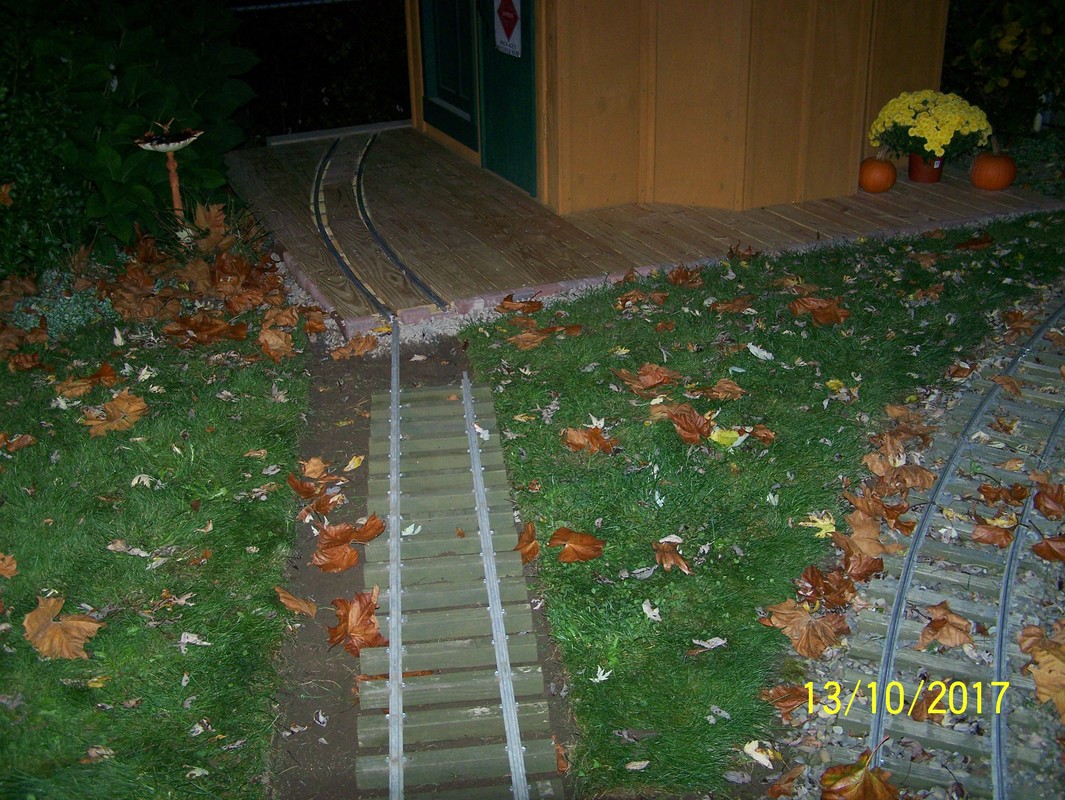
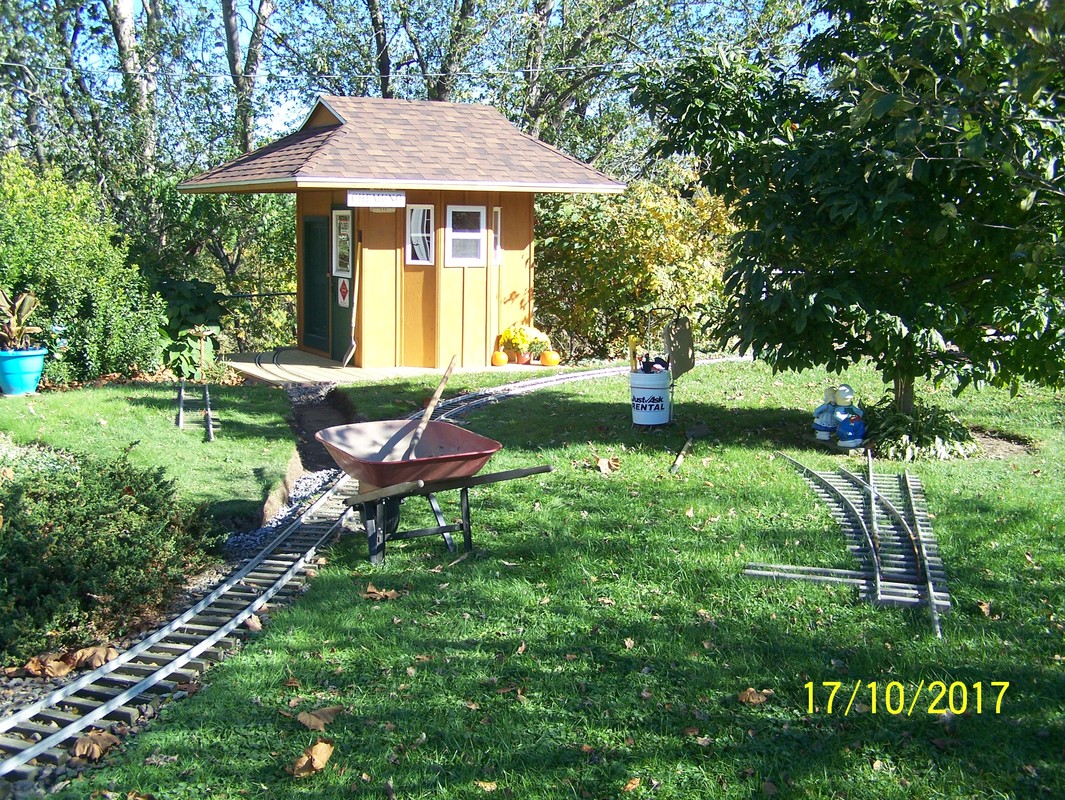
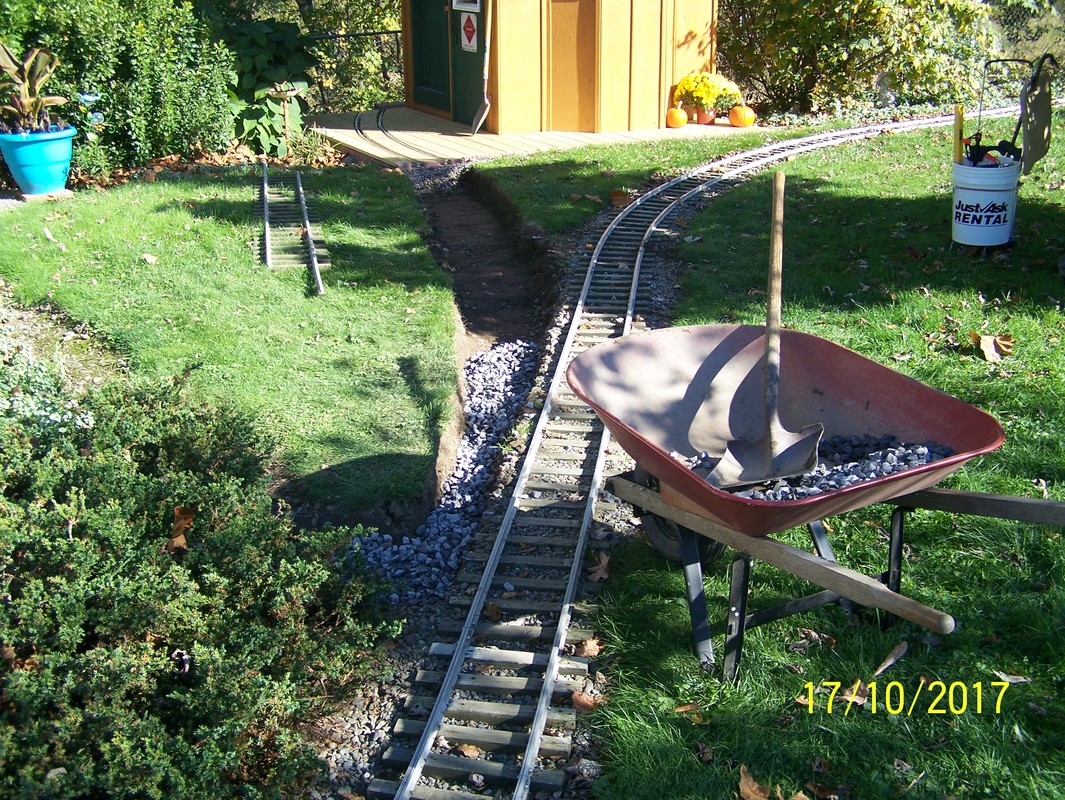
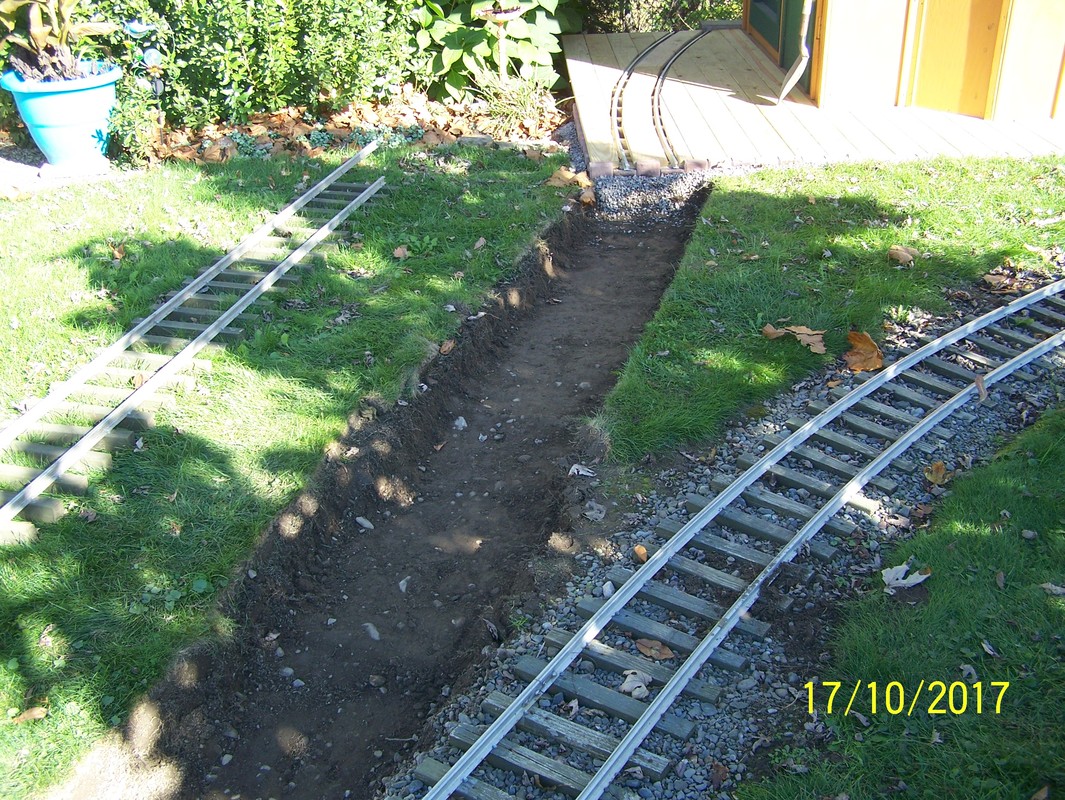
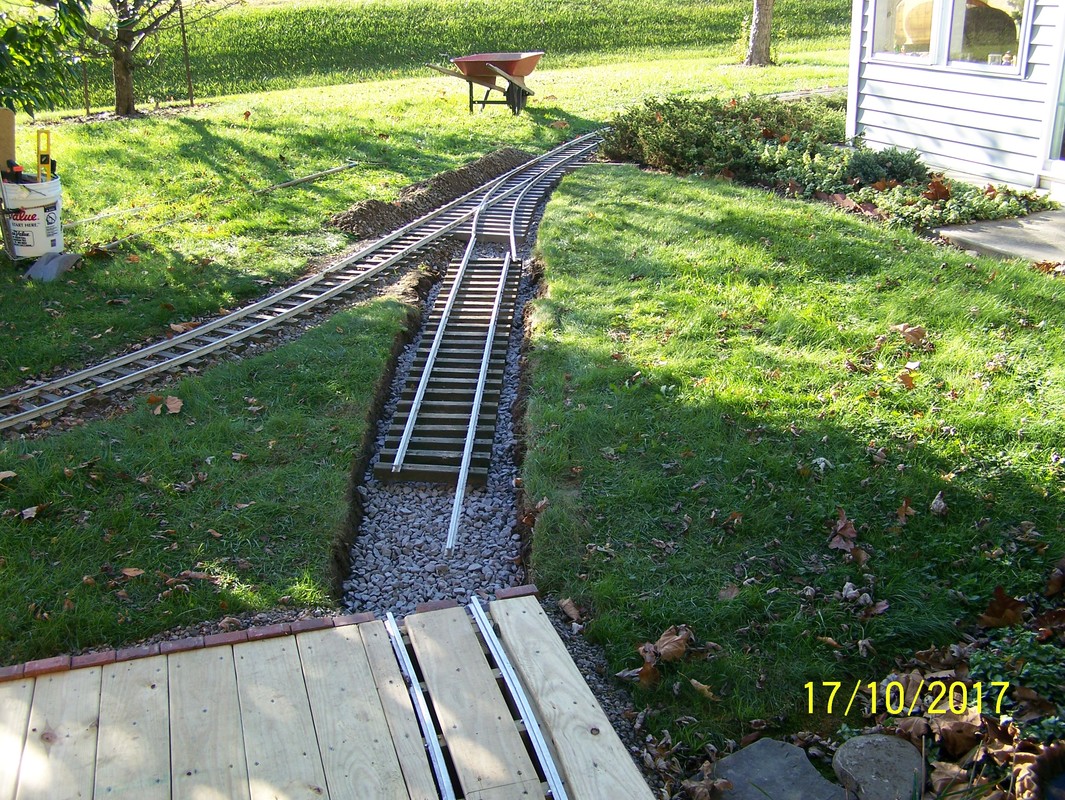
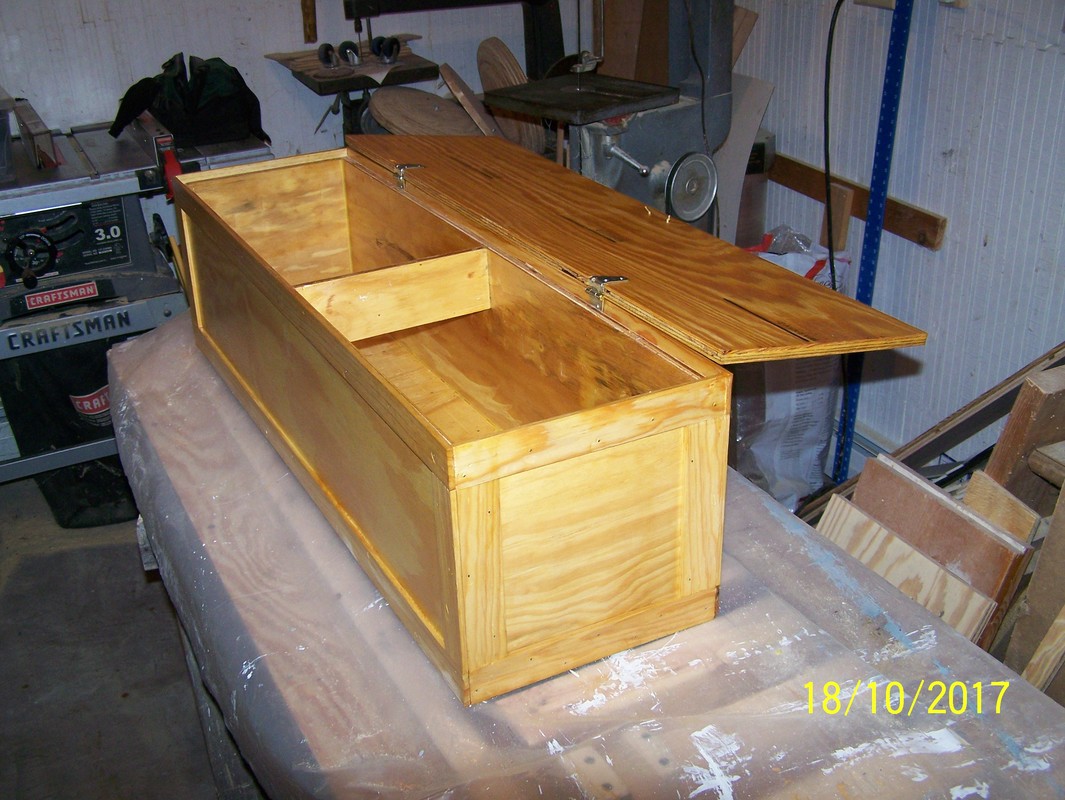
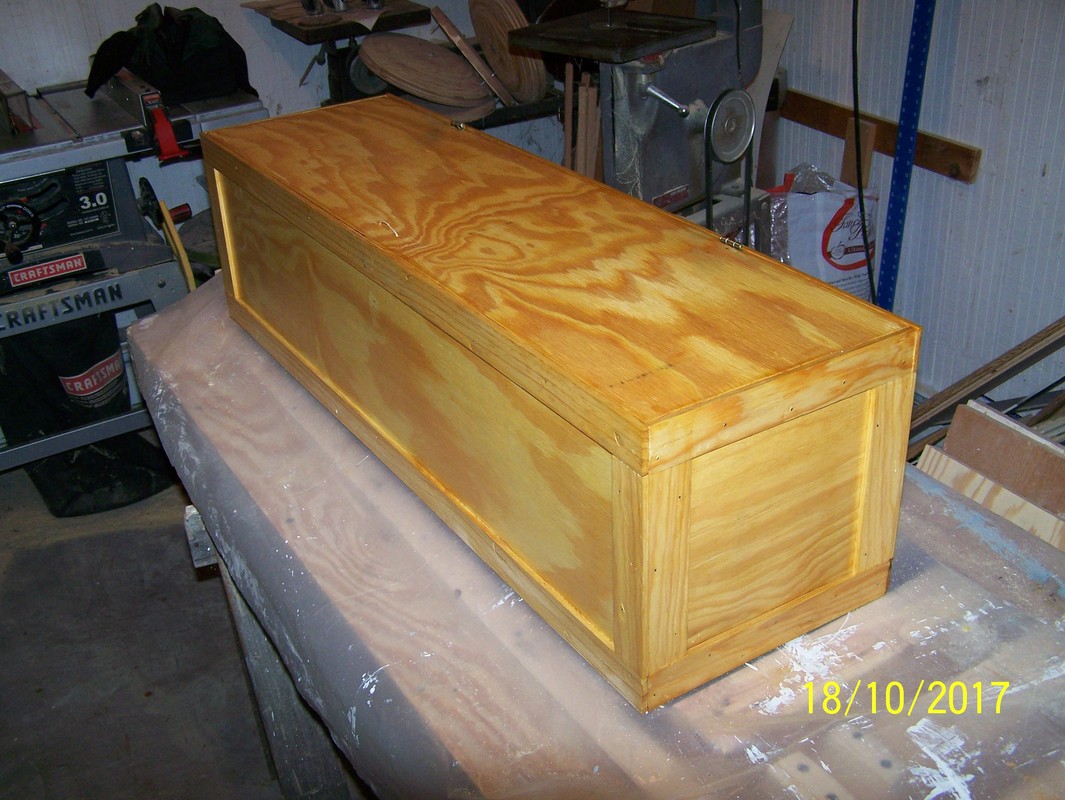
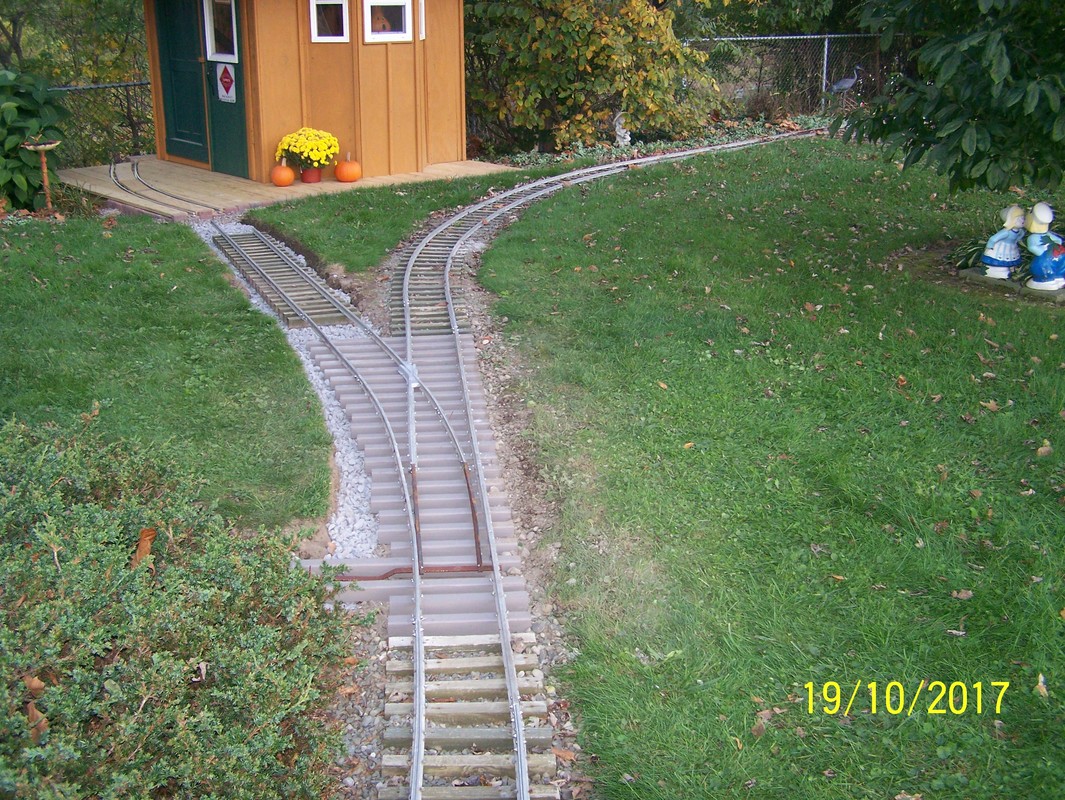
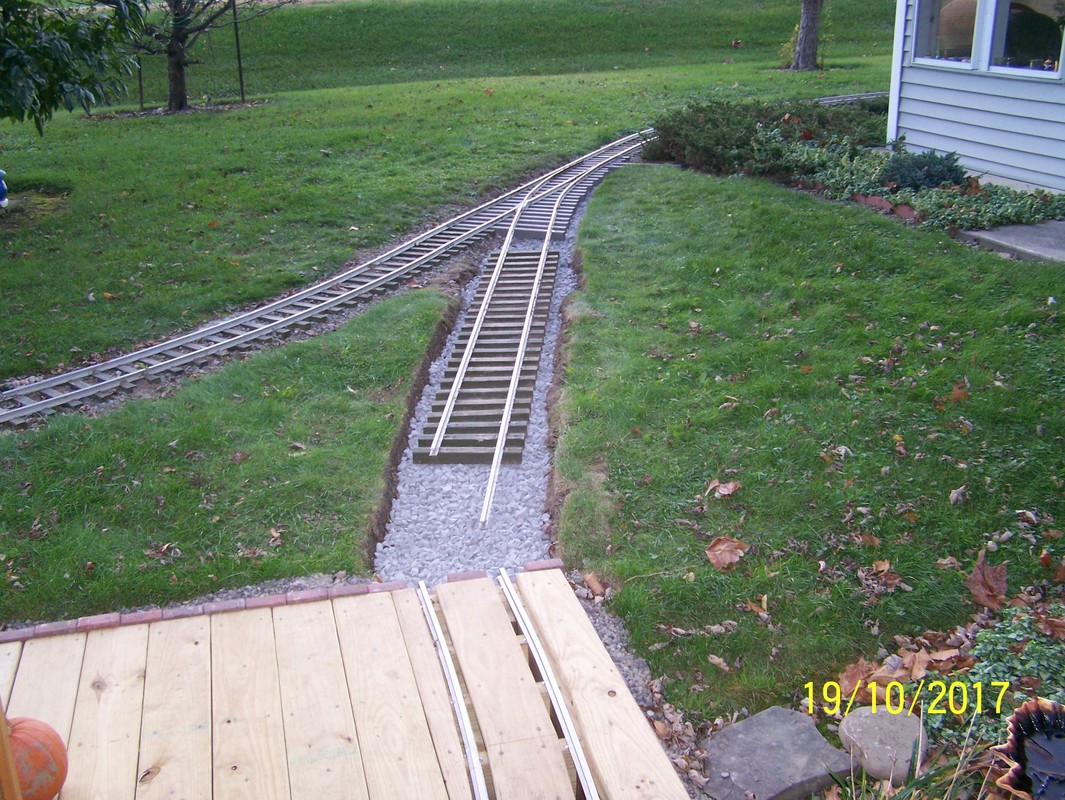
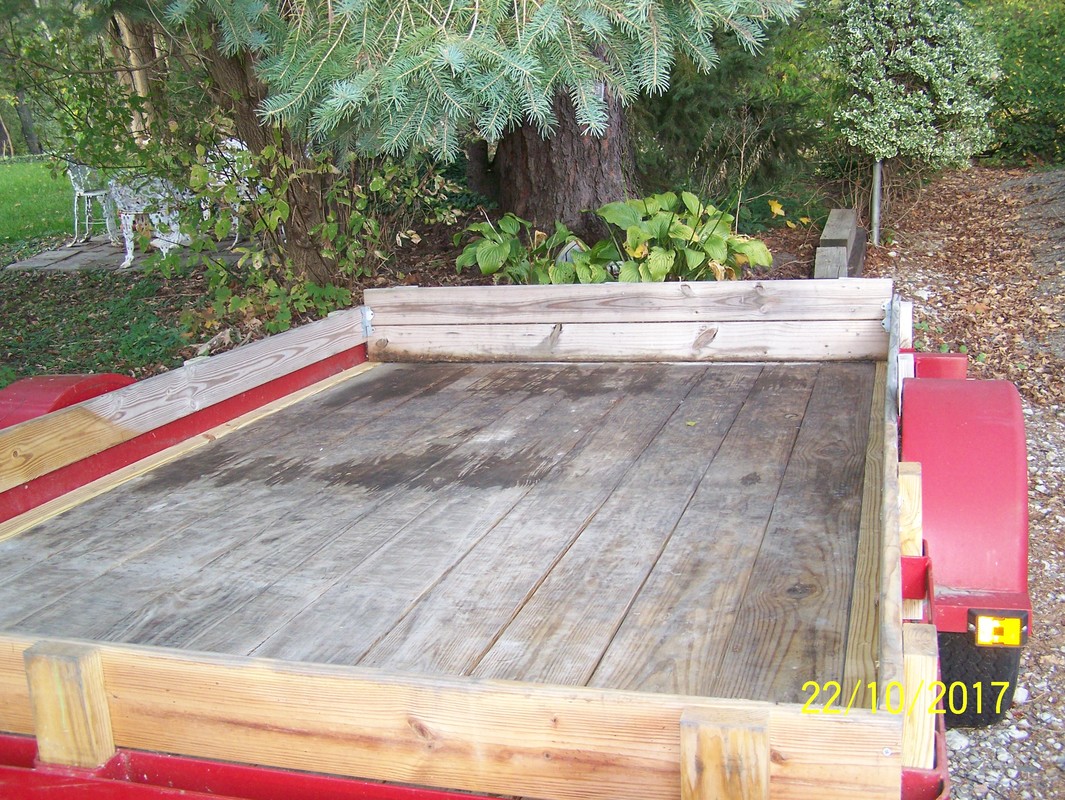
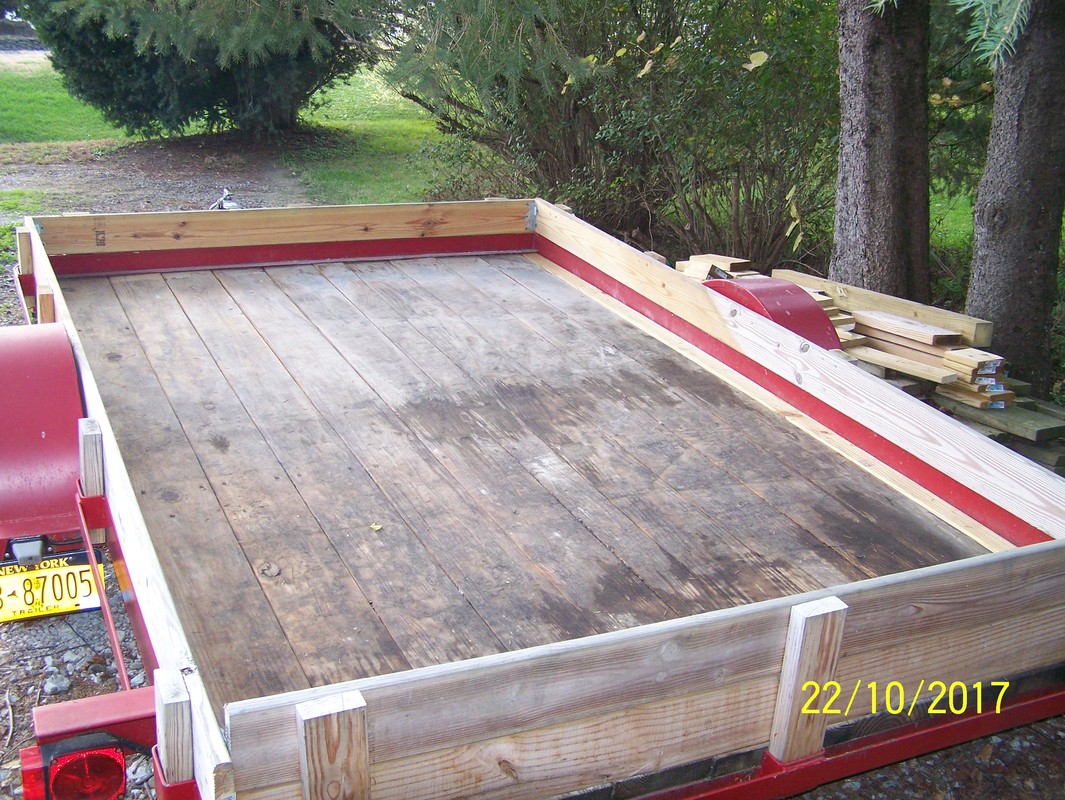
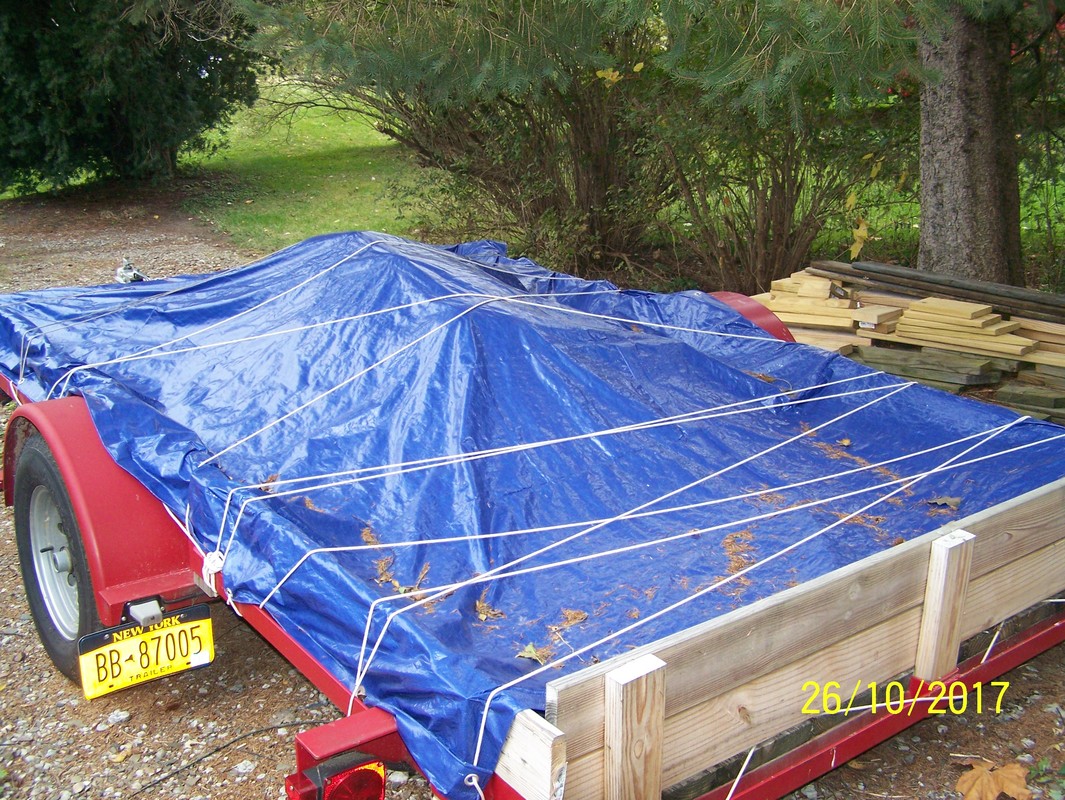
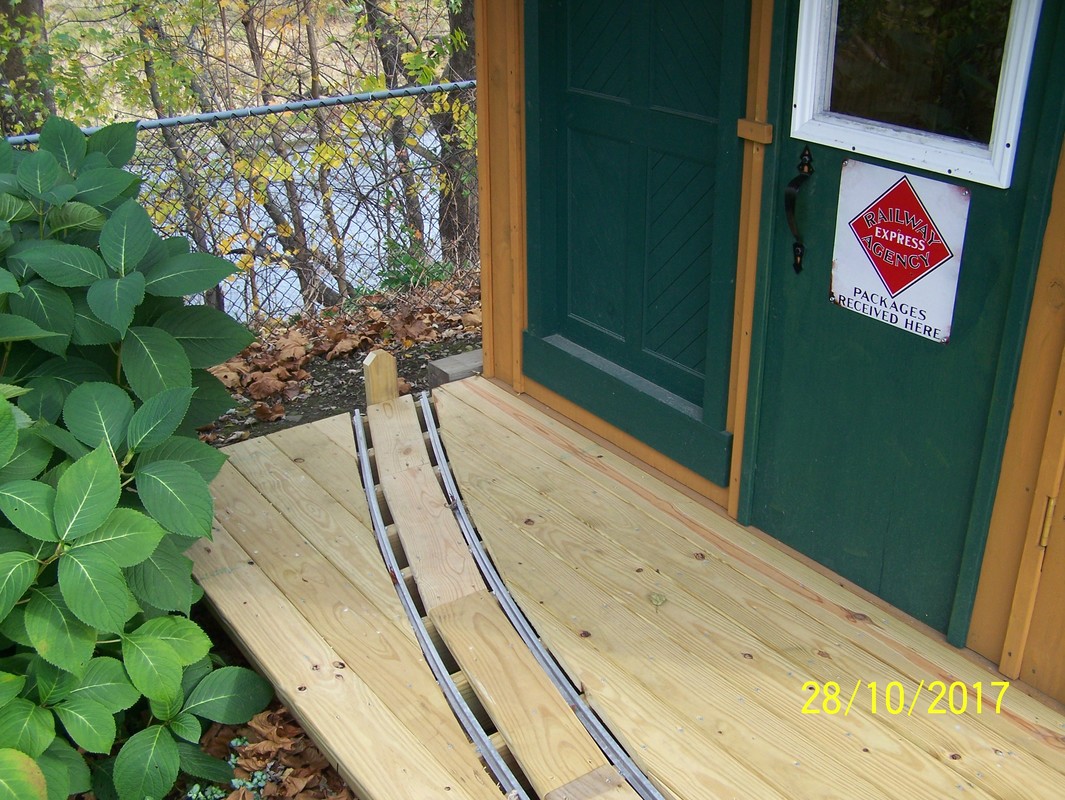
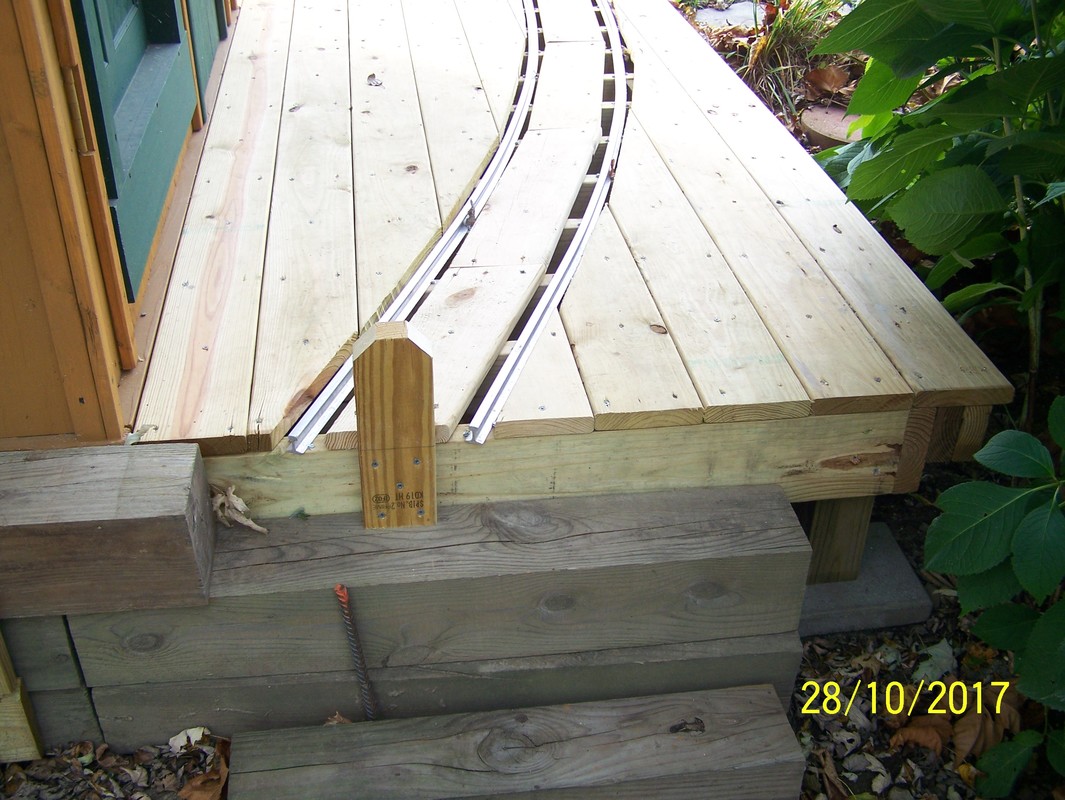
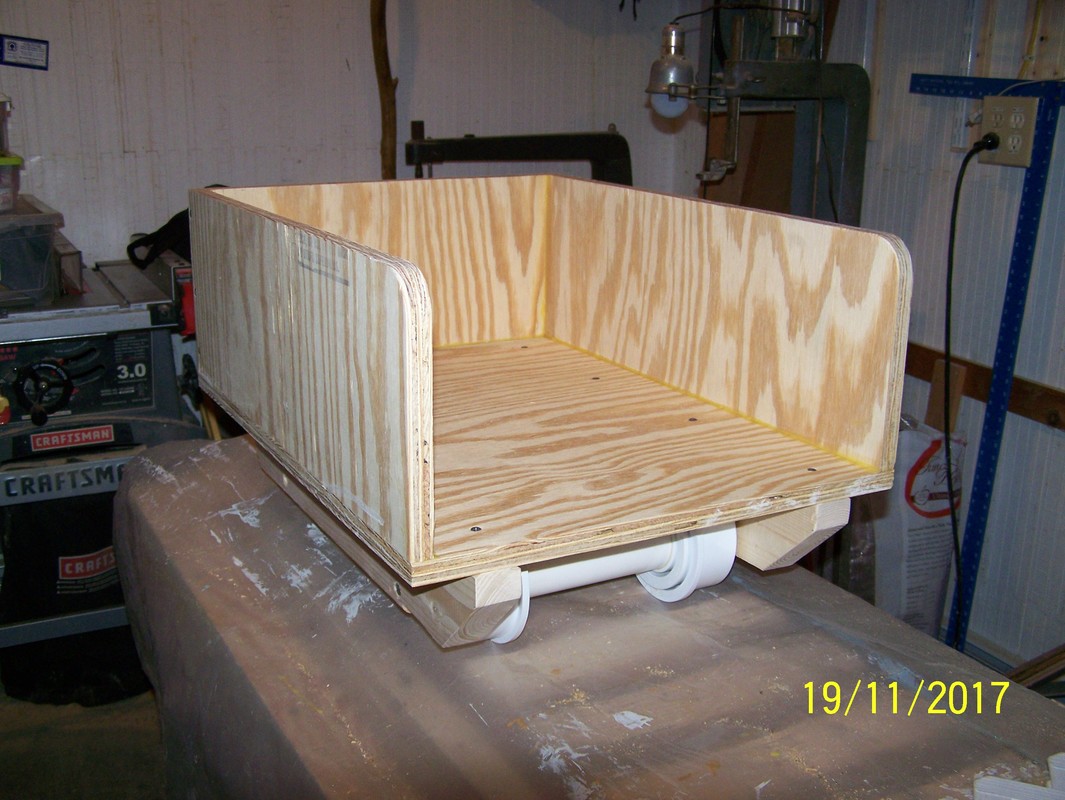
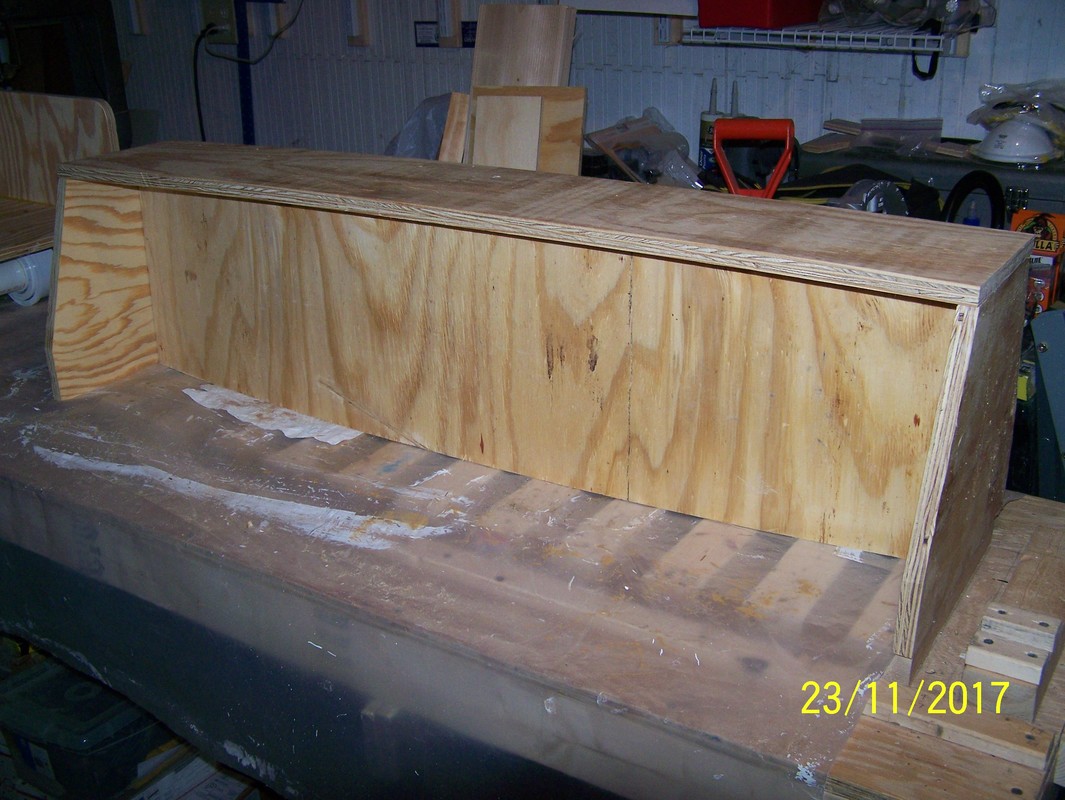
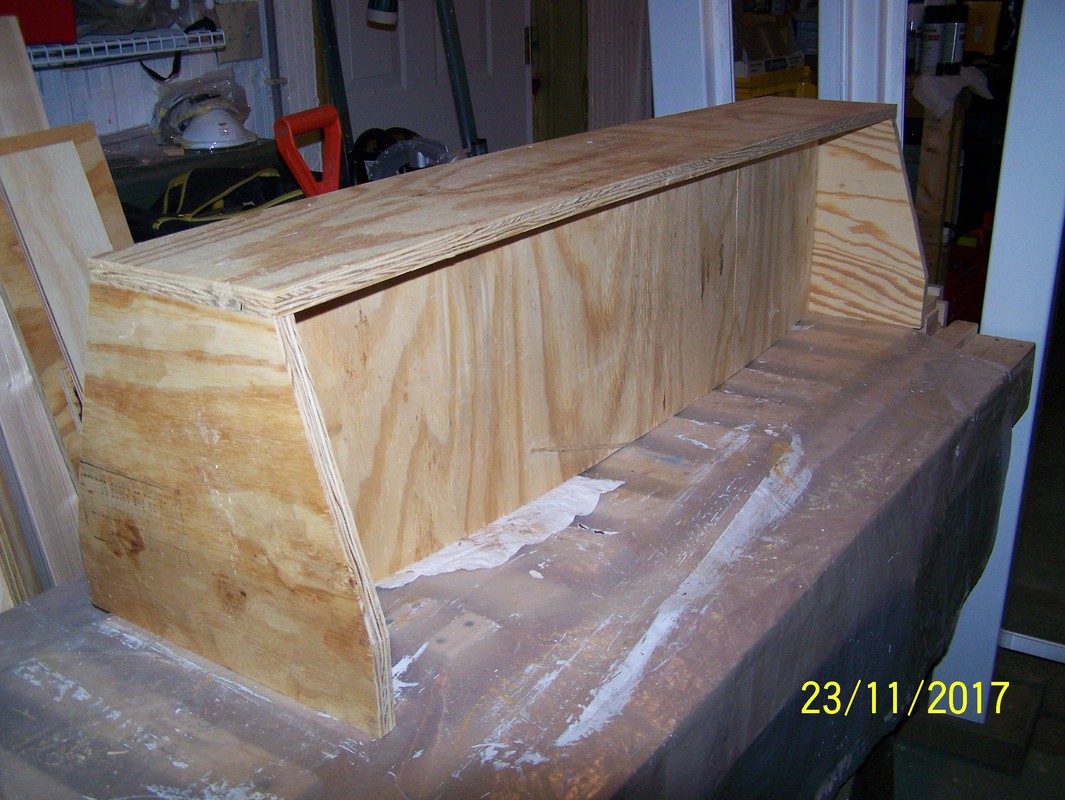
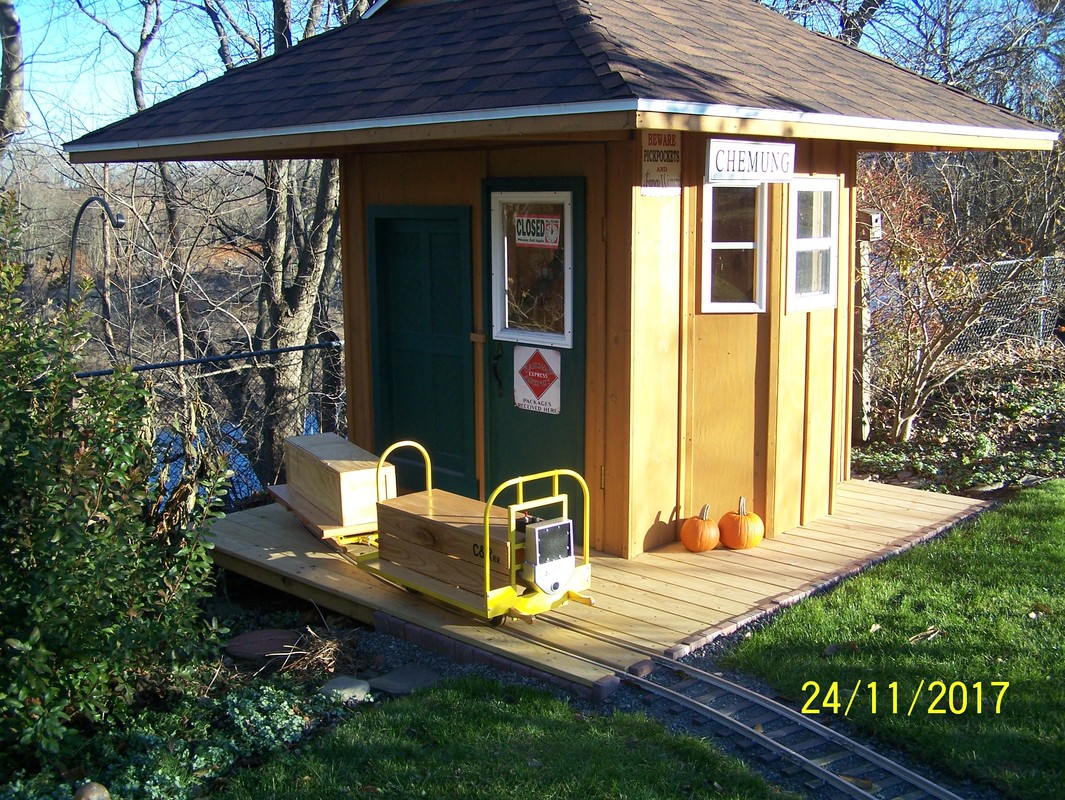
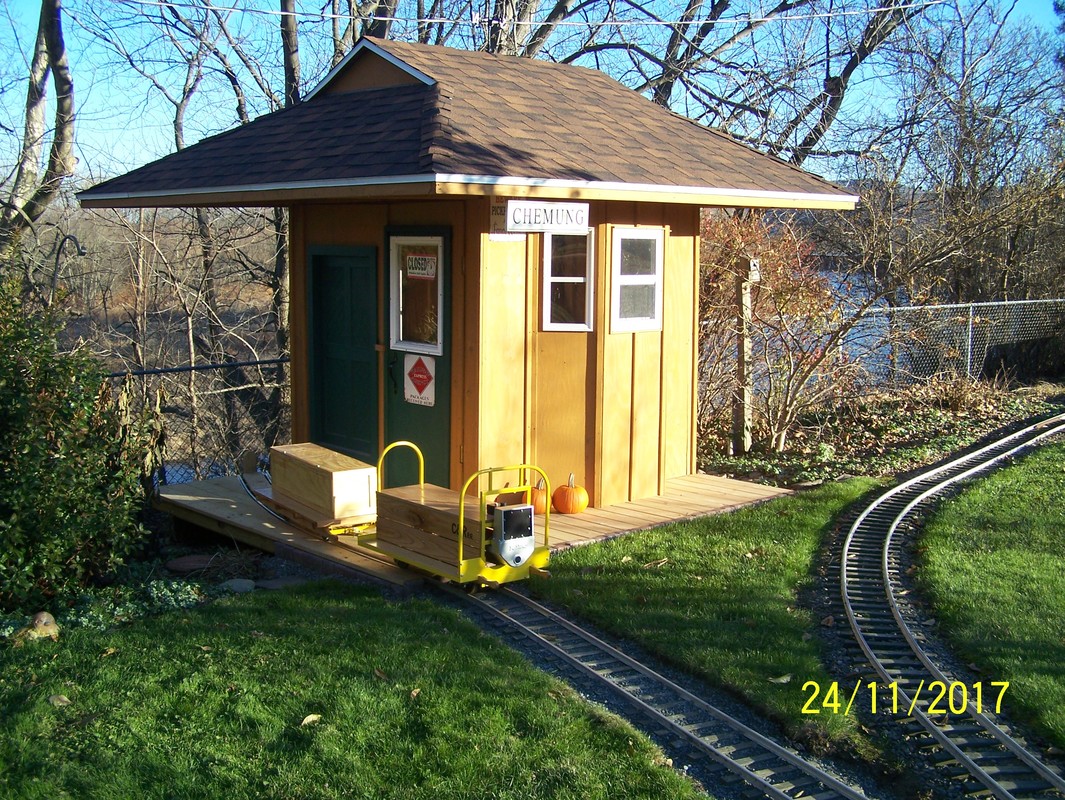
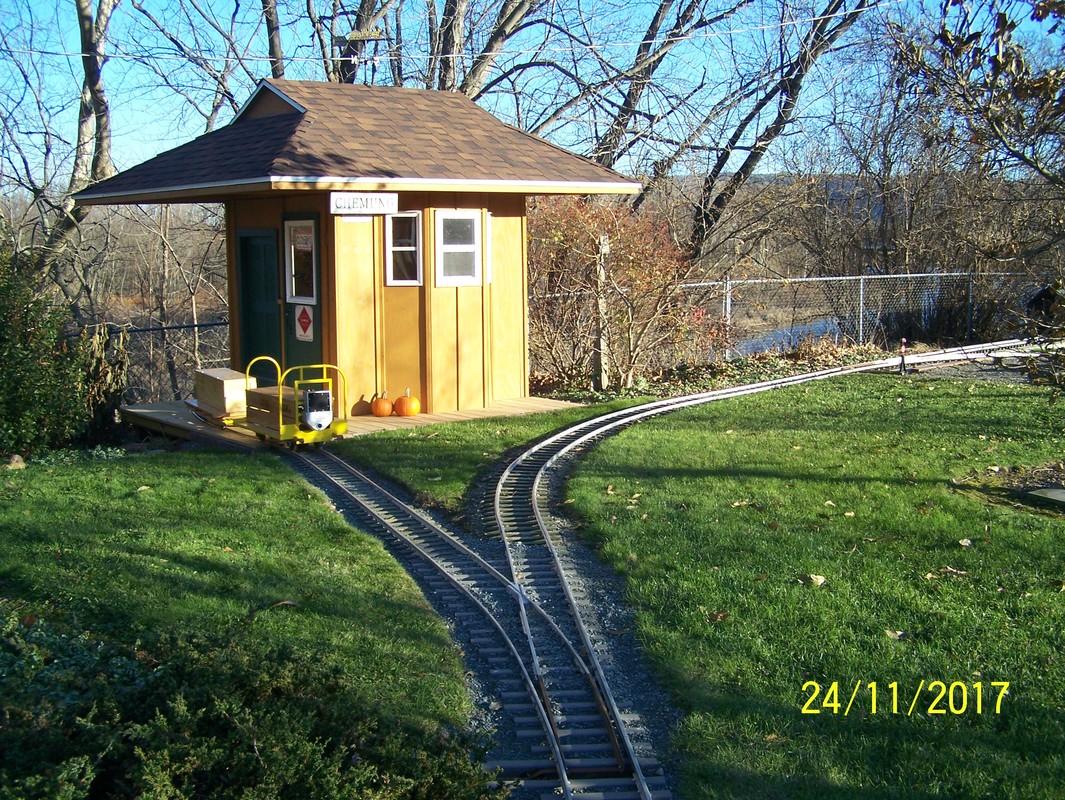
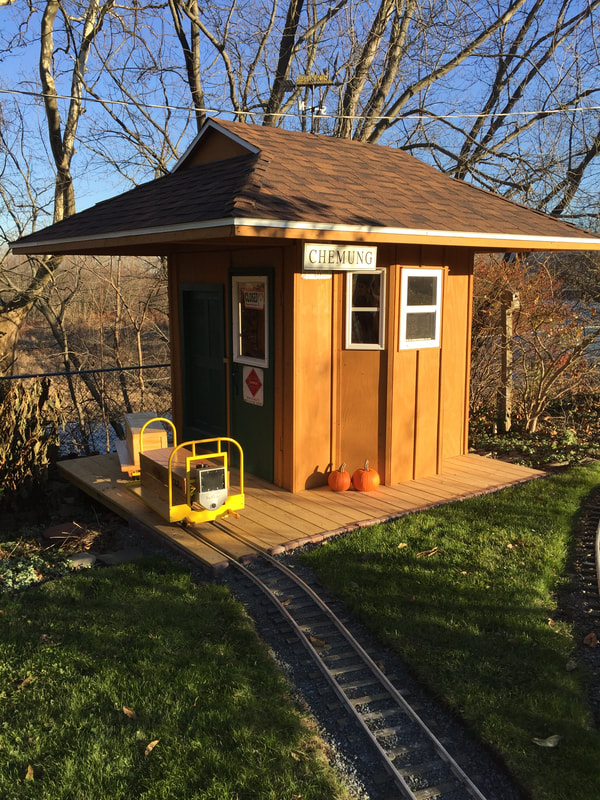
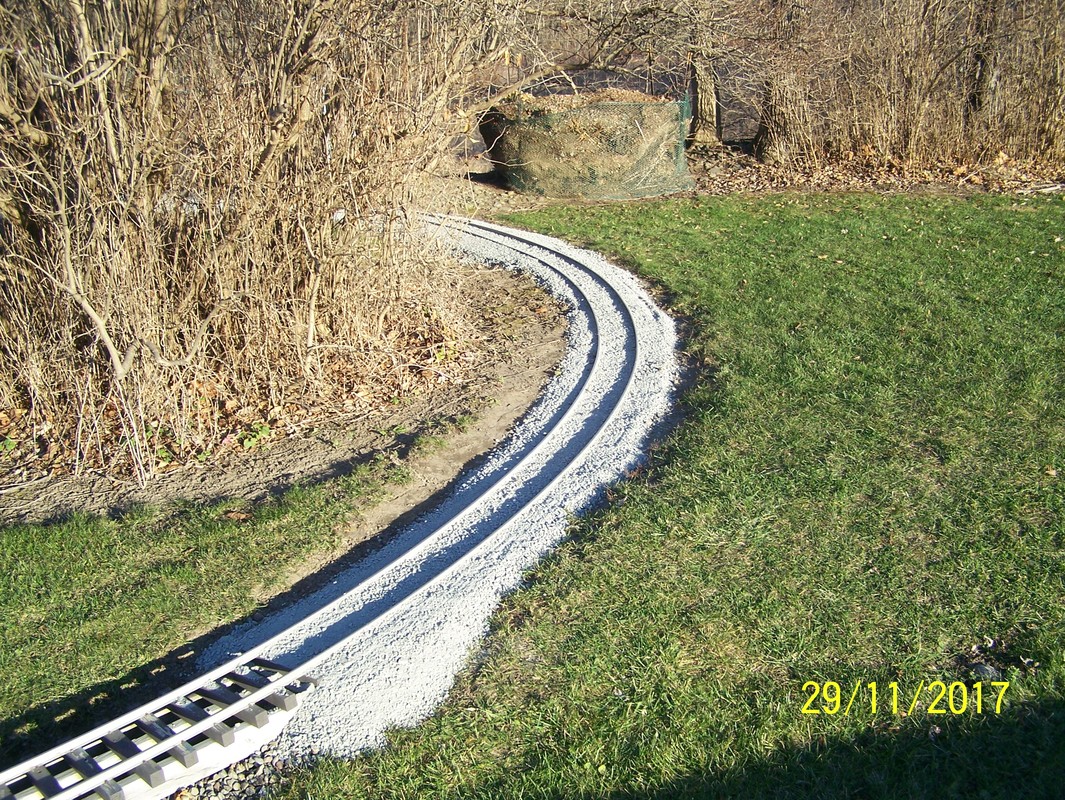
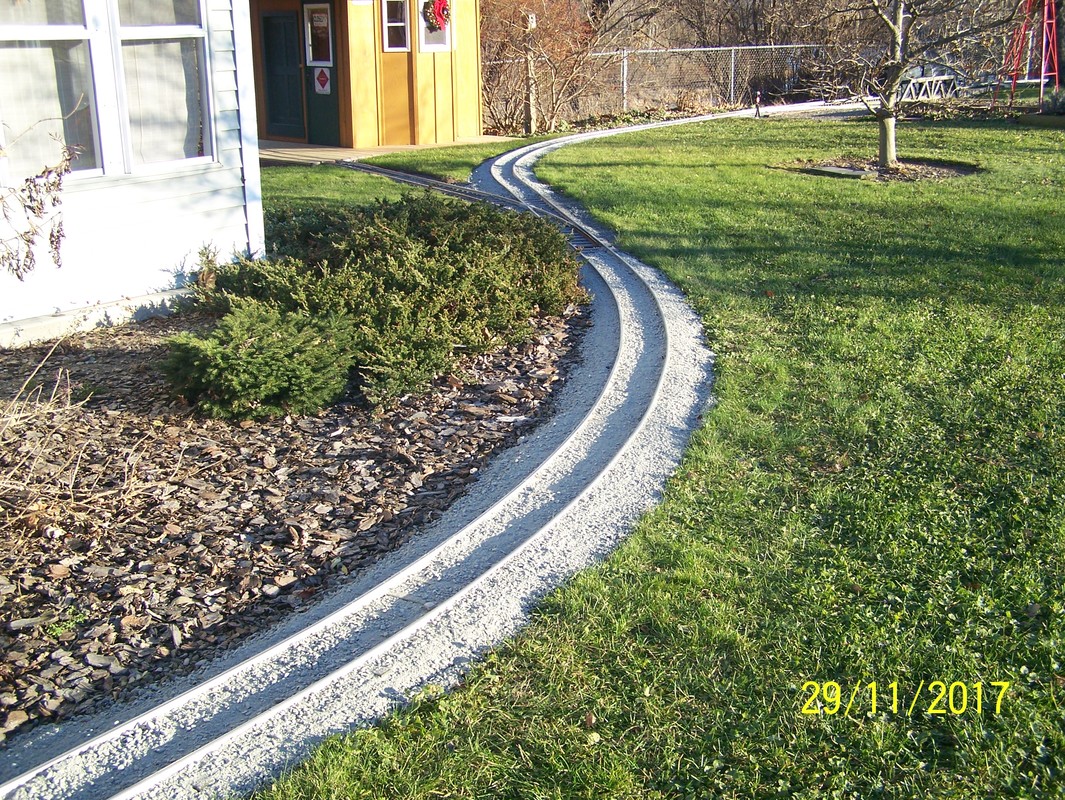
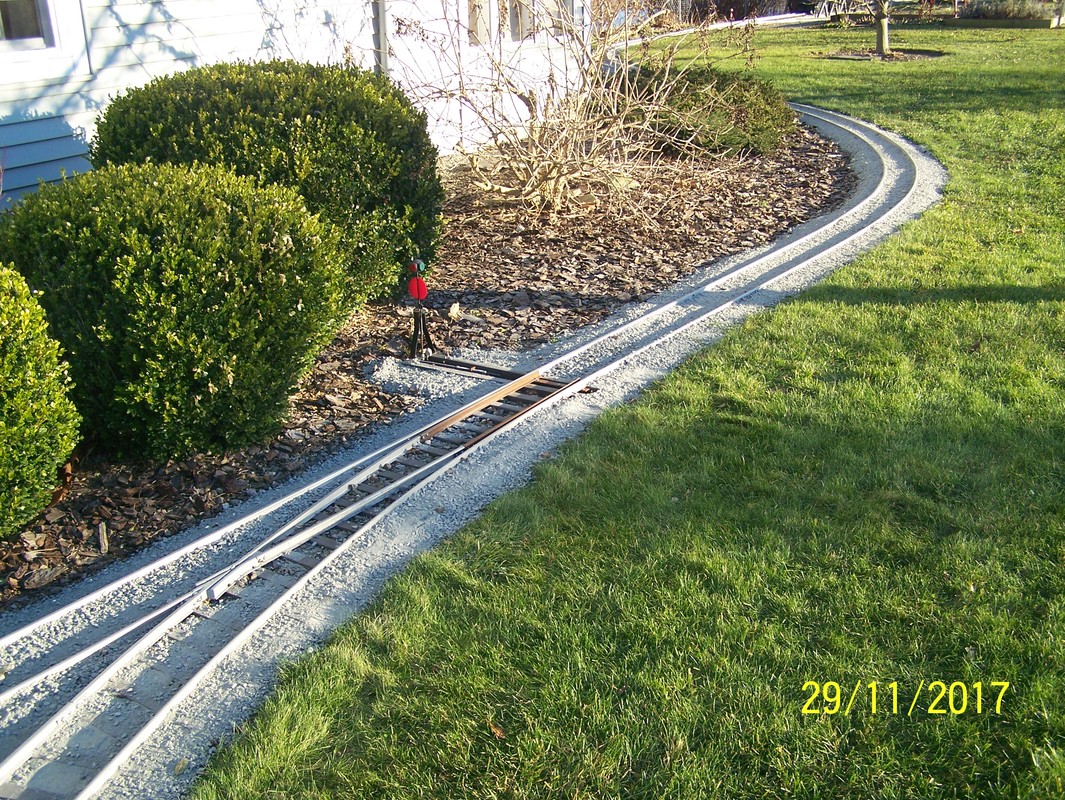
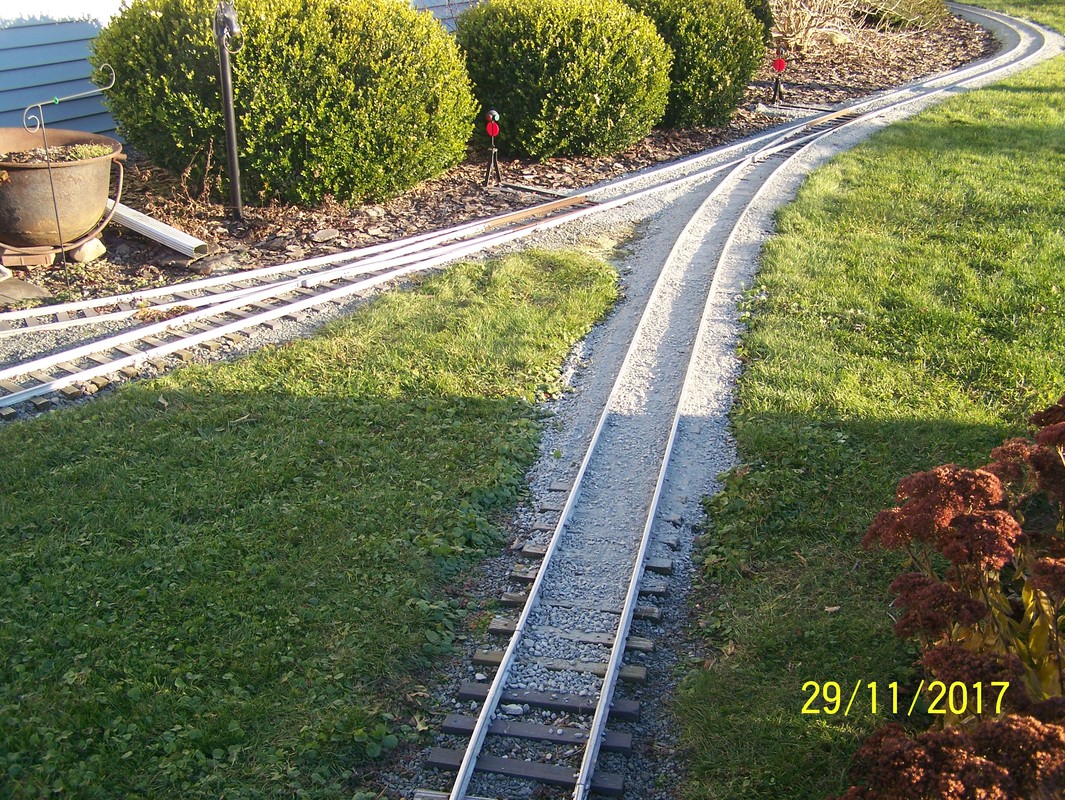
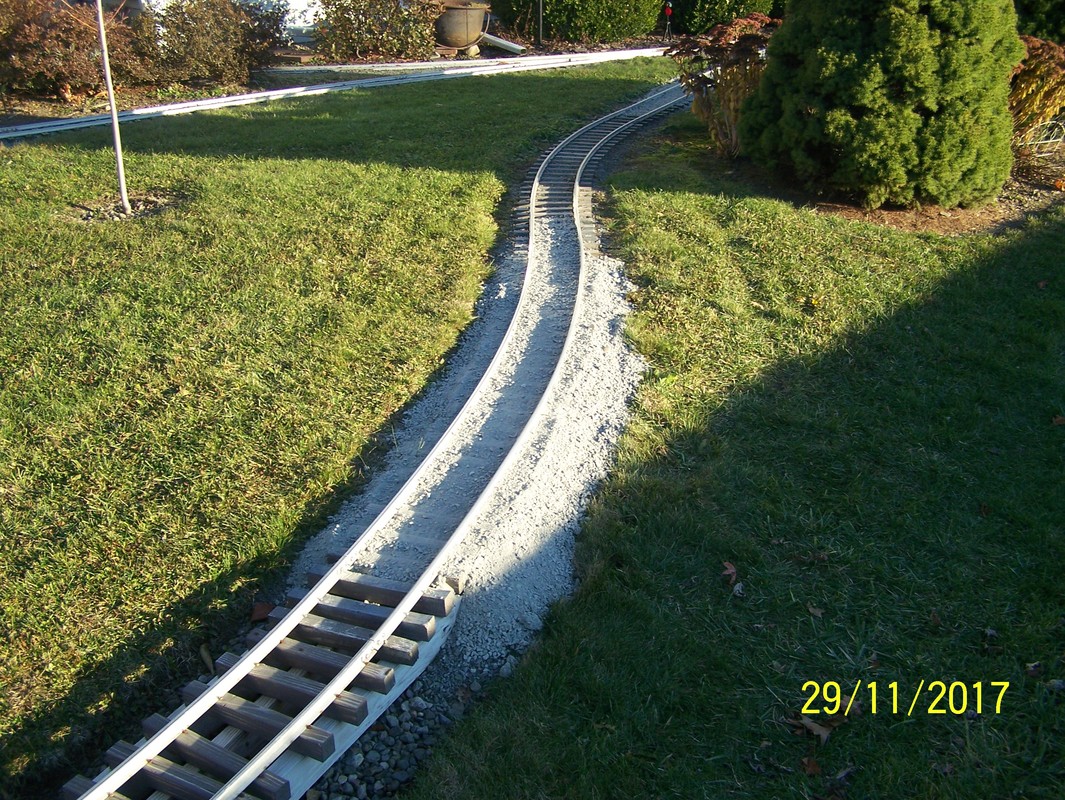
Oct, 2017. Continued on working on the deck for the station shed. Got some of the decking down and then laid down the curves rail. Then finished up the decking. Next removed a section of rail on the mainline and cut in a new switch. Then dug out for a section of track down to the station shed and connected it to the station shed curved track. Cleaned out the trailer and went and got a ton of ballast. While working on the deck and track, put multiple clear coats on the speeder work car box. Finished it up and tried the box out on the speeder work car and looks good. Finished up the month by installing a stop at the end of the track on the deck of the station shed and getting the speeder out of the basement and out on the tracks. Did not have a battery charged up so could not take it for a ride.
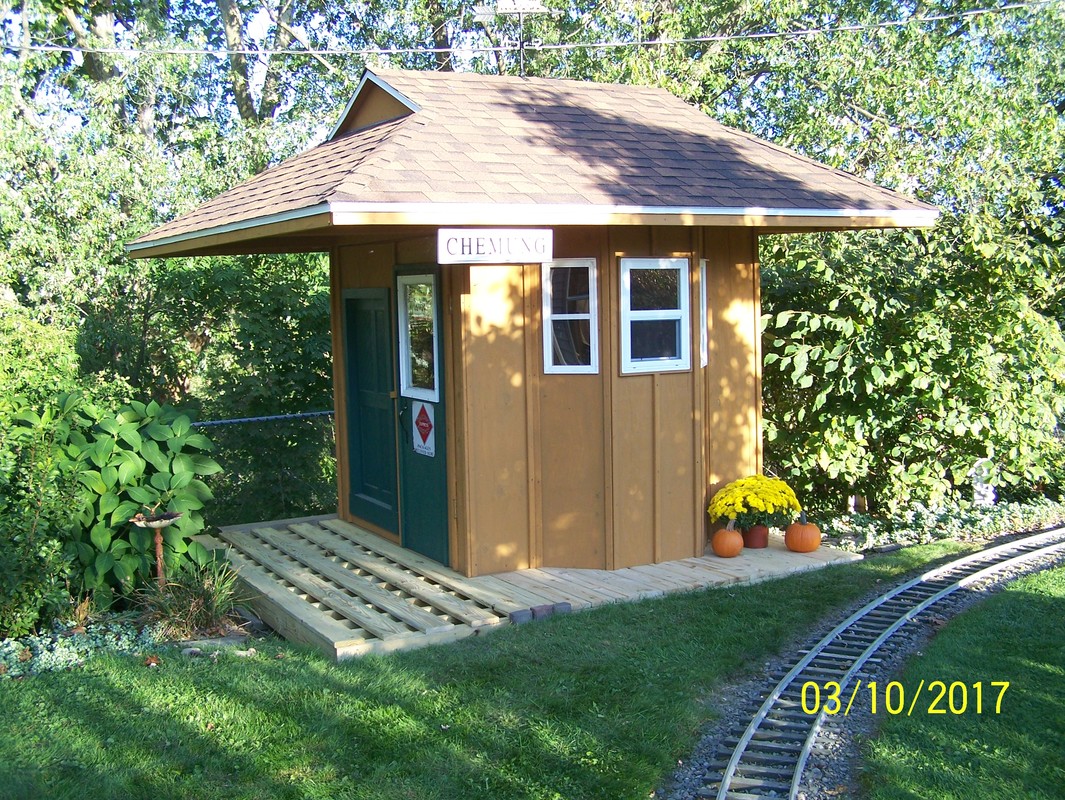

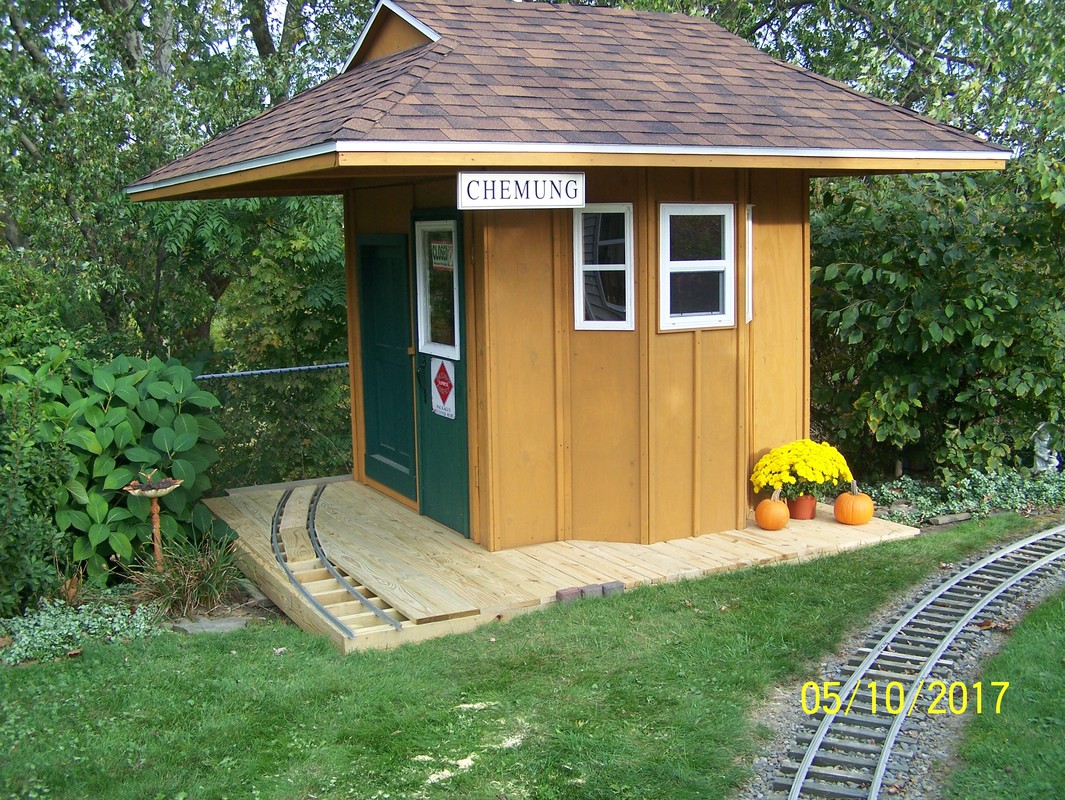
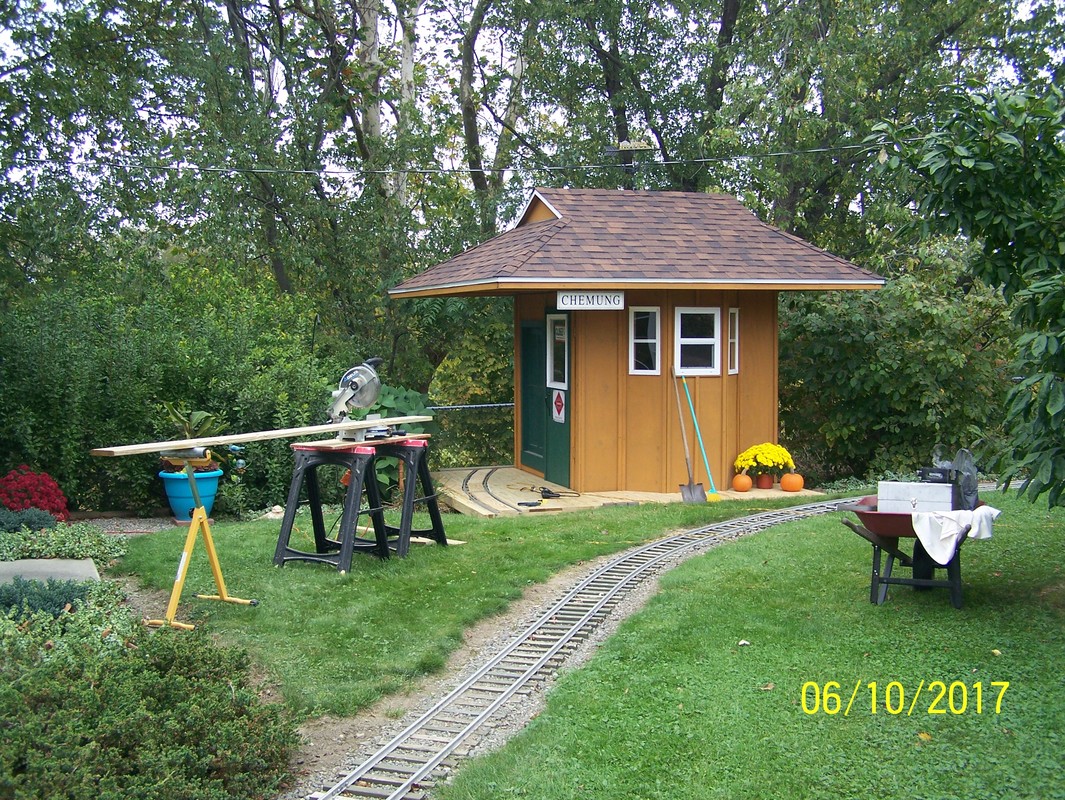
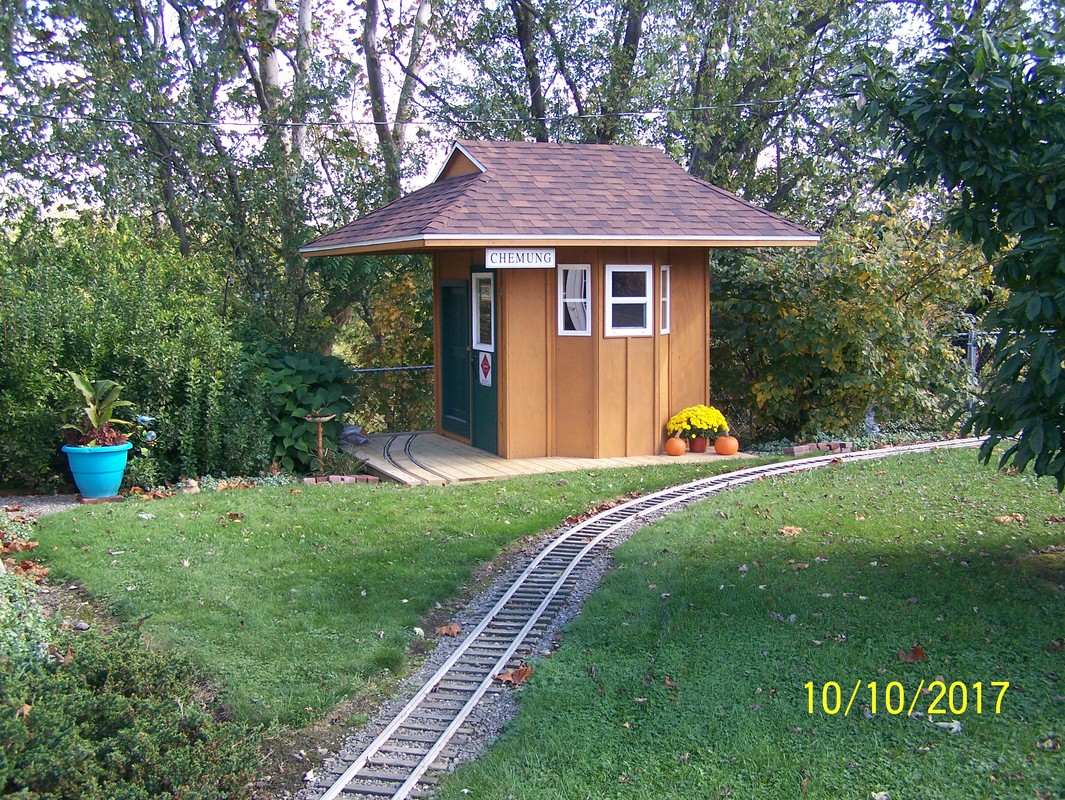
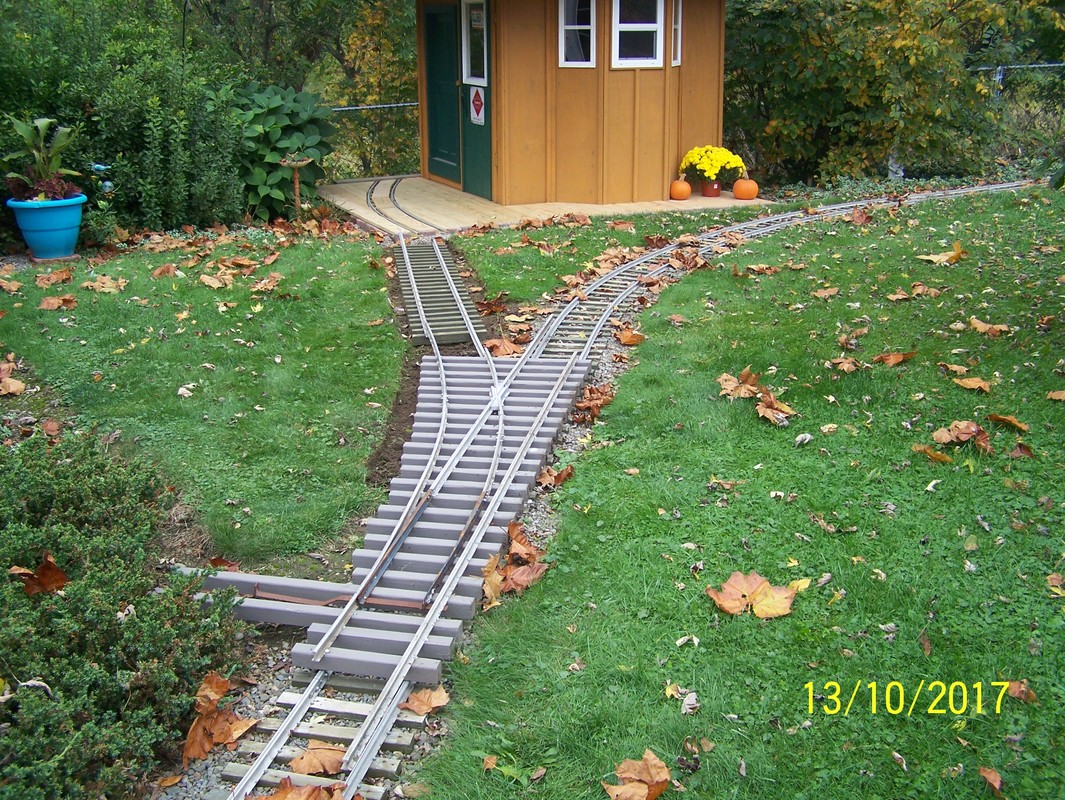
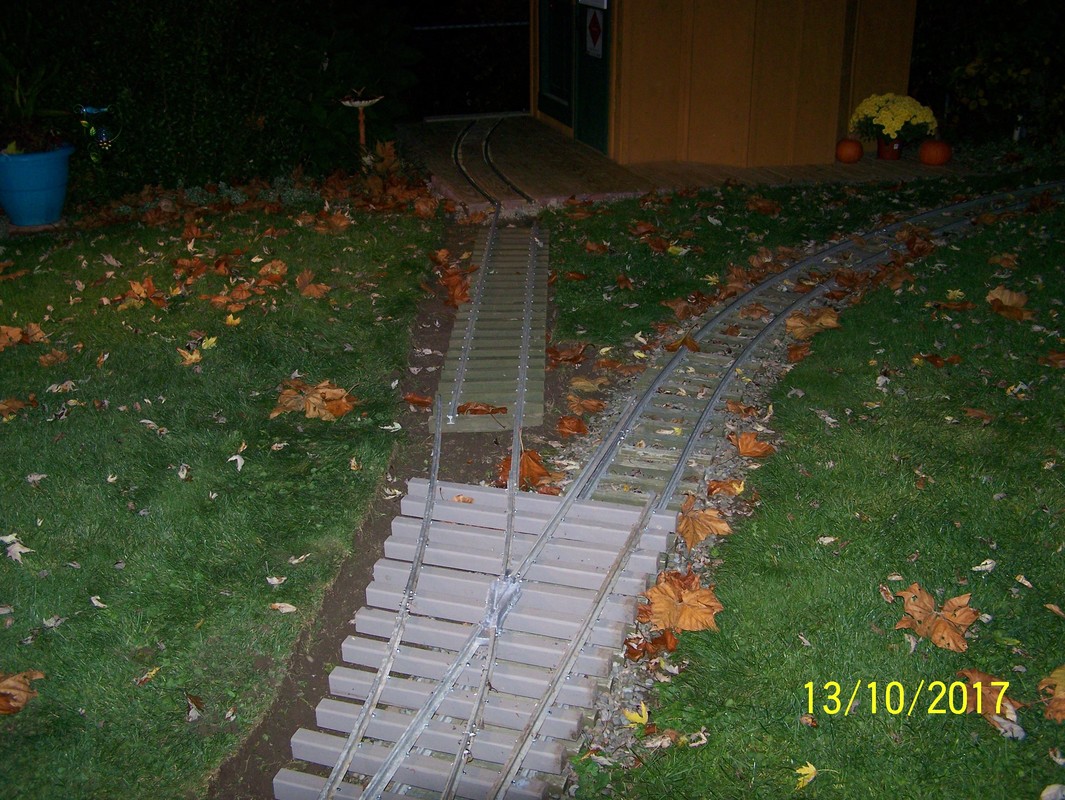
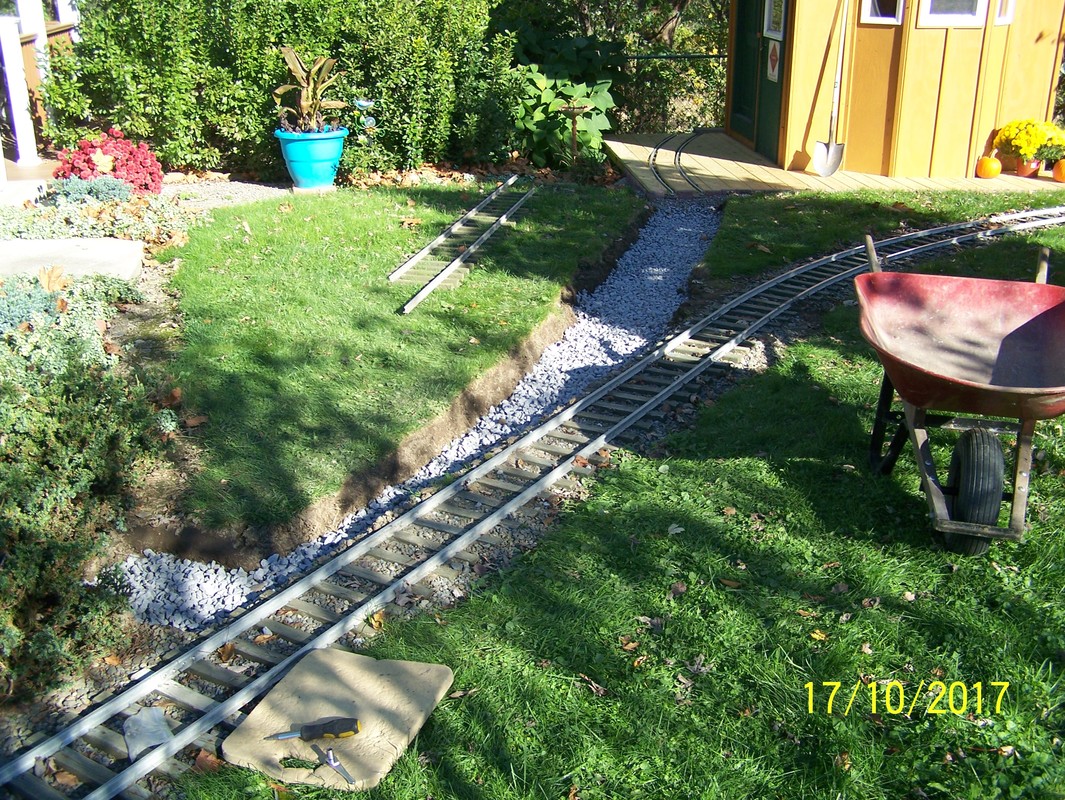

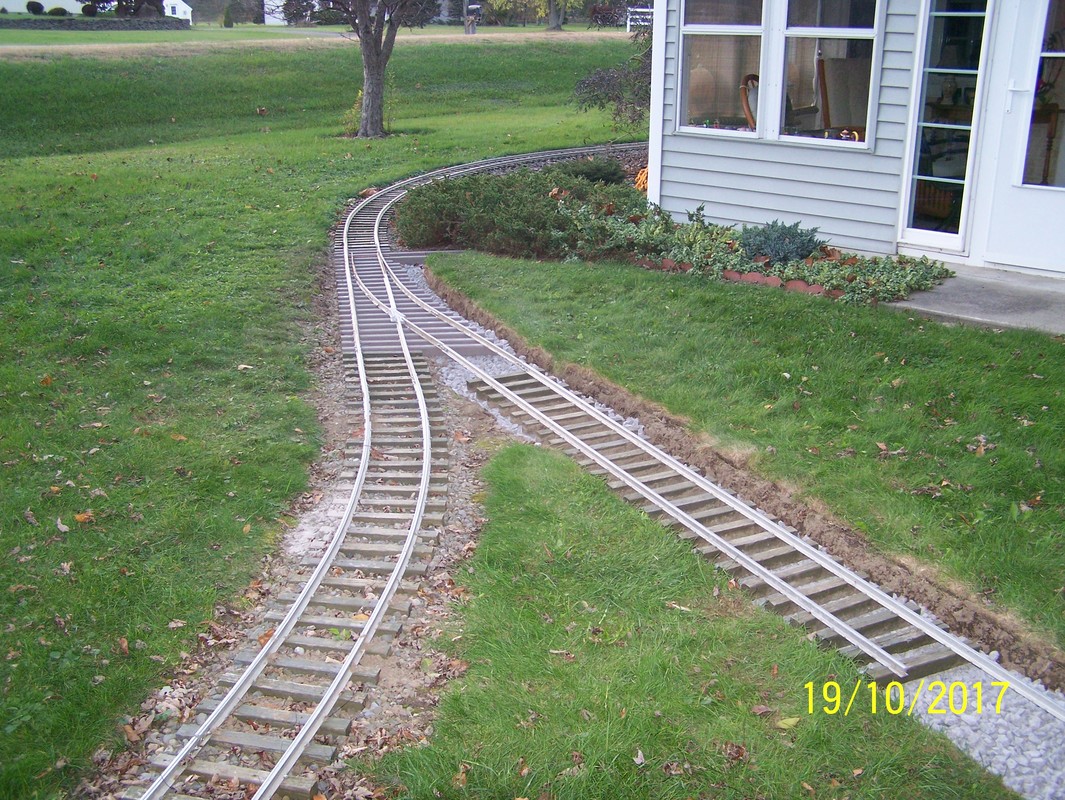

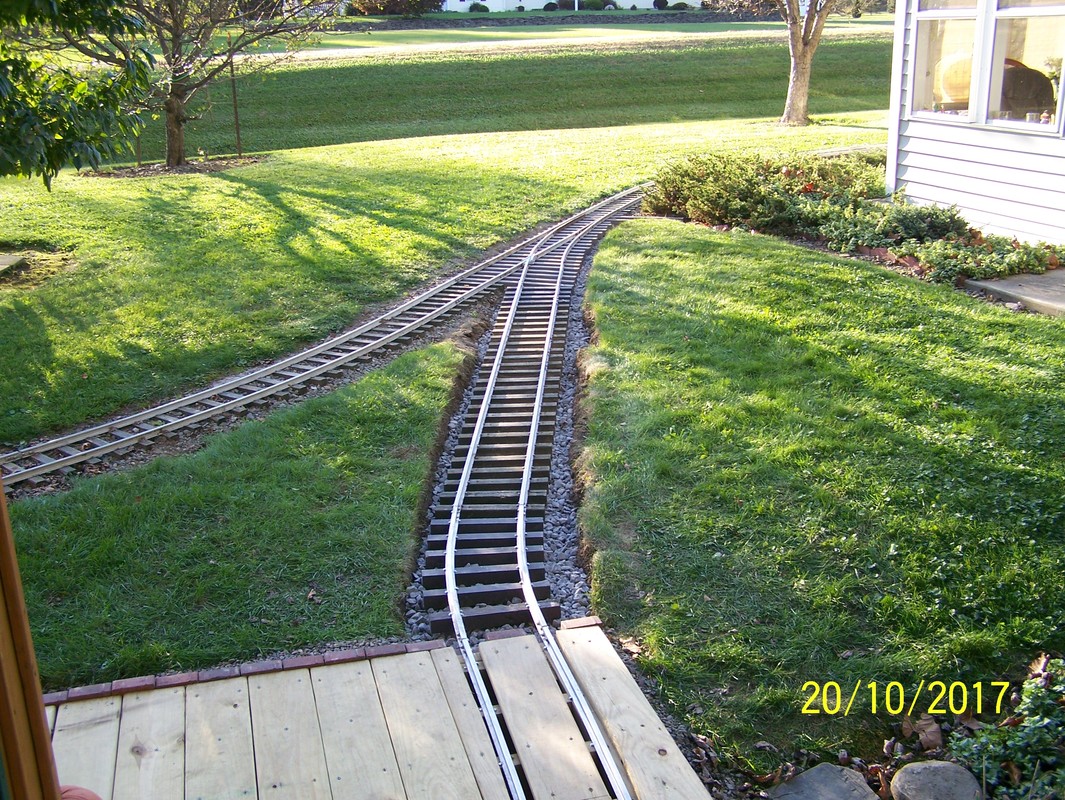
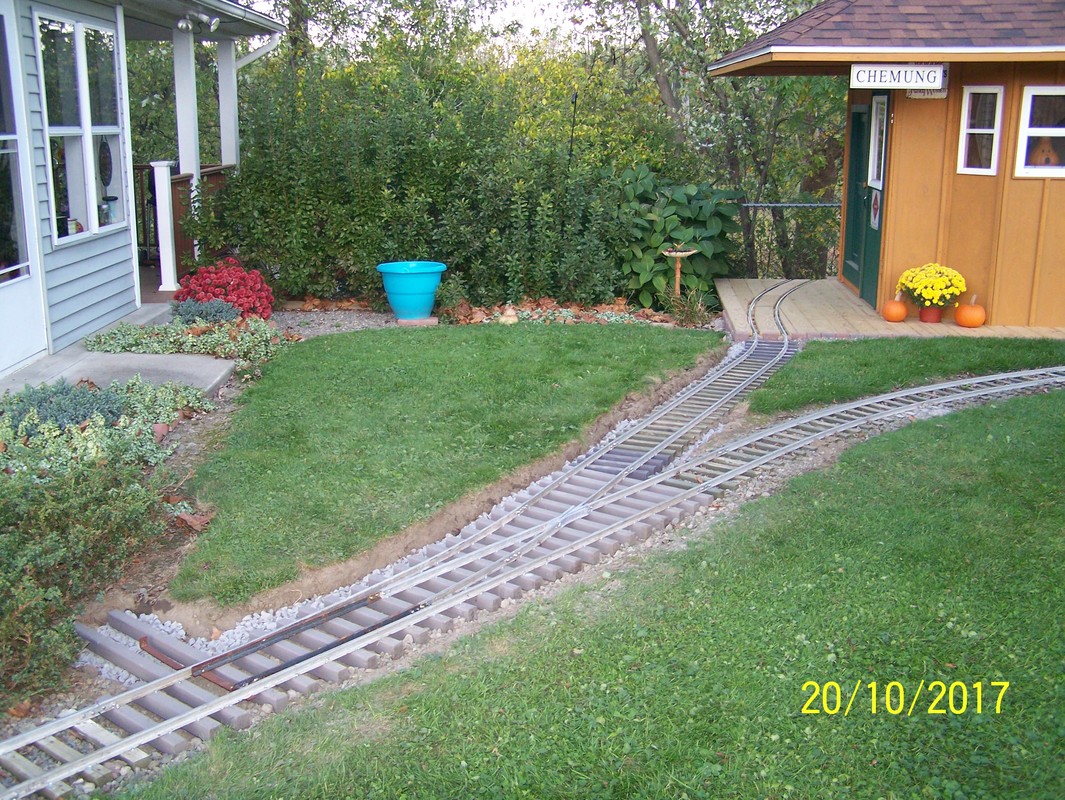
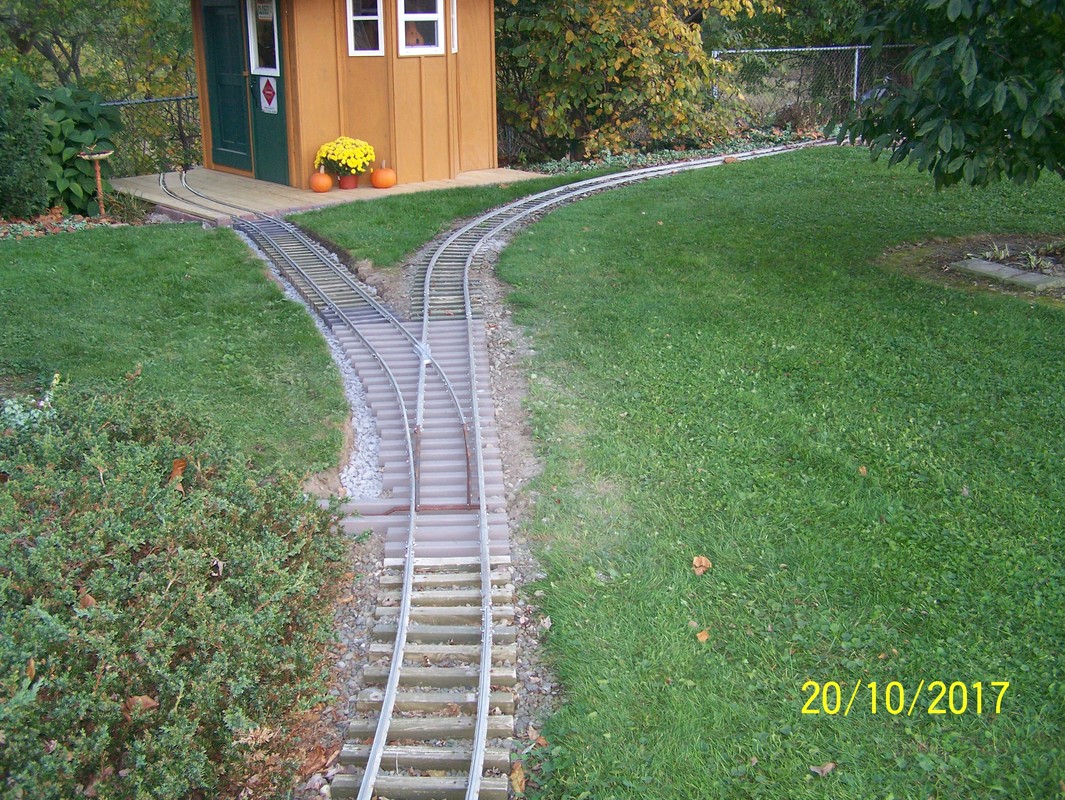
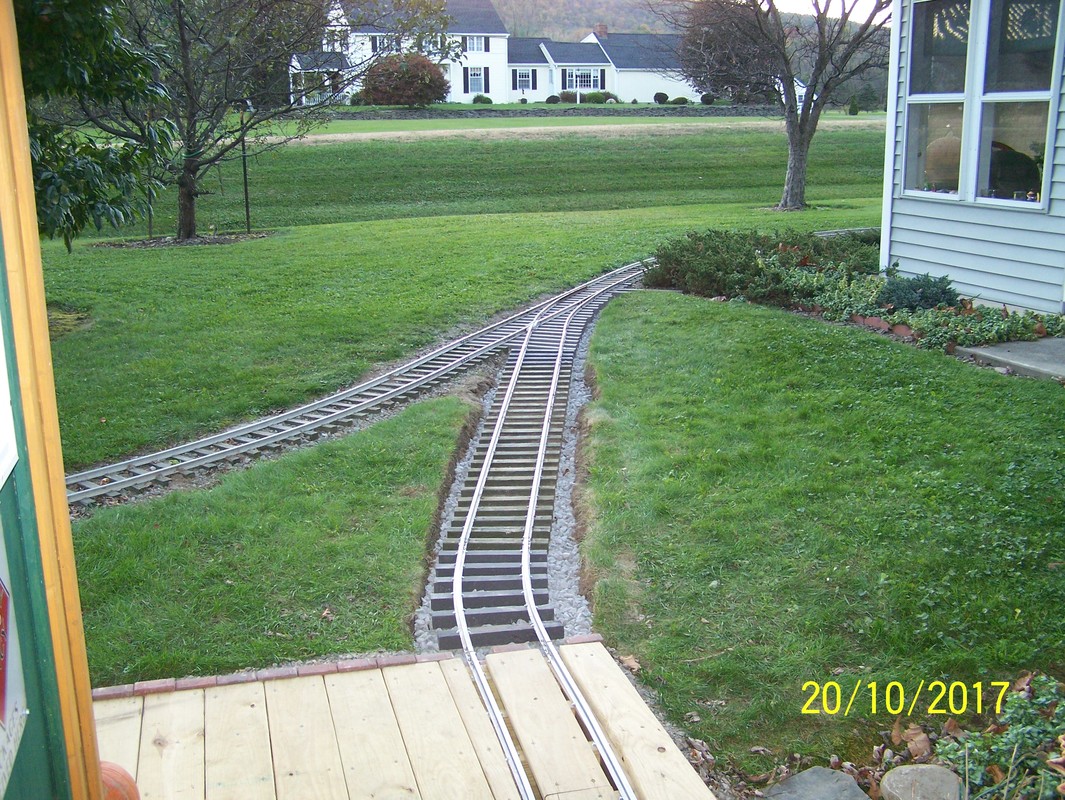
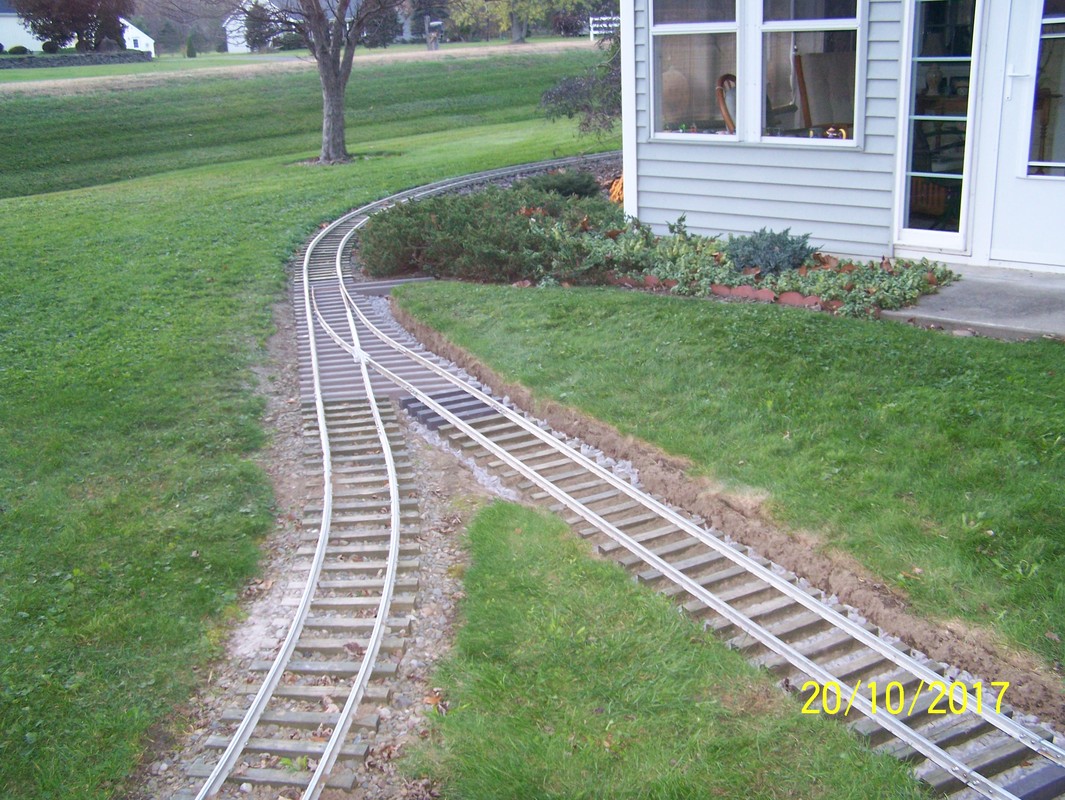
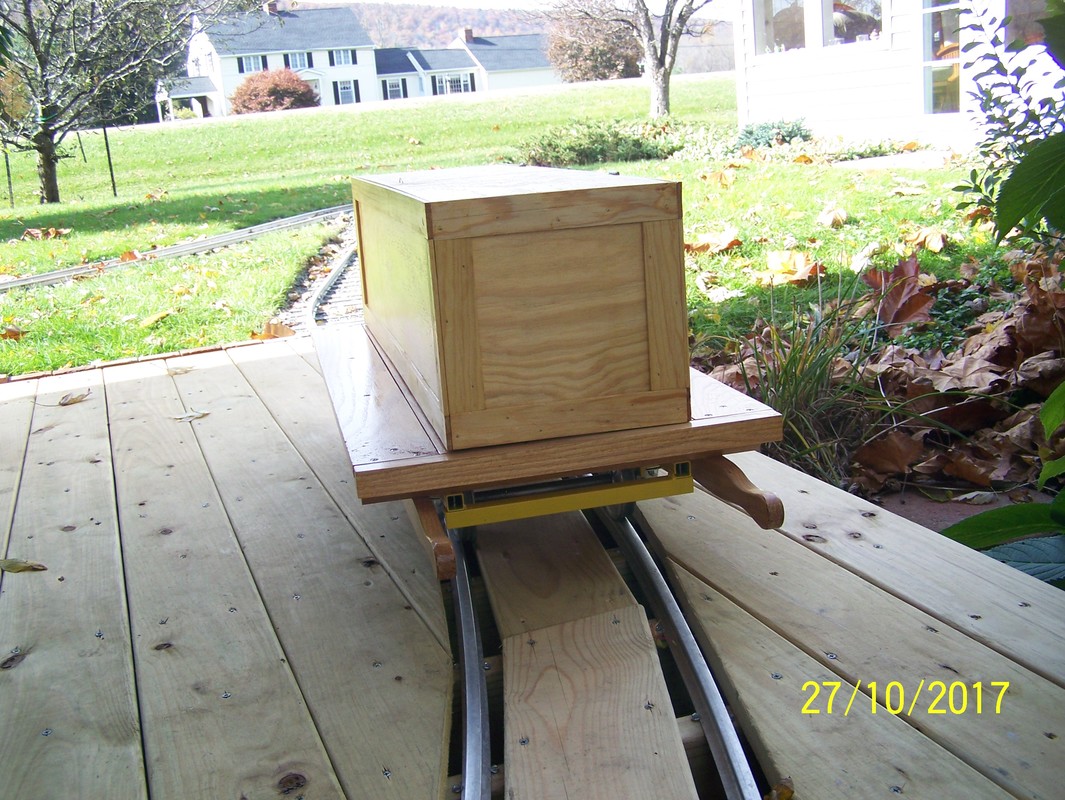
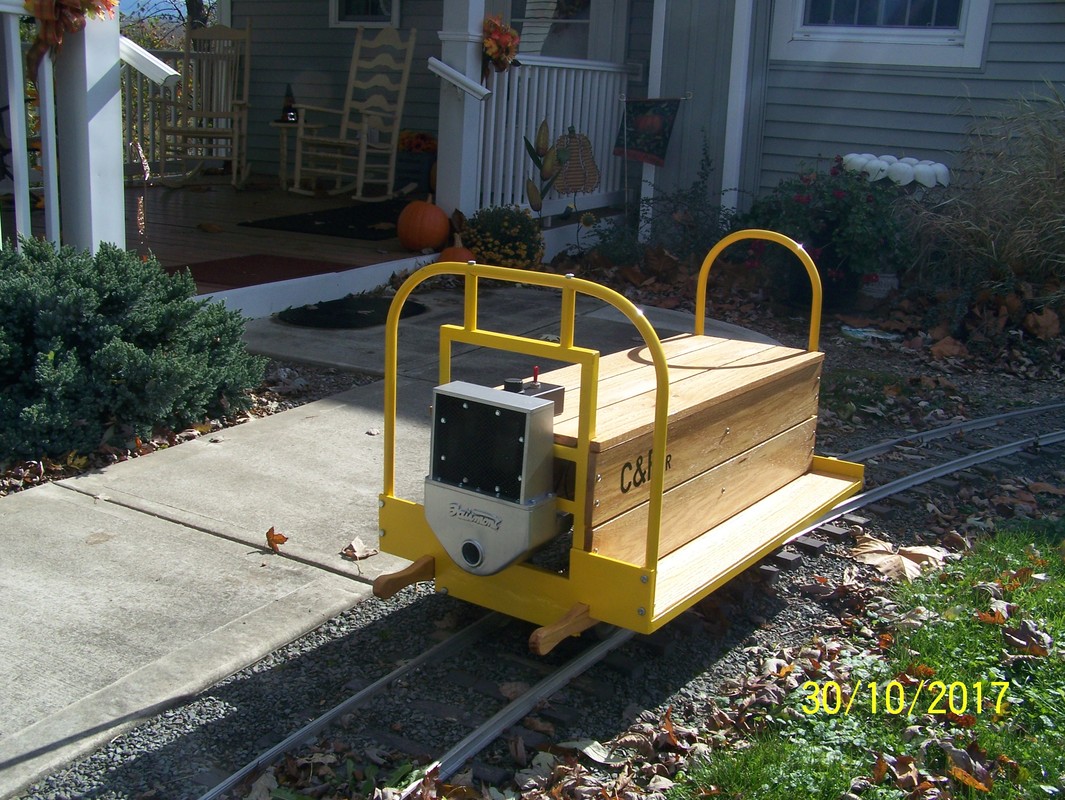
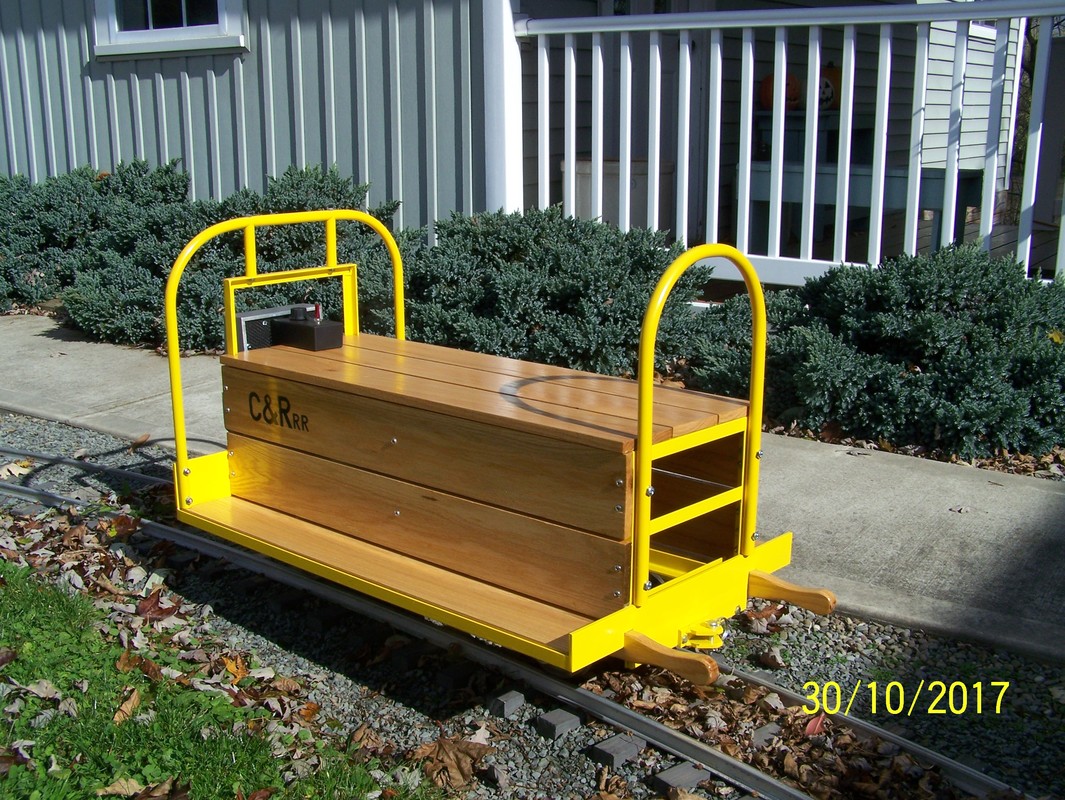
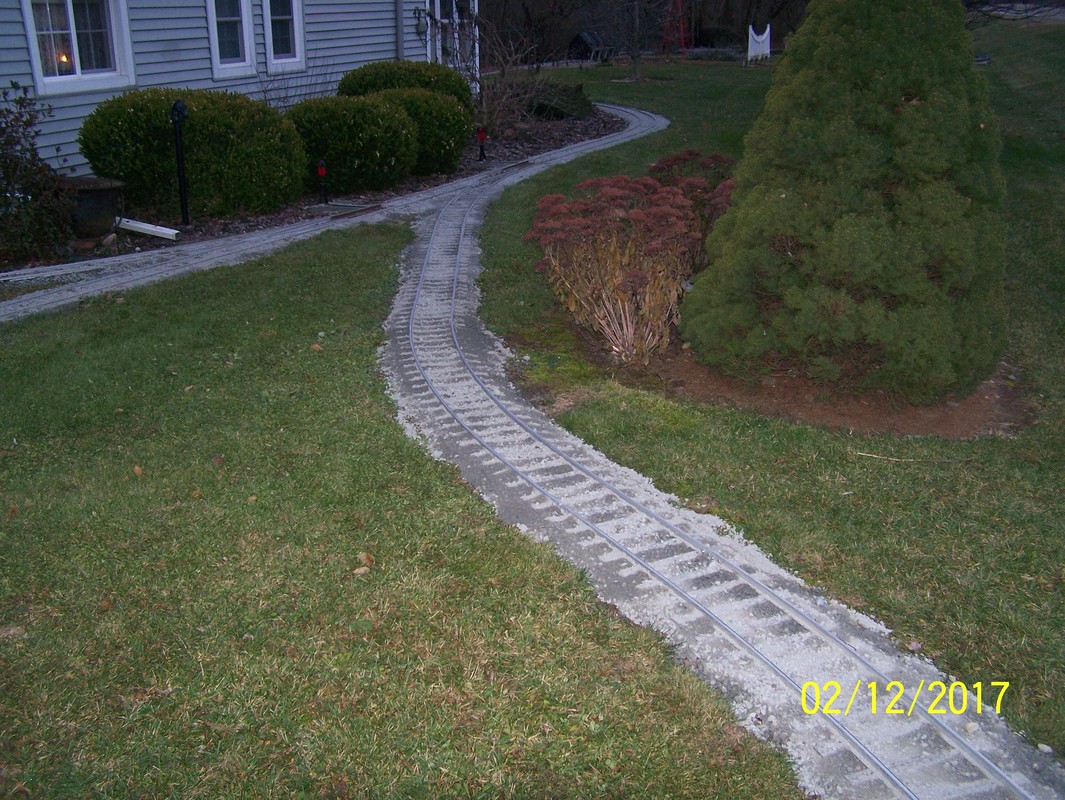
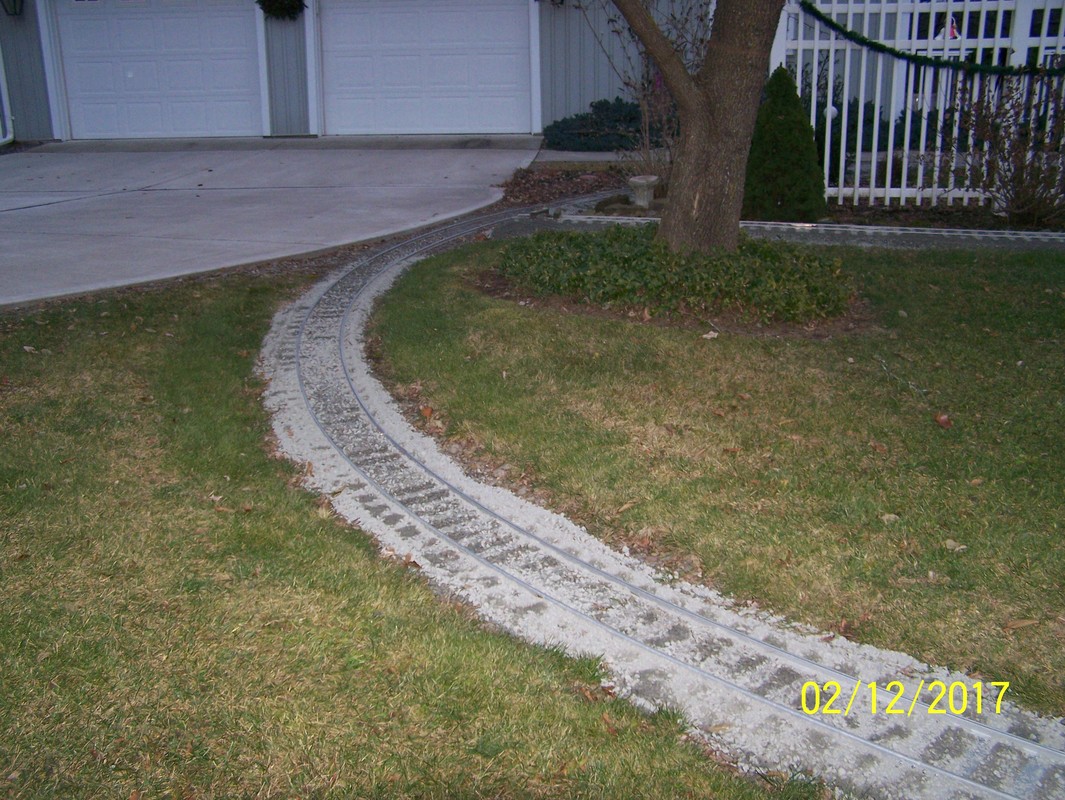
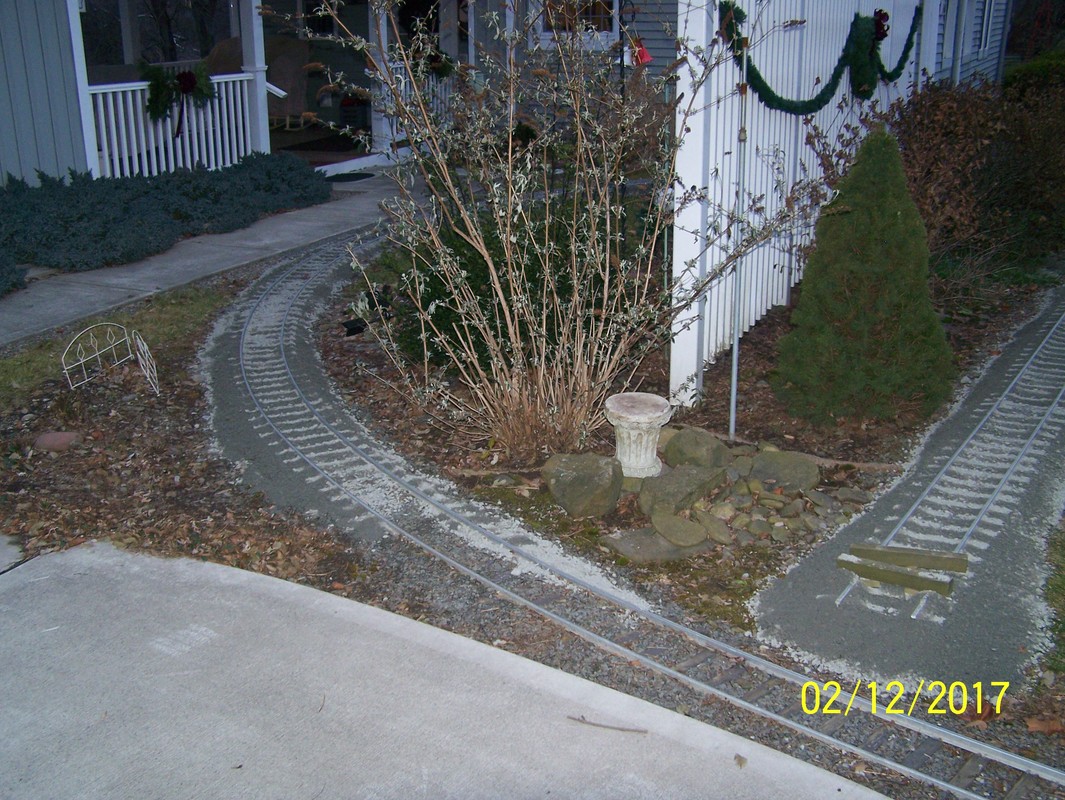
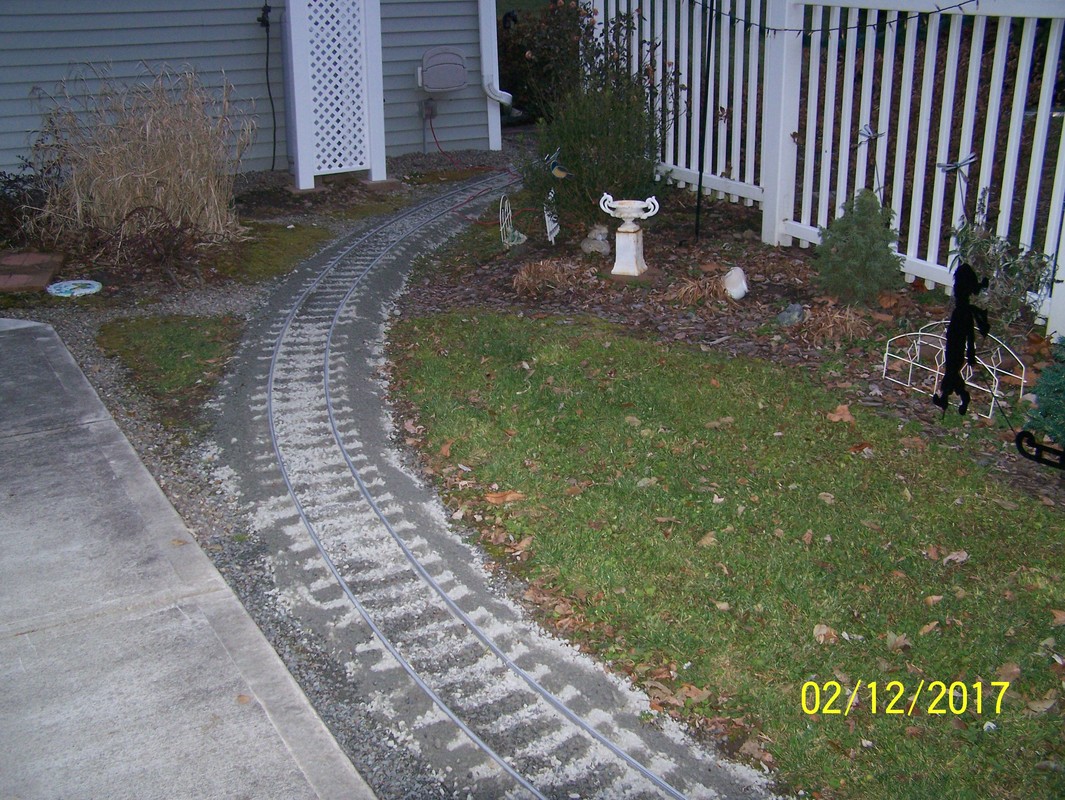
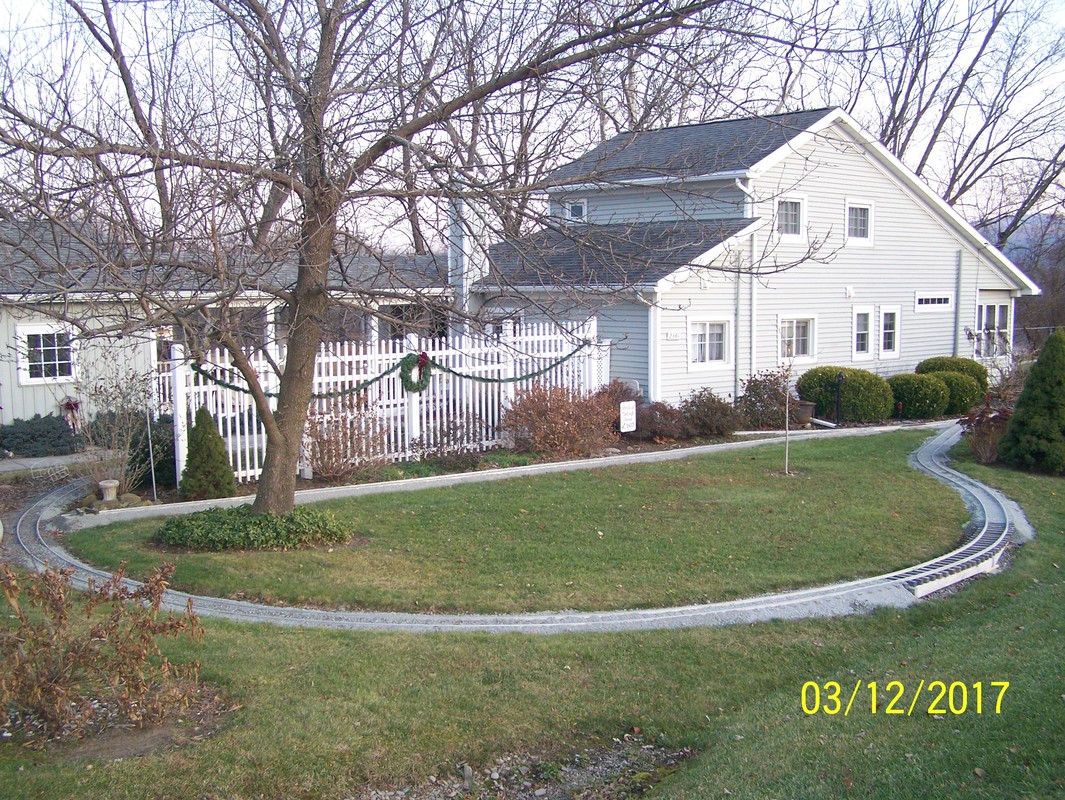
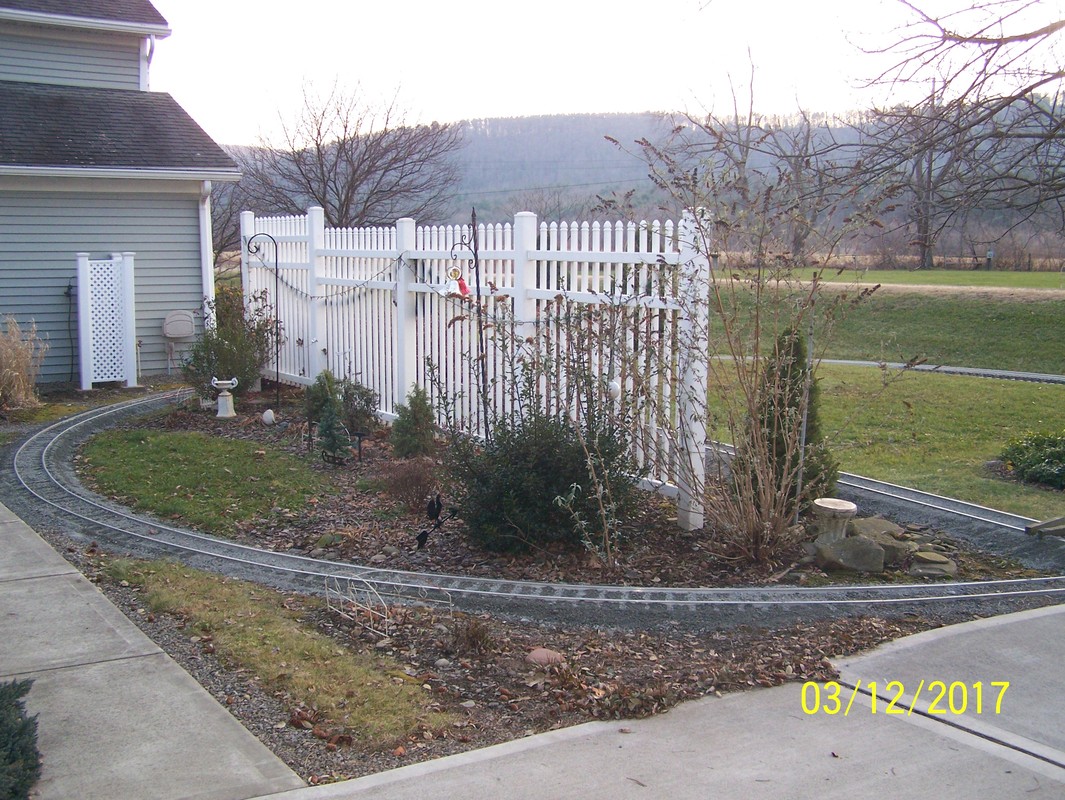
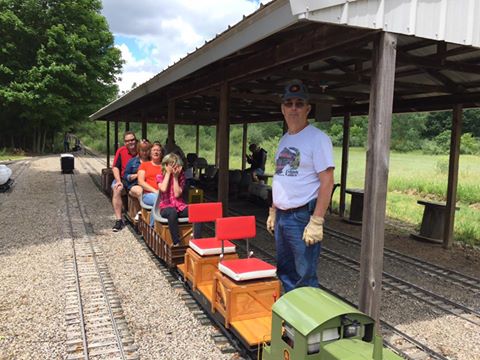
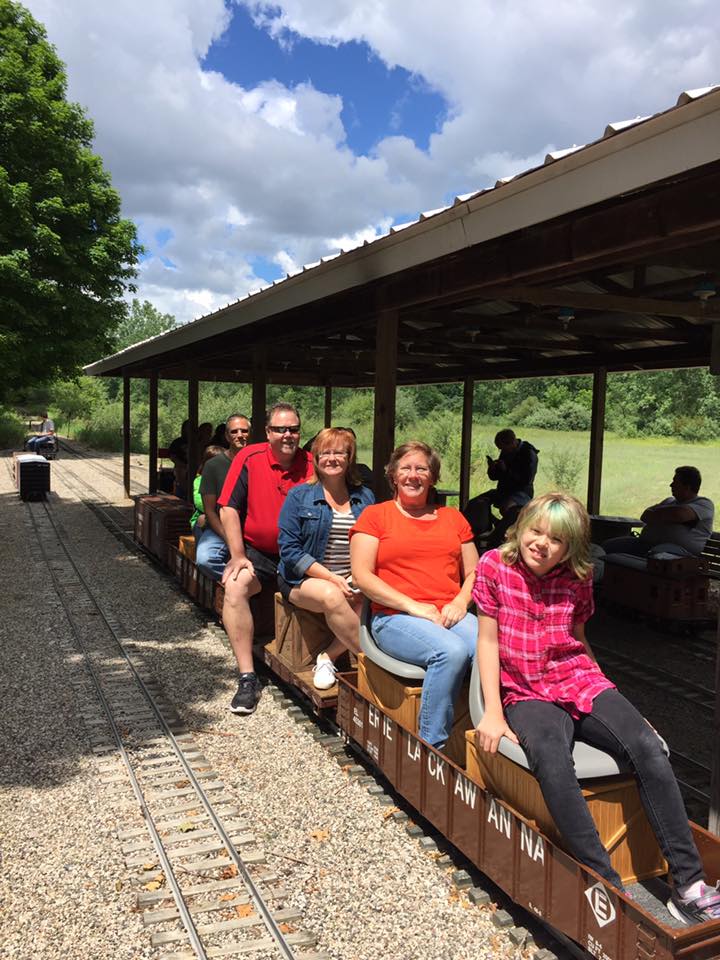
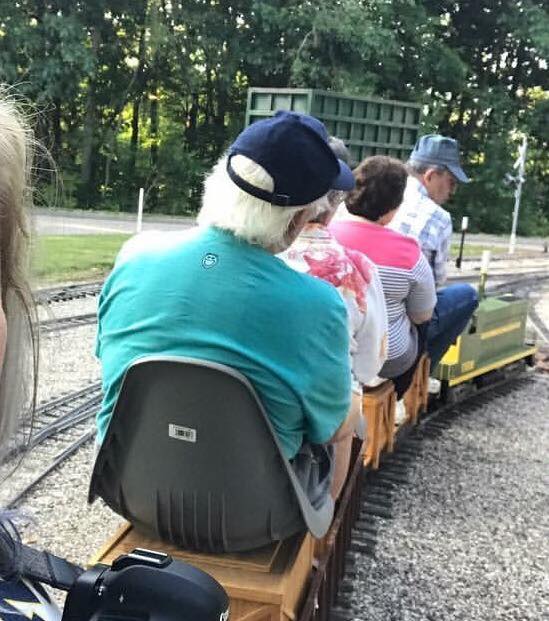
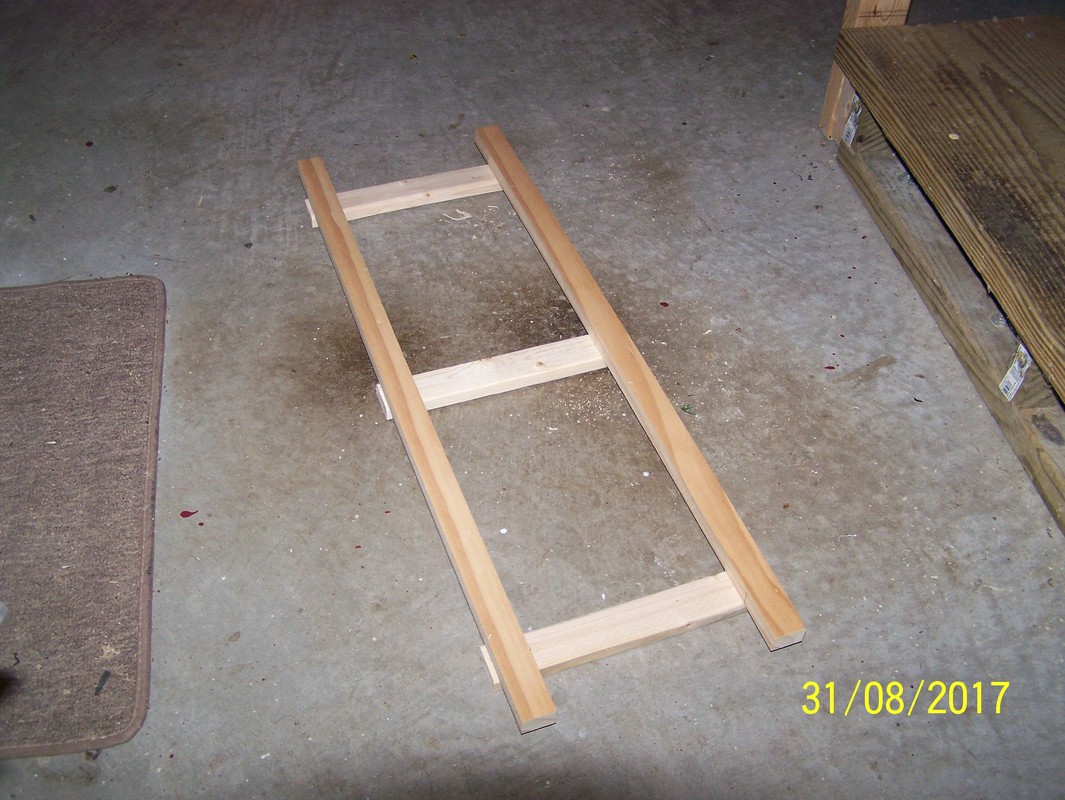
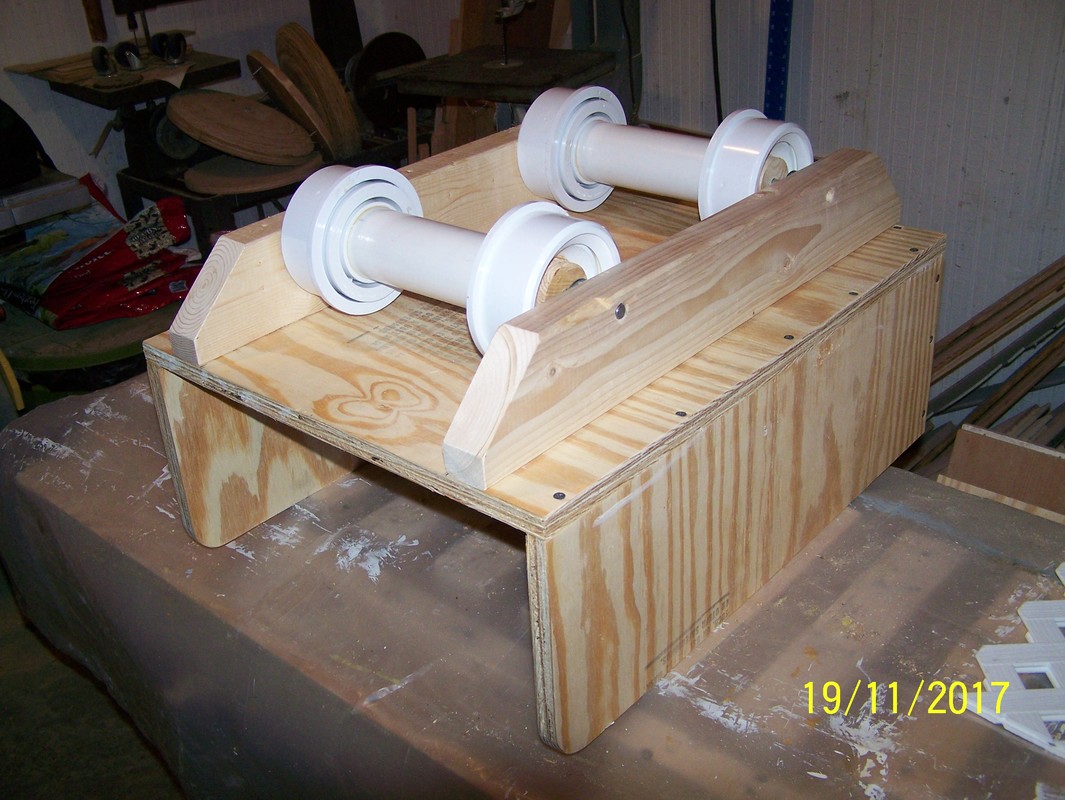
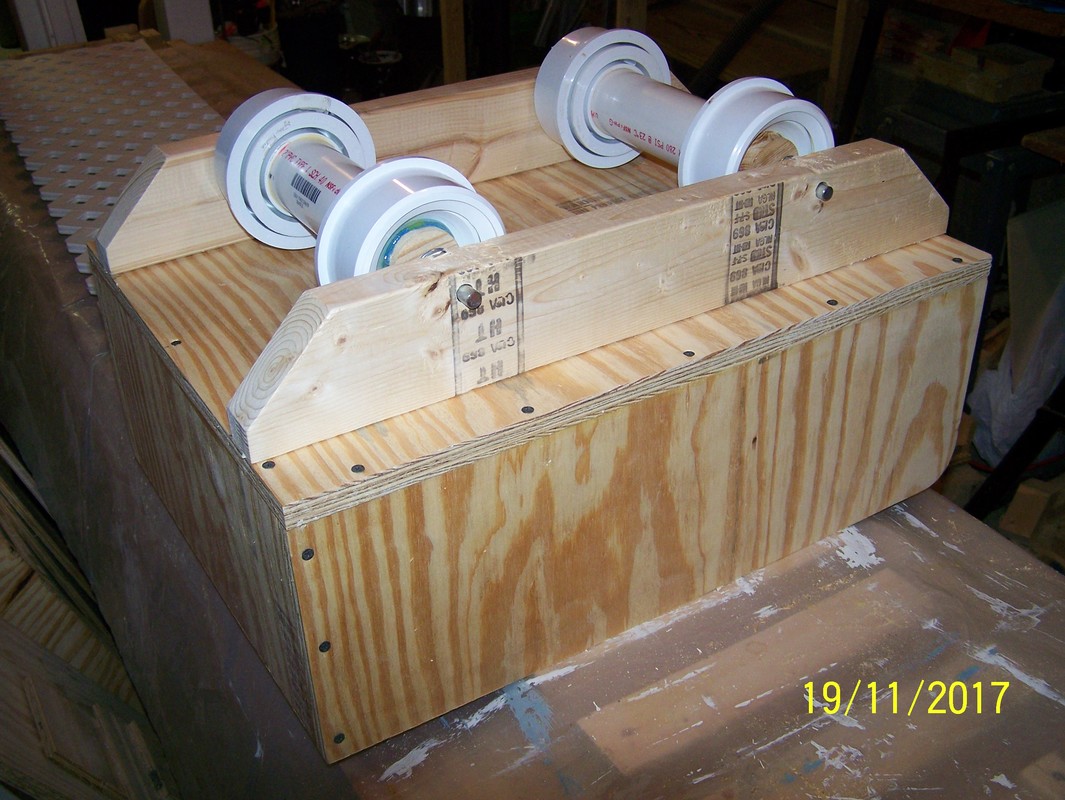
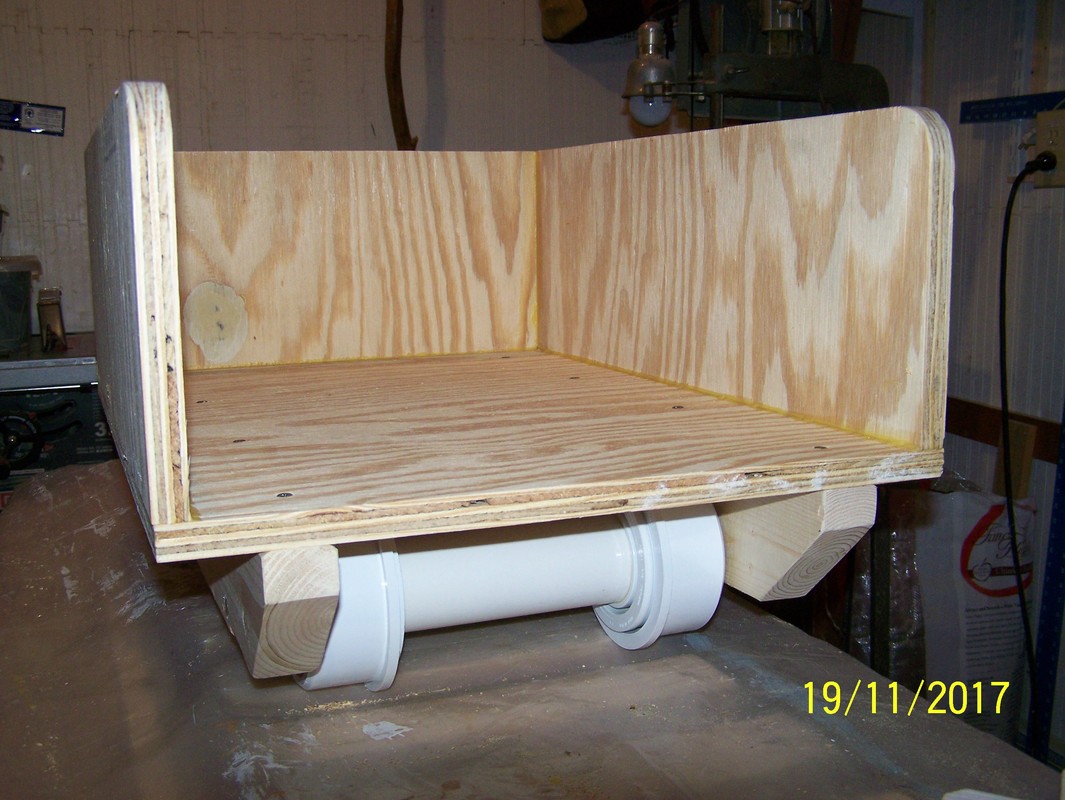
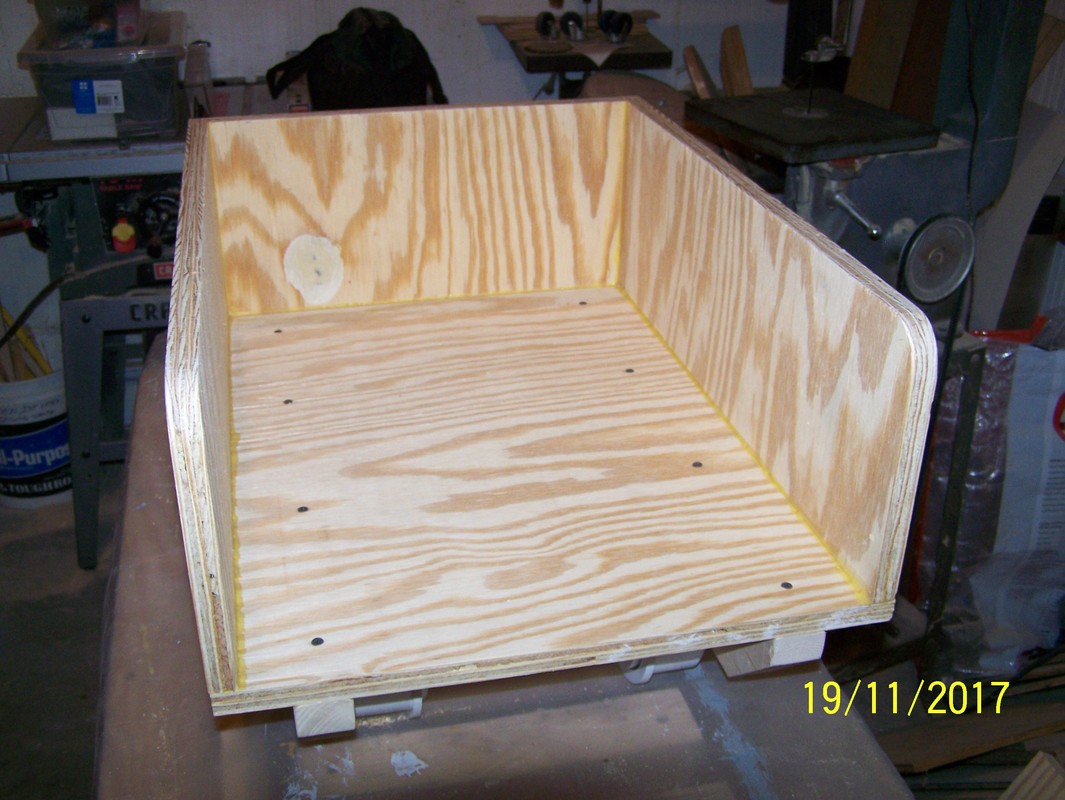
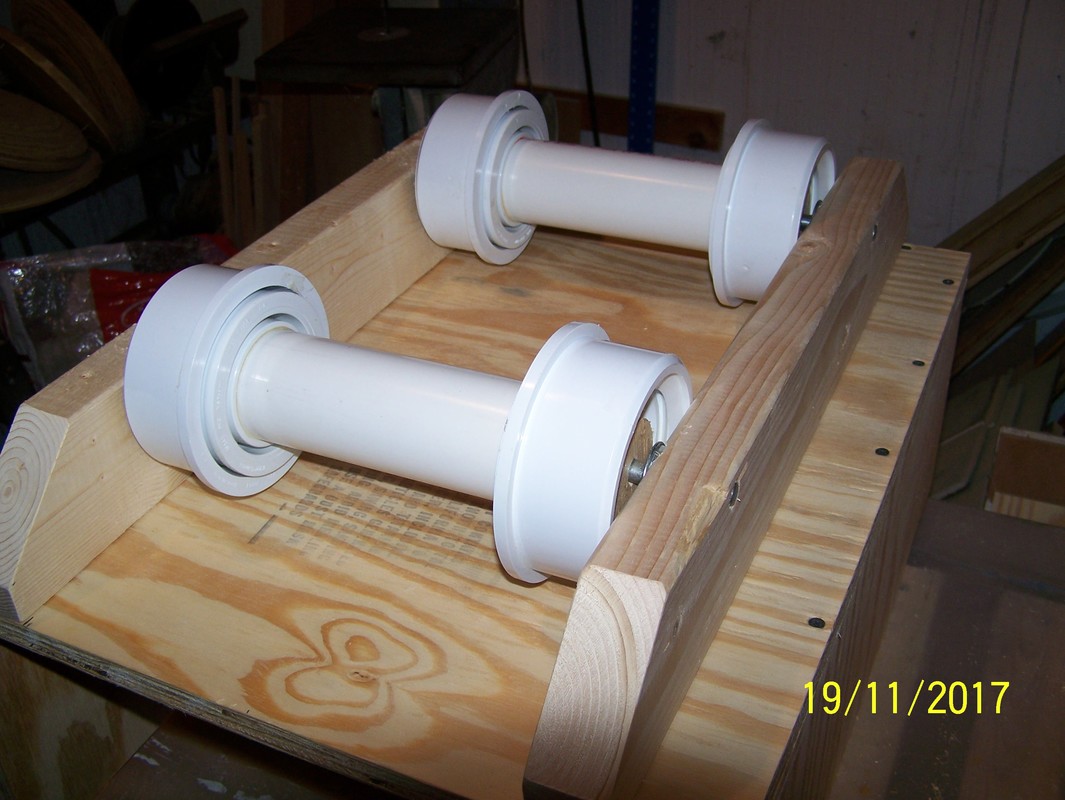
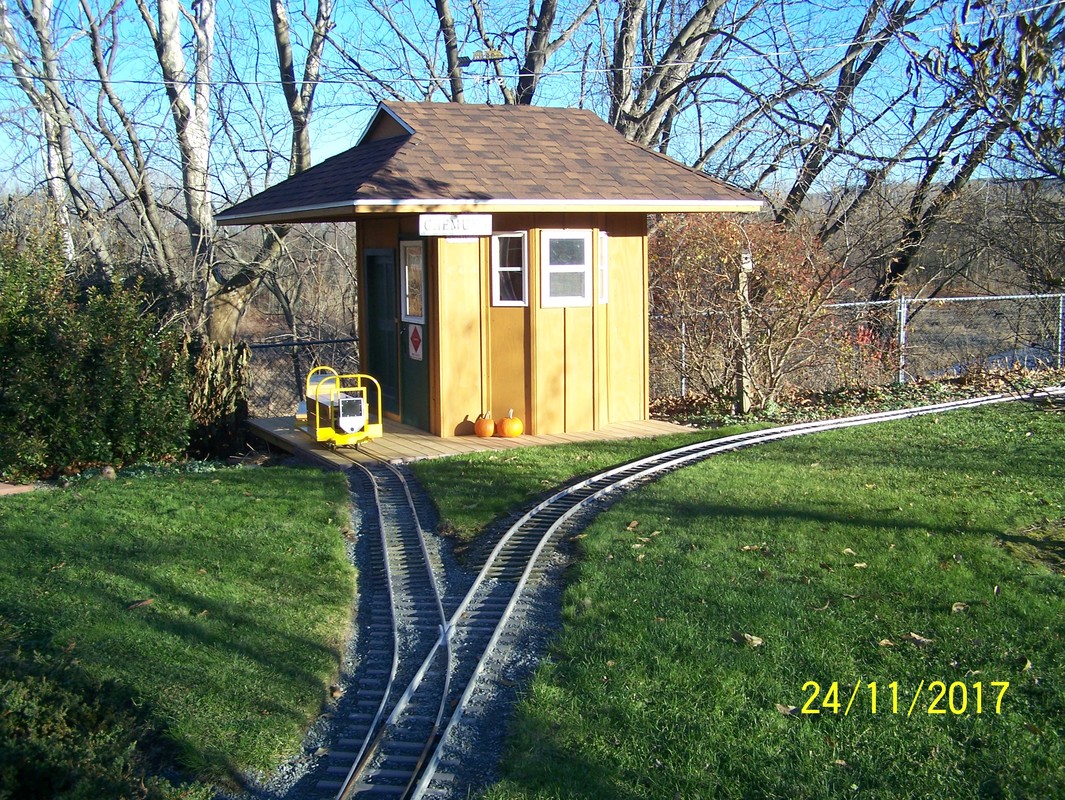
Nov, 2017. Since the speeder and speeder work car were out of the basement wood shop, pulled out the table saw and cut the plywood, that I've had for over a year, for a little work/ballast car. Made the wheels and axles last year out of plastic pipe. While at it cut some spare plywood to make a center beam seat for a flat car or gondola car. Then put the little work car together. Brought out the speeder and the speeder work car with the box for the speeder work car and took some pictures out by the station shed. After taking the pictures, stored the speeder and speeder work car in the station. Finished up by putting ballast down on the track. Got the new switch and runner to the station, the south loop and mainline in front of the house. Ran out of ballast.


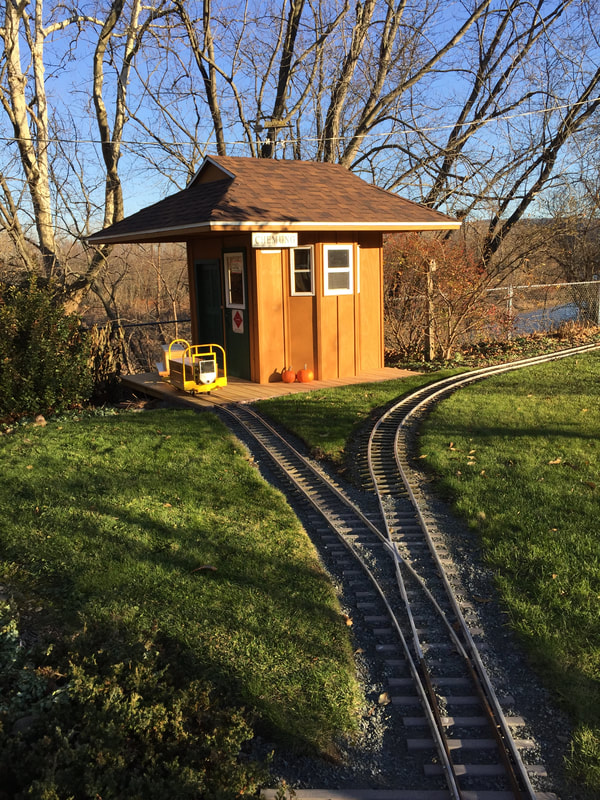
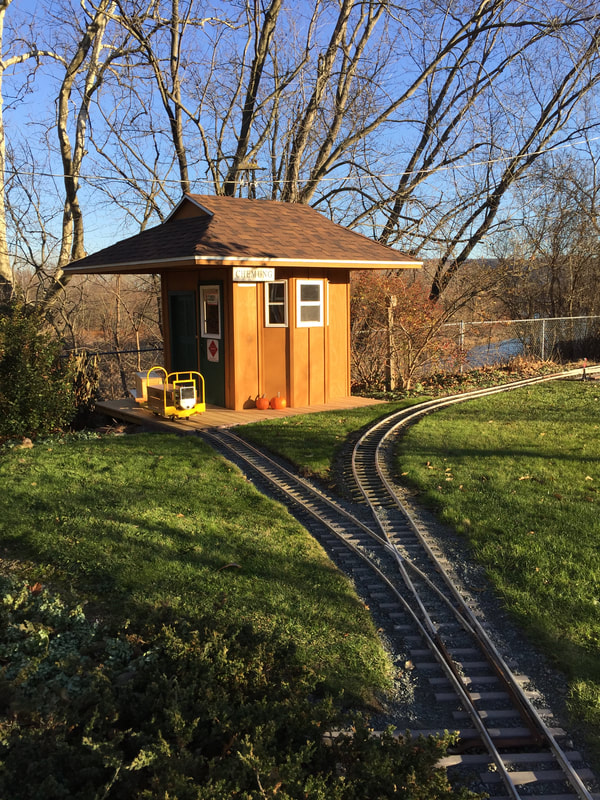
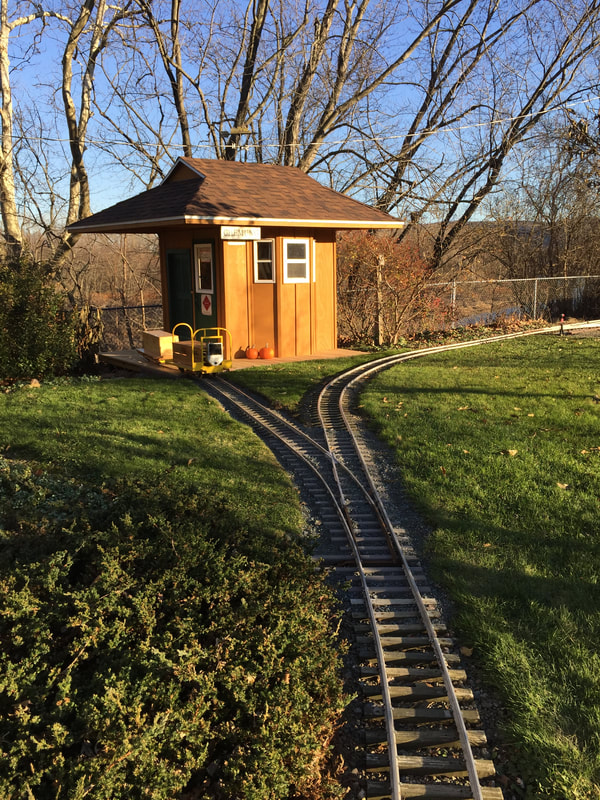

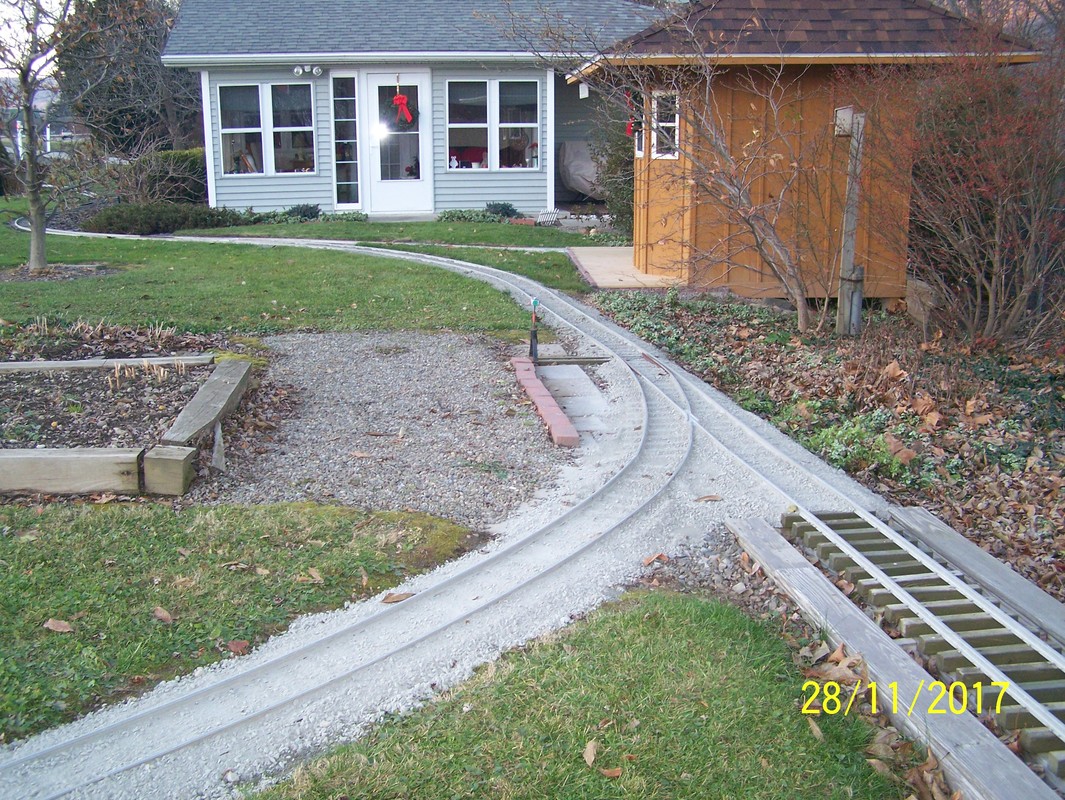

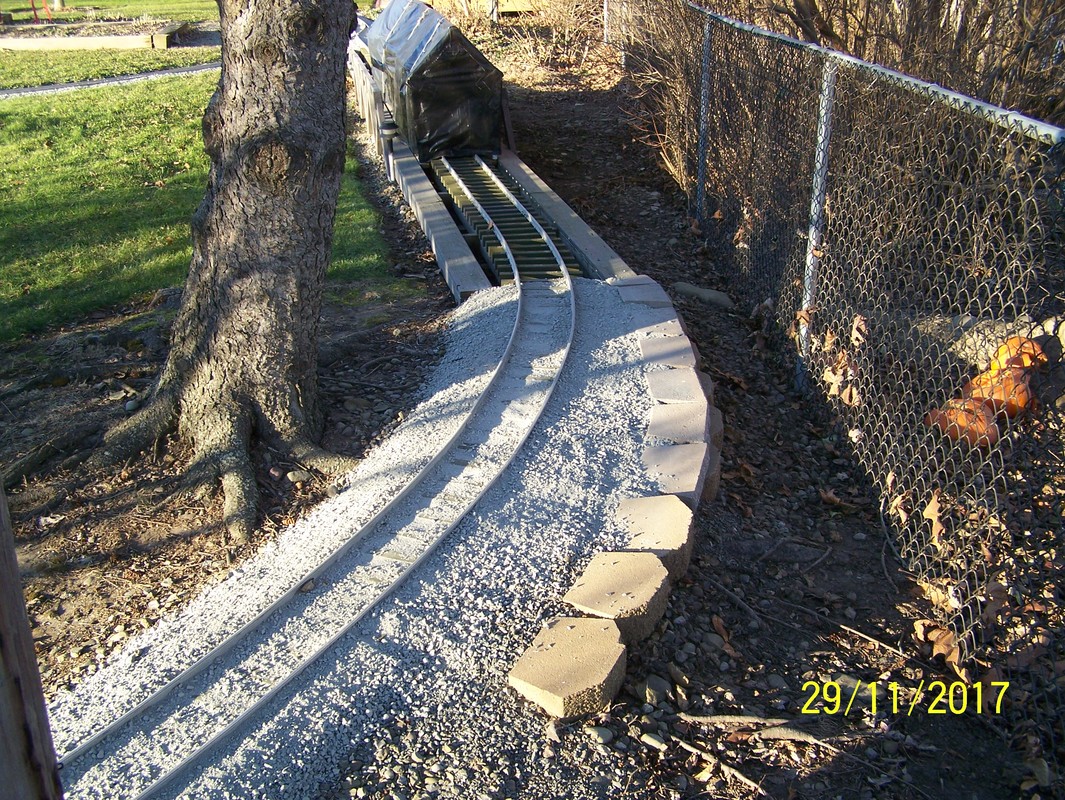
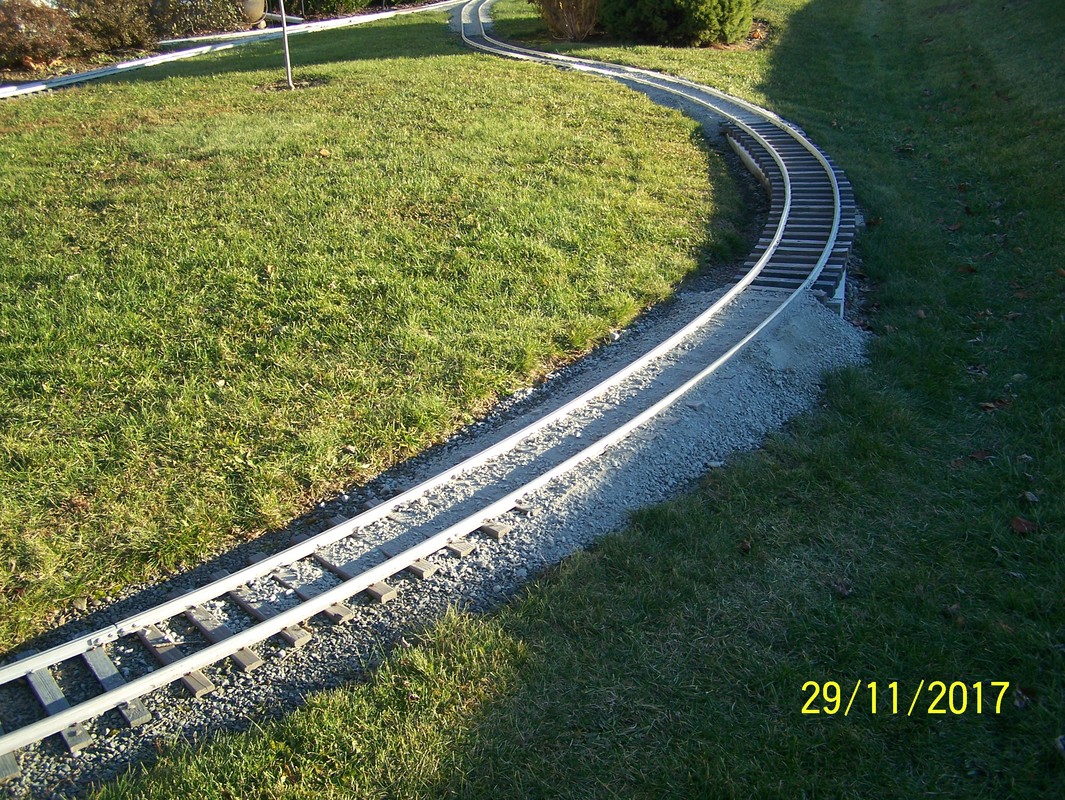
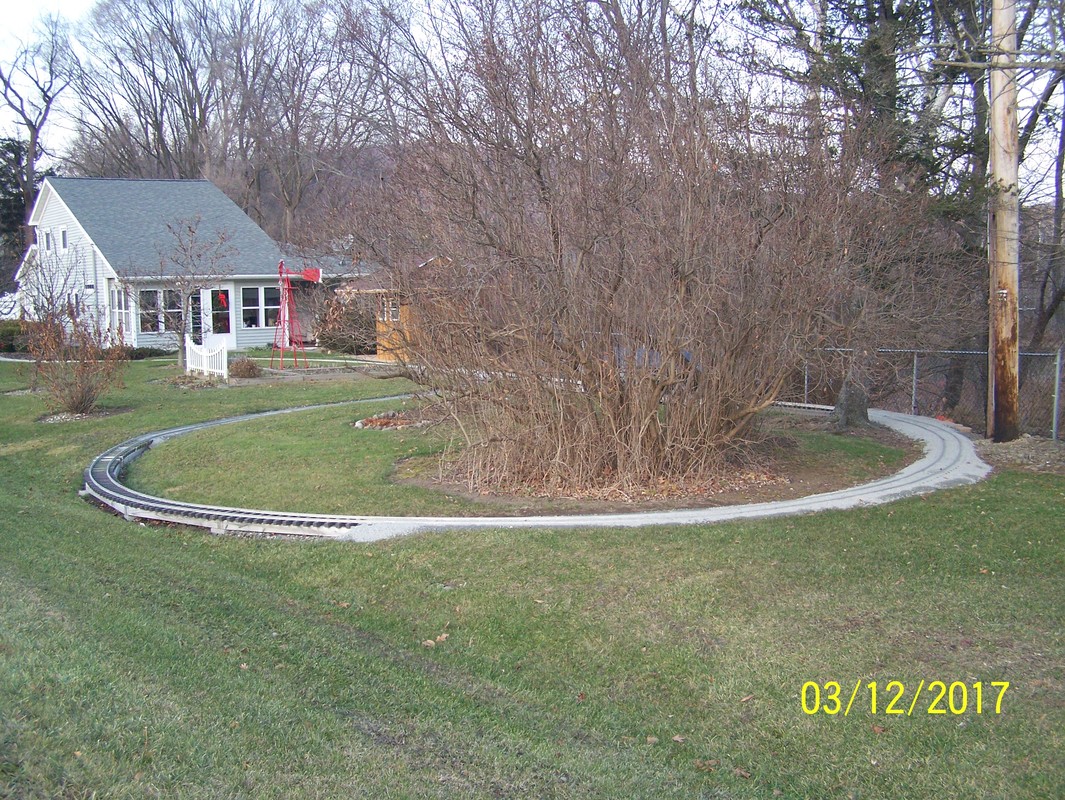
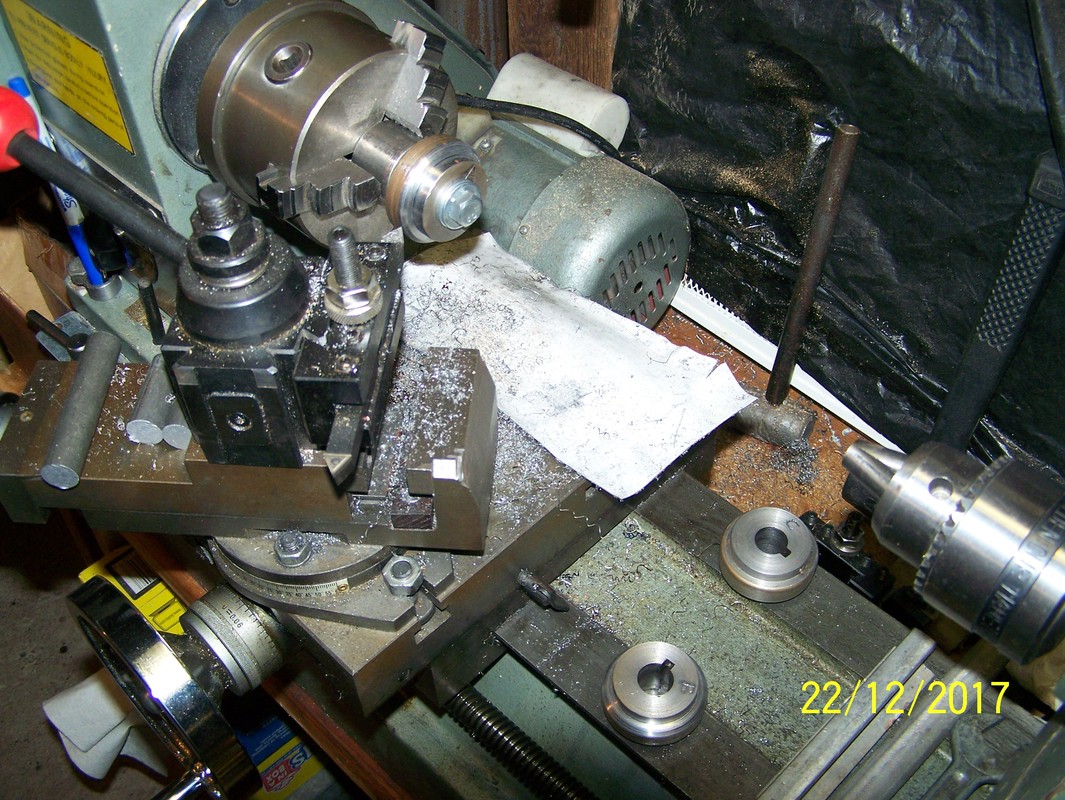
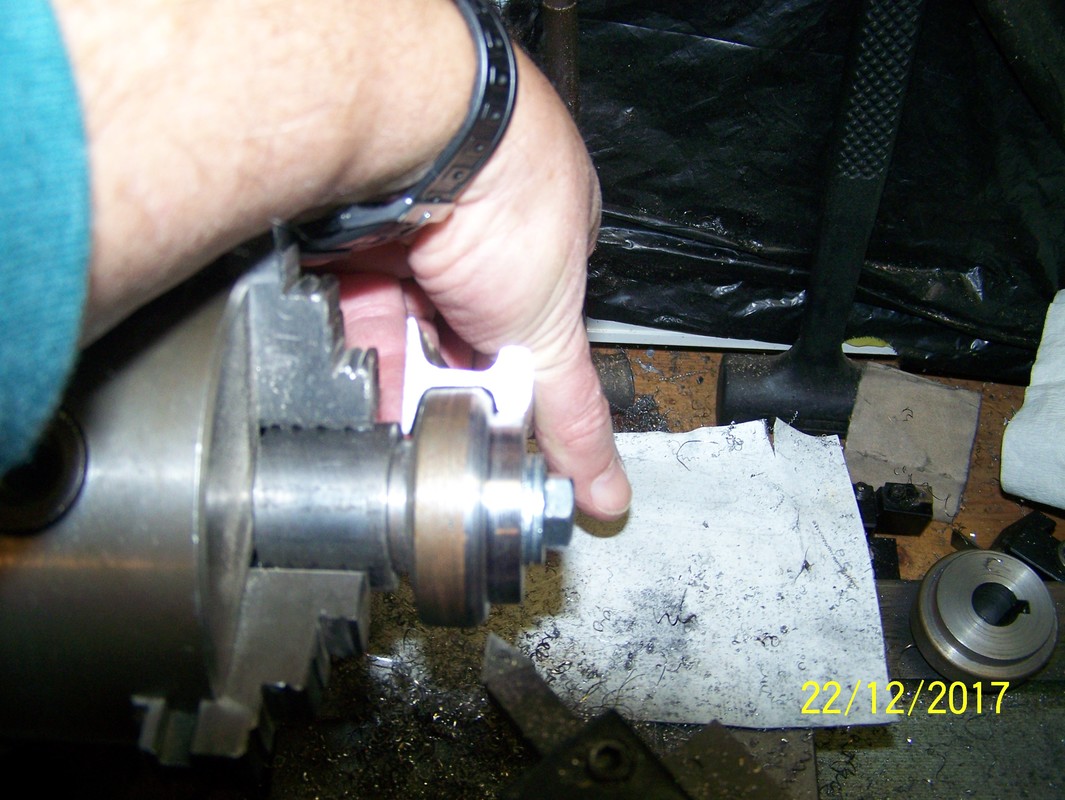
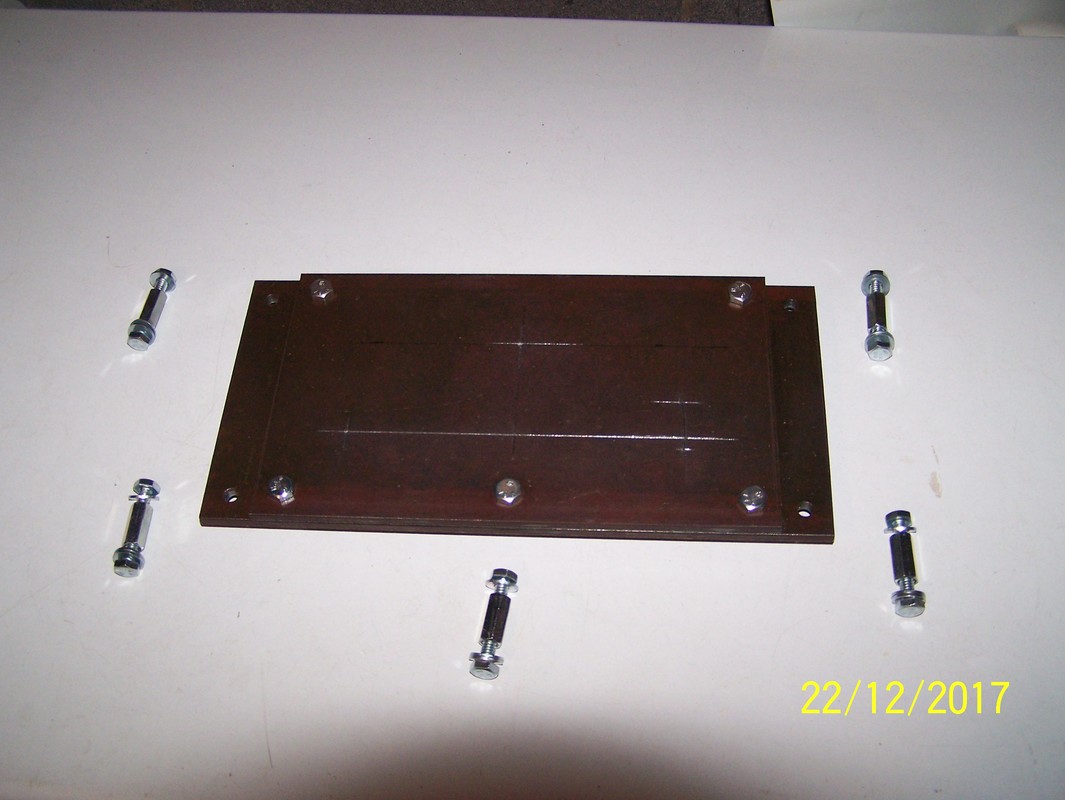
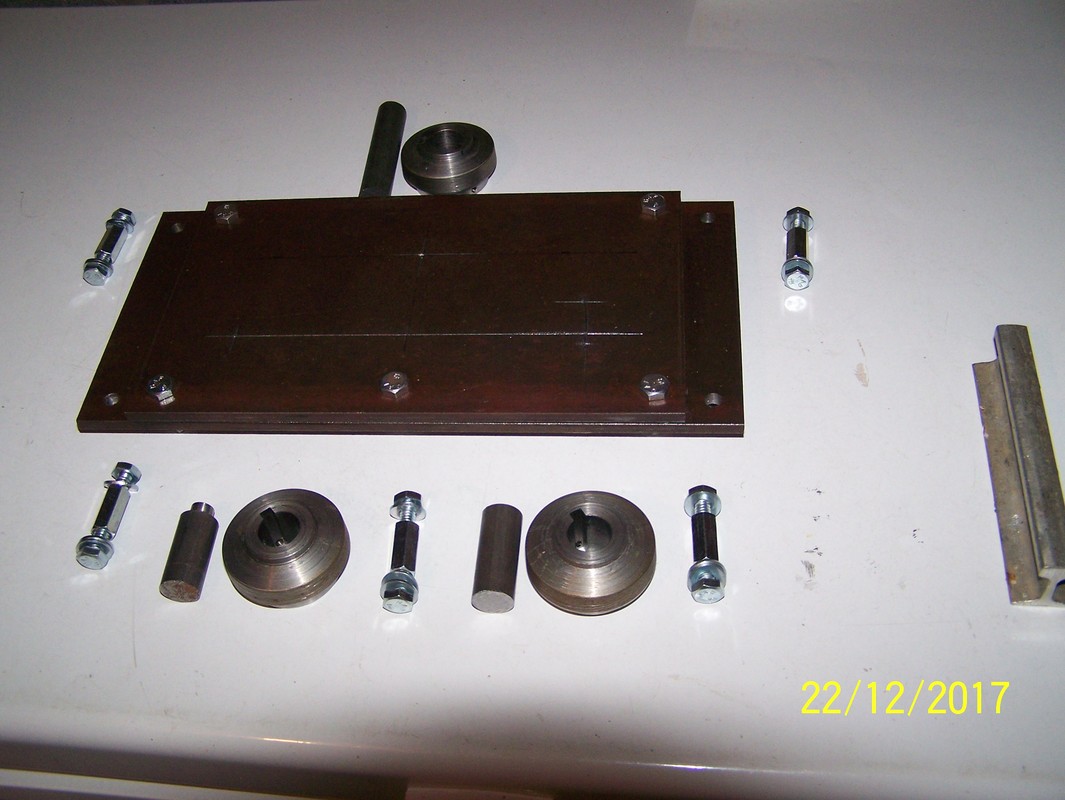
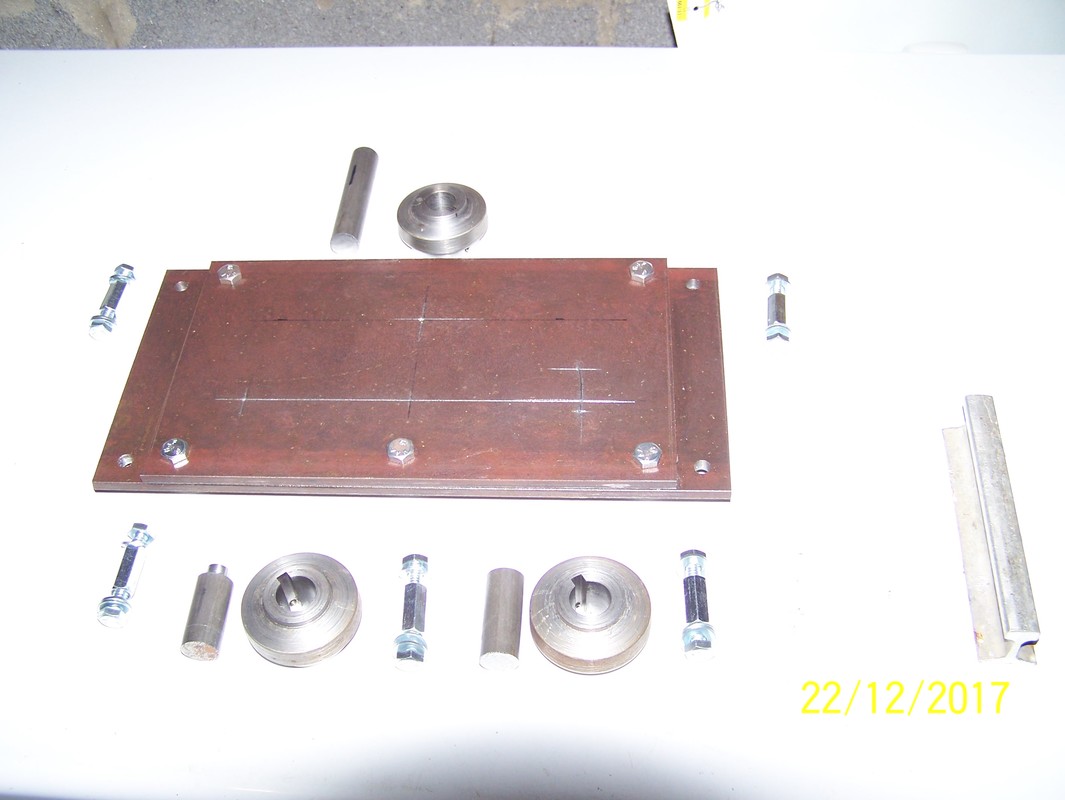
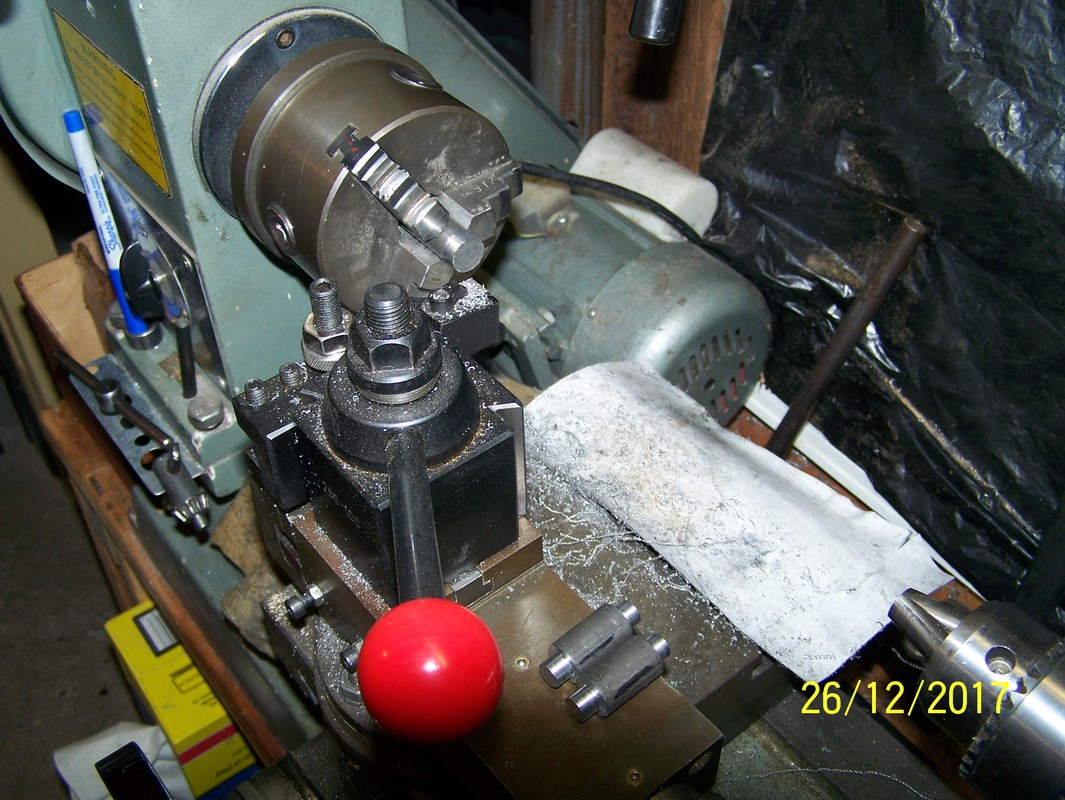
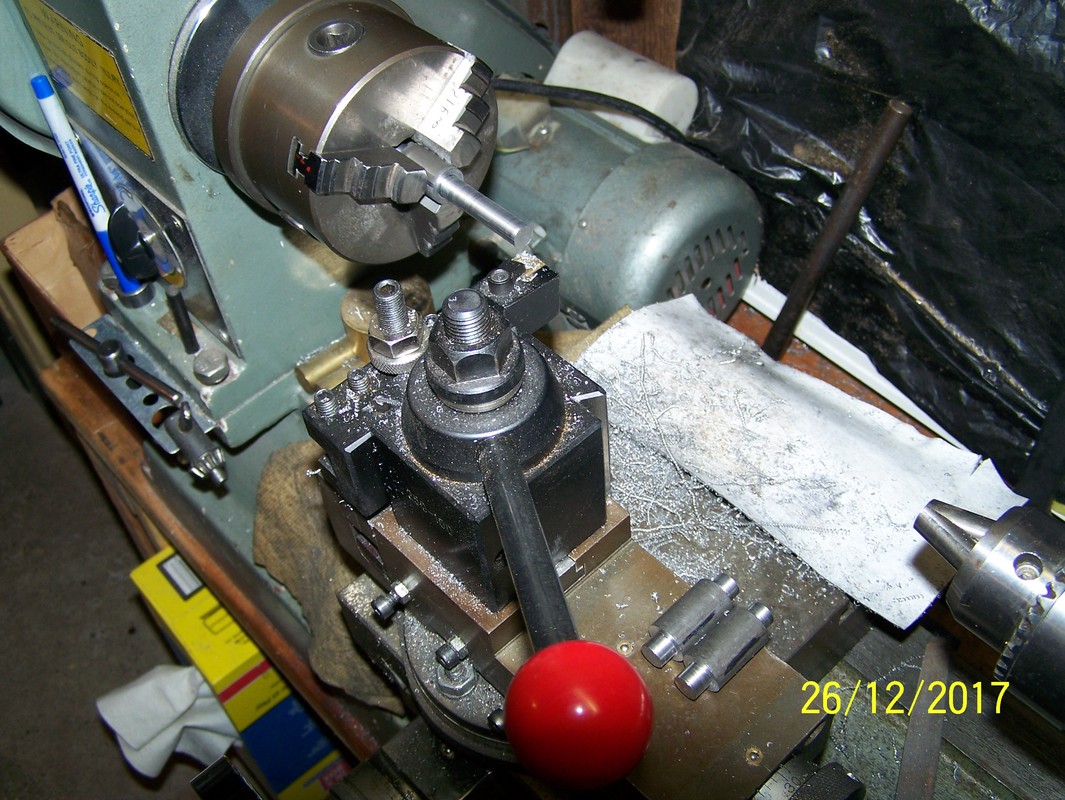
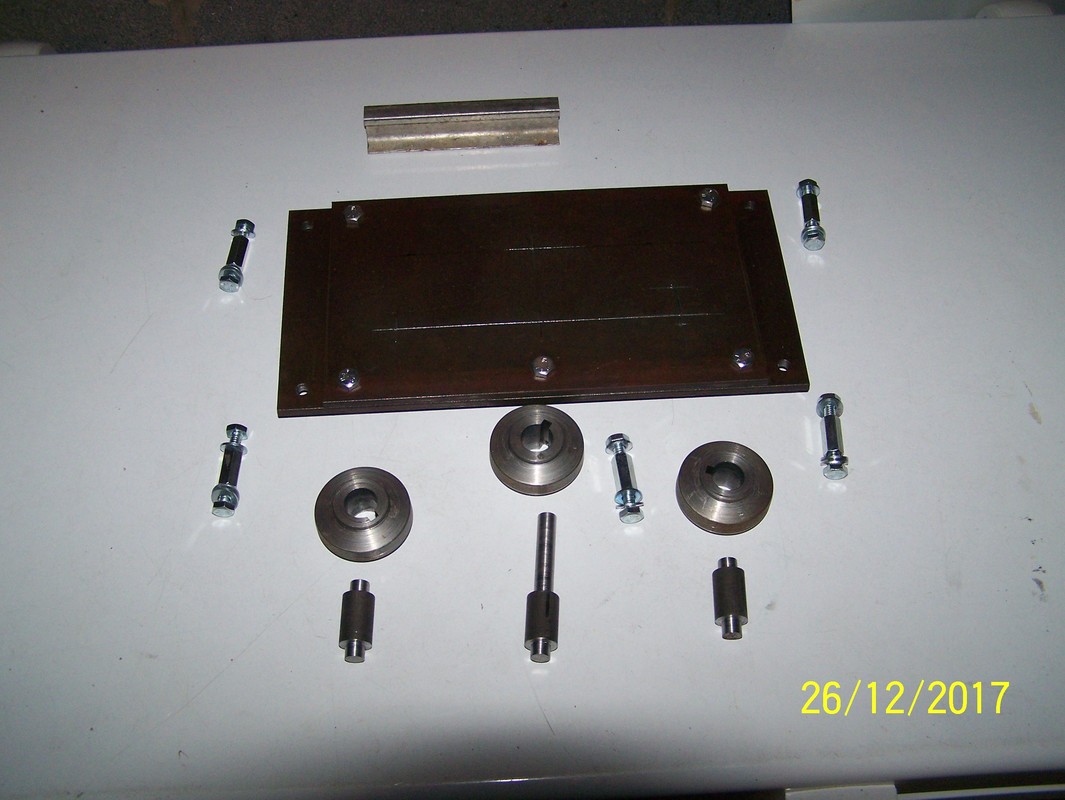
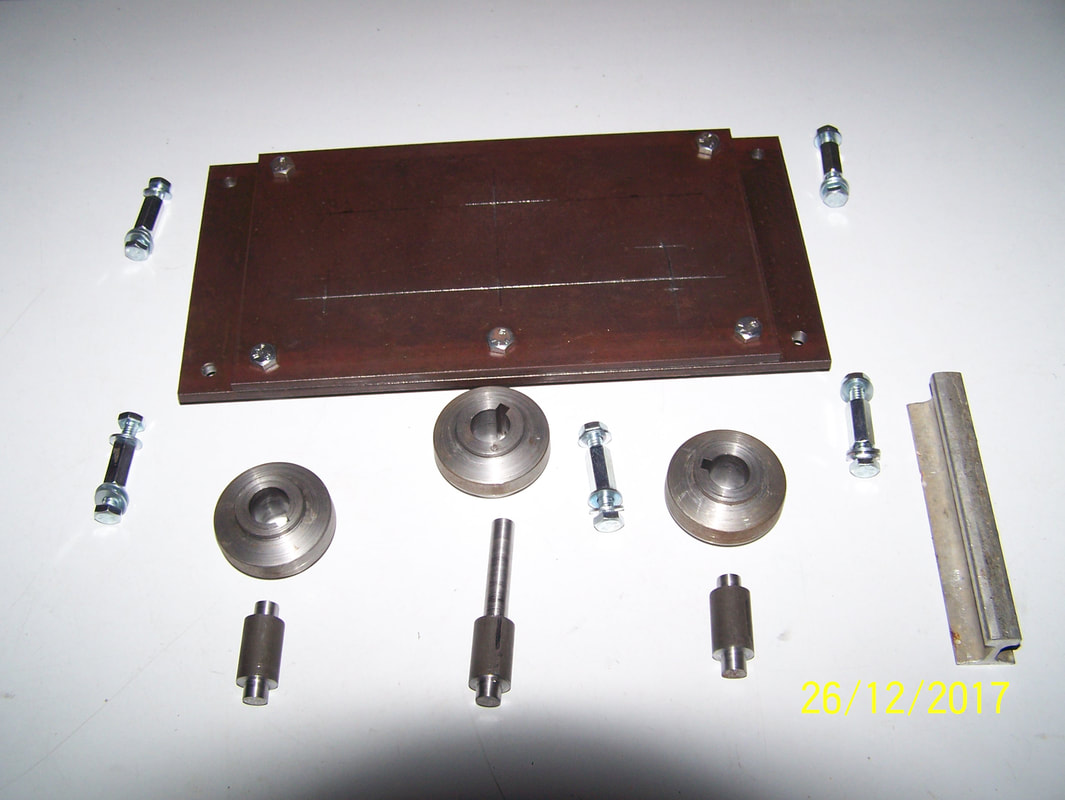
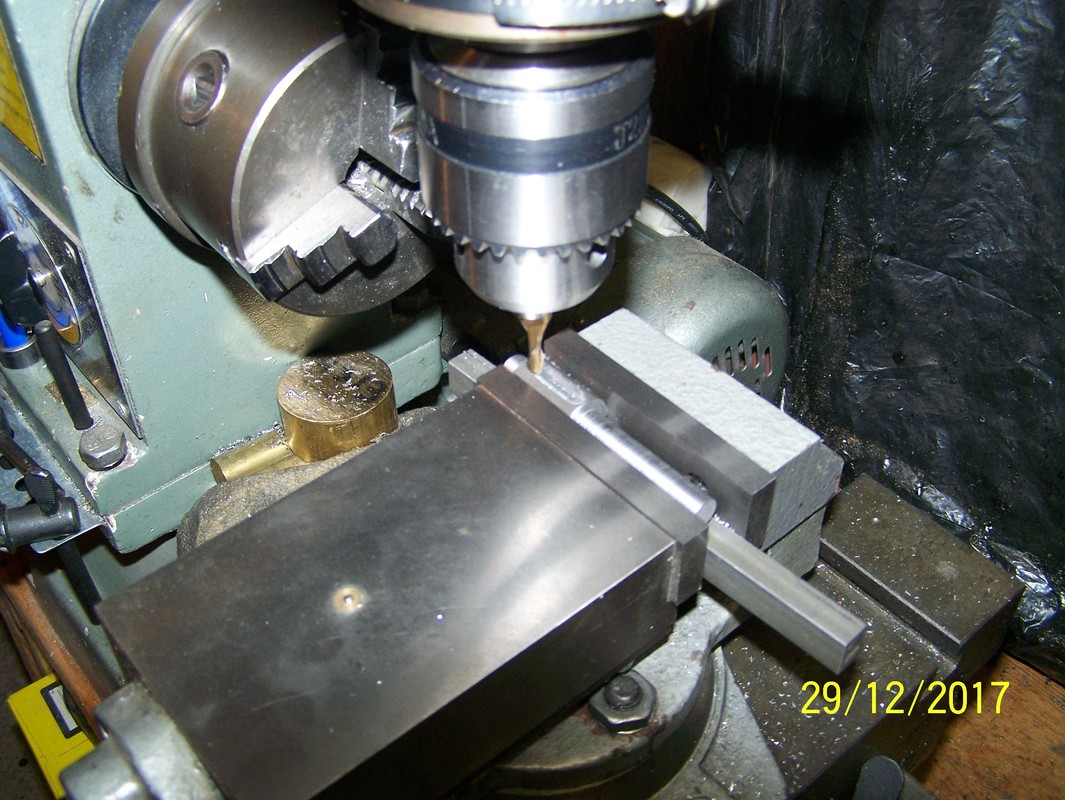
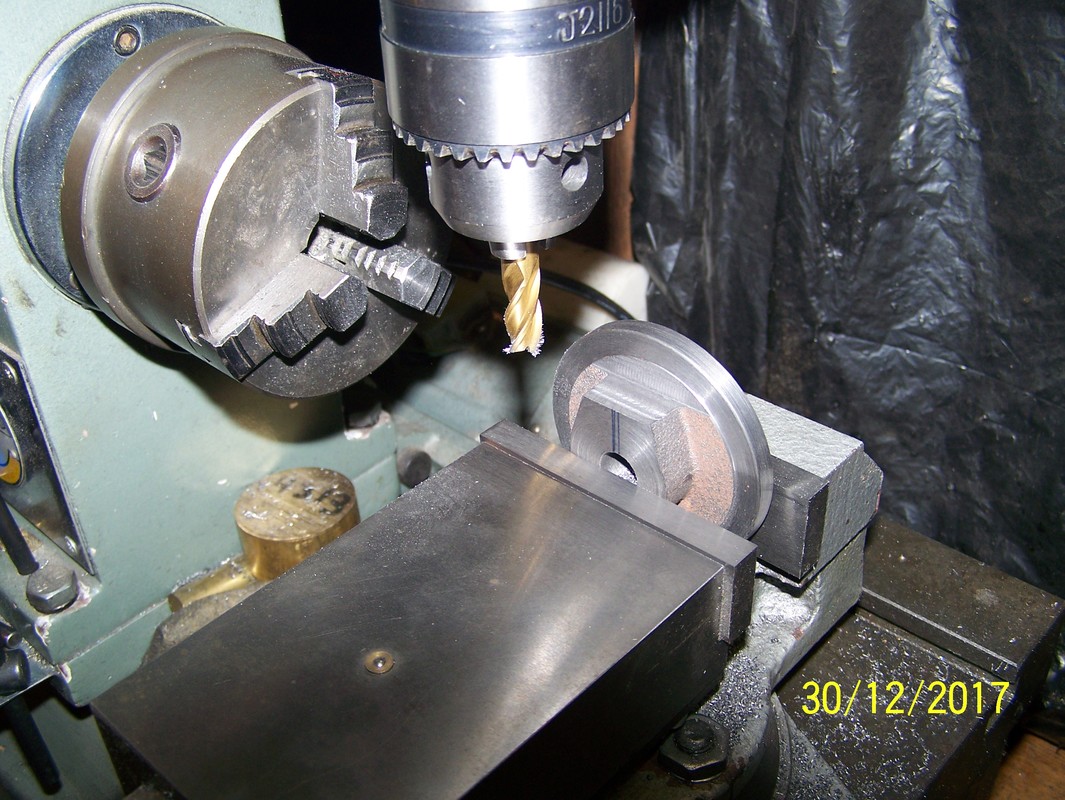
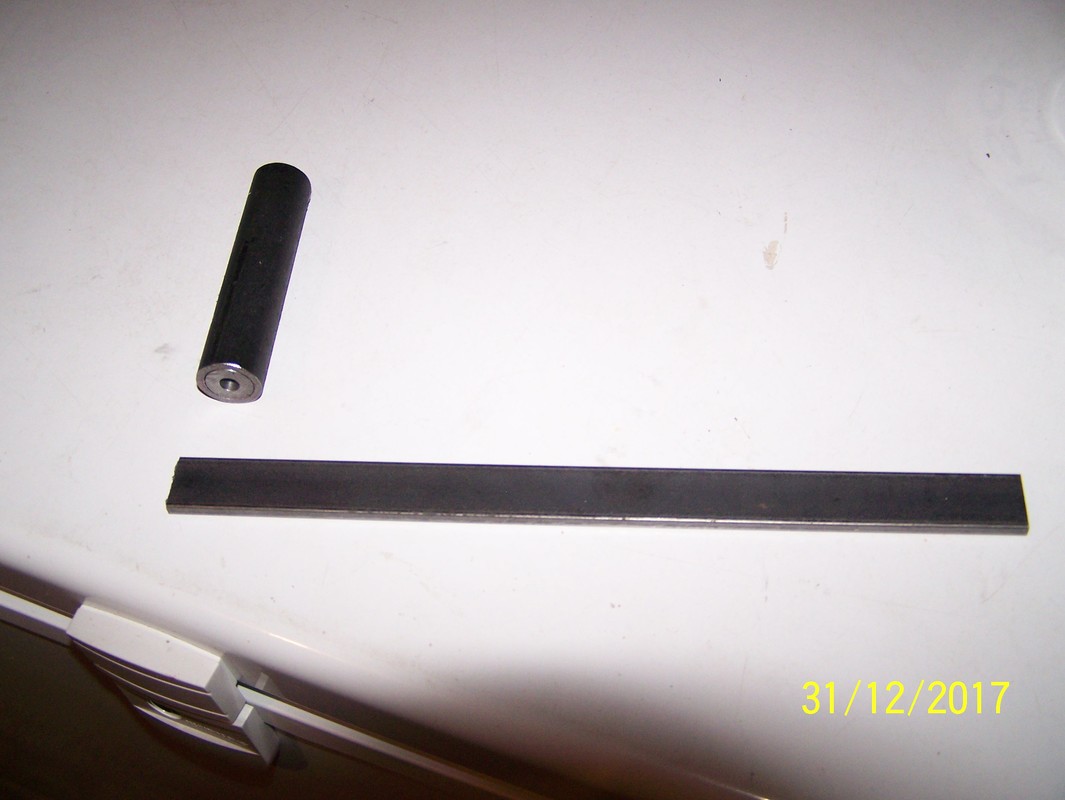
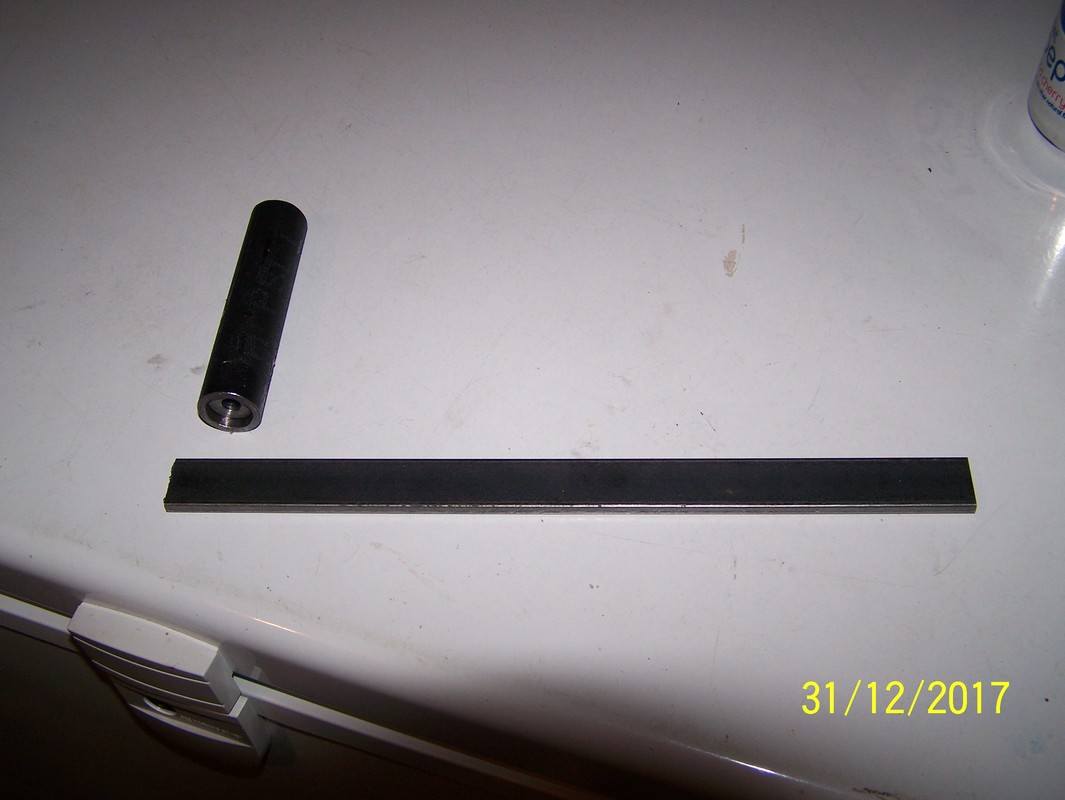
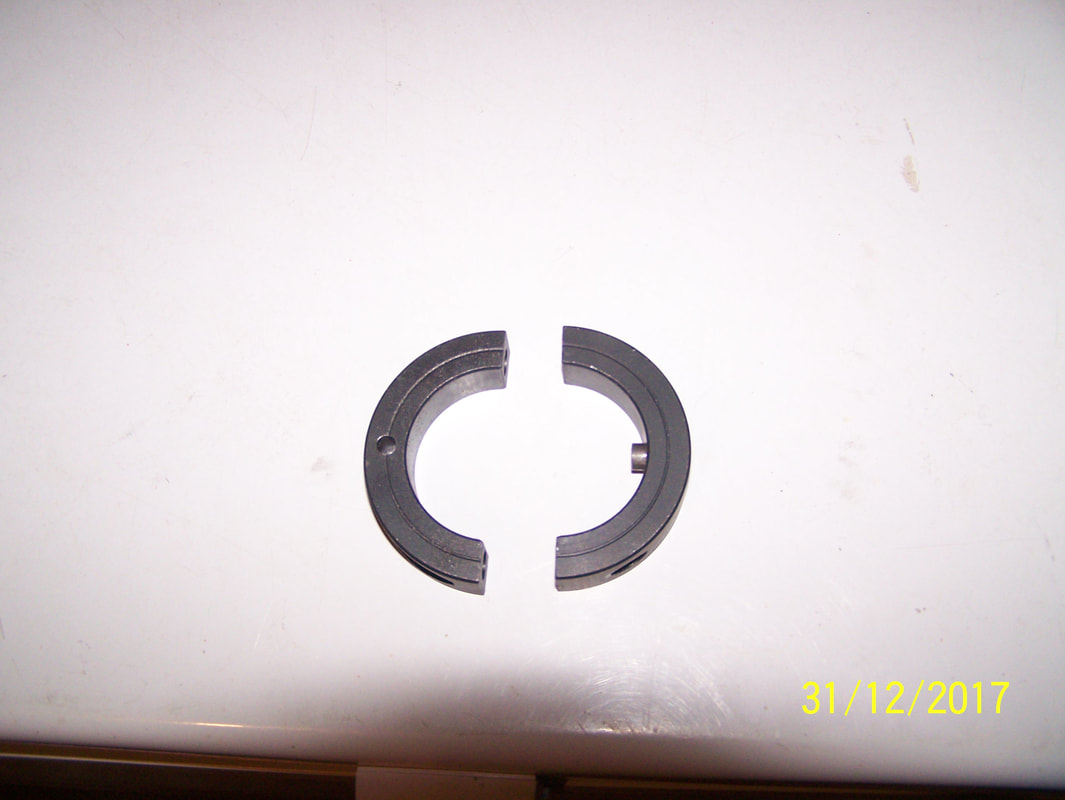
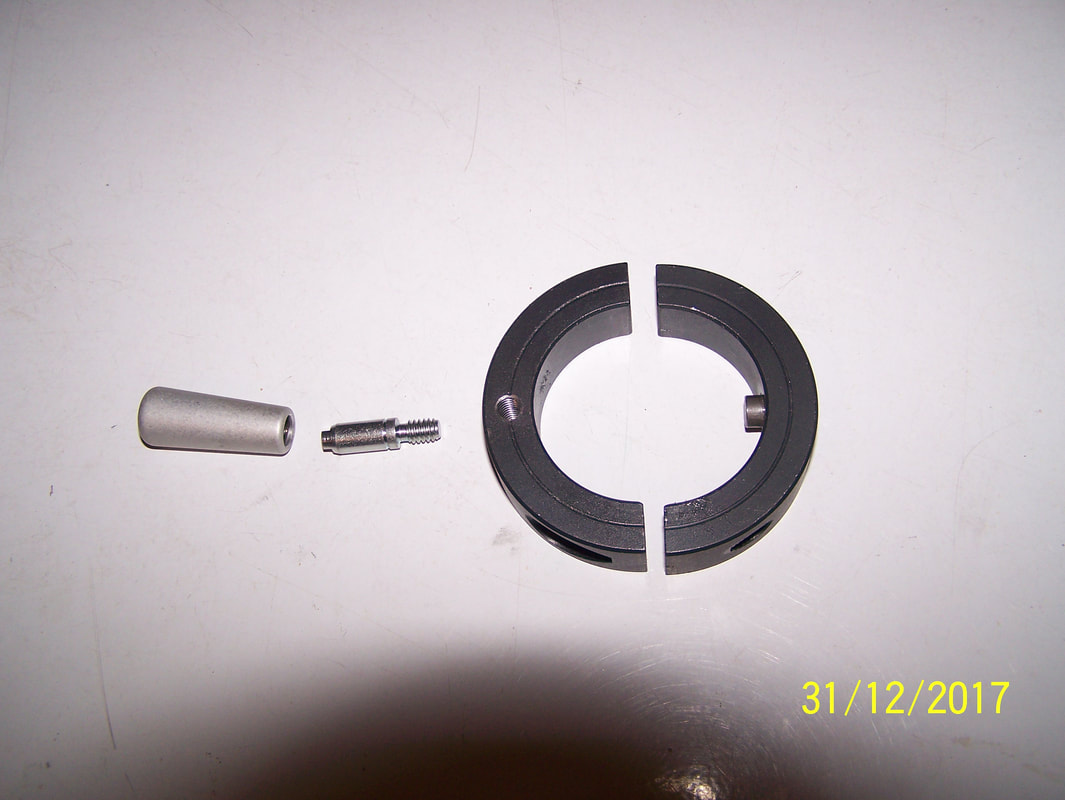
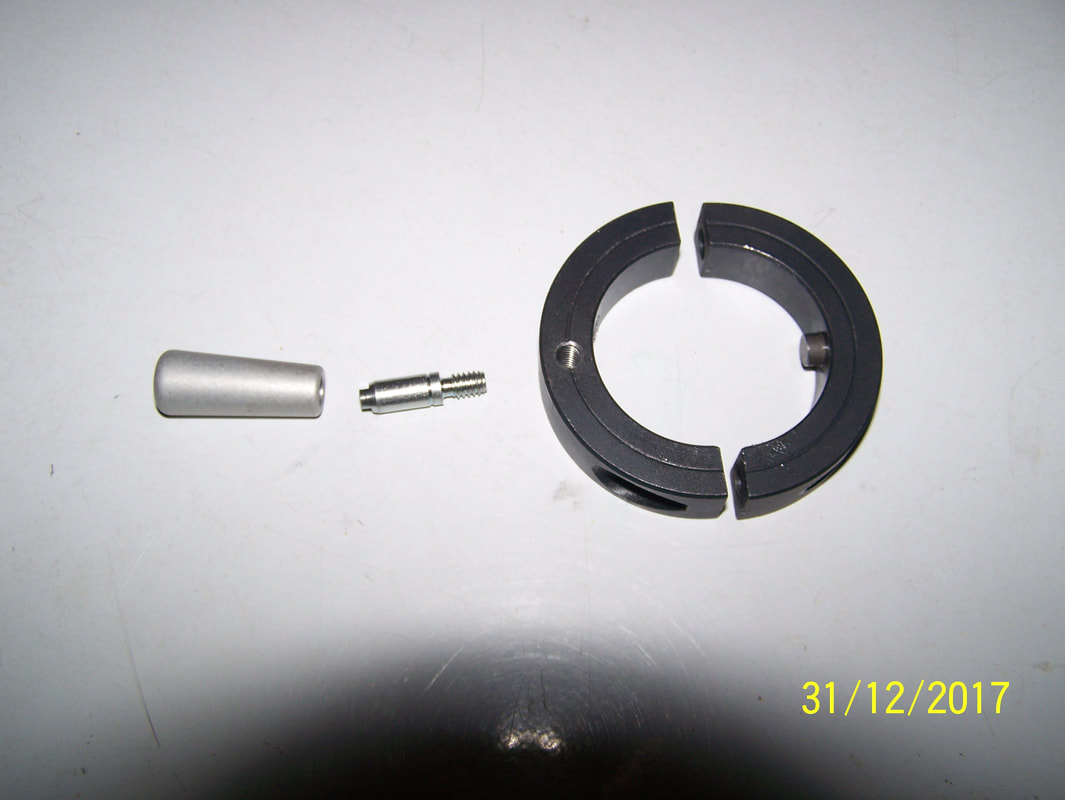
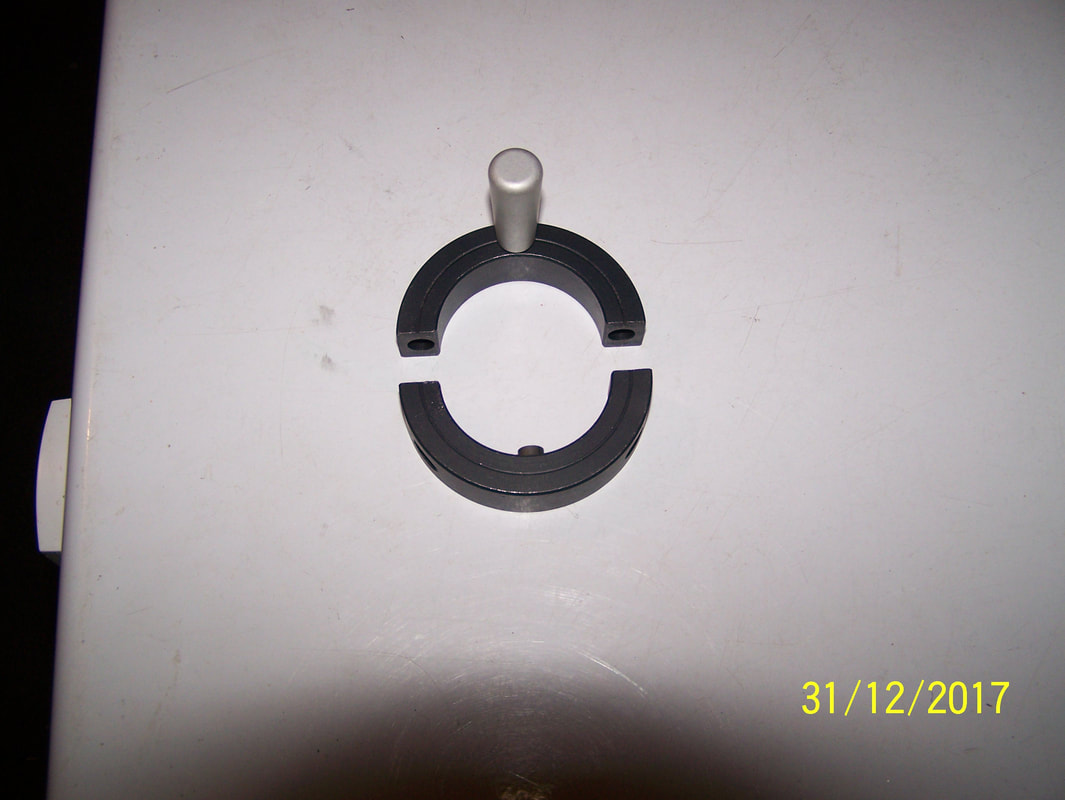
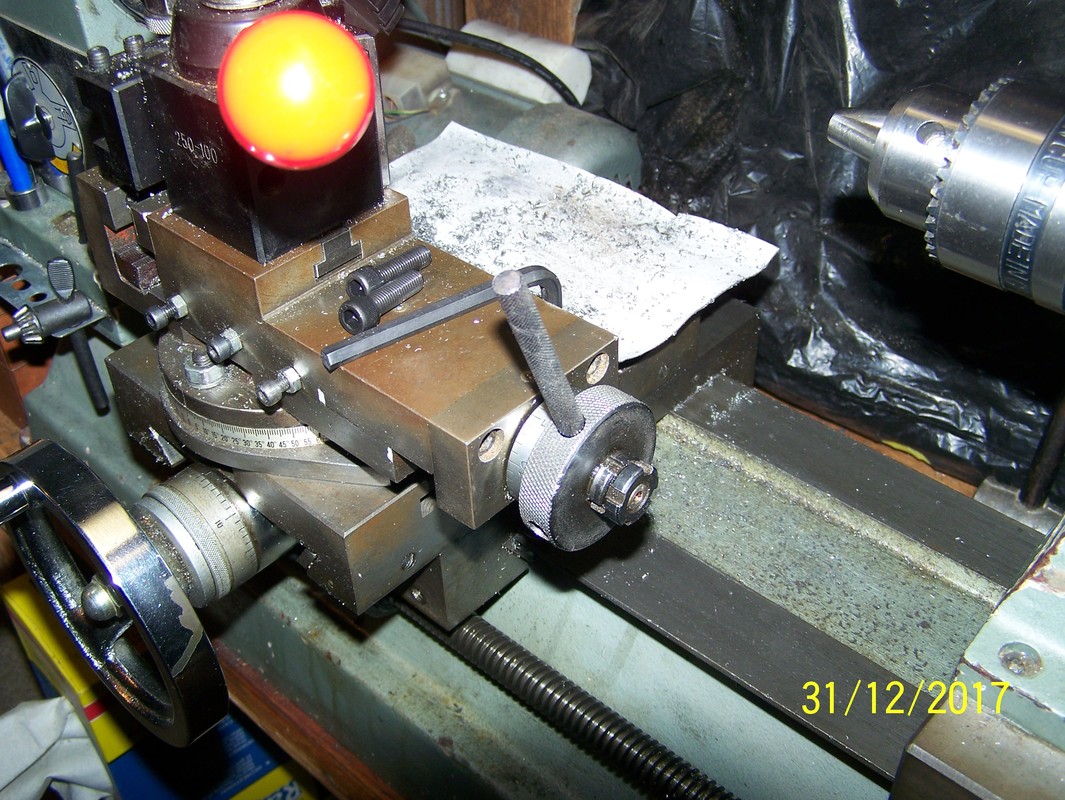
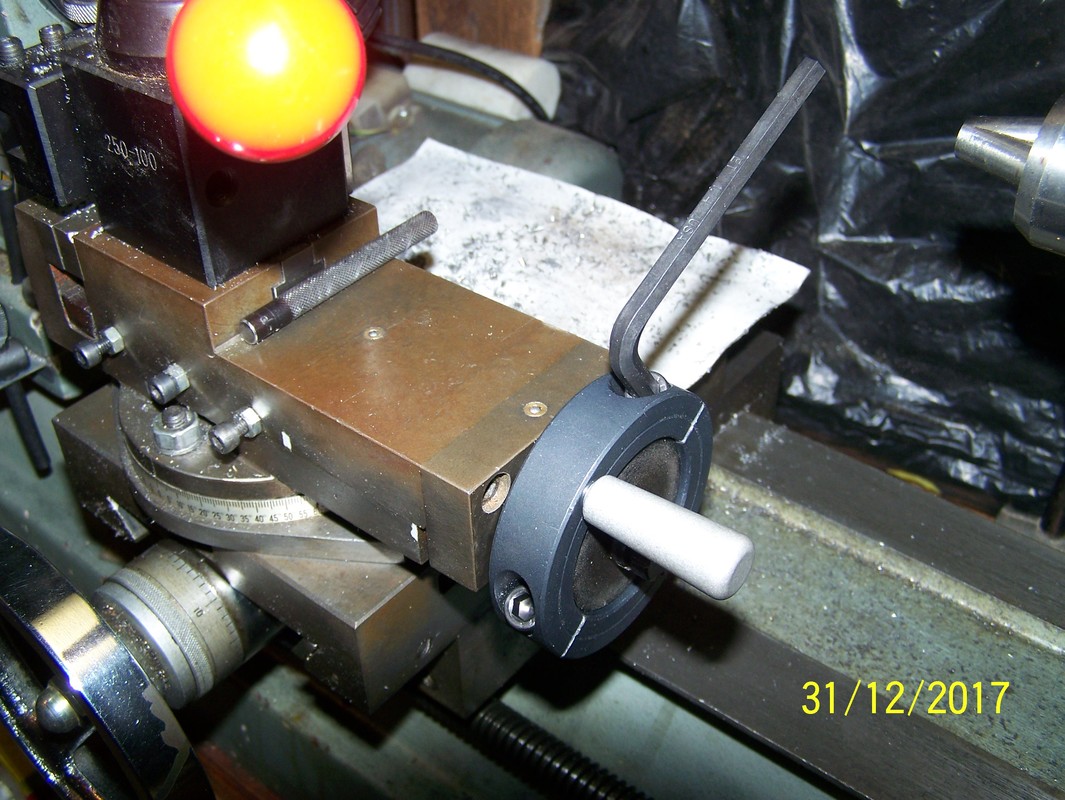
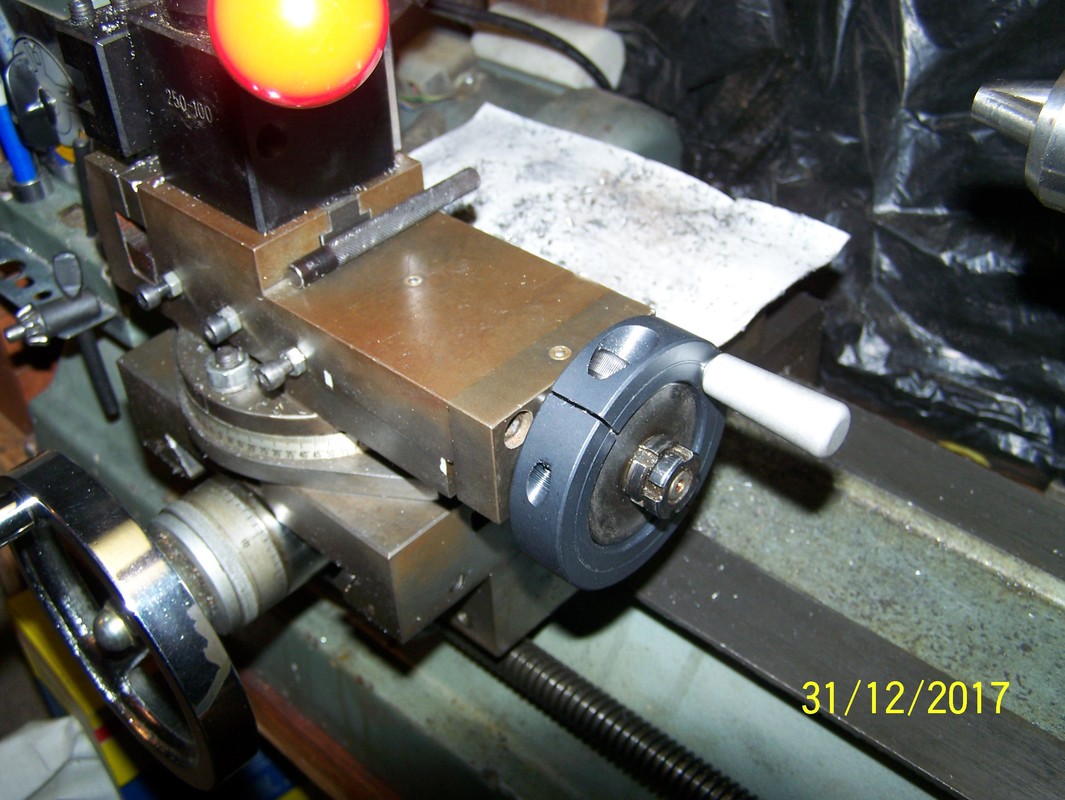
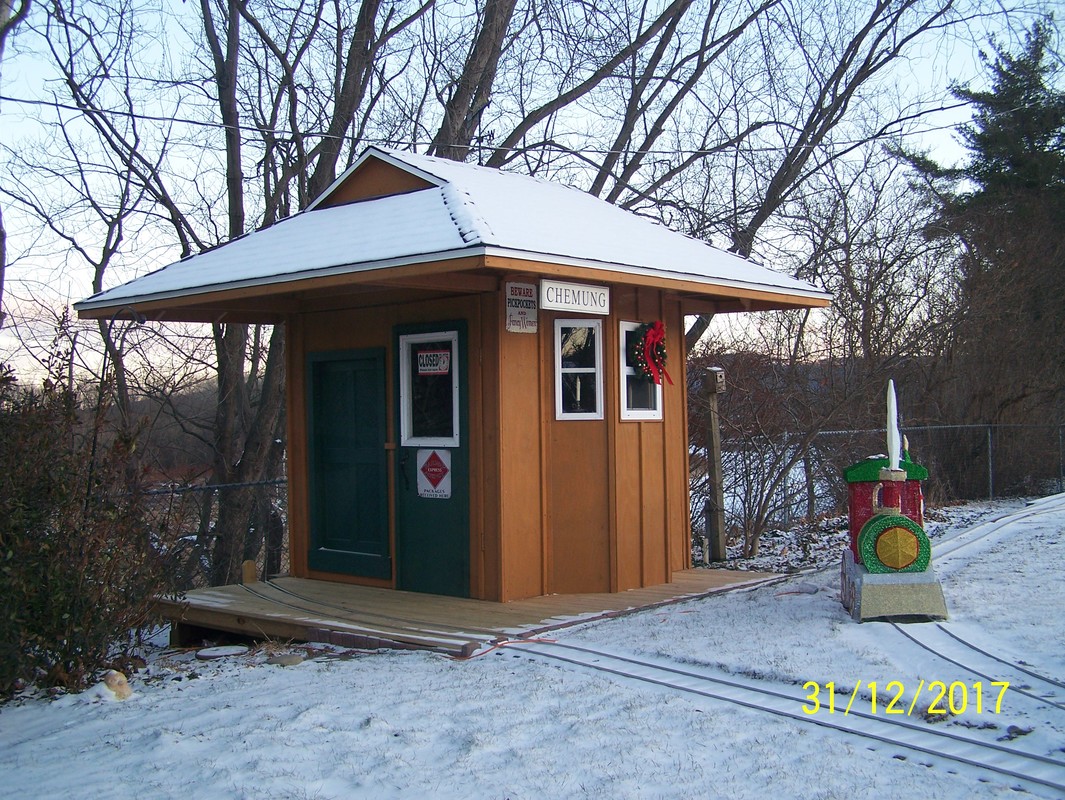
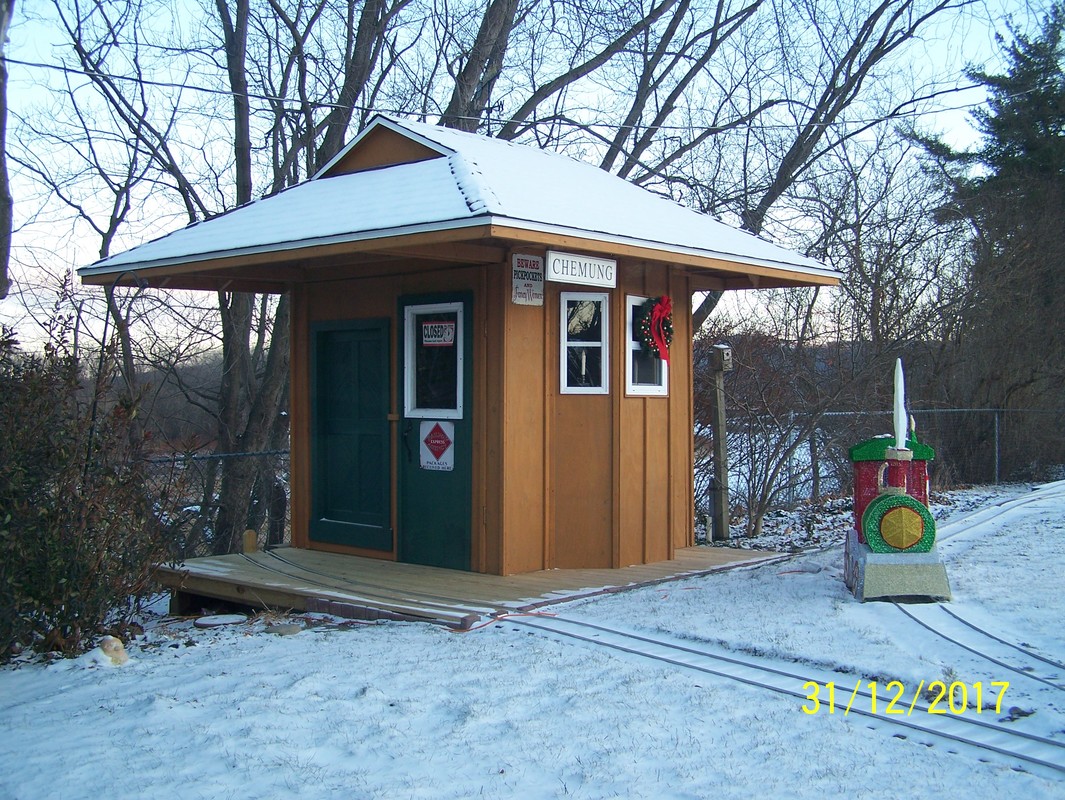
Dec, 2017. Since the weather was holding out to be good, got another ton of ballast and put it down on the track. Finished up the front mainline, the north loop and the yard just before it turned COLD. Finished building the center beam seat and then paint the seat and the work car with a primer paint. Got one coat on both but the fumes bothered my wife so had to move them to the metal shop out in the garage. Will put a finish coat of paint on them when the weather get's warmer and I can do it outside. I had returned the rail bender that I had borrowed from a friend, so decided to make one of my own. Modified a set of rollers that I had made to fit the new rail I have (west coast rail). Got some 1/4" steel plate, cut to the sizes that I needed and drilled the support holes and the mounting holes. Next layed out for the holes for the three roller die shafts. Two are fixed position's but the third is a grove on an arc. Then machined the three shafts. One is longer and is the driving one. From there I had to set up for milling on the mill/lathe, to do the keyway milling on the driving shaft. So while I had the mill set up milled down the steam engine rear cylinders covers to the right dimension. Then cut a piece of pipe and a piece of flat steel to make the driving handle and handle bar for the rail bender. Machined some plugs with 1/4 inch center holes, to be pressed into the pipe so it can rotate. Drilled out the ends of the pipe and pressed the plugs into the pipe. Since I was working on the mill/lathe, I have never had a handle for the compound slide on this machine. So ordered and got a 2" split ring and a 1 1/2" handle. Modified the split ring with a pin to go into the hole on the compound and drilled and taped a hole for the handle. Put it together and installed on the compound. Now have a nice handle to use. Plus I can always take it off quickly if needed. Finished up with pictures of the Christmas decorations by the station. "Merry Christmas everyone".